coolhikinggear.com

  • Men’s
    • Best Hiking Rain Jackets for Men In 2024
    • Best Men’s Hardshell Jackets Of 2023
    • Best Hiking Pants For Men In 2023
    • Best Ultralight Rain Pants For Men
    • Best Men’s Daypacks For Hiking In 2023
    • Best Backpacking Backpacks For Men In 2023
    • Best Base Layers For Men In 2023
  • Women’s
    • The Best Hiking Rain Jackets For Women In 2023
    • Best Women’s Hardshell Jackets Of 2023
    • Best Hiking Pants For Women In 2023
    • Best Ultralight Rain Pants For Women
    • Best Daypacks For Women
    • Best Backpacking Backpacks For Women In 2023
    • Best Base Layers For Women In 2023
  • Hiking Accessories
    • Best Hiking Poles
    • Best Trekking Pole Monopod Camera Mount
    • Best Hiking Headlamps
    • The Best Hiking Watches In 2023
    • The Best Hiking Gloves In 2023
    • Best Hydration Bladders For Hiking In 2023
    • Best Compass For Hiking Our Top Picks
    • Cool Hiking Gadgets
  • Footwear
    • The Best Men’s Hiking Boots In 2024!
    • Best Hiking Shoes For Men In 2023
    • The Best Women’s Hiking Boots In 2023!
    • Best Hiking Shoes For Women In 2023
    • Best Hiking Sandals
    • Best Hiking Sandals For Women in 2023
  • Hiking Guides and Resources

What Are Lumens in LED Bulbs in Hiking Headlamps

What Headlamp Bulb Do I Need

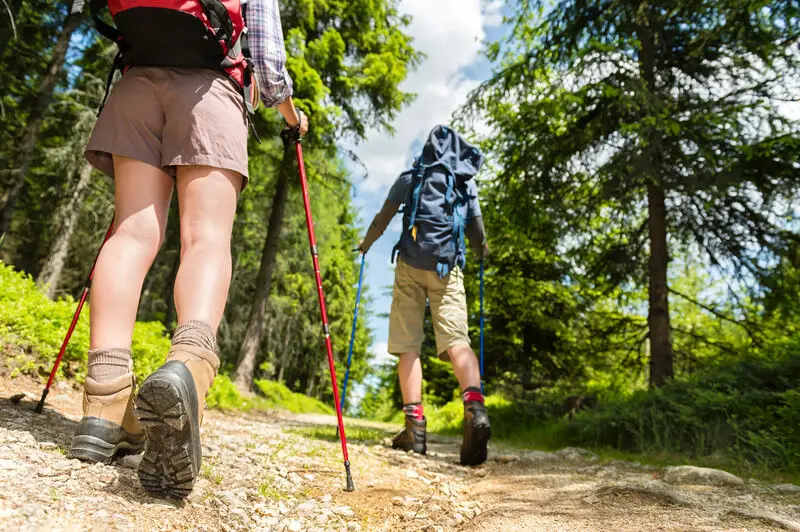
When you’re getting ready to head out on a trail for an amazing hiking expedition, you’re going to need to get the right gear together. One of the most important things to bring in your rucksack is a headlamp. However, many people get stumped when it comes to deciding between one headlamp and another.

There are plenty of things to watch out for, but you should pay particular attention to lumens. If you’re curious about, what are lumens in LED bulbs, this guide will help you to choose the right brightness for every outdoor adventure.

What Are Lumens?

When it comes to lighting, lumens are the first thing that you should take into consideration, as they are what will determine how bright a single bulb will be.

This not only applies to specialty outdoor-gear but regular light bulbs in your home as well. It’s important to remember that watts, contrary to popular belief, do not have anything to do with brightness and lumens are the key to equipping yourself with the right headgear.

By rule of thumb, the more lumens a particular bulb has, the brighter it’s going to be, which should make it relatively simple to find the ideal headlamp for day and night use.

How to Choose the Right Headlamp Brightness

Now that you have a brief understanding of, what are lumens in LED bulbs, it’s time to know what amount of lumens are appropriate for the type of activities you’re interested in participating in.

In addition, there are other factors that can influence the brightness of your headlamps such as the distance of its beam, the type of beam, and the quality of optics.

Type of Beam

First, you’re going to need to think about how the light is going to be emitted from the headlamp, as this is going to determine how bright the light will be when it is focused on an immediate object.

For example, some headlamps might help to illuminate a large area whereas others are better for directing light at a specific target.

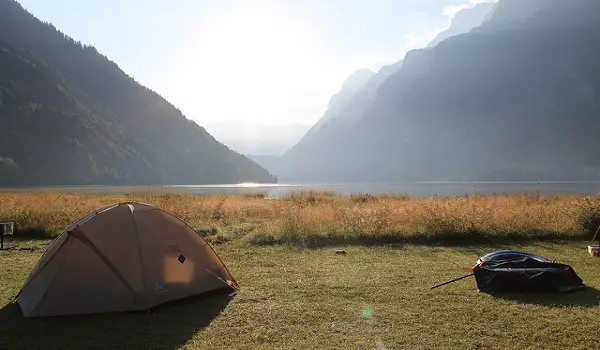
  • Flood Beam: Also known as a wide beam, a flood beam is great for emitting light over a large area and can be quite useful for setting up camp. Their only downfall is that they typically don’t emit light at a long distance.
  • Focused Beam: Also known as a spot or narrow beam, this will be a tight line of light that is ideal for looking at things that are further away from you for targeted tasks. This can be useful when hiking at night, if you’re trying to pick out features and the like.
  • Flood and Focused Beam: Some headlamps come with the ability to customize your lighting needs by choosing between either flood or focused,  and they are certainly the most versatile.
  • Other Options: Most good headlamps will provide additional options like a strobe function, useful for signalling a position to someone in an emergency, red light, etc.

Beam Distance

In comparison to lumens, which tell you how bright your LED headlamp will be in general, the beam distance will give you a clear idea of how far the light is going to travel.

This will provide you with a clear idea of what you’ll be able to see in complete darkness from where you will be standing, and for hiking at night, it’s always better to choose a headlamp beam that travels a reasonable distance.

Beam Brightness

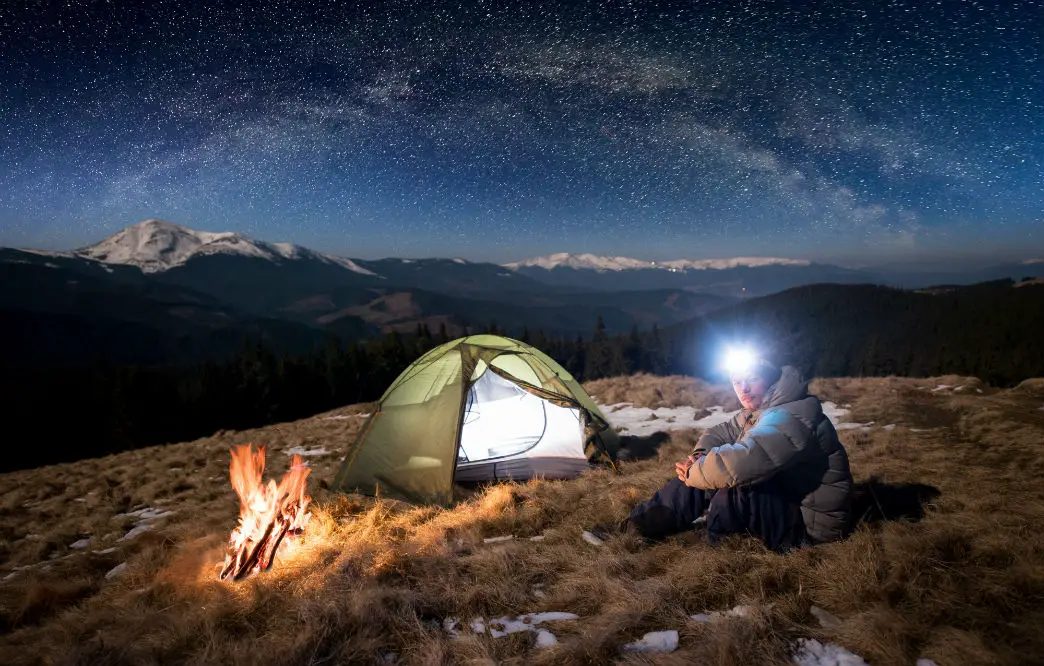
Now, it’s time to ask, what are lumens in LED bulbs? Your beam brightness is what will give you the comfort you need while going out onto the trail at night, setting up camp when it starts to get dark, or for other navigation tasks.

Low lumen headlamps (Less than 200):

For everyday tasks that don’t require you to have too much light in front of you, you’re going to want to find a headlamp that has a low lumen count of less than 200. These headlamps can be useful for walking your dog at night, reading in your tent while camping, or simply as an emergency tool to have at your disposal.

High lumen headlamps (More than 200):

It’s recommended that any time you intend on venturing out into the wilderness at night, you’re going to need a headlamp that has over 200 lumens, as it will thoroughly illuminate your path and help to keep your safe.

Remember, the higher the lumens, the brighter the headlamp will be, and as you won’t be doing close-up work while hiking at night, you’re going to want the brightest lamp possible.

Extreme lumen headlamps (More than 2000):

When you start shopping around, you might even find that there are headlamps that claim to have more than 2000 lumens and even though you might be tempted to buy one, they’re purely gimmicks.

A 2000+ lumen headlamp is going to generate such a bright light that it’s possibly only useful for self-defense and blinding your attacker, or perhaps landing a plane 🙂 That kind of level is certainly not necessary for exploring the outdoors at night.

Other Features to Look for in the Right Headlamp

We have a full headlamp buying guide which goes into this in much more detail, but we thought it would be no harm to add a few key pointers here in this article, for convenience.

Brightness, beam type, and beam distance are just a few things to pay close attention to when you’re choosing your hiking headlamp, but there are plenty of other features that can affect its ease of use, availability, and comfort as well.

Power

It’s essential that you consider how your headlamp is going to draw power, as you want to make sure you can easily charge the headlamp so that it’s ready to go for your excursion.

In most cases, headlamps will either use standard batteries, or be rechargeable via USB and so can be plugged into any charging device. You will also be able to find models that use rechargeable batteries; however, you’ll be responsible for buying new batteries as they become less effective over time.

Red Light

As another type of light that can be useful, a red light is great for having just the right amount of brightness for doing up-close tasks at night such as reading or preparing your tent.

It is also a great tool to have, as it won’t cut away from your night vision in the event you want to turn the headlamp off and still see around you. Red, and other colors of light also won’t spook certain animals, so they can be useful to keep a low profile as you move.

Waterproofing

Above all else, it’s crucial that you find a headlamp that is waterproof, especially as you cannot predict mother nature.

The waterproofness of a particular device is measured on a scale of IPX-0 to IPX-8, IPX-0 meaning that it’s not waterproof at all. Ideally, for hiking headlamps, you’re going to want to find a device between IPX-7 and IPX-8 for the most versatility.

Final Thoughts: The Importance of Focusing on Lumens in Headlamps

Without a clear understanding of what lumens are and how they affect the reliability of your headlamp, you’ll be in a tough position when it comes time to choose your hiking gear.

For people who enjoy spending time in nature at night, you need to make sure that both you and the rest of your hiking party are safe and able to see any threats or obstructions in your path.

At the end of the day, it’s important to find a headlamp between 200 and 1000 lumens, with a variable focused and flood beam, a reasonable beam distance, and waterproofing.

This will help to make sure that you are ready to take on any situation where low lighting may be of immediate concern so that you can venture back to your camp safely and securely.

How to Clean a Hiking Backpack

How to Clean a Hiking Backpack

If you use a backpack for hiking, you will likely have come across the issue of what to do when the backpack needs cleaning. Unlike clothes such as socks and t-shirts, which are straightforward items to clean by simply putting through a washing machine cycle, backpacks are items where the process of cleaning them is not so well known.

In this article, we are going to explain how to clean a hiking backpack, give you tips on how to care for your backpack, and let you into one or two insider secrets on how to ensure that when you must wash your backpack in the washing machine, there are no disasters.

Prevention and Care

There’s an age-old saying that ‘prevention is better than the cure’, and although it is normally used in the context of health, it can apply to all manner of subjects, and in our case, hiking backpacks.

While it is impossible to keep your backpack from never needing cleaned, caring for it properly will mean it needs cleaning less often and it will also prolong the life of your backpack.

Keeping The Interior Of Your Backpack Clean

Liquids are one of the most common reasons why a hiking backpack needs to be cleaned. These can be liquids inside the backpack or those which it encounters outside.

On the inside a common problem is drink bottles leaking, which is why you should always ensure that bottle lids and screw tops are closed tight before placing them in the backpack.

A good tip is to wrap any liquid bottle in a sealable plastic bag, so if they do leak, any liquid will remain in there, rather than spilling all over the interior of the backpack.

Another way to prevent liquid containers from leaking is to pack your backpack properly and carefully. Any sharp or heavy objects should not be resting on the bottle as this could pierce a hole or burst it open.

A good suggestion is to buy backpack liners or put your stuff in dry bags, and place them inside your backpack so if the worst happens, the main materials are protected if there is spillage.

Keeping The Exterior Of Your Backpack Clean

For the exterior, one of the primary problems is mold forming on an area where the backpack has been wet and not cleaned properly. First, you should always dry your backpack whenever it gets wet, and try not to leave it sitting on wet patches of grass, for example, for extended periods of time.

Please note when we say let it dry, this means let your backpack dry naturally. Do NOT put it in the dryer, which will destroy it, and potentially ruin your dryer too.

One great tip to help prevent your backpack from getting soaked through is to spray it with a waterproof spray. This should help prevent the material of the backpack from getting wet or damp to some degree, by repelling any water.

Just as there are liners to protect the inside of the backpack, there is a low-cost solution to protect the outside too. These are backpack covers, which as the name suggests, fit over the backpack. With the backpack inside the cover, any moisture or liquid on the outside cannot dirty or wet the material.

Basic Cleaning

If you are hiking, and notice any dirt or mud on your backpack, you should clean it off immediately. You should carry a small, bristle brush which you can use to clean other items such as your hiking poles or boots.

When you get home, empty your backpack completely, and ensure you have emptied out all the side pockets and other zipped enclosures. You could turn the backpack inside out if it is flexible enough, but a better solution is to use your vacuum cleaner.

It should be able to vacuum out all the little bits of dirt or grit which may be inside. These are what wear away the material and reduce the life of your backpack, so it is vital they are removed.

Read The Label

You should be aware of what material your backpack is made from, but if not, either check the sales information page for the product or look inside to see if you can find the washing instruction label. This will tell you what the materials are and more importantly how you can safely wash the backpack.

Just as it’s important that your clothes are washed in the correct way, and if machine washed, at the right temperature, your backpack needs the same care.

Although your backpack may look and feel the same as another, there are lots of different materials used to make these products and what might be suitable for one backpack, could ruin another.

Handwashing Your backpack

If the washing label or instructions say you cannot put your backpack in the washing machine, then you will need to handwash it. First, ensure you have taken everything out of the backpack, especially the small pockets. Fill a basin or sink with warm water. Do not use hot water as this has the potential to make any colors run.

Use a light soap to make a lather, and do not use detergents or fabric softener as these can damage the materials.

A soft brush can be used to get rid of some of the more stubborn marks or stains but do not rub too hard. Once you’ve finished cleaning, let the backpack drip dry naturally, and another reminder that you MUST NOT put it in the dryer.

Machine Washing Your Backpack

If the washing instructions say it is okay for the backpack to be cleaned in a washing machine, then follow those instructions carefully. Pay particular attention to the temperature it says you need to wash it at. If you choose too low, it won’t clean properly; if you make the water too hot, it could cause the colors to run.

A great tip is to place your backpack inside an old pillowcase and use a short piece of thread or string to tie it closed.

This will prevent all the buckles and straps from making a noise as the backpack is spinning around inside the washing machine. It also makes sure that there is nothing that can cause any damage to any washing machine parts such as the agitator.

Conclusion

It is inevitable that your backpack is going to need to be cleaned at some point; however, you can help to limit the amount of cleaning required by protecting your backpack from spillages inside and waterproofing it on the outside.

Always make sure you check the washing instructions for your backpack before placing it in water, and especially before using the washing machine to clean it.

The Best Hiking Boots For Machu Picchu

I mentioned a few weeks back that I am planning to travel to Peru later this year to, among many things, hike the Inca Trail to Machu Picchu. I am really looking forward to this as it is something I’ve wanted to do for a long time, it’s been on my hiking bucket list for many years.

Machu Picchu

I pretty much have everything sorted in terms of travel, Inca Trail passes, etc. As I draw closer to the trip, about three months away now, I am now starting to turn my attention to the finer details, so things like gear are coming up for review and consideration.

One of the main questions I have come across when looking into gear, is what are the best hiking boots for Machu Picchu, or rather, hiking on the Inca Trail to Machu Picchu.

I did a fair bit of research into this, and also spoke with a guide who leads treks on the Inca Trail to get his take on it and he confirmed what I suspected. Below I go through the main things you want to look for in a pair of hiking boots best suited to the Inca Trail and Machu Picchu.

Solidity with Flexible Soles

Basically, you want to have a solid pair of hiking boots, by solid I mean as in good quality. A key thing to look for is a pair of hiking boots with a relatively flexible sole.

The key thing here is flexibility in the sole. What I mean by that is that, you should be able to bend the sole of the hiking boot between your two hands, as shown in the image below.

Hiking Boot Sole Flexibility

Now, I don’t mean that you can bend it so much that the hiking boots fold in on themselves, that’s too flexible. On the other side of the coin, you also don’t want or need a sole that is too rigid that hardly bends at all.

For example, something along the lines of boots that are crampon compatible is not suitable. You’re looking for the middle ground of stability with flexibility.

It goes without saying, but the soles should also offer good traction and grip on the trail. It is hard to go wrong with Vibram made soles when it comes to that requirement.

I’ve used many hiking different boots with Vibram soles and to date, the Vibram soles have delivered well in terms of grip and good traction on terrain.

Comfort

On first glance, this is obvious, you of course want comfort in a good pair of hiking boots, almost a no brainer. However, there are a few things to point out when focusing in on this.

First, I think a good Mid style hiking boot is a good thing to aim at. In terms of construction, a mid style shaft is ideal. So not rising too high and tight up over your ankles, but providing enough support to be comfortable. The shaft should also have adequate padding to provide comfort in the support provided

The next thing is good breathability, so again Mid GTX (Goretex) is a perfect fit. Temperatures will vary depending when you go. Broadly speaking, as referenced in this post, the best time to visit Machu Picchu is between April to October, more May to September, as the rainy season is in full swing from November to February / March.

Between April to September, we are in Fall and Winter in Peru, with winter being from June to September. This is also the dry season, which may seem a little counterintuitive.

Temperatures from June to September can be as high as in and around 20 degree celsius during the day, and as low as zero degrees celsius at night. It is not uncommon for it to drop below zero in the negative either.

The main point of note here is that, you need a versatile of hiking boots that can breathe when your hiking during the day, but still offer a bit of warmth as the sun goes down and the evenings get chilly, and they can get chilly!

My Recommendation

Having reviewed the gear list for this trip, the good news was that I already have all the hiking gear needed in my existing hiking kit. Granted, I have a fair bit of hiking gear, but I think in many cases most people will have much of what they need, if they are regular hikers.

I plan to take my Lowa Renegade GTX, I think they are perfect for the job. They have decent flexibility in the soles so should meet the requirement and allow the foot to bend, not too little and not too much. Here is the ladies version of the same boots, which I also recommend.

They have a Gore-tex lining so they are very breathable, basically they are the boots I wear hiking in summer in similar temperatures as outlined above, but they also hold up pretty well in much cooler conditions too.

They are a mid style hiking boot so the shaft is just the right size, with adequate padding to provide comfort and stability.

They are my top recommendation. If you’d like to check out more hiking boots, check out the best hiking boots for men and the best hiking boots for women. You will find plenty of recommendations there to meet your needs for every type of hiking.

Conclusion

So, there you have it, that’s my opinion and recommendation on the best hiking boots for Machu Picchu. I hope you found this article useful if you’re trying to pick boots for this trip.

Your hiking boots are of course fundamental to the level of enjoyment you will have on this hike, a bad pair of boots and you will open yourself up to blisters etc. which is just no fun at all!

Remember to break your boots in before you get there, so your boots are comfortable for the entire trek. I am really looking forward to the trip, and I hope you have a great one when you get there too!

Please like and share 🙂

What’s the Purpose of Different Types of Outdoor Jackets?

When you start to look at hiking and what type of outdoor jacket could be good to get, you could easily get confused quite quickly, especially if you’re new to the them.

There seems to be so many different types of jackets for the outdoors, it can be hard to know what the purpose is for each of the different types, and what is good to get for your needs.

Hiker in Down Jacket

Sure, some of them are straightforward e.g. a rain jacket is obviously a jacket that is used to protect you from the rain. But what about say a down jacket, a soft shell jacket, or a hard shell jacket?

All of these are created with a specific purpose in mind, so in this article I want to run over a brief summary of each type of jacket category there is available, and what their core purpose and function is.

I say core, as many jackets will server multiple purposes e.g. a rain jacket will also give you some protection from the wind, but there is a whole specific category of wind jackets in their own right.

Note, for this article I am not looking at the complete and full range of outdoor jackets, only ones that can and do have some use in the context of hiking. There are outdoor jackets designed specifically for other outdoor sports and activities e.g. skiing, running, etc.

The jackets and their core purpose that we will review in this article are:

  • Rain jackets
  • Down jackets
  • Fleece Jackets
  • Hardshell jackets
  • Softshell jackets
  • Insulated Jackets
  • Wind Jackets
  • Winter Jackets

Rain Jackets

Well, this one is pretty clear. A rain jackets core purpose is to protect you from the rain. In terms of hiking, these will typically be very lightweight and packable.

Often times, they can be referred to as a rain shell which is a very literal description i.e. a shell, so on the outside, over you to protect you from the rain.

Their construction aims to keep rain from getting in while allowing the inside area, between the torso and the inside of the jacket, to breathe i.e. perspiration can easily get out so you don’t get wet from the inside.

These jackets are built with motion in mind, so they tend to be designed to allow a lot of movement and room for additional clothing e.g. layering, helmet, etc.

Rain jackets are versatile and perfect for hiking but also can be used for a variety of other outdoor activities, as well as typical day-to-day use.

You can check out our top hiking rain jacket for men recommendations here and our top rain jacket recommendations for women here.

Down Jackets

Down jackets are made from ‘Down’ which is the soft and warm feathers from the underbelly of ducks or geese. The core purpose of these jackets is to provide warmth.

Down is an excellent insulator and so, a very warm material. Down utilizes fill power as a measure of the loft or ‘fluffiness’ to provide an indicator of its insulating properties. The higher the fill power, the more air pockets in the down and the more insulating the jacket will be for its weight.

Down does have a synthetic counterpart, see below, and while it may hold its own against down in terms of warmth, it generally loses out in terms of overall comfort as Down is much more breathable.

While some Down jackets will have waterproof capabilities, Down is not good if it gets wet so that is something to be wary of. If you’re making camp on a cold and crisp evening, a Down jacket really comes into its own to help keep you warm when you stop moving, and the evening gets cool as the sun goes down.

Fleece Jackets

A fleece jacket is a key part of any hikers gear list, definitely a key part of mine anyway. A fleece is usually constructed from polyester synthetic wool and is typically used as part of a layering system.

It is typically not supposed to provide protection from the wind or rain, although you can get some crossovers which may provide some rain resistance.

The core function is to provide warmth while also providing a good level of breathability to let your torso breathe.

They come in different thicknesses, with the thicker ones providing more warmth. In my opinion, they’re perfect for hiking, I have several of these, of different thicknesses, which I use on the trail throughout the seasonal changes of the year.

I also find that good quality fleeces, tend to have a long life so I am ok to spend some decent money on them, as I know I’ll get years out of good quality ones.

Hard Shell Jacket

A hard shell jacket is, as the name implies, a shell you wear on the outside, which is, you guessed it, hard. A hard shell jacket at its core will protect you from rain and wind and is again a key part of any layering system.

Breathability will also form an important part of the functioning of a hard shell jacket, but that is very closely linked to your entire layering system i.e. it all needs to work together. As with a rain shell jacket, If you’re too warm from your inside layers, you will get wet from the inside as perspiration can’t get out.

The best advice I could ever give in this regard is, you have to find out what works best for you, as breathability ratings provided by manufacturers are not definitive, and in my experience are at best a guideline. You may also rightly wonder what the difference is then between a hard shell and a rain jacket!?

The main difference will be quality of construction and level of protection. Hardshells are typically better performers in terms of rain protection than rain shell jackets. However, they can be bulkier and heavier, and usually cost much more than a basic rain shell jacket.

They all have their place though and if I’m day-hiking in heavy rain in winter, a hard shell would usually be a better option.

Soft Shell Jacket

So now we move onto the soft shell jacket. A soft shell jacket will typically not be waterproof, but will usually have some element of water resistance. Its construction will also aim to be exceptionally breathable.

Similar to a fleece, a soft shell jackets core function is to provide warmth, while allowing moisture to wick away from your lower layers closest to your body.

They are usually very flexible so excellent for any activity where you need to stretch e.g. climbing. In terms of hiking, they can form part of a layering system and be used as an outer layer under the right conditions e.g. when you need a bit of warmth on the move on a crisp Spring day on the trail, but it isn’t raining.

Insulated Jackets

These are pretty much the same, in terms of function, as down jackets, but with one important distinction. As far as I can tell, the main difference is that an insulated jacket is made from synthetic fibres as opposed to natural down material.

The core function is the same, primarily for warmth, say on a cold evening at camp. You can of course wear them as part of a layering system, under your outer shell jacket for example, but as referenced above, they are usually not as breathable as a down jacket.

However, they are much better at retaining warmth when wet, than a down jacket, so that is an important thing to take into consideration too.

In my experience, I have always only ever used down / insulated jackets when I stop for a time e.g. stopping to eat lunch on a day hike on a cold day, pitching camp for the night on a cold evening, etc. When on the move, I use a fleece in conjunction with my lower layers for warmth and breathability.

That doesn’t mean you couldn’t use one in place of a fleece, as long as it worked ok for you in terms of letting perspiration out. If it was cold enough, it might well be needed and as with all things related to hiking gear, you need to find what works best for you, so don’t be afraid to experiment with different combinations, in different conditions, etc.

You can find some insulated jackets that roll up into their own pocket to form a really tidy bundle that is great for packing into a day pack.

Wind Jackets

The core function of a wind jacket is of course, protection from the wind. They will typically have some element of water resistance and they should be very functional in the breathability department. I imagine these could be very useful on boats, or out fishing where you could be exposed to higher winds.

They are made from synthetic materials and act as a windbreaker / windcheater. If the wind chill is a major factor, something like this might be a good addition to your hiking kit.

I personally have never had a big need for a jacket specifically designed to protect from the wind only. I rely on my rain shell jacket for that purpose.

Winter Jackets

A winter jacket is a jacket that is used for warmth when the very cold times of year roll around. They will have broad elements of weather protection, and will offer rain resistance as opposed to offering waterproof protection. Pictured below is the Canada Goose Expedition Parka jacket.

Canada Goose Men's Expedition Parka 1

A winter jacket is not something I personally associate with hiking as it’s too bulky, but I thought I would add it in here, as it could come into play as a general jacket for warmth, say if you’re bunking in a cabin as a basecamp at the foot of some mountains for example. Could be a very nice to have, as you collect you firewood or go about other chores about camp.

Conclusion

I hope you found this article on the various different types of outdoor jackets and their purpose useful. It is not meant to be a detailed deep dive into each category or type, rather an overview to give you an idea of what they are, so you can more specifically identify what you may need.

In the context of hiking, all the above could come into play although not always on the trail, as in the case of a winter jacket.

I have owned or used nearly all of the above, except for a wind jacket, so they all definitely have their place and function for a hiker and other outdoor activities. They can all also be used for general use as well, so they are versatile and they, largely speaking, look pretty stylish.

Remember, if you’re a casual hiker, a quality version of one the above, may cover many bases so you may not need to get all the various different types.

As always, please like and share if you found this useful 🙂

Hiking Gift Ideas for the Hiker in your Life!

So, maybe it’s that time of year again and you just can’t believe another year has rushed by, and Santa is looking around for the naughty and the nice. Or maybe it’s someone you loves birthday or you just want to get a hiker in your life a gift for the heck of it!

Person Giving a Gift

In this article I take a look at some hiking gift ideas for the hiker in your life. The good news is that it is not hard to get a gift for a hiker, there is massive choice available! So here I give five excellent suggestions for affordable, and functional hiking gifts.

So, let’s begin!

Hat and Gloves

This is an easy one that is an immensely functional gift for any hiker. Hats and gloves are a must over cooler times of year like autumn and winter. The main thing about then for a hiker is function.

When you’re standing on a cold peak in less than zero temperatures, you are primarily interested in warmth, comfort and functionality.

Although you of course would like your hat and gloves to look well, making a fashion statement is not a primary consideration for the vast majority of hikers.

With that in mind, you want to aim for function first. The good news here is that you can get very functional hats and gloves that are also stylish for hiking for a very affordable price.

Gloves

In terms of warmth, ski glove style gloves and mittens are excellent options. While you can of course go all out and spend a fortune, you don’t need to, it’s entirely up to you.

Best Hiking Gloves

If you want gloves with specific capabilities e.g. water resistance, touchscreen capable, etc. then you can expect to pay a bit more, even on basic gloves.

Check out this article for more about what I use for hiking gloves to get some more tips and suggestions.

Warm Hats

In terms of warmth in a hiking hat, it’s hard to beat a hiking beanie, and again, you can get one for a few bucks or spend a bit more if you wish.

I tend to get the cheap and cheerful beanies, see the image below, and they work just fine. Not spending a fortune also has the added benefit of not being heartbroken if you lost it!

Two New Beanie Hats

What if you live in a warm area? Well, again, a sun hat is just as necessary as a good beanie in the cold. Also, gloves also serve multiple purposes e.g. blister prevention, protecting hands while scrambling, etc. There is a huge range of hiking hat options to choose from depending on your needs.

The main point here is that there are hats and gloves that are useful for nearly all climates, so as you can see, the options are pretty much endless, so this is an excellent choice as a gift for a hiker.

Even if they already have hats and gloves, there will nearly always be a use for new ones at some point. Hiking hats and gloves, tend to get a lot of use so can wear out quite easily, they are also prone to getting lost i.e. left behind or accidentally dropped in the hills and on the trail.

It’s worth noting that there are a whole host of other options in terms of face protection. For example, a balaclava is excellent for very cold conditions and again can be got at a very reasonable price.

Neck gaiters are also very functional and useful in colder temperatures, while bandana’s are great for use most of the year round as a versatile and functional protection for the head e.g. from sun, keeping sweat out the eyes, etc.

Hiking Socks

Oh yeh! ‘How boring!’ I hear you say, ‘I can’t buy Uncle John a boring pair of socks, everyone gets him socks at Christmas, Yawn!’

Seriously though, in general, I personally find socks a really useful and practical gift. Assuming someone gets me the right size and they’re not some outrageous pattern or design of course.

I digress though … when it comes to hiking socks, they are actually a really important part of any serious hiker’s kit. Whether the hiker in your life loves to hike up scraggy ridges in the Cairngorms in Scotland, or likes to take in the trails in Zion National Park in Utah, their hiking socks play a serious role in keeping them comfortable.

Socks are of course the border between the skin on a hikers feet and their hiking boots or trail shoes (which is of course getting pounded by the trail as they hike), so good ones are essential.

Choose Hiking Socks

Again, the ranges and options are many. Buying a good pair of Merino Wool socks for warmth and comfort, will cost a bit more than a light sock for hiking on trails in sunnier climes.

However, nearly all are in the affordable category. Be sure to get an idea of what kind of hiking the receiver of your gift does though i.e. make sure they are functional for their use.

Again, socks could be looked at as boring, but trust me, hiking socks wear out regularly enough for a regular hiker, so new ones are usually not too far from their shopping list.

In summary, hiking socks are a very affordable and a very functional gift option for the hiker in your life. You can learn more about some specifics about buying hiking socks here.

Hiking Survival Kit

OK, now into some more exotic and fun stuff! Hiking survival kits are more what I would class as a novelty gift. Don’t get me wrong, many of them are good and you get some good stuff with them, but as a regular hiker, I am probably unlikely to pack one with me, but that’s more just because I already have all the separate parts.

I use a specific type of compass, I have a Swiss army knife and so on, that’s just me though.

Aside from fun and novelty value, there is function in these for sure. Having a good knife or torch handy is always useful, although I typically use a headlamp for hiking and camping purposes.

Personally, I see these packs as more something I would keep in my car as an emergency spare. Could be great to have on hand for camping and the like.

Typically, with a survival kit, you get a whole host of tools with one, for example, common contents are things like:

  • Flintstones
  • Multi-function scraper
  • Emergency tungsten steel pen
  • Emergency thermal blanket
  • Tactical torch flashlight
  • Multi-function compass
  • Portable mini light
  • Tactical Military Knife
  • Steel tool
  • Whistle
  • Shockproof case

That’s just one example and as you can see, there’s a lot of good stuff in there. All very functional and useful. I think this is a better gift for a newbie hiker as it opens up all sorts of possibilities to them that they may not have considered i.e. what do I use a compass for? What’s the emergency whistle for? etc.

Snack Pack

Another fun and easy one! You can get pre-made snack packs (basically a selection of snacks in a box) that can add a nice bit of novelty to things. However, there is no reason you can’t make up your own! Get a bunch of hiking foods together, things in wrappers with a decent shelf life are what you’re after here.

Trail Mix

So, think along the lines of a bag of trail mix, some granola or energy bars, protein bars, chocolate for an energy blast, boiled sweets, dried fruit, etc. you get the idea.

You could even go on step further and make some of the things yourself! I have a friend who makes his own protein bars, and they’re yummy! How about that for a unique and tailored hiking gift idea, specially made protein bars!

Now, that may be a stretch for most, but it could be fun thinking out of the box and seeing what you can come up with! No matter what option you go with above, again, you’re unlikely to break the bank, so you can get a fun gift for a very economical price!

First Aid Kit

I actually got this as an unexpected gift from a colleague in the office as part of a Kris Kringle some years back! I was quite surprised at the thoughtfulness of the gift, and it was a really quality one!

It had all the basics, and I needed one, so it was perfect! It was ready to go, aside from missing one or two things like Vaseline.

It really was a great gift. You can also make your hiking own first aid kit as well, again, another option to personalize it if you’d like to add your own touches.

As with a snack pack, or hats, glove and socks, a good and functional hiking first aid kit shouldn’t break the bank, so another very functional gift to help with blisters and other little problems and niggles while the hiker in your life is out on the trail.

I also know myself, that while I have a hiking first aid kit, I would have no problem with someone buying me a new one, as it can be good to replace stuff every so often so, as with all hiking gear, it’s good to have back-up spares!

A Voucher Perhaps?

I am concluding this with a trip to Boringsville! Ha ha … yes, indeed, the trusty voucher. Not anything that’s going to generate massive excitement, but it is something that the hiker in your life will find practical use for.

A voucher for a good outdoor store or a voucher from Amazon, will be welcomed by any hiker. They will need new gear periodically throughout the year, so being able to help with the cost of that, is a good thing!

Why a Voucher can be a Great Choice!

As well as that advantage, it can be hard to pick hiking gear for people, say things like boots, jackets, etc. There is so much personal choice involved, and there are so many options these days, it can be very hard to make a good assessment and guess as to what a person may like without discussing it with them.

That can be fine sometimes, but unless done with stealth it kind of takes the element of surprise out of the equation. That is where the voucher really comes into its own!

If someone has to get a new pair of hiking boots, or a new rain jacket, the cost can be significant. Knowing that they have, for example, a $100 voucher on hand that will help lighten the load of that cost can be a really good thing, especially for folks on a budget.

That voucher may also enable them to get a better level of product e.g. they have a budget of $160 to spend on hiking boots, they now have the option to add the $100 voucher to their budget making their buying power $260, so they can get a higher level of quality in their hiking boots.

So, yawning aside, the trusty voucher definitely has its place, and it’s easy to slip into a Christmas stocking or birthday card, no wrapping pressure too ha ha!

Conclusion

So, there you have it, I hope you found these hiking gift ideas for the hiker in your life useful! As you can see, there are lots of options to choose from and you really don’t have to break the bank to get something thoughtful, useful, functional and potentially fun.

Of course, as I referenced at the start of this, I am only scratching the surface here, walk into any hiking gear shop and you will find a veritable menagerie of stuff to choose from!

It can be a bit bewildering if you don’t know anything about gear though, so enlisting the help of a sales assistant may be advisable if it’s all new to you!

If you’ve been too busy to get to the stores and you’re doing your shopping last minute, no worries, an online voucher can be a great way to go, to dig you out of a hole!

Whatever you do, I hope you end up with the right gift that brings a smile to the face of the hiker in your life 🙂 If you liked this article, please like, share and comment!

Hiking In The Rain

Many people when they are getting started hiking, typically plan a day hike on a weekend. One of the things that should be on their planning checklist is to of course check the weather forecast. When some folks do this, they may see rain on the way and automatically think that their hiking plans are scuppered.

Raingear

OK, if a torrential downpour is on the way, or if the rain will be so heavy that the hike will be unpleasant, and potentially unsafe, then of course a hike should be cancelled. Safety always comes first.

However, if the day ahead is only dotted with patches of rain, then there may well be no reason to not go ahead with your hike. In fact, rain can add a beautiful dimension to your day out on the trail.

If you want to head out in the rain, there are a few simple things you should take into consideration, to help ensure you enjoy your day as much as possible.

Rain Gear

A must in any hiker’s gear, is of course rain gear. As a general rule, you should have a rain jacket and rain pants in your day pack as well as a suitable hat and gloves. These are your outer shell against the elements so you need to factor appropriate hiking pants, fleeces, tees, etc. for warmth and so on as well.

Of course conditions play their part here too, if the sun is splitting the sky, and you’re in the middle of a warm spell, sure it may be fine to not pack your rain gear.

Typically, I will always pack a light rain jacket, even in really good weather. It takes up minimal space in my day pack, and you never know when the sky may choose to open up for a ten minute blast of rain, so it’s good to have something on hand.

In terms of rain gear There are oodles of types of rain jackets and rain pants to consider, some being more resilient to the elements than others, so you need to spend a little time choosing the right rain jacket and getting good rain pants that are easy to use and of course functional for your needs.

The main point here, is that just because the rain is on the way, it doesn’t mean you can’t still get yourself out and about to enjoy the mountains. Some appropriate clothing gear in your pack, and you should be good to go.

Safety

I mentioned this briefly above, but it is of course a key factor in going out hiking in more inclement weather. If you’re going to hike in the rain, you of course need to be that bit more careful.

For example, terrain like rocks will be slippery to walk on so you need to ensure you have appropriate footwear to prevent a slip. Muddy areas will naturally be harder to walk on when they are wet, again you can slip more easily so trekking poles can really be a huge help, to help you keep your stability.

meindl-vakuum-gtx-hiking-boots-for-men-in-the-field-2

Similarly, gaiters are a great investment for muddy and boggy areas, they will protect your feet and the inside of your boots by keeping mud, rocks, etc. out of your boots, as your feet sink into the wet ground.

As well as that, packing some basic first aid is a good idea and if you’re pushing the boat out and planning to go into tougher terrain off the beaten track, it is always a good idea to have an emergency blanket and a bothy bag. Just in case someone in your party has an accident and you need to keep them comfortable until you can get help.

I should add a cautionary note here, that if you’re a relative newbie to hiking, you probably shouldn’t be going off trail in this manner. However, for the more experienced hiker, going further into the wilderness on a hike can be a natural progression, and so carrying safety gear for the group is a good idea.

Think Ahead

As well as having gear to protect and support you and your friends, simply making better decisions on your day out on the trail will help keep you safe.

For example, say there was a lot of rain the previous week, and there will be blasts of rain throughout the day ahead for your hike. Your planned route was to cross a small river. It’s normally no more than a few inches deep over a few feet.

However, given what you know the weather has been doing running up to the day of your hike, and what it is likely do in the day ahead, a simple route adjustment to completely avoid having to cross the river, will prevent any problem from arising. It’s worth noting that this safety decision is made before you even set out!

As you can probably tell from the way I am going with all the above, the point is that for every challenge that the rain may bring up, there are things you can use and do to help you counteract any potential problems, to help keep you safe.

Whether that be having appropriate gear, or making better route planning decisions, you can still enjoy your day out and stay safe.

Conclusion

Hiking in the rain can really be a lot of fun. Of course the intensity and parameters need to be appropriate, as there can be a fine line between enjoyment and fun hiking in the rain, to being dripping wet, miserable and potentially unsafe.

You always need to be smart and assess the challenges the weather on the day might bring to you, but just because it is raining, it doesn’t mean you can’t get out on the trail.

I know some fair weather hikers who love to hike, but hate being out in the rain under any conditions. If you fall into that group, well then obviously hiking in the rain isn’t your thing and you should never head out in the first place.

However, for those of you who aren’t that particular, if you’ve never experienced it, I can assure you that standing on a peak with the wind and rain hitting your face, can often be an exhilarating experience.

At least it has been for me on many occasions, so don’t think you have to pass up the opportunity to get out on the hills just because there might be a bit of rain forecast!

5 of the Most Common Hiking Injuries

As a hiker, there are some typical injuries, or maybe inconvenient niggles and pains might be a better description, that you’re going to run into at some point.

How To Fit Hiking Pole Replacement Grips And tips

In this article I take a quick look at 5 of the most common hiking injuries a hiker can run into on the trail, and look at some preventative steps that can be taken to help get you through the initial problem as it manifests, but also help to prevent it from happening on an ongoing basis.

Now, I say ‘injury’ but I am aiming more towards a general area of pain or discomfort, where problems tend to manifest for a hiker. You may avoid some of these in your hiking career, but if you’re a regular hiker, even with the best preparation in the world, you’re unlikely to avoid all of them, all of the time!

The Dreaded Blister

Foot Blister

The obvious one and the hikers nemesis ha ha 🙂 It stands to reason that you have a high likelihood of encountering this one as when you hike, you do a lot of walking in hiking boots.

Of course, at some point, your lovely boots that have molded perfectly to your feet over the last few years, have to be replaced, so you need to break in a new pair of hiking boots.

And there we have it, a typical example that provides ripe ground for a blister to make an appearance 🙂 That’s only one example though, and there are any number of reasons why a blister might show up, even when you are out on the trail in your favorite and well broken in hiking boots.

In fact, just a few weeks back, I was on a hike where a fellow hiker got three nasty blisters, two on one foot and one on another.

We stopped to help treat them, I gave him some blister pads, and he was very confused about this as he has been using his hiking boots for well over a year, and in that time, he never had any issues like this with blisters, after he had broken them in.

So, why did it happen!? Well, that particular group I hike with typically do a lot of off trail and open mountain hiking.

That particular hike was a 28km hike over a pilgrims trail type deal. That meant it was largely on very open trails, with sections on roads with not much uphill and predominantly flat ground. And there you have the culprit.

Terrain Type Matters

I can go out and hike 30 km’s through mountains and my feet will be in grand shape after, tired of course, but no blisters. If I did that same distance walking on roads, arrghgh, I dread to think what shape my feet would be in, blisters could be the least of my problems!

My theory on this, is that when you hike over mountainous terrain, the ground is of course uneven. This means you feet, your leg muscles etc. are getting moved around in different ways as you strike the ground with you feet.

On the other hand, when you walk on flat roads, you repeat the same muscle movement, with the same parts of your feet getting impacted, again and again. So, it can lead to pain much more easily than hiking up a steep mountain with uneven ground. A little counter intuitive perhaps, but that is experience.

Anyway, you get the idea, blisters can come at anytime and usually when you least expect it. Prevention is always better when it comes to blisters but if you do get one, having some blister pads in your first aid kit are the best way to deal with them in the short term to get you to the end of your hike.

I did a full piece on how to prevent and treat blisters which has much more information on avoiding and handling this troublesome fellow, so it’s worth taking a look at that to get some more ideas on prevention as well as more tips on treatment after the event.

Knee Pain

This is one I have encountered a couple of times, and in fact just a few weeks back. I was out checking a route out for a hike I am leading in a few weeks.

It’s a long hike with a lot of ascent, 26kms distance and 1900m height, over very rocky terrain, so tough on the joints for sure. I was about two hours from the end of my hike, coming off the last main peak on the route, and my right knee started to feel really sore.

Knee Pain

It was a real pain in more ways than one, as it really slowed me down to the point where eventually I had to take breaks every few minutes to give it a rest.

You also may need to factor your hiking stats in. What I mean by that, is, say typically, you hike 15 kms with 1000m ascent. Then one day, you take a notion to do 25kms with 2000m ascent.

It was gradually getting worse and worse, and I was getting concerned as it was getting late in the day. I made my way back to my car fine but this really hampered my progress, slowing me up by nearly two hours I reckon.

What can you do?

Well, the first thing I think that is worth investigating, is using trekking poles when you hike, if you don’t already.

They can really help to spread the load out when going up and down steep sections, I especially find the downhill can be tough on the knees. Trekking poles can be a great help in lowering the pressure on the knee joints.

That’s quite a jump and one that could make the body react by sparking knee joint pain. It is always a good idea to build up to a bigger distance over a few hikes, rather than doing it in one big jump up.

The next thing to think about, is knee sleeve supports. I know a few people who use these and they swear by them. To be honest, I am a little cautious of them, for fear of getting too used, and therefore dependent, to them. However, for many folks, it isn’t optional and they need the extra support.

Finally, you can also start looking into taking a supplement that is good for the joints, like Glucosamine and or Chondroiton.

Again, I don’t personally take these but I have a hiking buddy, who also loves running and skiing so does give his knees a fair run for their money, who swears by supplements like these which he takes.

It’s something that could be worth experimenting with, but you need to give it a bit of time to take an effect. If you’re going down this route, it is also a very good idea to talk to your physician or health professional to get some expert guidance and direction.

Back Pain

Now, this is one that is a huge issue for many people in day-to-day life, never mind when hiking. However, if you find that you only experience it after a hike, it is likely that your hiking could be having an impact. As you hike, over time, you tend to slump forward as your body gets more and more tired.

The first port of call here, is our old friend the trekking poles again! They can really help you keep your posture in a better alignment as you get tired on a long hike.

The extra support to spread the load also means you can take some of the weight of your back which can be really helpful as your body tires, giving your lower back a break.

Stretching is another one I find good for back stiffness, as opposed to pain, but stiffness can become painful so it’s an easy preventative measure you can take if you feel your back starting to lock up. Some twists and stretches can help loosen things up.

Below is a video of some good stretches you can try. There are plenty more available so don’t be afraid to look around online, you’ll find loads of stretching routines and variations.

Now, I don’t want to go too much more into giving advice or tips on back pain, as it’s a very broad area where professional help should be sought if you are developing a real problem.

You will know yourself whether you’re getting a mild pain from overdoing it, and a stretching session combined with using your trekking poles will do the trick, or if you need to seek professional assistance from your physician, chiropractor or other health professional. If in doubt, always get it checked out!

Foot Pain

Stands to reason really, doesn’t it 🙂 If you’re on your feet all day, there is probably a stronger likelihood of your feet hurting. If you’ve managed to avoid the dreaded blister, that doesn’t necessarily mean your feet are in a dandy condition!

Foot pain, and I include the ankle in that, can come from a varying array of places. As per my blister story above, sometimes just walking on flat terrain that you’re not used to, might cause a bit of upset.

In many cases though, the prime suspect could be your footwear. If you find yourself getting sore feet when hiking, it could be that your boots aren’t a good fit.

Now, there is a whole host of possibilities as to why this may be. Your hiking insoles could not be the right match for your feet for example.

If you have a high arch but you are wearing flat and wide boots, it’s likely you will feel discomfort and potentially pain at some point and problems like plantar fasciitis could develop.

Always spend time when choosing your hiking boots to get the right ones for your feet. Most gear shops these days have very knowledgeable staff that can help you get a pair of hiking boots that really fit your feet comfortably.

Other Options

If you’re consistently experiencing problems with foot pain after trying out several different pairs of hiking boots, you could always look into getting a pair of custom made boots, that will be created to fit your feet perfectly.

However, before doing that, again it’s wise to seek advice from a professional as there could be something in how you’re walking that could be causing your problems.

A gait analysis should show this up pretty quickly and you might be able to learn a lot from that, which will help you either get the right type of insoles or inserts to sort out your problem, get the right pair of hiking boots, or help you work on something in the mechanics of how you’re actually hiking e.g. over pronating on your feet.

Lower Leg Pain

This one usually comes in two forms, the first being stiff calf muscles which can lead to pain, the second being pain in your shins, never a pleasant experience!

If your calves are giving you problems, and are sore after a hike, getting some good stretching in before and after your hike (even during it) is a smart place to start to see if that alleviates any discomfort you may be experiencing.

Another great thing for your calves, or any muscle for that matter, is a muscle roller. Rollers are really excellent for rolling stiffness out of your muscles.

In fact, I highly recommend doing a full body roll out, all your muscles from you feet up to your upper body, on a regular basis. It is excellent and can really help keep your muscles lose. It can be a painful experience though when first doing it, so ease into it!

When it comes to your shins, thankfully that is one area I haven’t experienced many problems in but I do know that pain in that area can be really painful.

For example, shin splints can be a really painful thing to develop. Typically experienced more by runners, you can still run into similar problems while hiking.

With foot pain, or any other type listed above, it is wise to start with your insoles, footwear and even your hiking socks. Examine how your feet are working with all of those to see if you perhaps have a bad fitting boot, that is causing problems.

If you are at the point where you are getting shin splints while hiking though, you would again be wise to seek professional consultation, as you don’t want it to develop into anything further, as you won’t fully know the underlying cause.

Conclusion

These are some of the typical hiking injuries or discomforts that many hikers will experience throughout their hiking career. That is most definitely not to say though, that this is an exhaustive list, far from it! These are some common ones though.

Many of these types of injuries, when at a minor level of discomfort, can be treated and potentially resolved on an ongoing basis by the individual. With some good research and intelligent testing of possible solutions, you can often easily find what you need to sort the issue out by yourself.

However, if any of these are causing ongoing pain or regular and persistent problems, it is unwise to continue doing what you’re doing, as it could lead to longer term problems that may not be resolved so easily.

Where that is the case, it is always wise to seek good advice from a suitable health professional. Don’t keep plodding on, accepting the pain and saying you will walk it off!

In all likelihood, if the pain keeps repeating, that won’t be the case. Your body is trying to tell you something, so you would be wise to listen to it!

I hope you found this article on 5 of the main hiking injuries hikers experience useful. Please like, share and / or leave a comment if you did.

How to Plan a Hiking Trip

I thought it might useful to add up some tips and ideas on how to plan a hiking trip or vacation. I’ve organized and taken part in many hiking trips over the years so I thought I would drill down into the main things I look at when considering a trip.

Lone Hiker

First off, I should start by saying that by a hiking trip, I mean more than a day trip to your local mountains, although some of the items below could still apply. For this article, I am talking about taking a few days or more away, often in a location unfamiliar to you.

Every hiking trip is unique, no matter how small or large. However, if you want to go away to another country or state for a weekend with a few friends to hike some trails in a national park, generally speaking that will be much easier to get together than say, climbing to the top of Mont Blanc or hiking the Inca Trail.

So, let’s look into this some more. Below are some ideas on what to consider to help you find the right information to get you going.

The Basics

Starting at the start, establish the basic framework of your trip. Do you already know what type of hiking trip you want? This is the fundamental basis of organizing anything, you need to define what you want, or at least get an idea of what you’re looking for.

Sure, it can be fun to start from a completely blank slate, but the amount of choices are practically infinite so at some point, you need to get a clearer idea of some of the basic things you’d like your trip to cover. Listed below are some key areas to get you thinking.

Budget

This is self explanatory really, so not much explanation needed really. If you live in London and want to head to Everest Base Camp, it’s going to be a lot more expensive than heading to the Italian Alps for a few days.

Evening View of Everest with Hiker and Buddhist Prayer Flags from Kala Patthar

Travel is a big one in this example as it is way more expensive to get to the start of your hike to Everest Base Camp than it is to travel to your chosen start point in the Italian Alps.

Also, the more adventurous you get, you may need more specific gear to handle whatever the hike may throw at you. For example, if you think you’ll be hiking over glaciers, you may need to buy or hire crampons.

Qualified Help

Of course, you should never be crossing glaciers without the guidance and help of a trained mountain guide, or if you and your party are that experienced and know how to rope up and do it yourself. I assume the latter is not the case for most folks and so, the extra gear will add cost.

Then of course, as reviewed in more detail below, there will be the costs of accommodation whether you travel of your own accord or join an organized tour or trip of some kind. You have to eat and drink too so you need to factor that into your budget as well.

Typically organized trips with a company will cost more, but they have the added advantage of supplying all the gear you may need for the hike which is a big plus. I first experienced this when I climbed Mont Blanc.

The company I went with not only took care of all the gear needed, but they supplied transport, guides, accommodation, meals, etc. It was great, as it meant me and my friends could focus on the task at hand, namely getting to the top of Mont Blanc! Which I’m happy to report, we did 🙂

Duration

How long do you want to go away for, a weekend, a week, longer? Depending on the type of trip you want to take, this will of course vary. But if you know you only have a weekend to work with, that immediately puts certain limits on your options and helps narrow down the search criteria.

Hiking Type

This was alluded to just above but it is fundamental to organizing your trip. Exactly what kind of hiking do you want to do? Are nice and easy trails, taking in the morning sun your thing, or are you after challenging off trail stuff?

This is kind of the fun part, as the choices are practically limitless. Taking all other considerations into account, you can get to pick from any country, park, trail, etc. Within reason of course, some places are of course just not viable or accessible.

You also can consider whether you need guided help or is it’s a do it yourself mission. I touch on that in more detail below.

Weather and Climate

Important to factor in, if you have a hike in a certain location in mind. Depending on the time of year, the weather and climate could mean it’s a big no-no to do what you want to do. You may have to pick the right time of year.

For example, a common one, is that some mountains in winter time are just no go zones as it is far too dangerous to attempt to summit them in winter. Even in summer, when the weather is typically better, it could be a no no.

For example, I hiked in Death Valley in April last year, and I found the heat tough. I can’t imagine what it would be like to do that in August when the Summer heat is scorching. Potentially very dangerous and it could mean you’d be wiser not to even consider heading out on the trail there at that time of year!

In Death Valley Heat

Hiking Gear

Already touched no above but it is an important one so deserves a specific mention. Whatever trip you decide on, do you have all the gear you need for it?

Will standard hiking boots do the job or do you need specialized boots e.g. crampon compatible? Will your normal hiking rain jacket be enough, or do you need something much more resilient to the elements?

There is a lot to think about here, depending on your trip. For standard hiking trips, you can probably get away with gear you already have. You can check the complete day hiking checklist for the standard gear you typically need for an average day hike, that covers most things.

However, for more adventurous hiking trips, you may well need to hire or buy more specialized gear to ensure you are safe while out on the trail.

If you choose to go with a guided hiking trip or adventure holiday, any required gear may be supplied by the company, so that is worth looking into as well if specialized gear is required.

Getting There

Depending on the trip you want to undertake, you have to of course work out how you’re going to get there.

When you hike, you are of course in mountains and so on, so you’re not likely to have an airport in close vicinity to your chosen destination (which is of course a good thing as who wants an airport in the wilderness!). I’m sure there are exceptions though.

The point being that if you’re travelling and organizing things yourself, you’re not going to always have easy access transport to the mountains.

Sometimes you will, but not always and even if there is public transport, you will most likely have to get a series of connections to get there if you aren’t hiring a car (Or driving yourself there in your own car from home). So, in summary, how hard it is to get to where you need to get to, is an important thing to consider.

If you are going on organized trip, say a hiking package holiday, all of this should be taken care of for you, from when you arrive at the airport till the time you get back.

There are also plenty of hiking day trip options from city centers so that can be another option i.e. to use a main city or town as a hub or base and travel in and out of it to your hiking location of choice.

This isn’t always desirable though and you may be better planning to set up base in the local area. Anyway, you get the idea, there are often plenty of options available, if you go down the organized trip route.

Cost plays an important role in this as you can imagine, so you should try and get an idea of all the travel costs involved.

Accommodation

Just like getting there, you will need to factor in accommodation for your hiking trip. Are you planning to backpack and camp in the wilderness, or do you need a hotel or hostel to sleep in at night? These things all add up in terms of cost as well, so you need to examine the various options available.

Camping

This isn’t usually a big deal when travelling to popular travelling destinations as the local economy is setup to support that kind of tourism. Timing may be a problem for this though, so you may need to book well in advance.

On the other hand, if you’re going well off the beaten track though, that may not be the case and you need to do a lot more research to figure out what will work best.

If you’re thinking about backpacking, be sure to check the rules in the area (see the restrictions and limitations section below) as you may need special permission, like a wilderness pass to do that kind of thing i.e. you can’t just show up, head into the mountains and pitch a tent.

That isn’t the case everywhere of course, but it is in plenty of places so you need to take it into consideration and check when doing your planning.

Do it Yourself or Guided

I touched on this above, but depending on what kind of trip you end up looking for, you may need to sign up for a guided tour.

For example, sometimes you need a license to hike in certain countries national parks, which are only available through official tour companies. This is done to prevent overcrowding and to protect the natural habitat, history, etc.

On the other hand, this can sometimes be optional. For example, if you land in the UK and want a hire a mountain guide to take you hiking to the top of Ben Nevis, the highest peak in the UK, you can do that.

However, if you’re an experienced hiker, there is no reason you can’t head up Nevis of your own accord given the conditions, etc. are suitable. You just need to be aware that you will have do you own route planning etc.

Again, this ties back to your requirements and how experienced, adventurous, etc. you may be. I have used both options at times, when the choice has been available to me. In some cases, say going to a foreign country, guided help can be a real help.

If you’re unsure about this, again, just do some research online, etc. In most cases, you will find information in articles and so on, on how easy or hard it may be to go on your own, and whether it is better to have a local guide with you. There are plenty of hiking forums too.

There are of course, as always, exceptions to this. There are countries with beautiful hiking regions that aren’t frequented as much as others. Think of somewhere like Siberia, or deep regions in India as an illustrative example.

Off the Beaten Track

A hiking location could be well off the beaten track and far from populated civilization. Therefore, there may not be as much information available on these types of places (even things like available maps of the region may not be great or they may even not exist).

Hikers In The Arctic

Now, for this kind of trip, you are moving into adventurer territory to a degree and suffice it to say, you need to do a lot more good research, as opposed to for a more mainstream type of trip.

Hire Local Support

Employing a competent local guide (who speaks the language) is both sensible and probably essential for this type of trip. This is also good for the local community / economy as well, as you’re putting money directly into the hands of locals.

That is a nice segway into my final point for consideration on this. Many tour companies will organize trips abroad from your home country. These can be excellent, and they usually take care of everything end to end, from your home airport, right till you get back.

However, sometimes, it could be worth considering directly employing a local tour company in the place you are visiting. Your money is potentially going directly into the pockets of local people, without an intermediary.

Now, I do not mean to imply that international tour companies do not support local economies on these types of trips, in most cases they do and employ the local people as well.

However, it is something which might be worth looking into, as if you are willing to take care of your own travel arrangements, you might just save some money too as utilizing local resources directly, can often be much cheaper than a big established international tour company.

Again, it comes down to what you’re most comfortable with and what meets your needs best.

Restrictions and Limitations

As already referenced above, many places have restrictions and limitations on what you can and can’t do. It’s very important to get clear on this before you go.

So, for example, if you need a license or pass to hike in the area, you can get one organized in advance; if you don’t need a pass but you’re not allowed to hike on private land, you should be clear on where you can and can’t go; and so on …

Access Forbidden Sign

Broadly speaking, most national parks and established hiking locations have clear rules and regulations to follow, to ensure everyone enjoys themselves and stays as safe as possible.

If however, you’re aiming for somewhere much more off the beaten track, that will not likely be the case, so again, at a minimum, consultation with a knowledgeable local expert is a must and ideally, hire a guide to keep you safe and within the rules.

It’s worth keeping in mind cultural differences here as well. For example, are there religious festivals or local traditions that may impact the planning of your trip!?

Finally, depending on the country you’re travelling to, you may even need a visa to just get into it, and they can cost money, so that is another factor to consider.

Health and Safety

Probably more one for the more adventurous hiking trip but it is something that you need to think about in certain cases, and it could well add to your budget too.

For example, do you need vaccines for the country you intend to travel to? If you’re heading to the Amazon, you will need a bunch of vaccines to be sure you don’t catch any unwanted diseases like Malaria, Typhoid, Yellow Fever and so on. Are you going to high altitudes and so may need medicine to help with altitude sickness?

As well as this, you may need to keep in mind the basics like food and water. Is the water safe to drink? If not, how will you sterilize the water to make it potable?

What about food, will the local diet agree with you? Again, these are things to reflect on and consider, especially if you’re going to an exotic location or somewhere well off the beaten track.

Roles and Responsibilities

Typically, for a trip of this, one or two people take on the organizing of it, if it is for a larger group. Where this is the case, it can be wise to work out who is looking after what.

Many times, I have chose the route of organizing all my travel, accommodation myself, and then passing on the details to everyone else to book for themselves. This can be the least painful way to do it, and whomever decides to go, books for themselves.

However, this may not always work and you may need to assign one or two organizers, who do all the set-up work.

Where this is the case, and you’ve had everything arranged for you, it’s always nice to show your appreciation in some small way e.g. buy the organizers dinner on a night out during the trip. That kind of thing to show your appreciation.

Online Search

Ok, Ok … I am totally stating the obvious here but it is a key step in the process and one that I want to conclude with! Once you have some level of all the above requirements defined, you need to get onto Google, Internet Explorer or whatever your browser of choice is, and start the search.

Type in exactly what the first steps gave you. For example, ‘Good sunny hiking destinations in <location> for people on a budget in Spring’.

Hiker with Pack

I won’t dwell on this as it is obvious to most, but this will return a host of possibilities that might meet your initial requirements. You can then do a deeper dive into options so you can start to hone in on relevant and more detailed possibilities that look to fit the bill.

Also, keep in mind, asking around your hiking friends and other ‘offline’, if you will, resources can also lead to excellent possibilities too, many of which could be far from the madding crowd, so keep this in mind. Not everything is on the internet, but a hell of a lot is 🙂

Conclusion

So, there you have it, these are just a bunch of tips and areas to consider, to help get you started on planning a hiking trip.

I think when most people start as beginner hikers, if they take to it and enjoy it, many folks start to get the taste for hiking in different locations, for more adventures further afield and so on. And why not, there’s a great big world out there to explore and enjoy, with amazing hiking locations all over the globe!

If you’re just starting to entertain the possibility of your first hiking trip, check out the gallery 40 of the best hikes and trails. It lists some of the top hiking locations all over the world, so there will be plenty of inspiration there to get the creative juices flowing as you try and settle on a plan.

Again, these are just some things to think about, the main ones. However, there are potentially oodles of other things involved and, as mentioned at the start of this article, every hiking trip is unique, so there will nearly always be exceptions and special things that need to be taken into consideration.

I hope you found this article on how to plan a hiking trip useful 🙂 Please like, share and / or leave a comment below if you did!

Leather vs. Synthetic Hiking Boots, Which is Better?

I was thinking recently about the pros and cons of the traditional leather hiking boot versus some it’s synthetic counterparts, in terms of its material construction.

Before going any further, I think it useful for me to define what I mean by a traditional leather hiking boot and a synthetic hiking boot.

Meindl Vakuum GTX Hiking Boots For Men

To me, a traditional hiking boot is the leather alpine style boot, like the one pictured above, which have been around for years.

A synthetic hiking boot is one that may have a more technical look and will usually consist of textile only or a greater mix of textile and leather materials in the construction, like the one pictured below.

HiTec Mens Bandera Mid WP Hiking Boot Featured Image

If you’re in the market for new hiking boots, then check out the best men’s hiking boots and the best women’s hiking boots.

Materials

The main construction material options for hiking boots are broadly summarized in the table below:

Full Grain Leather
Tough and durable leather with great abrasion resistance, as well as natural water resistance and breathability. Ideally used for wetter climates and rugged terrain. Can come in different thicknesses depending on what hiking you want to use the boots for.
Nubuck Leather
Buffed down full-grain leather. Not as tough as full grain leather but still has good water resistance and breathability as well as performing well in terms of abrasion. A step down from full-grain leather in terms durability but a step up in terms of flexibility.
Synthetic Materials
Made from synthetic materials like polyester, nylon, etc. Usually a combination of many different materials. Less expensive than leather but does not enjoy the natural waterproofing that leather provides so the waterproof membrane used in the boots is important.

I should state at the outset, that while I definitely have a preference which I won’t reveal till we reach the conclusion, I have over the years utilized both the traditional leather and more modern synthetic types of hiking boots. 

I thought I would walk through some of the obvious categories for comparison to see how they both fair in comparison.

Weight

A practical consideration for any pair of hiking boots is weight. This can be more relevant for certain types of hiking than others. For example, if you are planning to do a lot of backpacking, a sturdy but ideally lighter hiking boot could be preferable.

In my experience, in terms of weight, as a general rule, the more modern hiking boots constructed using a mix of leather and more synthetic materials and textiles are typically lighter than the traditional Alpine style full leather boots.

There are exceptions on both sides of this equation but this has been what I have found overall. A fully synthetic pair of hiking boots will be lighter in weight, but you will lose out in other categories.

Stability

Given that the traditional leather Alpine hiking boot is usually heavier, I have also generally found the traditional style of leather hiking boots provide more stability over varying terrain.

Again, there are exceptions and the overall construction of the whole hiking boot has a lot to do with this. However, that said, on a longer term basis I think leather is a tougher material that molds better to the shape of a foot than synthetic materials.

It remains stronger for longer and with that in mind, I give this one to the traditional leather hiking boot.

Style and Look

This is one that I personally feel is a big one. It’s probably just good old fashioned conditioning but it is hard to not think of hiking when you look at a traditional style leather hiking boot.

That style and design has been around for a very long time and so is just associated with hiking … I think of the Alps and I think of a fine pair of leather Alpine hiking boots 🙂

The synthetic style boots broadly speaking aim for a more modern and technical look or aim to mimic the traditional leather style. You can of course get a very technical looking hybrid that utilises both leather and textiles.

At the end of the day, this is down to personal taste and preference. For me, I think it’s very hard to beat the look of a traditional leather hiking boot. It is pleasing to the eye and looks the part. As this is a personal preference, so I will call this one a draw.

Waterproof Capabilities

A large part of any hiking boots waterproof capabilities comes from the lining which is often made from a specific waterproof material like Gore-tex.

Nearly all hiking boots will have this lining. However, leaving the lining aside, the question here is whether an upper made 100% from full grain leather or one that is 100% synthetic, or a combination of the two, provides a better option in terms of being waterproof.

I will always come down on the side of the 100% leather option but the quality and type of the leather used plays a big part in that statement. Generally speaking though, the leather boots win out against synthetic.

Breathability

Most hiking boots these days will have an inner liner that is both waterproof and breathable. In that regard, most well designed hiking boots should have some level of breathability.

However, leather is skin at the the end of the day and so has some level of natural breathability in it. However, by design and construction, synthetic materials can be adapted to allow a much better airflow inside hiking boots. In that regard, it could be argued that synthetic materials are better in terms of breathability.

However, you need to look at things in their entirety and in the right context.

That is, if you’re planning to always do your hiking in warm and dry weather, mainly over well established paths and trails, you may think about sacrificing the other advantages that leather hiking boots can provide to be able to enjoy a better ventilated pair of hiking boots. It’s rarely that simple though 🙂

Price

At the end of the day, any top pair of hiking boots will likely have leather in its construction to some degree. The question becomes more, are the uppers 100% made from leather or a mix of leather and textiles.

As a general rule, a good solid pair of leather hiking boots will cost more than something that is either made wholly from synthetic materials or a mix of both synthetic and leather. Leather is a more expensive material and so usually means a more expensive pair of hiking boots.

Break In Time

Nearly all new boots or shoes need to be broken in, to some degree. When it comes to leather vs. synthetic hiking boots, in the early stages synthetic will usually be the winner.

Leather is of course a much tougher material than the synthetic materials used for hiking boots, so it logically will take longer to break leather in.

However, what you may gain in the short term you may lose in the long term in terms of abrasion and wear and tear. On the cold number of breaking in alone, your feet will usually adapt much quicker to synthetic material boots than leather.

Durability

In terms of durability, I would say there is no real contest. Hiking boots made from quality leather are tougher and more durable. As a natural fiber, leather is more resilient and will withstand abrasion over time much better than hiking boots made from synthetic materials.

This is borne out in the fact that many top quality leather hiking boots can be resoled if the leather upper is taken good care of.

It is not uncommon for good leather boots to last for many, many years if you replace the soles. Synthetic hiking boots on the other hand, have a shelf life and when they’re done, they’re done.

meindl-vakuum-gtx-hiking-boots-for-men-in-the-field-2

Other Considerations

One other thing worth mentioning is related to your diet preferences. ‘Huh?’ I hear you say. Yes indeed … if you are a vegetarian or a vegan, a synthetic hiking boot may be more in line with your principles than one made from leather, which of course comes from animals.

Not relevant to all but most likely relevant to some so I wanted to add that in as a note here. While not directly related to the performance of the types of hiking boots against one another as such, it is still a valid point worth adding into the mix.

Conclusion

In conclusion, when it comes to leather vs. synthetic hiking boots, my personal preference is hands down, a top notch leather pair of hiking boots.

I just can’t really see how synthetic hiking boots can compete in terms of functionality. However, there can be exceptions as outlined above e.g. hiking in really hot weather on well established trails.

While leather is my favorite, in summer I do sometimes use a hybrid mix in hiking boots with an upper made of nubuck leather and some synthetic materials. As outlined above, they are a bit lighter and definitely more breathable for a hotter time of year.

At the end of the day, it’s your personal preference but if you are looking for a quality pair of hiking boots, you will nearly always end up with some element of leather involved in the construction of the upper, if they are not 100% leather.

I hope you found this article useful and maybe even thought provoking. What do you prefer, leather or synthetic hiking boots? I’d love to hear your thoughts in the comments below.

  • « Previous Page
  • 1
  • …
  • 4
  • 5
  • 6
  • 7
  • 8
  • …
  • 16
  • Next Page »
  • Facebook
  • Pinterest

What are you looking for?

Copyright © 2025 · Cool Hiking Gear

Cool Hiking Gear is a participant in the Amazon Services LLC Associates Program, an affiliate advertising program designed to provide a means for us to earn fees by linking to Amazon.com and affiliated sites.

  • About This Site
  • Privacy Policy
  • Affiliate Disclosure Statement
  • Contact