coolhikinggear.com

  • Men’s
    • Best Hiking Rain Jackets for Men In 2024
    • Best Men’s Hardshell Jackets Of 2023
    • Best Hiking Pants For Men In 2023
    • Best Ultralight Rain Pants For Men
    • Best Men’s Daypacks For Hiking In 2023
    • Best Backpacking Backpacks For Men In 2023
    • Best Base Layers For Men In 2023
  • Women’s
    • The Best Hiking Rain Jackets For Women In 2023
    • Best Women’s Hardshell Jackets Of 2023
    • Best Hiking Pants For Women In 2023
    • Best Ultralight Rain Pants For Women
    • Best Daypacks For Women
    • Best Backpacking Backpacks For Women In 2023
    • Best Base Layers For Women In 2023
  • Hiking Accessories
    • Best Hiking Poles
    • Best Trekking Pole Monopod Camera Mount
    • Best Hiking Headlamps
    • The Best Hiking Watches In 2023
    • The Best Hiking Gloves In 2023
    • Best Hydration Bladders For Hiking In 2023
    • Best Compass For Hiking Our Top Picks
    • Cool Hiking Gadgets
  • Footwear
    • The Best Men’s Hiking Boots In 2024!
    • Best Hiking Shoes For Men In 2023
    • The Best Women’s Hiking Boots In 2023!
    • Best Hiking Shoes For Women In 2023
    • Best Hiking Sandals
    • Best Hiking Sandals For Women in 2023
  • Hiking Guides and Resources

Safe Hiking Tips – What To Do In An Emergency And How To Contact Help

I plan to start adding safe hiking tips to on an ongoing basis as part of the Hiking Guides and Resources and safety categories, and this is the first post in the arena of safety.

When you go out hiking, nothing it more important than the safety of you and your hiking group, if you’re with others. Safety is of the utmost importance and you should always do everything you can to stay safe. Common sense and good decision making go a long way in keeping you good and enabling you to enjoy your hike with out any fear or concern of accident or danger.

Hiker Walking In Alpine Scene

However, accidents can and, of course, do happen so it’s good to be prepared as best as possible and know what to do in an emergency. A key part of that is knowing how and when to contact help in an emergency.

In this post I want to look at some high level guidelines of what you should do if you’re unfortunate enough to find yourself in an accident or emergency situation. This isn’t an article on wilderness first aid care, that’s a massive subject in and of itself that is best learned by training with an experienced trainer. This is however, a key part of the wilderness first aid process when you’re out on the mountains.

Assess the Situation

In the first instance where any accident occurs you should try your best to assess the situation. The main thing to establish first is the extent of the injury to the injured party. If it’s minor and some basic first aid, I’m talking plasters and tape here, will treat it, and you know how to do it, administer the treatment and then take the quickest and safest route off the mountain if necessary.

Red Cross

If the injury is of a more significant nature, you will need to make a more in-depth assessment as best as you can. Now, you generally need to have some first aid experience to do this effectively but overall, the main thing to ascertain is whether the injured party is in a fit enough condition to get off the mountain of their own accord or with help from the rest of the hiking party.

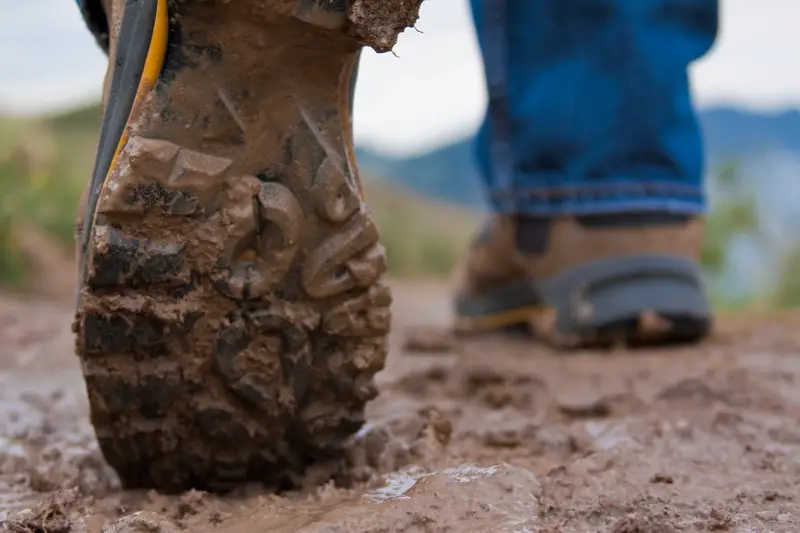
For example, a common hiking injury is a sprained or broken foot or ankle. Hiking can involve a lot of walking over rocky or loose terrain which of course provides plenty of opportunity for ankle or foot accidents to happen. Even with the utmost care, you can just be unlucky and have a bad turn or fall.

(As an aside, for this particular injury, this is why good hiking boots are so important. A good pair will provide adequate stability for your ankle and while it may not prevent all injuries it should significantly cut down on the likelihood of a break!)

In this example, and to try and give an example of assessing an injury, try your best to understand if the ankle or foot injury is a sprain or a break. This should be relatively easy to establish. As a general rule, if it’s broken it is highly unlikely it can be walked on or can handle any standing pressure without very bad pain. A sprain on the other hand, while still sore, should be bearable to stand and walk on.

If it’s a sprain, or break for that matter, the key thing would be to keep your socks and boots on and to keep moving! This may sound counter intuitive but continued movement ensures blood still flows around the sprained area and should provide enough mobility to get off the mountain to safety and treatment.

Unfortunately once you get off the mountain and you eventually remove your boots, socks and rest the sprained foot or ankle, it will stiffen and the pain and lack of mobility will kick in. However, at that point you should be safely at home lying on your couch with your foot raised sipping a hot cup of coffee!

This is listed here only as an example of assessing an injury situation and is of course specific to foot and ankle sprains and breaks. There is a wide range of factors to consider for the many possible problems and injuries a person could experience.

However, the broad principle is the same for all injuries and you need to adapt this process as best as possible based on the nature of the injury e.g. if someone has banged their head, are they compos mentis, are they mumbling when they speak but think they are lucid, etc.

Tip: If you ever get a chance to do a first aid course, take the opportunity to do it. Many companies offer basic first aid courses at work for free on the condition you spend some time on their ERT (Emergency Response Team). This is well worth doing and you will pick up skills that could save a life! The best option for hiking is a wilderness first aid course.

Contacting Mountain Rescue / Emergency Services

If you are unsure how to assess the situation or unsure what the best course of action should be, you need to contact Mountain Rescue or the Emergency Services.

Contacting a rescue service will likely differ depending on where you are located so it is always wise to check out the best way to contact the emergency services in advance if you’re in an area unfamiliar to you.

Usually, you need to call your normal emergency services number and ask for some kind of specialized service, for example a Mountain Rescue service. (I mentioned in a previous post Telephone buttonthat your most important piece of safety equipment is a fully charged mobile or smart phone.

Even if you can’t get reception on your normal network, when you dial the emergency services, your phone should connect via any available network to enable your call to go through regardless. Your position can also be tracked via a smart phone.)

The Emergency Services should then patch you through to appropriate service who can initiate a rescue in the mountains you are hiking in. If you’re out of coverage, you will need to try and get into an area with some kind of coverage to make your call so keep trying intermittently.

As a broad guide, the Rescue service will likely start by asking you specific questions about the incident. Be ready to provide:

  • Location
  • Number of people in your hiking party and names
  • Detail on injuries / casualties
  • Your phone number as well as others in the group
  • Incident detail – time it happened, what happened, etc.
  • Equipment available at your location
  • Landmarks or distinguishing features at your location
  • Location Coordinates if you have them

The rescue service will use this information to help them make their own assessment of the situation. Based on that they will then give you advice on what you should do.

If, using the example above, the injured party is incapacitated and has a broken foot or ankle, in all likelihood the Rescue service will ask you to give details of your location and tell you to make the person as comfortable as possible while they make their way to you to help.

If you’re in anyway unsure about something, don’t be afraid to make the call. Even if it isn’t necessary for them to come out, they will happily give you good guidance and advice over the phone and it’s better to be sure and safe than to be sorry!

It’s worth noting that many Rescue services around the world are staffed by a lot of volunteers working on their own time, so a big salute should be sent out to them!

Conclusion

I hope you found this short post on what to do in an emergency in the mountains useful. If you take anything from it, let it be this. Before you head out on a hike in a certain area, educate yourself on who to contact and how, should you or a member of your hiking party should be unlucky enough to get into difficulty. It really could be a life saver.

If you don’t know, just dial the emergency services and explain your situation to them, they should be able to help and figure out who you need to be talking with.

If you get a chance, I really recommend that you do a wilderness first aid course. This will provide some good education on what you can do in specific situations and what you can do at the scene while you’re waiting for help to arrive.

Have you ever been in an emergency situation and had to call out an emergency Rescue? I’d love to hear your story in the comments below.

How to Plan a Day Hike Route – Tips and Safety

Today, continuing on in our series on getting started with hiking, I wanted to do a short post on planning a hiking route. At the start of this series we looked at where you should go for your first inaugural hikes and how far you should go. When you have those things worked out, you then want to start thinking a bit more about your actual route that will fit the criteria you’ve laid out.

Route Map

Now, as I mention throughout this series of getting started with hiking posts, it’s a good idea to keep your first hikes well within your comfort zone and to stay on very well marked paths and trails, so much so that you could probably get away with hiking on them and making your way back to base without a map.

Overall, the main priority is to stay safe so you have the freedom to enjoy your hike and get familiar with being out on the trail. The best way to do that is to do some good route planning in advance. For this I’ve listed some pointers below to help guide you through the best way to do this.

1. Plan Your Route in Advance

Stating the obvious here but, in short, no matter your level of hiking experience, you should always plan your route in advance!

Try and get an up to date map of the hiking area. An up to date map is important as things do change over time and trails once marked on the map may
no longer be in existence! Also, be sure to keep in mind that some basic land features like forests, even an up to date map, can change. For example, they are often cut down for maintenance purposes. When you go looking for it on your map, it may not be there which could lead to confusion.

Now this post is part of a series mainly targeted at beginners who broadly speaking, probably don’t have finely tuned navigation skills. However, it is very possible that you could have someone who is new to hiking but knows a lot about navigation. If you fall into that category and you do happen to have good navigation skills get a hold of a route planner and write out your route including coordinates, key points, distance between key points, timing (how long you estimate it will take you to get from one point to another), etc.

Compass

When you get more familiar with route planning, you can use certain tools and guides to help you work out more detailed information about your hike.  For example, you can calculate the length of time your hike should take. Many people use traditional tools like Naismith’s rule to help them in that process, which although not perfect, is popularly used to give an idea of how long in minutes you should factor in when you ascend by an increment of 10 meters.

These days, there are lots of really cool smartphone Apps which you can utilize too. For example, I’m a big fan of Viewranger. It’s very easy to plan out a route once you buy the relevant map. While apps like that can also be used as a guide on your route, I strongly recommend that you don’t rely on that method alone. I do use Viewranger but I always keep the traditional method of map and compass close at hand. Batteries in phones can die, typically at the most inopportune times 🙂

I won’t go into too much detail on navigation this post, I do plan to start a series on navigation at some point though which should give a bit more information on the basics of navigation. In short there are plenty of tools and methods you can use to help you plan your route as you get more experienced. At the start though, I recommend you ….

2. Stick to Marked and Open Trails

If you’re new to hiking or if you’ve only been hiking a short while but do not have reasonable navigation skills, using a map and compass etc., then you should stay on established trails and marked treks. I really don’t recommend that you go venturing out into the wilderness and stray away from established paths as it is very easy to get lost if you do not have the navigation skills to guide yourself safely across open terrain.

It is also very possible that you could encounter difficult terrain e.g. cliff edges. While this will be marked clearly on any map, if you can’t read a map correctly it will mean nothing to you. All you’ll see are a bunch of squiggly lines very close together 🙂

The weather is another key factor here as if fog or mist develops you could be in difficulty if you can’t establish your position on a map and don’t know how to take a bearing to guide yourself safely out. If you’re hiking in a new area for the first time, it is also advisable to ask some locals or people who have hiked there before for any information on your route. The internet is a wealth of information of course.

3. Hike in a Group

Generally it is a good idea to have a few people hiking together. If one or two people get into difficulty, the odds are that someone is still able to raise the alarm and get help.

It is also a really good idea to try and hook up with some experienced hikers when you’re just starting out, that way you shouldn’t risk getting lost as their experience will keep you on the right trails etc. a great way to do that is to join a hiking club or group. You’ll not only be safe as you get started but you’ll likely make some new friends too.

4. Tell People Where You’re Going

A simple but often neglected safety tip is to simply tell people where you are going hiking and give them the route you plan to take. A useful idea for this can be to photocopy the section of map you plan to hike and mark out the your hiking route clearly on it. That way, if you don’t show up for dinner, they have a pretty good idea where to send the search and rescue party!

Planned Route
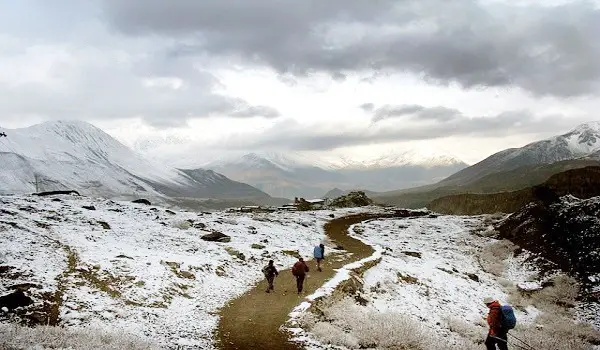
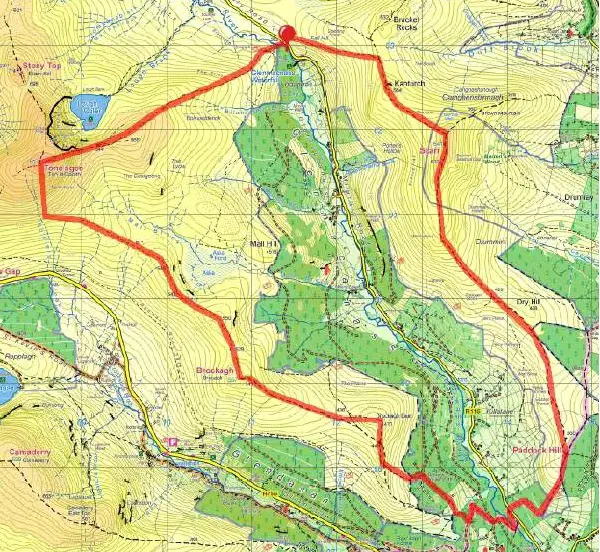
Again, Apps like Viewranger make this really handy and easy to do. I plotted the route above using it.

5. Easy Access Map

When you set out on your hike it is wise to have your map, with the hike route clearly marked out on it, fully open and with easy access to reference. Maps, as you know, can be big and unwieldy so you may need to bend them about a bit to get the relevant area clearly and fully visible.

SealLine Map Case Another good tip here is to invest in a map bag, pictured above, to keep your map in. A map bag will keep your map dry and protected from the weather as you reference it while you hike. If you’re tight on funds a good food zip lock bag can do the trick just nicely!

Conclusion

So there you have it. Whether you’re brand new to hiking or a very experienced hiker, these same tips always apply. There are many more things to consider but these are some fundamental tips, if you will, on how to plan your hiking route and of course stay as safe as possible in the process.

When you’re at the stage of planning your route, you’re probably very close to hitting the trail and have all the other bits sorted out. Next up we’ll take a look at something everyone should be aware of when they’re out on the trail and that is to Leave No Trace. If you would like to start from the start of this series of posts on getting started with hiking, please click here.

If you found this post useful, please share it or leave a comment 😉

Hiking Food Ideas For Day Hiking

In this post I wanted to take a look today at some hiking food ideas that you can take with you on your hikes.

I started to think about this last night while I was buying some of my usual hiking supplies in the store for the trail. Of course the more I thought about it the more options seemed to present themselves.

Food

So rather than starting with an exhaustive list of the many food possibilities for day or multi day hiking, I figured I would just start with what I know best i.e. what I take with me on my hikes.

I am focusing on day hikes in this post and I will list out some of the general food ideas I regularly utilise.

Water

OK, so technically, not food but absolutely critical all the same. When you’re heading out on a hike water is of course of the utmost importance,  it is critical to have a good supply with you so I feel I should put it in here at the start. There are various ways to carry water on the trail but if nothing else a basic water bottle from the store will do the trick.

Always be sure you have an adequate supply with you, you don’t want to run out. You can get by for a long time without food with the only consequence being hungry and probably a bit grumpy 🙂 Not so with water as you can imagine.

River Water Bottle

Remember water can be heavy to carry so if you’re going out on a longer hike, you could look to utilize water spots along way like rivers and so on. Always be careful when you drink water from a river or in the mountains. I have drank water straight from source in many of the places I regularly hike in but as general rule, you should always purify water found on the trail before drinking it.

Fruit

Moving on, I then look to things that are convenient and easy to carry. I also try to only consume healthy stuff as much as possible. I think fruit is great for a day hike. Easy to carry and great for a short snack aka as a ‘banana stop’. 5 minute break, some water and banana, happy days!

Apples and bananas in bowl

Banana’s and apples are regular companions with me on my day hikes. Two of each is my usual stockpile. They are  great and they can also be easily munched on the move. They also provide some water and a some sugar with fiber to top up on energy needs. You can of course pick your favorite fruits if bananas and apples aren’t your thing.

Always remember that if you take fruits into the mountains, take your waste back out. Many people mistakenly throw the cores of apples and banana skins on the ground believing this is fine as they’re biodegradable. This just isn’t so and unless the fruit is native to that specific area i.e. it grows alongside the trail you’re on, you need to pack it out!

There are lot’s of sound reasons for that which I won’t delve into here. Check out this post on leave no trace to learn more.

Nuts or Trail Mix

For quick, convenient and healthy snacking I find nuts to be perfect. I usually have a nice mix of almonds, a few Brazil nuts, some cashews and walnuts. I am big fan of walnuts and they pack a healthy and filling energy punch for their size.

Almonds

Trail mix is another good option which can be easily purchased in any large grocery store. While trail mix will have nuts too it will usually also have dried fruit, grains and sometimes even chocolate. I prefer to keep it down to my own selection of nuts, almonds 🙂 , but trail mix is a fine and popular choice too.

Note: Just a small note of caution with regard to nuts. Stick to the recommended daily portion sizes as taking more than that of some nuts can have adverse effects if done too regularly. Don’t let this minor note of caution dissuade you from nuts though, they’re healthy and awesome but like anything, it’s all about the balance! I love them 🙂

The Main Event

What I like to call the main event is your main meal while out on your day hike, generally speaking this is normally lunch. Up until about two months back I was a big fan of the good old fashioned sandwich or baguette!

Baguette

I of course tried to keep it as healthy as possible with some lean meat like boiled or grilled organic chicken, salad mix and mayonnaise on whole grain bread or in a baguette. The options for a sandwich are of course endless and you can adapt it to whatever your tastes are.

However, about two months back I cut bread out of my diet completely as part of a new strength and conditioning program I started. Part of that was also to only eat, what are defined as, ‘clean’ carbs. While I had taken cold pasta and white rice meals with me on my hikes before, and again the options for pasta and rice are many e.g. a nice tuna pasta salad works very well on the trail, these aren’t classed as clean carbs.

So I had a quick rethink and experimented with brown rice, a little finely chopped onion, chopped peppers, some boiled or grilled chicken, some herbs topped with some light seasoning. It was delicious and that, or a variation of it, has been my main staple on my recent hikes the last month or two. Again, I’m all for experimentation so mix whatever ingredients you like to see what you come up with.

Overall, any of the options reviewed above are good for your main event.

Note: If you’re taking a rice or pasta dish with you on your day hike, be sure to pack a fork or some other eating utensil, check out the Spork on this page, in your day pack! There’s nothing more frustrating than trying to eat rice or pasta with your fingers and yes, this has happened to me 🙂

Tea / Coffee

I did a post recently on taking a Thermos water bottle or flask for the trail. To me having a hot Thermos flask with hot tea or coffee in it is a wonderful luxury to have with me on my day hikes. This is even more important for me as we move further into the colder months.

A hot drink is a great thing to have with you, not only functional as it’s hot and so warms you up, but also a great morale booster if you’re cold and standing in pelting rain! You can of course take whatever hot beverage that tickles your fancy e.g. any variety of tea, soup, etc.

Chocolate Bar

Next up, something I always have with me in my day pack is a chocolate bar. This is more for emergencies and so therefore I don’t always eat it while out on a day hike but it is wise to have one or two tucked away in the kit for an energy boost if required. I normally have a  70% cocoa dark chocolate bar but you can of course have your chocolate nibble of choice. Try keep it as a chocolate bar though, I don’t recommend carrying a box of chocolates on the trail!

Chocolate Bar

Cereal Bars

Personally, I think these are just bars of sugar. It confuses me when they’re marketed as being part of a healthy breakfast on a normal day. If you look at the nutritional label on the standard cereal bar, it’s usually loaded with sugar which I don’t think is a great idea for a normal breakfast.

However, if you’re out hiking on the trail and burning lot’s of energy, cereal bars can really work a treat for giving you a quick boost on the move. So, for hiking I think they’re a winner! I usually have one or two packed away, alongside my chocolate bars, in my pack.

Remember, some bars are much worse than others, in terms of sugar. Take a few minutes and read the nutritional labels on the packet boxes and try and find something that has a bit less on the sugar side with a reasonable amount of grains, seeds and / or nuts in them.

Chips and High Fat Snacks

Now, this is one I don’t normally use on the trail, especially for day hikes, but I wanted to mention it for any hiker who is thinking about longer hiking trips, more ultra hiking type of stuff. Some of the stuff that you normally are not supposed to be munching, like high fat potato or corn chips e.g. Doritos, can be useful on the trail for longer hikes.

Why is that? Well the high calorie count can come in useful. If you are ultra hiking, you’re hiking very fast and probably moving at 3 to 5 miles an hour. Now, that is serious speed on the trail and it means you will burn a lot of energy fast.

Some, not all I hasten to add, junk food can be a quick way to get a quick dose of calories. If you’re ultra hiking, you’re probably already skinny as a rake anyway so when you eat this stuff on a multi day trek, you just burn it right back off. The other advantage, it’s lightweight and relatively easy to pack away to carry.

I hasten to add that I do not know that this scientifically sound but, from the once or twice I have used it, it seems to have worked. The higher fat carbs gave me an energy store of sorts. Again, for most hikers this one doesn’t apply but I thought I’d mention it.

Conclusion

So that’s really it for this post. I think I will expand on this topic in future as there must be any amount of nice, as well as handy, food ideas you can take with you on a day hike. Just thinking about this now, while I have cooked and ate hot meals camping out many times while hiking, I have never ever brought hot food, aside from soup in a Thermos flask once or twice, with me on a day hike! There could be room there for experimentation, especially as we move into winter. Eating a hot meal on a peak would be a nice treat, definitely some food (excuse the pun) for thought!

Finally, when you’re thinking of food ideas for your day hike, keep it convenient, healthy and tasty! Lunch is a welcome break on the trail and as well as being a necessary thing to keep your energy levels up, similar to hot tea for me, it’s a nice morale booster to get some tasty food into you while chatting with your fellow hikers over lunch on the trail!

Do you have any tasty, healthy and convenient food ideas that you like to make and take on the trail with you? I’d love to hear about it in the comments below.

I added another related post on the 10 best day hike foods which is also worth a look. Similar stuff to this but some more nutritional information is available there.

Hiking Clothing Layers for the Colder Months!

With the Fall in full swing and the winter months drawing ever closer, I thought it would be a good time to do a post on the simple but necessary process of hiking clothing layers. Layering will help ensure you stay warm, dry and comfortable on all your hikes.

Winter Hiking

It isn’t by any means a complex thing but it is worth reviewing, especially for people who are new to hiking. While I am specifically thinking of the colder months here, the same process applies all year round. For example, it only gets colder as you hike further up mountains and you get more exposed to high winds, etc.

What are Layers?

In a nutshell, all of your clothes are layers. When hiking, you want to be sure that you have enough layers with you to ensure you can stay warm and dry.

In the first instance there are base layers. These are the ones that are directly next to your skin. These need to be warm but they also need to have wicking ability to let moisture, like sweat, wick away from your skin. A handy example to use when thinking of base layers is to think of Long Johns but in Base Layerstwo pieces so a bottom part for your legs and a top part for your torso.

That is where the illustration stops though as Long Johns are made of cotton which is a big no-no when hiking.

I should also add that I have never wore leggings on a hike, but in really cold temperatures, you may need them.

Hiking Base Layers can be made from synthetic materials like polypropylene, polyester, etc. They can also be made from natural fiber like Merino wool, a very popular material that not only has excellent wicking capability but will keep you warm.

Most of my base layers are made from Polypropylene but I do plan to venture into the wonderful world of Merino wool this Winter as I hear great things about it.

Once you have some good base layers on, you then move up to the next layer. Here you’ll be thinking of a good hiking tee or shirt. Again, wicking capabilities are preferable.

I tend to stick with polyester tees over my base layer top. It has worked well for me over the years so I am unlikely to change. Shirts can be good too though but I don’t really use them.

For hiking pants, you need to again be thinking of breathability and wicking as well as some element of water repellency and general protection. Again, man made fibers like nylon are good as they can offer flexibility which is a plus on the trail. I know I’m stating this again, but pants made from cotton are out.

In general, avoid cotton for hiking gear, it isn’t a good material for outdoor gear. Some features hiking pants should have is the ability to dry quickly and, if you can get them, ventilation zips on the sides at thigh level are excellent to have.

When opened, they allow air to easily circulate around your legs as required. You can check out some decent hiking pants options here.

The next layer up, you will want to have a warm hiking top of some kind to go over your base and second layers. I usually use a fleece jacket but a thermal jacket is also a really good option that works well for warmth.

Waterproofs, Boots and Accessories!

Finally, as you’re now up at the outer end of your layers you will need to have a waterproof hiking jacket and waterproof pants. These should ideally be breathable, water repellent, windproof, easy to put on and remove, as well as stow away in your pack.

I use the Berghaus Helvellyn Pants and they’re excellent. There is a whole range of things to consider when buying waterproof gear so check out the waterproof hiking jacket buying guide and the hiking pants (external waterproofs) buying guide. It covers everything you need to consider for this outer layer set.

On your feet you want to ensure you have comfortable hiking socks and appropriate hiking boots that have been adequately broken in (I can’t emphasize breaking your socks and boots in enough, see this post!)

Finally some clothing accessories are also crucial for hiking in the colder month’s. You will need a good pair of waterproof gloves that will keep your hands warm, dry and, ideally, also allow you good hand and finger movement. The last piece of the puzzle is of Beaniecourse a good hat.

While a good hiking jacket or fleece may have good hoods attached to them, I personally like to have a good beanie cap too to keep the noggin that bit warmer.

It’s worth pointing out that there are a whole range of hiking hats that are good to use at different times of the year, in different environments, etc. Check out the hiking hat buying guide to learn more on this subject.

So there you have it, a quick synopsis of all the main layers of clothing you should have for hiking in the colder months!

So what Exactly is the Importance of Having all these Layers Anyway?

Well, the main reason for having all these layers is to enable you to stay warm and dry. The inner layers stay close to your body all the time and are designed to keep heat in and let moisture out.

As you move further out, the next layers start to move to keeping heat in, with some breathability, to finally, at the external layers, letting moisture out but keeping the elements at bay too.

The beauty of layering is that it is quite easy to adjust your layers to the needs of your environment as it changes. For example, if it starts to get colder as you ascend up a peak you can take out your fleece and slip it on over your hiking tee and below your rain jacket for some extra warmth.

Or, if the rain starts pelting down you can quickly get your waterproof pants out of your pack to keep your legs dry. You get the general idea.

Two Tips to add here …

Firstly, it is a good idea to take a spare set of clothes with you on all your hikes regardless, just in case you get wet or have some kind of incident that renders your clothes problematic.

In particular, you need to be able to replace the lower layers that are closer to your skin as you need to get those off fast, if they get wet, in cold weather.

Now, I should say that I don’t always pack a full set of clothes with me on a hike but I will always have a few extra layers and a full change of clothes in my car.

It really depends on the hike I’m taking on as well as the conditions. Sometimes a full set of gear should be in your pack with you on the trail, you need to use good judgement. I review that further in this post.

Secondly, aside from the extra set of dry clothes, I think it’s always a good idea to have a second long sleeved base layer as an extra safety net.

The reason for this is just if it gets really cold very quickly or if you get injured and can’t walk, having another skin tight garment to put on will really help keep your core temperature good.

Also, you never know if someone in your hiking crew might need a spare so it’s good to have an extra just in case!

Conclusion

With the right gear both on and with you, you will have done all you can to ensure maximum comfort and enjoyment while hiking in the colder months.

Always be sensible and check the weather before-hand and remember, if the weather is looking really bad just leave it for another day. The last thing you want is to get into difficulty and have to call for help just because you were too Gung-ho!

If you’re totally new to hiking, I suggest you start here where I walk through all the key points you need to consider to get started hiking. There are plenty of links from there to, among many other relevant topics, posts about the different bits of gear you should have.

If you want to get straight to business with it, check out the complete day hiking checklist which covers everything you need to consider in terms of gear and a bunch of other stuff.

OK, that’s it for today 🙂 I really hope you found this useful. Any questions on any of this or of you’re unsure about anything, feel free to leave a comment and I’ll get back to you to try and help as soon as possible. Don;t forget to like and share this post 😉

How to Clean Hiking Boots – Some Tips and Tricks

This post looks at some simple tips and tricks to help you clean hiking boots after your hikes. You can check out our top hiking boot recommendations for men here and our top hiking boot recommendations for women here.

Muddy Boots

I was out hiking last weekend in some pretty wet and nasty weather and through some pretty boggy and marshy terrain. That kind of weather mixed with the dirt and debris on the ground can be tough on your hiking boots.

This post is not intended to be a fully exhaustive treatise on how to best look after your hiking boots over the long term as there is much to consider for that depending on the type of boots you have, the material, etc. I will compile all that information into a more complete post in the future. For now I wanted to review some basic tips for cleaning your hiking boots that you can easily follow and implement immediately.

The first crucial point is to clean your boots regularly and always after every hike where you get them very dirty. This is mainly to protect them from any erosive effects that may arise from the type of ground you were hiking in. For example, as I mentioned above, I was hiking in bog and marsh last weekend in mountains I know pretty well. I also know that the bog and marsh there is particularly acidic and therefore can eat away at your hiking boots over time if not cleaned properly.

So, below are a few basic steps on how I go about cleaning and drying my boots just after a day hike.

Step One

To clean my hiking boots properly, I first run them under my outside tap and use a tooth brush, any small brush will do, to brush off any dirt. I pay particular attention to the areas that connect one part of my hiking boots to another to ensure no acidic bits of marsh or nasty dirt are left to eat away at any glue or material.

Step Two

After I've completed step one above, I then take the boots indoors and remove the insoles. Removing your insoles won't be an option in many hiking boots. Don't worry about it if they're fixed inside you're boots, just skip onto the next step.

Step Three

If your hiking boots are wet, get some old newspaper and wrap it up into loose balls. Then stuff the paper inside your hiking boots loosely filling them from the toe to the top of the boot. I also like to make a few rips and tears in the newspaper (in my head I think this makes the paper more absorbent especially if it's lightly gloss coated paper).

Step Four

Leave the hiking boots and insoles overnight in a warm room to dry out. In the morning if your hiking boots are still wet, remove the first batch of newspaper, which will be damp and soggy, from your hiking boots and dump. Then repeat step three above until your boots are dry. When your hiking boots are dry, replace your insoles. and you should be good to go for your next hike!

Conclusion

These are just some basic tips but simple care like this can really extend the life of your hiking boots. Even if you're hiking in dry weather and your boots only get a bit dirty on the outside, a light clean is still a good idea every couple of hikes.

Do you have any tips for cleaning your hiking boots? We'd love to hear them in the comments below.

How to Clean a Waterproof Jacket

This post is all about how to clean a waterproof jacket or any waterproof clothing hiking item you have. First off, it’s important to mention that to get the most out of your waterproof hiking gear, you need to look after it so a routine cleaning and maintenance plan is a good idea. Not only will this ensure the best performance but will extend the life of your garments.

Care Label

The outer layer of waterproof jackets are covered with a substance that has been treated to make it DWR (Durable Water Repellent). To know that your DWR is working as it should is easy. Next time it rains and you have your jacket on, look at the rain on your jacket. You will see that little beads of water form and roll off your jacket.

DWR will of course not last forever and will eventually wear away and many people think that washing your jacket will only speed this process up. This is only sort of true. Washing your waterproof hiking jacket with standard detergent will not do your jacket any favours. However, not washing it is not a good option either.

When you wash a waterproof hiking jacket with a standard detergent, the DWR is affected and so it’s ability to bead water is lessened and eventually lost.

Not washing it however will also eventually lead to the same problem, so therefore you do need to wash your jacket but you need to wash it with very specific detergent and you also need to, what’s known as, ‘reproof’ your jacket from time to time to help revitalize the DWR capabilities of your jacket.

Washing your Waterproof Hiking Jacket

Your first port of call, as with washing any item of clothes, is the manufacturers label. Review it first to find the most suitable temperatures, guidelines, etc. for washing your jacket. Always follow the manufacturer’s instructions!

When you wash your jacket you need to use a very specific detergent for washing waterproof clothes. I use Nikwax Tech Wash as it is specifically designed for cleaning waterproof clothes and I have found it to be very good. Now I should add here that this only takes Nikwax Tech Wash  care of the cleaning part of  looking after your jacket. It doesn’t ‘reproof’ as mentioned above. That is looked at further below.

Handwashing is fine but if you’re machine washing your waterproof hiking jacket, always ensure the detergent tray and machine is completely empty of old detergent from standard washes. When you’re happy that is the case, you simply machine wash your jacket as normal but using Nikwax Tech Wash rather than standard detergent.

Always ensure that that all zips and Velcro straps are closed on the garment. I tend to try and not wash my waterproof gear too often, I try to keep it down to once or twice over two seasons so either Autumn and Winter or Spring and Summer.

This is of course dependent on how dirty you get your gear while out venturing in the hills and also how long your waterproof capabilities last.

If you hike five days a week, you will likely need a wash and reproof sooner than someone who only hikes once a week. I have a friend who works in the outdoors on a daily basis and for his specific rain gear, he uses a 12 use rule. That is, for every 12 heavy uses he washes and reproofs his rain gear. By heavy, he means when they get a battering from the weather. However, he uses a discerning eye to either extend or shorten this schedule.

What I’m trying to get at with this is that while the guidelines I provide here are hopefully useful, you need to learn what works for you based on your usage and your quality of gear. Basically, keep an eye on your rain gear and when it starts to give minor indications that it’s not doing it’s job as well as it should, you know it’s time to try and reproof.

Drying your Waterproof Hiking Jacket After Hiking

Personally I prefer to let all my hiking gear drip dry so to be honest I’ve never used a dryer to dry any of my hiking stuff so can’t really comment on whether it’s a good idea or not. If you’re in a rush I would refer to the manufacturers instructions again but if you can, let it hang to dry, most rain gear dry’s quite quickly using the drip dry method anyway.

Re-proofing your Waterproof Hiking Jacket

After washing using Nikwax Tech Wash, it is probably a good idea to reproof it too. In short ‘Reproofing’ means washing with a product that revitalizes the DWR of your gear. I’m not 100% ‘au fait’ with the science of how this works but it does work and can extend the life of your rain jacket. I again use a Nikwax product called Nikwax TX.Direct Wash-In. This is very easy to use and you just was it in your machine as normal using the it.

Another option is to buy DWR enhancing spray like Nikwax TX.Direct Spray-On, pictured below. I have heard this stuff is good but I haven’t used it myself as yet. Nikwax TX Direct Spray-On  I have no doubt it works well though as I have had good experiences with the other two Nikwax products mentioned in this post. There are also a lot of very positive user reviews for the TX direct spray so the general consensus is that it’s good stuff.

Conclusion

Just as a note, this post applies to all waterproof hiking gear treated with DWR not just your rain jacket. Your hiking gear is of course durable and tough by nature but it of course must endure harder conditions and tougher treatment than standard clothing.

Therefore, it can need a bit more specialized TLC than your standard clothes. Do that and you’ll get good longevity, life and use out of all your rain gear!

There’s a lot to be said to getting used to your gear too. When you buy rain gear, you’ll start to get a feel for when it needs to be treated as you use it. Remember though, as with everything, nothing lasts forever. The longevity of your gear will depend on the quality and make-up of the construction and materials as well as how well you look after it over time. There will come a time though when you just got to get new gear 🙂

Do you have any tips for cleaning hiking gear? I’d love to hear about it in the comments below.

What Is Leave No Trace?

To explain what leave no trace is, let me start with a story. Some time back, I was doing a mountain skills course and while we stopped for a banana break a conversation started up between a few of my fellow course attendees on whether it was OK to leave the banana peel, or any fruit waste for that matter, on the hill side.

Rotting Fruit

The argument here is that fruit is of course biodegradable so therefore there’s no harm done i.e. the banana peel will simply naturally bio-degrade into the landscape and will most likely even provide nutrients for the soil.

Now I had heard this conversation and that particular argument many times before so I knew what was wrong with it and the course instructor was quick to pick up on it and set the guys straight at the time. I should add that it was really only about a year or so before this while I was attending an introductory survival skills course (yes, I know … I attend a lot of courses … the best way to learn how to be safe and enjoy your time on the trail I assure you) that I first came across the thinking behind this.

To explain …

Now, I always knew that you should take all your rubbish out with you, that was a given. However, I too used to think that leaving fruit or vegetable waste behind was OK as it is biodegradable. This is not so and here’s why.

In short, when you’re hiking in the hills and you leave a banana peel, apple core or any other type of fruit or vegetable waste behind, while it will bio-degrade, unless it is from that habitat and grows in the mountain or countryside area you’re hiking in, you are in effect leaving an alien species in that environment and ecology.

To illustrate this, banana’s don’t grow in the Rockies so leaving a banana skin there means you’re introducing a new variable to the local ecology. That can potentially have knock on effects. For example, local wildlife might eat said banana peel and if it’s not part of their normal diet it could make them ill. Even if the banana peel just bio-degrades, you are still introducing the chemical composition of a banana peel into ground, soil, etc. that is not normally exposed to that chemical make-up.

Where?

So where did this wise thinking come from in the first place? The example I have listed above fall’s under one,  number three to be precise, of the seven leave no trace principles of the leave no trace organization. This body teaches people how to enjoy the outdoors responsibly. There are seven principles:

  1. Plan Ahead and Prepare
  2. Travel and Camp on Durable Surfaces
  3. 
Dispose of Waste Properly
  4. Leave What You Find
  5. 
Minimize Campfire Impacts
  6. Respect Wildlife
  7. Be Considerate of Other Visitors

The member-driven Leave No Trace Center for Outdoor Ethics teaches people how to enjoy the outdoors responsibly. This copyrighted information has been reprinted with permission from the Leave No Trace Center for Outdoor Ethics: www.LNT.org

If you are new to hiking or if you have been hiking for a long time and this information is new to you, please take the time to visit www.LNT.org and read over the detail of each of the above principles. There also expanded principles for some specific outdoor activities.

As with everything, education is really important and there are also a lot of resources available on the site. The more people that learn the better.

Continuing on the opening story above, after the course instructor corrected the guys who were saying it was OK to leave banana peels Banana Peelin the hills,  they proceeded to tell a story about a time they were working with a group in Ben Nevis in Scotland.

Ben Nevis is a very popular hiking destination with thousands and thousands of visitors every year. A group of volunteers went up the mountain to clean up waste left behind by the visitors. They put banana Peels into separate bin liner bags and they apparently filled a frightening four bags full with them! These must all have been dropped in the relatively recent past as otherwise they would have rotted away.

To try and hit the point home after this they got some folks to dress up in banana suits and engage hikers around Ben Nevis for the day to raise awareness! Walking around Ben Nevis in a banana suit … I don’t like the sound of that but fair dues to the folks who did it. Anything to help raise awareness with people on how to act ethically in the beautiful natural outdoor areas they get so much enjoyment from is a great thing.

In short, leave everything exactly as you found it!

Keeping our mountains and hills pristine and as they were before we hiked in them will help keep them for the enjoyment of others for generations to come.

Have you heard of leave no trace before? Where did you learn about how to act ethically in the outdoors? Let us know in the comments below.

Always Wear the Right Hiking Gear on Your Hikes!

Yesterday I went out for a hike with a great group of folks. It was a pretty unsettled day weather wise to say the least! I woke up early at 6:30am and it was pouring rain, looked like a full blown autumn day outside.

Teeming Rain

Photo Credit: dok1

I got up and started preparing for the hike ahead, packing some gear and stuff into my daypack.

A Truly Mixed Bag!

At about 7:30am, I looked out of the kitchen window and noticed the sun was poking its head out from behind the clouds. I started thinking that maybe it might even brighten up for the day ahead. The weather forecast wasn’t much use, it just said it would be unsettled with sunny spells and rain.

We weren’t all meeting at the meeting point till 10:45am so I didn’t have to hit the road till 9:45am. Therefore I had some spare time to do a few errands.

I needed some bread and a few other bits and pieces to make a sandwich to take on the hike so I went to the store around 8:30am. When I went outside I noticed that the rain had dried off and it was now very, very windy but still quite sunny with a mish mash of threatening clouds in the sky.

I returned from the store, got my sandwich ready, finished packing up and set out at 9:45am sharp. On the drive down it started to pelt rain again and by the time I got to the meeting point it was teeming but the wind had died down. It was like vertical water streams coming from the sky!

It was a truly mixed bag of weather indeed! So, on with the Rain jacket and we set off in the deluge on the hike.

On (and Off) with the Rain Gear

And so it continued throughout the day. Pouring rain for a half hour; then sunny warm and bright; then very windy again (lift you off your feet windy when we reached the summit and were exposed); then pouring rain again, etc.

The temperature was generally pretty warm but with either the sun shining down or the wind biting through you at the top of the mountain, it ranged considerably.

Woman in Rain

Throughout the day we must have added and removed gear nearly ten times! Rain jacket on, then off; hiking fleece on then off; rain pants on then off and hiking pant bottoms detached into shorts; gaiters on and off, etc., etc.

The hike was great and we did about 14 miles across a few peaks. We all had a wonderful day. It really hit home to me again the importance of always having the right hiking gear and clothing on, as well as with you when you set out on your hikes.

Conclusion

Weather in the hills and mountains is prone to rapid change. If we hadn’t had the right hiking gear with us on the hike, we would have been soaked like a wet teabag from the rain and our sweat.

For example, with the wrong hiking shirt or tee on it would have eventually been like wearing a cold wet towel, a sure-fire ticket to a miserable hiking experience!

The main point of this post is to simply reiterate how important it is for you to have the right and best hiking gear with you when you hit the trail. If you don’t, you could be pretty miserable pretty quickly and even get into difficulty very quickly should conditions turn against you.

Have you had any bad experiences while hiking with the wrong hiking gear? Let us know in the comments section below, we’d love to hear about it!

What Hiking Supplies Should I Take?

Today’s post is the next in a series on some of the basics to consider if you are new to hiking to help ensure you have a safe and enjoyable hike from the get-go! So far we’ve looked at where you can go for your first hikes, what distance you should aim for and a broad range of the basics in terms of hiking gear, from hiking pants to hiking shirts, hiking footwear to rain gear and a whole lot more!

One other key piece of gear we looked at was having a good day pack to put some bits and pieces in for when you head out on your first hikes. You need something to store various bits and pieces in, things like water, food and so on.

Lunchbox

Photo Credit: Lunch in a Box

With that in mind, today I want to take a broad look at what supplies you need to bring with you when you first head out on the trail. These posts are focused on a newbie hiker, as in someone just starting out for the first time. Again, there are certain assumptions I am making for these getting started with hiking posts:

  • It will be day hiking i.e. likely out for anywhere from two to six hours
  • Will be hiking in a very well established area i.e. sticking to well-worn and clearly marked paths and trails
  • Hiking at a pleasant time of year in terms of temperature and climate
  • Likely to be hiking with other people (always advisable when starting out)

In the context of supplies, there are many things that are good to bring but below and in no particular order below, I’ve focused on four essentials so this list is not exhaustive, far from it.

If you want to go to the start of this series of posts on hiking for beginners, please click here.

Water

The ultimate essential!

River Water BottleAs with any exercise or activity you need to be sure you have easy access to water to keep you well hydrated on your hike. There are many factors that go towards helping you decide how much water you should take with you. For example:

  • The distance you plan to hike
  • Your current state of fitness
  • How thirsty you get when exercising, etc…

All these things and more will contribute to helping you determine the necessary amount of water to bring with you. However,  assuming you’re not pushing yourself too hard on your first hikes as per the assumptions above, you can use three to six ounces (Approx 80 to 200 ml’s) per mile as a guideline amount.

Only you know yourself how much you drink but whatever you do …

Major Notice Alert: Always ensure you bring an adequate supply of water, better to have more than less! 🙂

It will only be a hassle if you go too far out on a hike and run out of water, will make your journey back a real pain. And, heaven forbid, something where to happen to you and you had to wait for help to reach you, that extra bit of water could be very much needed and appreciated.

Snacks & Food

You will burn energy as you hike and so it is handy to have some snacks with you for easy munching. I like to bring nuts, dried fruit, bananas and some small cereal bars. Another great one to carry with you is some chocolate. A relatively small amount of chocolate can provide a swift boost of energy when needed.

There is really no limit to what you can take out with you as long as it’s easy to carry and provides decent energy. Now, just because I mentioned chocolate above, doesn’t mean you can take ten Hershey bars out with you and nothing else 🙂 Common sense is required and a balanced selection is the best approach.

Food

If you need some ideas check out this post on the ten best hiking foods. They’re the common ones I regularly take with me on my day hikes.

Extra Clothing

Now, the assumptions above do stress that you should only hike at a fair time of year in terms of climate and temperature when you’re just getting started. However that may not always be possible.

As well as that, even in good conditions, it can get a whole lot chiller as you head out into wide open spaces and possibly go up higher in terms of elevation. These shouldn’t be huge factors when you’re just starting out hiking, but they all add up.

With that in mind, depending on what time of year you’re planning to go out hiking and the climate you are hiking in, extra clothing is always a good idea. Keeping some extra layers of clothing in your day pack is a winner. I recommend you have an extra base layer tucked away in there as well as a fleece or jacket for insulation.

A hat and Gloves are also a good idea to have if required too. Remember, as mentioned above a lot of the time when hiking you will be going upwards and therefore exposing yourself to cooler temperatures and open winds. Don’t use the ground level temperature as a barometer or gauge of what you’ll experience when you get up to the top of a mountain!

Marmot Thermaclime Sport Crew Long Sleeve For Men

Pictured: The Marmot Thermaclime Sport Crew Long Sleeve For Men, click image to learn more.

Mobile Phone

And finally, we conclude with a crucial bit of kit! I will likely touch on this more in other safety related posts but the best device you can have with you when hiking, and people sometimes are surprised at this, is a fully charged mobile phone in case of emergencies.

Smartphone

Photo Credit: Johan Larsson

Even if you happen to have no reception on your network, if you have a smart phone and you hit the emergency call button, it should automatically connect to the nearest available network it can find in the ether near you to place your call through to the nearest emergency service to your location.

Your mobile phone is also a great location device for emergency services to locate your exact position!

Conclusion

So, today we covered just some of the key supplies you should take with you when heading out on your first hikes. This post is far from exhaustive and only covers some of the basics to get a newbie hiker out on the trail as quickly and safely as possible based on the assumptions listed at the start of this post.

There are many more supplies and accessories you should take with you as you get more and more into hiking, however, these basics should see you good for your first few hikes. You can find an extensive list of what you need for a day hike by checking out the complete day hiking checklist.

I hope you found this post useful. Please share this post and leave a comment 🙂

  • « Previous Page
  • 1
  • …
  • 14
  • 15
  • 16
  • Facebook
  • Pinterest

What are you looking for?

Copyright © 2025 · Cool Hiking Gear

Cool Hiking Gear is a participant in the Amazon Services LLC Associates Program, an affiliate advertising program designed to provide a means for us to earn fees by linking to Amazon.com and affiliated sites.

  • About This Site
  • Privacy Policy
  • Affiliate Disclosure Statement
  • Contact