coolhikinggear.com

  • Men’s
    • Best Hiking Rain Jackets for Men In 2021
    • Best Men’s Hardshell Jackets Of 2021
    • Best Hiking Pants For Men In 2021
    • Best Ultralight Rain Pants For Men
    • Best Men’s Daypacks For Hiking In 2021
    • Best Backpacking Backpacks For Men In 2021
    • Best Base Layers For Men In 2021
  • Women’s
    • The Best Hiking Rain Jackets For Women In 2021
    • Best Women’s Hardshell Jackets Of 2021
    • Best Hiking Pants For Women In 2021
    • Best Ultralight Rain Pants For Women
    • Best Daypacks For Women
    • Best Backpacking Backpacks For Women In 2021
    • Best Base Layers For Women In 2021
  • Hiking Accessories
    • Best Hiking Poles
    • Best Trekking Pole Monopod Camera Mount
    • Best Hiking Headlamps
    • The Best Hiking Watches In 2021
    • The Best Hiking Gloves In 2021
    • Best Hydration Bladders For Hiking In 2021
    • Best Compass For Hiking Our Top Picks
    • The Best Hiking Watches In 2021
    • Cool Hiking Gadgets
  • Footwear
    • The Best Men’s Hiking Boots In 2021!
    • Best Hiking Shoes For Men In 2021
    • The Best Women’s Hiking Boots In 2021!
    • Best Hiking Shoes For Women In 2021
    • Best Hiking Sandals
    • Best Hiking Sandals For Women in 2021
  • Hiking Guides and Resources

How To Get In Shape For Hiking

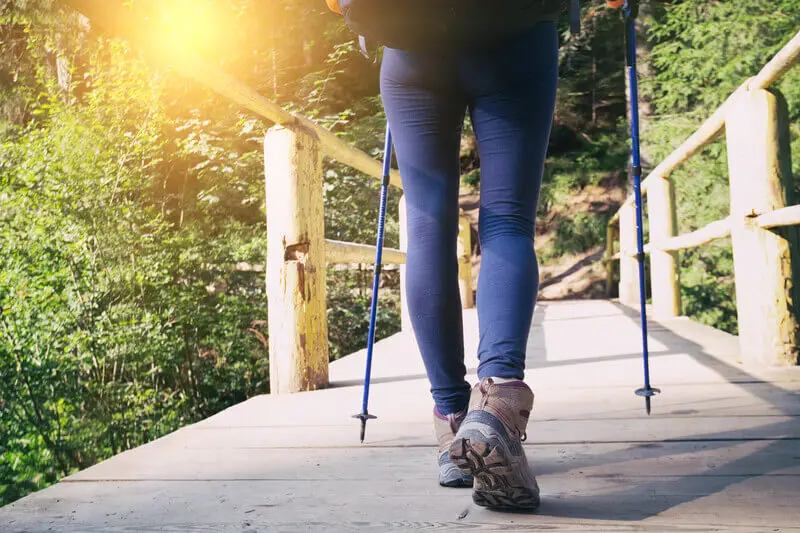
If you would like to spend more time discovering the great outdoors and your level of fitness is holding you back, finding out how to get in shape for hiking is the place to start.

It will provide you with a way to progress to longer hikes, giving you the confidence to join a hiking club or the means to greater self-discovery far from urban environments.

Why you Should get in Shape for Hiking

While hiking is a pleasurable experience that requires little to no skills at a very easy level, if you enjoy being outdoors and walking, then why not improve your fitness level by pushing it a bit further.

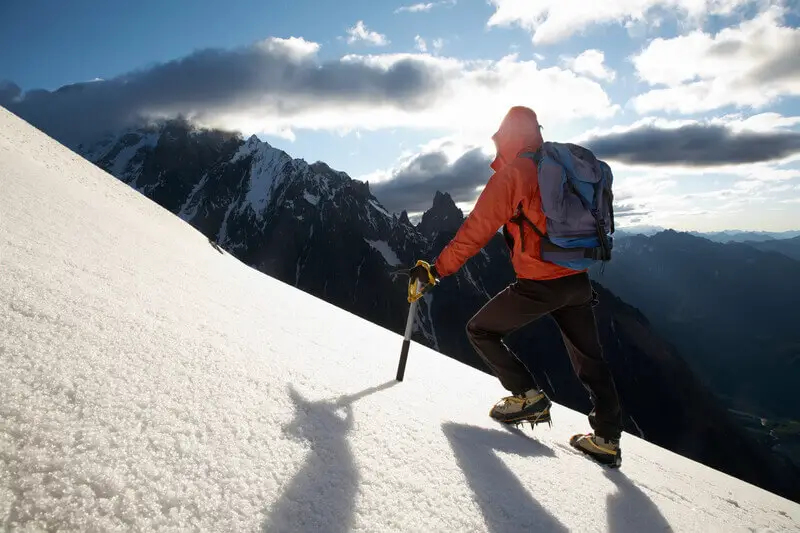
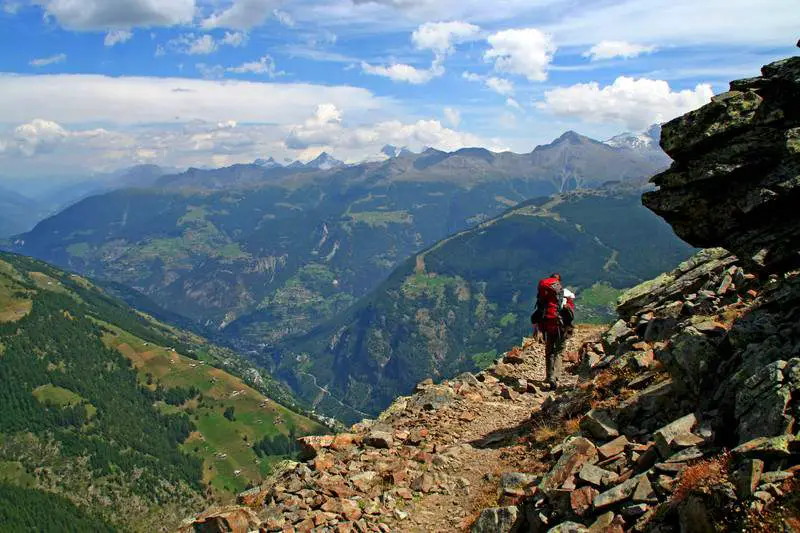
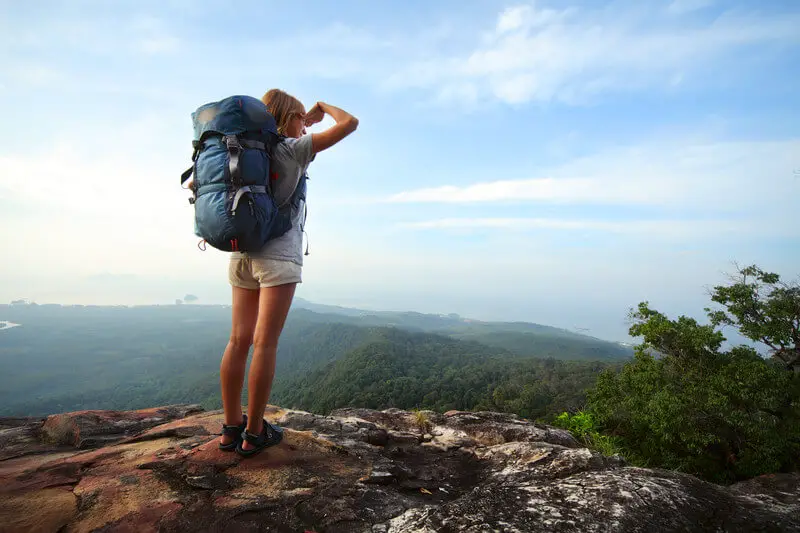
Doing so will allow you to take longer hikes over varied terrains and elevations with stunning viewpoints.

You can discover new places, new areas and make new friends. Taking on new challenges and longer hikes will give you a sense of achievement and may inspire you to go even further.

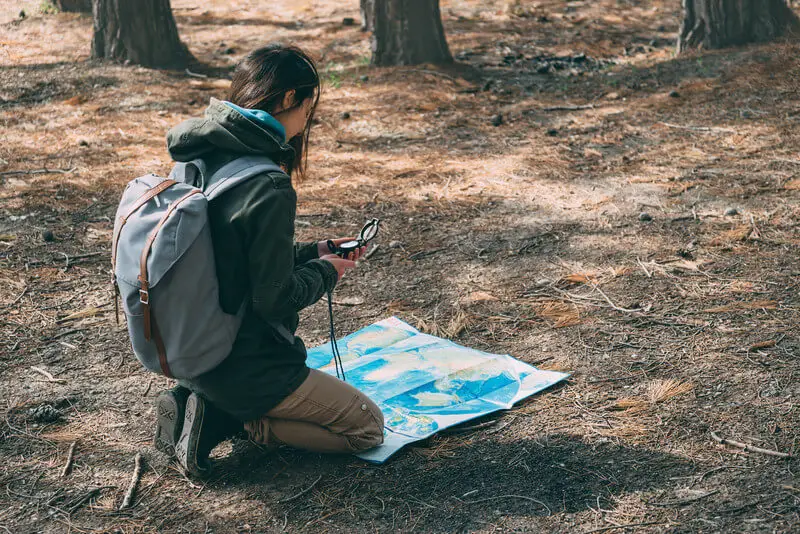
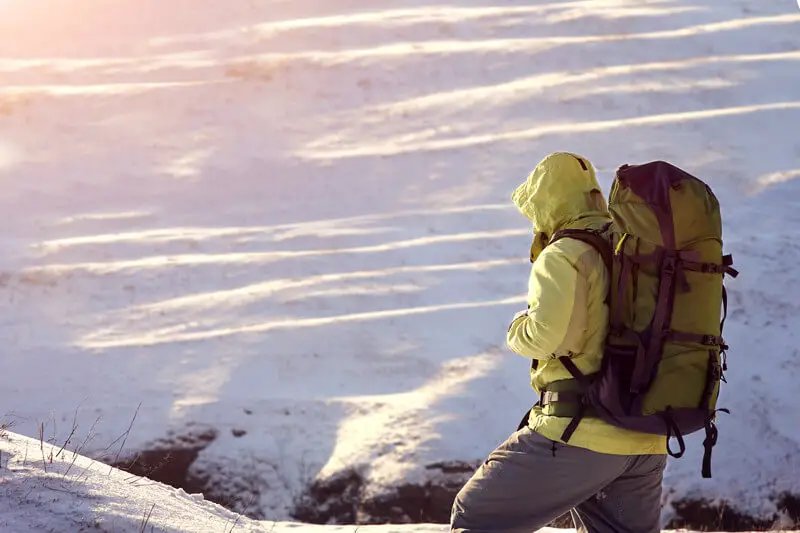
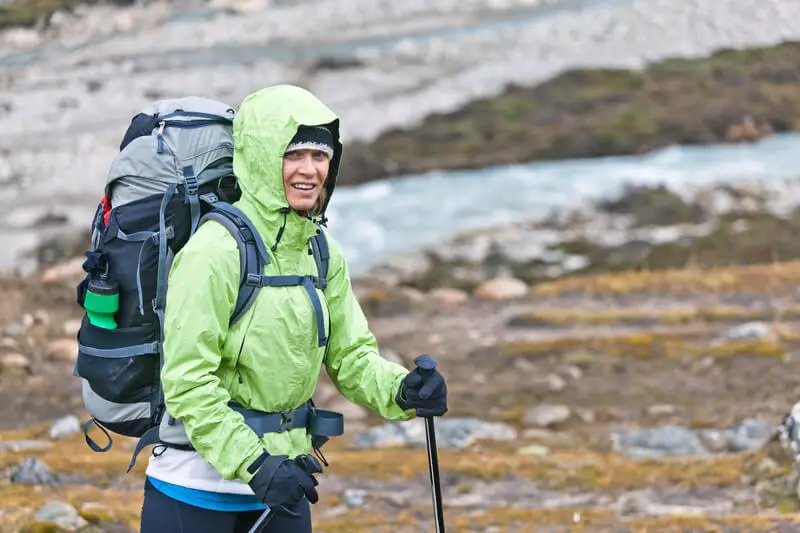
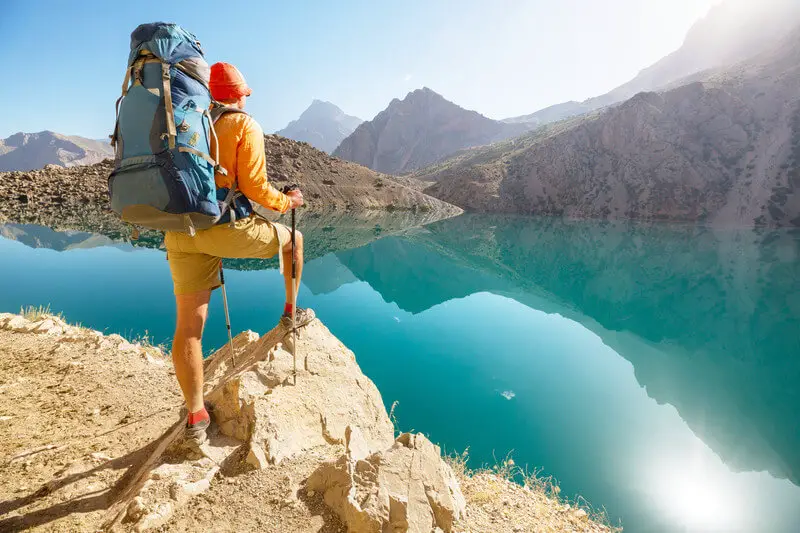
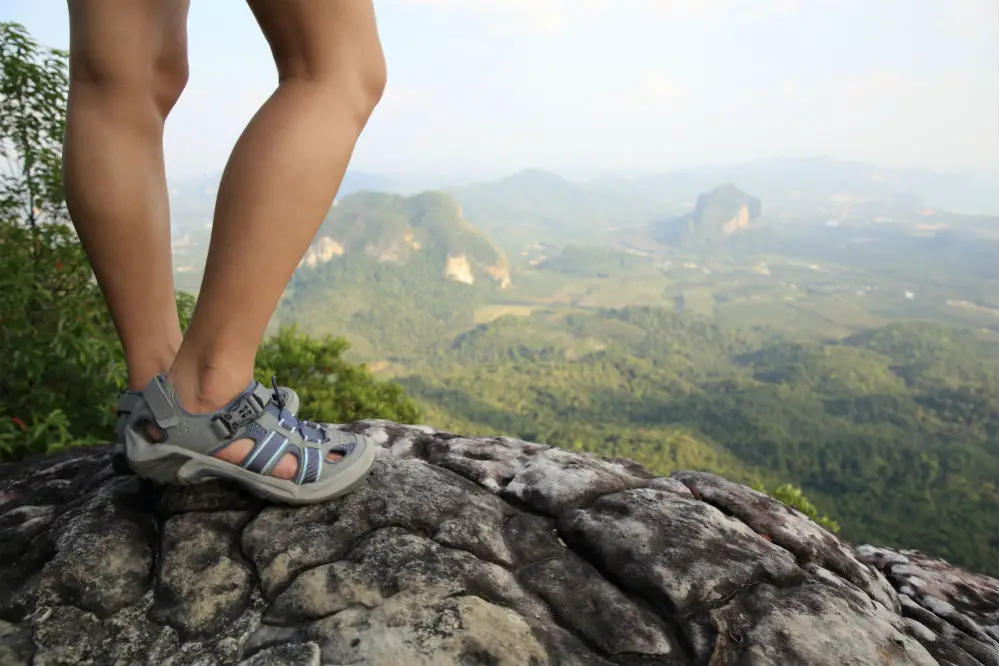
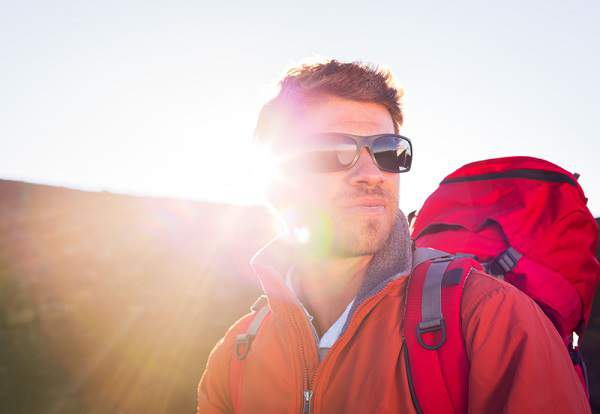
The fitter you are, the more you will be able to enjoy your hikes, whether it’s reaching a lofty summit, visiting a distant landmark or just losing yourself in the middle of nature.

If you’re not panting for breath or worrying about aching the next day, you’ll be free not only to enjoy your surroundings but also to open up your mind and to relax.

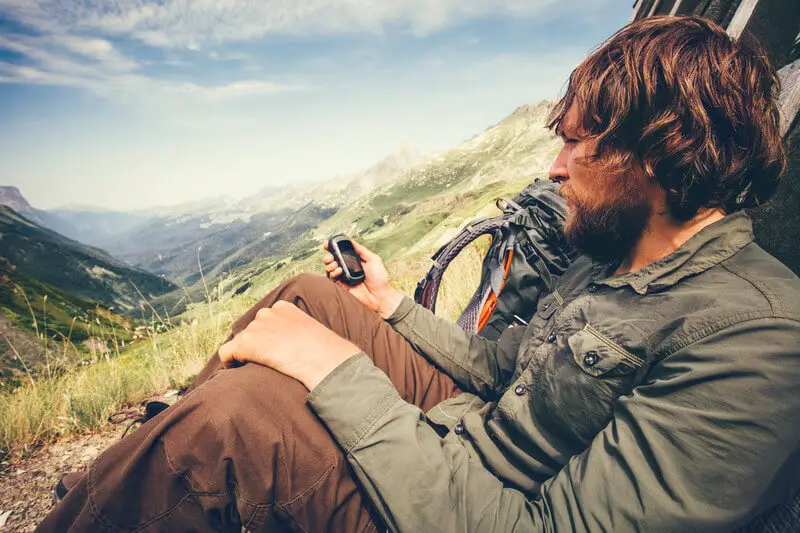
Improving your general fitness is also highly recommended for a healthier lifestyle, better general health and a more positive outlook on life.

Combined with the psychological benefits of and getting out in the fresh air and reconnecting with nature that are provided by hiking, it makes sense to put in a little effort to reap so many rewards.

How to Get Started

One of the great things about hiking is that you can improve your hiking simply by hiking. So if you are not particularly interested in starting a new sport, you can improve your hiking skills by just getting out there more regularly.

Can Walking Tone Your Body

If you are in poor shape and you feel embarrassed or don’t want to be seen working out, then gentle walking is a great way to get started. Just make sure that you change your routine and do it regularly.

If you can only hike at the weekend, incorporate as much walking as possible into your daily schedule. Walk to your local shop, if possible walk to work or take an evening or morning stroll around the block every day.

Of course, this can get a little monotonous and is a far cry from walking through beautiful scenery in the great outdoors, however, regular exercise even at low levels will help you to get in shape and will slowly improve your stamina.

Once you’re feeling good about doing small amounts of walking, build up gradually and keep up the good work.

Next Steps

If you can’t get out hiking that often, you can still find ways to improve your fitness for when you do get out on the trail.

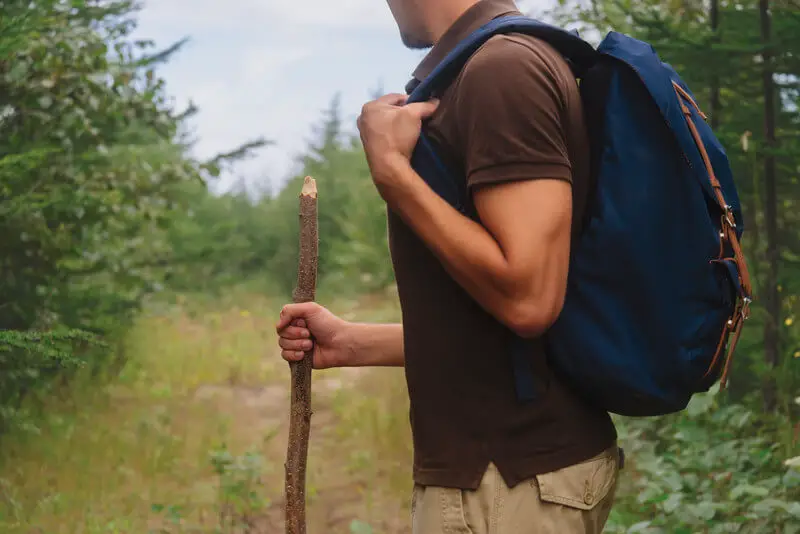
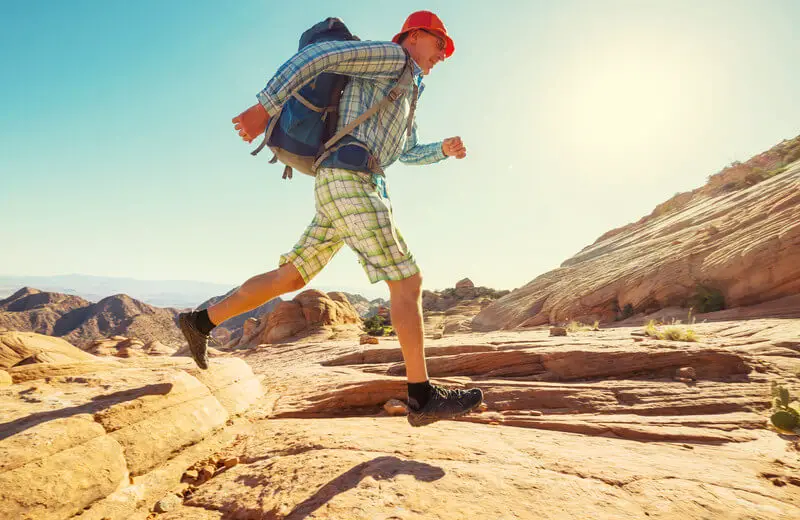
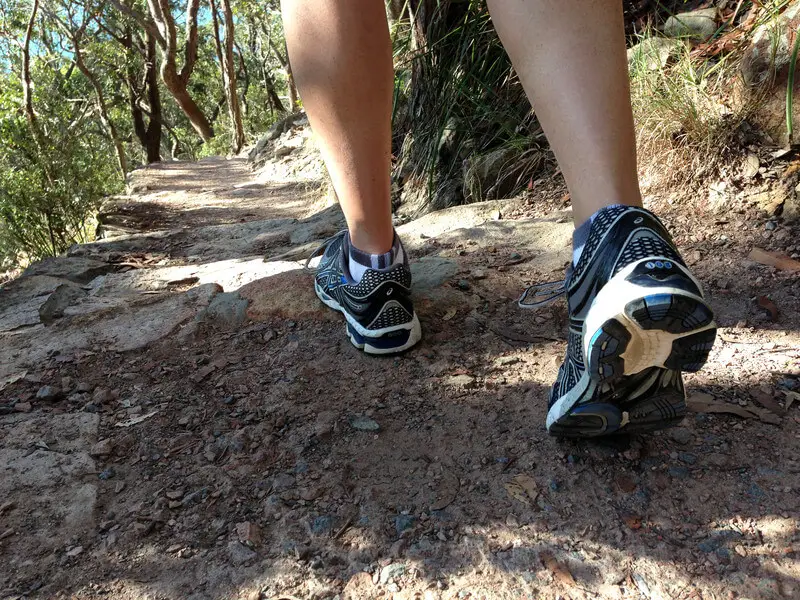
Plan a long but manageable hike for you to look forward to and train by carrying about your daypack on your daily walks. Start with a light weight and build up to a decent base weight.

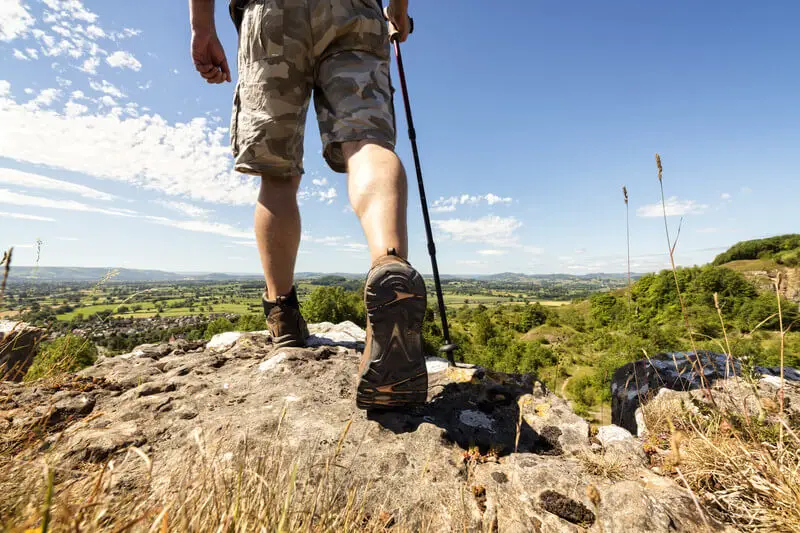
Once you’re comfortable with your daypack, you should try to find ways to replicate the trail environment. Try to take routes with uphill sections, descents or uneven ground to prepare yourself for your next hike.

Remember not to take things too fast, you want to steadily improve and to be able to enhance your enjoyment when hiking.

The Next Level

You may decide that you’re now ready to improve your fitness above this basic level. To tackle more challenging terrain, elevations and longer hikes there are plenty of activities that you could try either at a sports club or alone or with your family and friends.

Here are some popular ways that you can improve your general fitness for hiking.

Running

Running can be a natural extension of hiking. It will improve your endurance, cardio and strengthen your joints and muscles, ideal for hiking.

Running is natural and something we can nearly all do with no training. With modern technology you can easily track your runs with your smartphone and see your progress grow.

Something which can become addictive. If you enjoy running you may like to progress towards ultralight hiking or fastpacking where you take on long hikes at speed.

Cycling

Like running, cycling will also build up your muscles and improve your cardio. It can be easier to get started as taken at a slower pace it can be less intense on your body than running.

If your commute to work isn’t too far, you could try cycling to and from work. Start with one day a week and build up.

This also has the added bonus of saving you money on your transport or fuel costs. After a few weeks cycling, you will really notice the benefits on your next hike.

Yoga

Yoga is great for improving your balance, coordination, core strength and inner tranquility.

Women Practicing Yoga

All thoroughly useful for any hiker. While the best way is undoubtedly to join a yoga class, if you want to first focus on some basic positions and stretches then you can find a wealth of information, programs and plans online.

Just be careful starting out. While it may look simple, yoga tends to make use of muscles that you may not even be aware that you have. So take it easy and build up gradually or else you may end up aching all over the next day.

Workout

The gym is an obvious place where you can do a wide range of workouts that will get you fit for the trail. Between strength training and the wide variety of cardio machines, you have everything you need to get going.

Even if gyms are not your thing, with the internet and exercise apps, you can create a tailor made workout program to do in the comfort of your own home with no equipment required. Body weight stuff is really excellent.

Set it up on your smartphone to receive notifications so you won’t miss a training session. Videos can show you how to perform specific stretches, body weight exercises, etc., and for how long. You can personalize your program to focus upon various aspects of your performance.

Join a Hiking Club or Local Park Organization

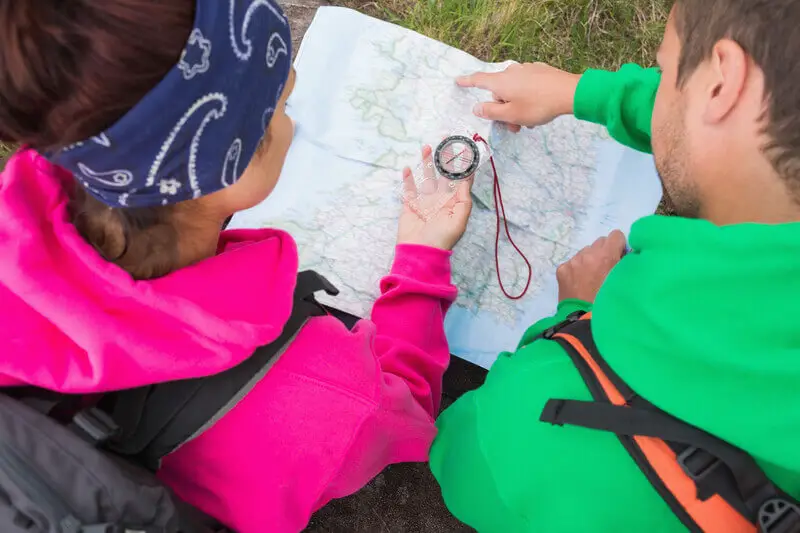
Joining your local hiking club will put you in contact with like minded individuals with a wealth of hiking knowledge. Going on group outings will improve your skills, confidence and ability.

You could also volunteer at your local park, while you may be helping with trail maintenance rather than enjoying hiking, it’s good to give something back.

It can be a real eye opener as to how our park systems work behind the scenes and the struggles and conservation efforts that are in place. Both options will help you to get into better shape for hiking.

Conclusion

If you would like to hike more often or hike longer on more challenging trails, then don’t let your fitness level hold you back. One of the main advantages of hiking is that almost everyone can enjoy it.

Learn how to get in shape for hiking and imagine how much more enjoyable it will become, and how much more you will be able to benefit from your hiking trips.

Whether you want to hike into the backcountry or complete a particular hike that means a lot to you, hiking can reinvigorate both your mind and body.

Taking simple steps to improve your general fitness will make the world of difference to your life as well as making hiking a more fulfilling and challenging experience.

What’s A Hiking Trail Difficulty Rating Scale?

Before you start planning a new hiking trip it’s important to make sure that the trail you’re planning on hiking is suitable for your ability level, time-frame and equipment.

While discussing your plans with a park ranger, or someone else with in-depth knowledge of the area, is the ideal way to find out whether or not a particular trail is suitable, consulting the hiking trail difficulty rating scale can help you to narrow down potential trails to just a handful, as well as helping you to prepare your trip.

So what is a Hiking Trail Difficulty Rating Scale?

Hiking trail difficulty rating scales are used to class trails according to their level of difficulty  to complete.

While it is always recommended to find out more about the specifics of individual trails and the general area before deciding upon a trail and setting off, consulting the hiking trail difficulty scale for your trail can provide you with immediate information, as to whether that particular trail is what you’re looking for and whether it’s suitable for your ability.

Typical Hiking Trail Difficulty Scales

While there isn’t a single agreed upon hiking trail difficulty scale, most scales have plenty of similarities. There are usually between three and six ratings. We’ll take a look at the three main ones below, easy, moderate and strenuous.

When there are extra ratings they are usually indicators for trails that fall in between the ratings, so you may have easy-moderate trails that are harder than easy but not quite rated a moderate. Likewise with moderate-strenuous and very strenuous being used to indicate the most difficult trails.  

Note that certain hiking trail difficulty scales may use different words although the sense behind the ratings is still the same.

What’s more, some systems may refer to the actual hiker’s ability rather than the trail’s perceived level difficulty, so you may also see ratings such as beginner, advanced and so on.  

Here’s a general outline of what an average hiking difficulty scale equates to in terms of ability, distance and terrain. Of course, this is merely an indicator and you should always check the specifics of your chosen trail before setting off.

Easy

Generally less than three miles over flat terrain or terrain with a slight incline. Trails that are rated easy are on the whole suitable for most people who enjoy walking, and you will often see a wide range of age groups including children.

Hiker on Trail

You may also find short interpretative nature trails with educative panels as well as rails-to-trails paths that fall into this category.

While experienced hikers may deliberately seek out more challenging terrain and many stunning views and landmarks can be a difficult trek away, taking an easy hike can be a good way to get a feel for the area, to test your skills and to see local landmarks, wildlife and scenery when time is short.

Moderate

Moderate hikes are for the main part suitable for hikers with a reasonable level of fitness. They are generally around five to ten miles long, involve some varied terrain, ascents and descents.

Obviously not all moderate hikes are of an equal difficulty, hence the need to find out more about your chosen trail before reaching the trail head.

Easy-moderate trails should be within most beginners capabilities too, with possibly a slightly harder section or a greater length. On the other hand if your looking at a trail that’s more moderate-strenuous, you may need a decent level of fitness, especially if it involves tough terrain and ascents over long sections.

Strenuous

Strenuous hikes often involve elevations over 2,000 feet and challenging terrain. You should not attempt a strenuous hike until you’re confident with your performance and equipment over easier trails.

Woman-Hiking-Through-Forest-In-Mountains

Hiking a strenuous trail often involves covering distances of 10 miles and more. They are also more likely to be further located from civilization and in some cases you’ll need to hike to reach them, or face a long drive out to the trail head.

If something goes wrong, especially with the increased risks of falling and injury, you need to be prepared and know how to get help.  

How to Use Rating Scales

Checking the rating scales of trails in the area where you are planning to go hiking can be extremely useful in helping you to narrow down your choice. By focusing on ratings you will be able to gain a quick idea of the following factors at a glance when planning your itinerary.

Appropriate

By checking a trail difficulty rating you will first and foremost know if it’s appropriate for your level of fitness and experience. For example, if you are a beginner, you should focus on easy trails until you feel confident, even if your fitness level is pretty good.

Differently rated trails can also be appropriate for different types of trips, for example you may not always want to take a challenging, strenuous hike even if you are experienced. Visits to a certain area may be best explored with a short, easy hike to start with, before taking on more challenging trails.

Time

How a trail is rated should help you to better work out how long it will take. While an experienced hiker with a high level of fitness is likely to complete a trail faster than a beginner who is out of shape, you will need to factor in extra time per mile for the steeper terrain on moderate and strenuous trails.

What to Look for in a Hiking Watch

Naismith’s rule allows one for one hour every three miles hiked, plus an additional hour for every 2,000 feet of ascent. As a rule of thumb, expect moderate and strenuous hikes to take longer at an average pace of around 2.5 miles over uneven ground when making your calculations.

Equipment

If you’re thinking of hiking a moderate or strenuous trail, you’ll need to make sure that you have the appropriate equipment.

Make sure that have the hiking essentials to hand e.g. proper gear, food, water, map and compass, first aid, etc. On strenuous hikes in particular you may need to factor in more extra layers especially if your trail takes you to high elevations.

What you can get away without packing for a gentle three mile stroll near to towns is very different to what you need for longer hikes, especially those in isolated areas where help and shelter can be very far away.

Conclusion

When you’re looking for new hikes to discover, check out the hiking trail difficulty rating scale, if there is one available, for those trails that interest you. This will let you know if a hike is suitable for your abilities, time frame and equipment.

In my experience, most ratings err on the side of caution and safety, so something marked as strenuous can be a medium level hike to an experienced hiker. It makes sense to do this for the majority though, who while fit, may not be regular hikers.

Stay safe and don’t take on a hike by yourself that is way beyond your fitness and experience level. If you’ve narrowed down your selections and are having difficulty picking which hike to go for, speak to a park ranger or other knowledgeable person, they will be able to advise you which one is the best choice for you.

How To Use A Handheld GPS For Hiking

While you probably have used a GPS system in your car or on your mobile phone, you may not be quite as sure how to use a handheld GPS for hiking.

How To Use A Handheld GPS For Hiking

Although the technology behind it is the same, using a handheld GPS receiver for hiking is quite different to other more everyday GPS systems.

Using a GPS receiver for hiking requires a certain amount of knowledge and familiarity, with how the device works.

After all, if you are going to head out into the wilderness, you need to be sure that you know how to correctly use your GPS receiver and have a backup plan for what you’ll do in case of any malfunction, no matter how unlikely.

So, to make things a little clearer, let’s take a look at what a handheld GPS receiver is, what it does and any extra features that are useful to have. We’ll also look over the advantages and disadvantages of using a handheld GPS receiver for hiking, as well as the basics of how to use one.  

What is a Handheld GPS?

A handheld GPS receiver is an extremely useful piece of equipment for navigating. It can let your know your precise location as well as providing information on where you have been and helping you to get to where you want to go.

GPS stands for Global Positioning Service. Satellites orbiting the Earth are used to determine your position by a process called trilateration. Trilateration depends upon your device picking up the signals sent from at least three satellites.

Once your device has picked up these signals, it can pinpoint your position by working out how far away each satellite is based on how long it takes for their signals to arrive.

The process is somewhat similar to triangulation, used when using your compass in the field to find your position on a map, except GPS does not use angles, but measurements of distance and time.

Advantages of Using a GPS for Hiking

There are plenty of obvious advantages to using a handheld GPS for hiking. With a GPS receiver you can see at a glance where you are, so you don’t have to worry about getting lost, as you can also see where you want to go and how you can get there.

GPS receivers can also provide you with other extremely useful data. They can record tracks so you can see where you have come from and follow your route right up to your present location.

This is useful if you need to double back for one reason or another. It can also be useful in planning future outings or in providing important information to the authorities about hazards and their exact location.

Saving Location Points

You can also program points into your GPS so you can get a good idea of the distance and direction of where you’re headed next. In addition, your GPS receiver can display your trip data, letting you know how far you have traveled, your speed and how far you have left to travel to reach your destination.

This information can also be useful for planning future trips and sharing your hiking routes with other users. GPS can also give you information on your altitude, providing that it is receiving signals from at least four satellites, although accuracy is greatly improved with larger numbers.

Using a GPS receiver can give you greater freedom and confidence to explore. If you ever get lost or injured, you can easily find out your location and get help.

Many GPS receivers also have the added option of being able to alert emergency services as to your whereabouts by sending a distress signal.

There are also other possible options such as barometers or altimeters, a compass and some offer communication capabilities with other similar devices in the area.

Disadvantages of Using a GPS for Hiking

While using a GPS receiver can make light work of navigation, it’s important to not become over reliant upon technology that can break, run out of battery or occasionally lose signal.

One of the main disadvantages of GPS is that it can discourage some people from developing their map and compass reading skills.

Best Compass For The Money

In the event of your device failing, it is important to have a back up and a map and compass as one of your essential pieces of kit, that you should carry with you at all times out on the hills.

A handheld GPS for hiking can be a really useful tool, however, remember that it’s no replacement for experience and keeping your eyes on the trail.

If you enjoy hiking as a way to escape the modern world and too much time spent with screens and relying on technology, then over reliance upon a GPS when you’re out in the middle of the great outdoors doesn’t make much sense.

Better to stop for a break and to check it occasionally when you’re uncertain, rather than checking your every move along the trail in real-time.

Double Check

If you’re using your GPS receiver in canyons or in any areas where the sky is obscured, you may not receive an accurate location.

So if your location isn’t matching up with your gut feeling, don’t be afraid to trust your instincts and get out your map and compass and double check, or try again with your GPS location when you’re out in the clear.

While all GPS receivers offer the same basic functions that we’re pretty much all used to, they can also have some very complex options. Using your GPS receiver accurately when out hiking, especially in the wilderness, requires a certain level of experience and skill.

While we tend to trust technology to do things for us, taking time to learn about what we’re actually doing and how it works is highly recommended.  

How to Use a GPS When Hiking

When you purchase a GPS receiver, be sure to thoroughly familiarize yourself with it before relying upon it for finding your way when hiking. Read through the operations manual and try out all of the features until you understand how they work.

Hiker with a GPS

Once you’re familiar with your handheld GPS, you should test it by using it around your neighborhood, then progress on to using it on local hikes where you’re thoroughly at ease with your route.

When using your GPS out on a hike, you will need to set it up before setting off to make it easier to use when you’re out in the field and to ensure that you have your route recorded.

If you’re having difficulty becoming better acquainted with your GPS unit, then it makes sense to have a start up list of what you need to do before starting off on your hike.  

Here’s a general idea of what most handheld GPS users will need to do before starting their hike.

Steps

  1. Before leaving make sure that your handset is in good working order, with a fully charged battery. Check the charge on any spare batteries you may have too.
  2. Turn on your unit and wait for it to receive satellite signals and pinpoint your position.
  3. Reset any data or trip logs.
  4. Program your waypoints.
  5. Calibrate any compass, barometer or altimeter functions.

Before leaving home, make sure that you have uploaded any necessary maps, for your planned hike, or system updates. Remember, don’t rely solely upon your GPS, even once you’re comfortable using it.

It is always recommended that you carry a compass and map as a backup and that you tell someone where you’re planning on going and when to expect your return.

Conclusion

It is extremely important that you learn how to use a handheld GPS for hiking before relying upon it out on the trail. While they are not essential, they can be extremely useful in planning your route, digitizing it to share it with others and to let you gain a better insight into your hiking capabilities.

A handheld GPS can also be invaluable in the event of an emergency, enabling the appropriate emergency services to pinpoint your location.

However, it is important to remember that like any electronic device, a GPS receiver can malfunction, break or run out of battery. While they can greatly enhance your hikes, it is important that you still, to stress it again one last time :-), carry a map and compass and know how to use them.

Spending too much time using your GPS when you’re out in the great outdoors, can also mean you miss out on a valuable chance for downtime away from screens and the modern world.

So while they are useful and can even save lives, it’s important to know not only how to use your GPS, but also how to do so with moderation. Doing so will ensure that your trek through the wilderness is also one of natural and self discovery.

We hope you found this article useful, please share it round your networks if you did 🙂

How To Use A Walking Stick For Hiking

If you’ve ever wondered how to use a walking stick for hiking, or even why you would want to use a walking stick on a hike, then read on to find out all you need to know about using a hiking staff out on the trail.

Let’s face it a lot of us tend to think walking sticks are just not for us. There are, however, plenty of situations where using a walking stick out on a hike makes perfect sense.

Also, for the uninitiated, we’ll take a look at the different types of walking stick for hiking. These range from traditional wooden staffs or sticks, to modern day carbon-fiber models, via ones that double up as camera mount monopods and even selfie-sticks.  

Walking Stick vs Trekking Poles

We did a whole post on whether a walking stick or trekking poles are better on the trail. As opposed to trekking poles, which are used in pairs, walking sticks are used singularly.

Whereas using trekking poles tends to increase speed and rhythm, hiking with a walking stick is more of a steadying process, with the accompanying stick providing extra support rather than increased propulsion.

Some people prefer to use their walking stick on a certain side, depending upon their gait, any mobility issues or just personal preferences. If necessary you can simply pass your hiking staff over to the other side to provide additional support on that side as needed.

It’s worth keeping in mind that trekking poles can be used singularly, and in pairs. I know many hikers who like to use only one pole on the flat but will utilize two on trickier terrain.

Why Use a Walking Stick When Hiking?

Using a walking stick when hiking provides extra support and stability. Some hikers use walking sticks throughout the entirety of their hike, whereas others may only use them for certain sections or in certain circumstances.

Here’s some of the most common reasons you may want to use a walking stick for hiking.

Recovery

If you have suffered a recent injury, you may feel more confident getting back into hiking with a walking stick to help to support your weight.

Ascents

You can use a hiking stick to help push yourself up over steep terrain. It can also act almost like a brake too, so when you stop half way up that steep ridge, you can lean against it while you catch your breath.

Descents

Steep descents are made much easier with a walking stick. Using one for descents can also help to take some of the stress off your knees, as well as reducing the risk of a fall.

Contouring

Using a walking stick on your lower side when contouring can help to give you extra stability, especially when on a narrow, crumbling path.

Obstacles

Rivers, boulders, rocky or uneven terrain, downed trees and even mud, using a walking stick can help you to overcome all sorts of obstacles.

From giving you an idea of how deep that creek really is, to providing a stable grip over wet, slippery patches, a walking stick can be invaluable in preventing slips and falls.

Vegetation

Some trails can get pretty overgrown and a walking stick can be useful to push branches and briers to one side, protecting any exposed skin as well as your backpack and clothing.

Snakes and other potentially dangerous animals

Use your walking stick to scare away any potentially dangerous animals. Having a walking stick to hand can be useful anywhere you’d rather test the ground first before placing your feet. A stick can also make you look bigger and more threatening in the unlikely event you have a negative wildlife encounter.

Shelter

Many shelters, such as tarp tents, require a trekking pole or some sort of stick for their structure. There are plenty of uses around camp for a walking stick, from propping things up, to providing a support for a mosquito net or an impromptu sun shade.

Different Types of Walking Stick for Hiking

While there is not a huge amount of basic differences in walking sticks, they have developed somewhat with the times. There are two main types, rigid or collapsible walking sticks, with a vast array of extra options that can be combined for a highly individualized modern hiking stick.

Or you can keep things simple with a plain old wooden staff or stick as in the picture above. Your choice will depend upon your needs, your personal preferences and how you intend on using your walking stick when you’re out hiking.

Rigid Walking Sticks

Rigid walking sticks provide extra stability and you don’t have to worry about not extending them fully, and risking them folding up or an internal mechanism breaking.

Simple and easy to use, they range from tree branches to more modern cutting-edge carbon fiber designs with additional features. Due to their rigid nature they can be difficult to transport and carry when not in use.

Collapsible Walking Sticks

If you like the idea of using a walking stick for certain types of terrain, but don’t want the hassle of carrying one throughout your whole hike, you may like to try out using a collapsible walking stick.

The two most popular choices are telescoping walking sticks, where the pole collapses internally and the sections retract within one another and z-style sticks, where the walking stick is held together by the tension in an internal cable that can be relaxed allowing the stick to “fold” into sections.

Collapsible walking sticks are easier to pack and store, however, you can run into problems if their mechanism for collapsing or locking into place stops functioning.

Additional Features

Once you’ve decided on either a rigid or a collapsible model, there are plenty of additional features that you may or may not wish to combine.

  • Material – From traditional wooden staffs to carbon fiber and various alloys, there are plenty of different choices each with their own advantages.
  • Adjustability – Some poles can be easily adjusted to accommodate a range of different heights. You may also want to adjust your walking stick to better deal with steep ascents or descents, a longer stick will be better for downhill, while shortening your stick can make uphill climbs easier.
  • Lightweight – Some people prefer heavy, sturdy sticks, others lightweight models. Given the strength in today’s modern compound models, you can have the best of both worlds. It really comes down to a matter of personal preference.
  • Shock Absorbers – some walking sticks have a shock absorber at their lower end. This can be useful for downhill stretches and for anyone with any lingering injuries.
  • Camera Mount – Monopod camera mount walking sticks save you from dragging a heavy, cumbersome tripod out with you into the wilderness. You can also find walking sticks with mobile phone attachments for the ultimate selfie at the end of your summit climb.
  • Handles and Grips – whether you prefer a t-shaped handle, no handle or a cork grip for use in hot weather, there’s plenty of different options available.

Conclusion

So there you have it, we’ve taken the mystery out of how to use a walking stick for hiking.

Even if you’re not too sure whether using a hiking staff is quite for you, the next time you’re headed out over difficult terrain, you might like to try one out and see whether using a walking stick for hiking could make your hikes more enjoyable.

Personally, I prefer hiking poles, they are versatile and easy to use, but traditional walking sticks have their place on the trail for sure.

Best Hiking Jackets For Cold Weather

When the weather turns cold, you’ll benefit from a good hiking jacket designed specifically for winter days on the trail.

Best Hiking Jackets For Cold Weather

However, some of the best hiking jackets for cold weather are not necessarily quite as warm as you might imagine, with most hikers favoring a lightweight, layered approach to winter dressing with an outer layer that provides primarily water and wind protection.

Advantages of Cold Weather Hiking Jackets

A cold weather hiking jacket will keep you warm out on the trail mainly by providing a protective barrier or shell. Your outer shell should first and foremost be weatherproof to keep you protected from the elements, so you can stay warm with your other layers.

Specially designed for being active in cold conditions, your jacket should be lightweight and breathable. Hiking in the cold, especially on more strenuous hikes, can still get you hot and sweaty, especially with a heavy pack.

So, it’s important that your jacket allows some of this excess heat and moisture to escape and your inner layers the possibility to dry.

At the same time, a good cold weather hiking jacket will keep enough warmth in so you feel comfortable without that clammy feeling.

Hiking Jacket Features

Aside from breathable, waterproof membranes, expect some extra features, such as vents to dump heat on strenuous sections, as well as protective features such as collars and adjustable hoods to make your winter-time hiking comfortable, even if you hit a patch of bad weather.

Here’s some of the main features that are often found on cold weather hiking jackets that you should look out for.

Waterproof and Breathable Membrane

Essential to keeping you warm and dry, every cold weather hiking jacket needs waterproof protection. Almost all cold weather hiking jackets are treated with a durable water repellent (DWR) often coupled with a membrane or laminate.

Best Hiking Rain Jackets For Men

There are various types available, offering different degrees of breathability so you will stay dry from both the outside and the inside.

Insulating Inner Fabric

Some cold weather hiking jackets may come with a soft insulated interior fabric. This can be useful if you feel the cold and tend to take things slow and easy.

As a cold weather jacket is really to provide protection, if you tend to warm up pretty quickly out on the trail you may prefer a simple shell style over your mid-layer of clothing.

Vents / Pit Zips

Vents are extremely useful for when you find yourself getting too hot and sweaty after a stretch of strenuous hiking. Open your vents for a quick heat dump, allowing you to stay protected from the elements while cooling off quickly.

The North Face Mens Venture 2 Jacket Pit Zips

Vents are often zippered and may be found under the arms, pit zips, although some jackets rely upon mesh pockets or back vents.

Adjustable Hood

You’ll need a good, adjustable hood to keep you warm and dry in severe weather conditions. Some hoods come with a visor style front that can help to improve your visibility in heavy rain.

It’s essential to be able to adjust the hood tightly around your face to withstand strong winds. A collar will also help to block out the wind and rain, whilst retaining warmth.

Cuffs

Often overlooked, cuffs are essential to keeping the warmth in and the cold out. Adjustable hook and loop or drawstring cuffs can help to ensure a tight, individual fit, while making it easy to get your jacket on over a bulky mid-layer and for wearing with gloves.

Two-way Zipper

A two-way zipper can be handy to reach inside to your internal layers without having to remove your outer layer in the rain. It can also be used to quickly dump heat on the go.

Pockets

Pockets are pretty much essential in outer layers for easy access. However, they can mean vulnerabilities in your waterproof protection, so be sure to check that any zippers are waterproof or that they are covered by storm flaps.

Marmot Minimalist Jacket Chest Pocket

You may prefer a large breast pocket for maps and other larger items, or small, side hand warmer pockets for on-the-go essentials.

Some pockets double as vents, thanks to their mesh construction, although this can mean that you will have to rely upon pockets in your other layers for your valuables when you leave them open for venting.

Layering

When you’re out hiking, conditions can change quickly with little warning and you could potentially be hours away from civilization and shelter.

In order to ensure that you stay warm and dry, it is important to learn how to dress in layers for hiking. If you get wet, either from rain or perspiration, you could catch cold or even hypothermia.

As hiking is an outdoor activity, it’s not just as simple as dressing for the heat or the cold, you also have to dress in a way that can be adapted to the changing weather, your activity level and whether you have a tendency to feel the cold or the heat.

This is why it is common to dress in three, although sometimes four or more, layers for hiking.

Sometimes you won’t actually be wearing all three layers, one may be in your backpack just in case, but it’s important to have all three with you when you’re out on the trail. Here’s a quick rundown of the main three layers you’ll need and why they’re useful.

Base Layer

Your base layer is primarily worn to wick sweat away from your skin, keeping you dry and preventing you from catching a chill.

Polarmax Mid Weight Double Base Layer Men's Long Sleeve Crew Tee

Base layers need to be quick drying and comfortable next to your skin, especially when you’re carrying a fully loaded backpack that can cause chaffing.

Some base layers tend to suffer more from odor buildup than others, while certain types may be more durable. Some are also warmer than others, however, you should mainly focus upon a base layer’s wicking properties.

You can check out our best base layers for men here, and our best base layers for women here (To be added soon :-).

Mid Layer

Your mid-layer is designed to provide warmth and insulation. Available in a wide variety of options, you can opt for a thicker, warmer layer or thinner ones, depending upon the conditions and your personal preferences.

Polyester fleeces are a popular option as they are lightweight, fast drying and take up little space in your backpack. For colder places, you may want to wear a light down or synthetic jacket as a mid-layer.

It is also important to remember that you may want to add more layers in among your mid layers, if you are hiking in very cold conditions, e.g. an extra tee over your base layer.

Outer Layer

Your outer layer is there to provide protection from the elements. It should provide some breathability and possibly vents for those strenuous uphill sections.

Most importantly, your outer layer needs to be waterproof to keep you warm and dry, as well as windproof. Most hiking jackets are treated with a DWR coating so that water beads and rolls off the surface, keeping you dry and allowing the jacket to breathe.

Best Hiking Rain Jackets For Women

Generally speaking, for most average hiking, we recommend that you use a good hiking rain jacket for your outer layer, in conjunction with the other layers above, for warmth, etc.

You can check out our top hiking rain jackets for men, and our top hiking rain jackets for women, for some excellent options in this department.

For faster-paced hiking or lighter weather conditions you may want to consider a soft shell hiking jacket with extra breathability, or for colder conditions with less intense activity, a hard shell hiking jacket.

Depending upon where and when you are hiking, you may want to opt for a hiking jacket that is more breathable, designed for higher-intensity activities. Such jackets are likely to cost considerably more due to the advanced membrane and DWR used.

If you don’t need such a highly breathable garment, you can find weatherproof jackets at a much lower price that will keep the rain and wind out, although exerting yourself whilst wearing one is likely to result in an excess of perspiration and you could catch cold once you slow down.

Specialized Jackets

For your average hiking needs, you will be best suited to wearing the above layering combination. Its advantages are that it can be adapted to almost any conditions, and you can alter your combination piece by piece making it more affordable to update.

Best Men's Hardshell Jackets

However, if you are considering venturing out into very harsh conditions, you may want to consider a systems jacket, also known as a 3-in-1 jacket. Such jackets combine a waterproof shell jacket with a insulated liner jacket.

Each jacket can be worn alone or together, hence the 3-in-1 name. When worn together they offer good protection from the elements in extreme conditions.

However, for your average hiking trip, you probably will not experience the conditions needed to truly realize the benefits of a 3-in-1 jacket and their price can be extremely prohibitive.

That said, if you are planning an extreme hiking trip you can undoubtedly benefit from the expertise and cutting-edge technology that goes into these superior performance jackets, so they are worth looking into.

Conclusion

When you’re looking for the best hiking jacket for cold weather, it’s important to bear in mind what you’ll be wearing underneath, as much as the jacket itself.

When the temperature drops, we naturally think about keeping warm, however, a day on the trail is also physically exerting and you will build up a considerable amount of internal heat especially over strenuous uphill sections.

Finding the best hiking jacket for cold weather for you is all about keeping the weather out, whilst allowing for some breathability, especially if you tend to go in for higher intensity hikes.

Combining a waterproof, weatherproof rain shell jacket with wicking and insulating layers is the best way to tackle cold weather hiking, enabling you to adapt your combination in order to suit the exact circumstances, rather than being stuck with a jacket that is too warm, bulky, heavy and unbreathable.

How To Use A Map And Compass For Hiking

If you don’t know how to use a map and compass for hiking, then not only are you missing out on an essential skill, you could also be putting your life in danger.

Modern technology has its limitations and the best way to play it safe, is to know how to use a map and compass, and to make sure that you always have them to hand in your backpack as an essential part of your kit.

Let’s take a look at some hiking compass and map basics, as well as how to find out how to take a bearing and how to find your location on a map.

An Essential Skill

Even in today’s modern world, knowing how to use a map and compass is an essential skill for all hikers.

While you could, conceivably, go on a lifetime of hikes without ever having to read a map and compass, they are one of the ten hiking essentials and knowing how to use them correctly could even save your life.

When you can read a map and compass correctly to find your way, you’ll benefit from greater confidence and an increased sense of security when you take on more challenging hikes in remote areas.

Your phone or other GPS equipment, is undoubtedly easy to use and extremely convenient. However, you need to be careful relying on technology, batteries can run flat quicker than expected and if your devices get dropped or wet, you could find yourself lost very quickly if you were solely relying upon them.

Even the temperature can adversely affect certain electronic equipment, draining a full battery in less than half an hour.

So, you need a backup plan and a compass and map are the true tried and tested way to navigate. Read on to find out the essentials of map-reading for hiking.

Topographic Maps

Topographic maps don’t just show you trails and roads, they also show terrain types, gradients and landmarks.

Once you are able to read them correctly, they will give you an almost lifelike, three dimensional reading of your surroundings, making it easier to plan your route avoiding potential hazardous areas.

Here’s some of topographical maps main features that you’ll use when hiking.

Contour Lines

Contour lines help you to visualize relief and gradient. A contour line links a series of points that are all at the same height. The green arrow in the image below is pointing at a contour line.

Contour Line

When the lines are close together, that indicates a steep gradient, when they’re spaced far apart a gentle slope. Each contour line corresponds to a set interval in height, usually 40 or 80 feet, check your map’s legend to make sure which one.

Contour lines also give you an idea of how the surrounding terrain looks by the forms that they make. Looking at the highest lines that form the peaks can give you the outline of the shapes formed by surrounding hills and mountains.

Index Lines

Every fifth, tenth or fifteenth contour line, depending on the map you are using, is an index line. Thicker than the surrounding contour lines, index lines also have their height indicated somewhere along the line.

Color shading, as shown in the image above, is also sometimes used to help to easily distinguish different sections.

To quickly and easily work out the heights of the neighboring contour lines simply add on the amount indicated in your maps legend as the vertical interval between contour lines.

Spot Heights

Spot heights are specific heights that are given next to a black dot, showing their precise location and height. They are used for areas which may differ in elevation  from the surrounding area, such as peaks.

Scale

Scale shows the relative distance on the map. To find out the actual distance, refer to the scale shown on the map or legend to work out how far the corresponding distance is in miles. You can use the flat, graduated edge of your compass to work out actual distances on your map.

Map Scale

Maps with smaller scales show more detail, but over a smaller area, whereas maps with a larger scale will show larger areas but in less detail.

Landmarks and Terrain

Looking through your map’s legend will reveal a huge variety of symbols to help you to recognize various landmarks, buildings and terrain features. As your map reading skills progress, you will soon come to recognize some of the most commonly used symbols.

Dense vegetation is indicated by darker shading, fading to indicate sparse or no vegetation. Water courses are indicated in blue and roads, trails and paths are shown in various different ways depending upon their importance and size.  

When you look through the symbols in your map’s legend, be sure to pay attention to the declination (direction offset for true north), the contour line interval and the scale, before you attempt to start navigating.  

Setting a Map

A key navigation skill, is knowing how to set a map. Basically, this means aligning the map to what you see on the land in front of you.

So, say you are standing in front of a lake, with the highest peak in the range, directly in front of you, no the other side of the lake.

You first identify where the lake is, and then find the peak. this wouldn’t be hard in this case as it will be the highest one on the map 🙂

Then rotate your map until the peak on map, with the lake in front of it, is aligned to the one you are looking at. Congratulations, you have just set your map!

Why is this important? Simply, if you want to know where to go, you need to start by knowing where you are. This is an easy and quick way to establish your location, and you can plan your next steps from there.

Without a shadow of a doubt, this is the most regularly required and used skill when using a map. It’s not hard once you are familiar with the legend, the markers, etc. of the map. Like most things, it just takes a little practice.

A great way to practice is to randomly try and identify your exact location, while out on a hike. Perfect for when you are on a marked trail, you won;t get lost and you can try and identify where you are as you learn.

Understanding your Compass

Just like topographical maps, you should take time getting to know the features on your compass and how to use them.

Suunto M3 DL Pro Compass

Be sure to get the best compass you can, well, the best one that you are comfortable using.

We recommend the simpler plastic ones, like in the image above.

Baseplate

The baseplate is the transparent plate upon which your compass sits. It will usually have at least one straight edge with graduated markings to help you to work out distances and for use in triangulation.

Map Pic

The base plate is also home to numerous other essentials, such as the direction of travel arrow, to help you to line up your compass correctly on the map.

Rotating Bezel

Your compass will have a rotating bezel also known as an azimuth ring, this is marked with degrees 0 through 360. See the circle with degrees marked on it in the image above

Needle & Housing

The needle housing contains the magnetized compass needle. The red end of the needle points towards magnetic north.

There will also be an orienting arrow that you use with the bezel, shaped to fit around the needle, as well as an index line where you will take your bearing reading. Again, you can see these in the image above.

Setting your Compass Declination

You will need to check the declination on your map so that you know what angle and direction equates to the difference between magnetic north and true north. This information can be found in the legend section of your map, or on the cover.

Map Legend

This also changes over time though, so what might be accurate today, may not be accurate in a years time, so keep that in mind. There are websites you can use to check the declination for a particular location.

If your compass has adjustable declination, and some do, then follow the manufacturer’s instructions on how to set this up. Some compasses require you to use an included small tool to alter the declination, while others need to be pressed down.

If your compass doesn’t have an adjustable declination, then you will need to take your readings and add or subtract the declination each time you take a bearing. This is not difficult at all.

Remember, with magnetic north being currently located around the Hudson Bay in Canada, an east declination will be a positive number and a west declination a negative number.

Using your Map and Compass

Using your map and compass together you will be able to pinpoint your location on the map, or to find out where you should be heading to reach a specific destination.

Let’s take a look at how to take a bearing and how to identify your location using your map and compass. First, watch this useful video from the folks in REI.

How to Take a Bearing

As shown in the video, a bearing is a direction that is specified in degrees. To take a bearing using your map and compass, line up the straight side of your compass with your location on the map.

Rotate the compass so that the straight edge forms a line between your location and your desired destination. Make sure that the direction of travel arrow is pointing towards your destination. Then, rotate the bezel until the orienting lines are correctly aligned with the map’s north and south.

Once the lines are correctly positioned, look at the index line to take your bearing reading. To follow it on land, remember to add or minus any applicable declination if you need to do it manually, and there you have it, you’ve successfully taken your first bearing, that you can follow to take you to where you want to go.

Point your compass in front of you with the direction of travel arrow facing away from you. Rotate your body until the needle is inside the orienting arrow. When it lines up inside of it then you’re facing the correct direction.

A handy tip when following a bearing, assuming you have visibility, is to pick a landmark of some kind in the distance, say a noticeable tree, or shape in the land, that lies in your direction of travel.

You can now put the compass away and walk to that landmark to save you having to keep looking at your compass. Then do it again, until you get to your destination.

How to Identify your Location

You can identify your location on a map using a process called triangulation. Triangulation works by taking different bearings in the field and using them on your map to narrow down your location.

Best Compass For The Money

One bearing will give you a line upon which you will be situated, you then refine this reading and hone in on your location by taking further readings. Where they meet will pinpoint your actual location.

Here’s how it works. Take a bearing in the field by focusing upon a nearby landmark that you can easily locate on your map. Hold your compass in front of you with the direction of travel arrow pointing towards your chosen landmark.

Keeping your compass steady, rotate the bezel until the magnetized needle lines up inside the orienting arrow. Once it is lined up, take your bearing at the index line.

Transfer your bearing to the map by lining up your compass on the map with the edge at the known landmark (remember to account for any declination from land to map).

Of course, you’ll need the direction of travel arrow to be pointing towards the landmark. Rotate the compass until the orienting lines are running north-south and north is situated at the top. Draw a line along the edge of the compass, your location is somewhere along this line.

Repeat the process, taking a second and third bearing to find your precise location along this line. Just make sure that your landmarks have an bearing of at least 60 degrees between them.

Mark these bearings on the map. With three bearings you’ll have a triangle, the smaller the triangle, the more accurate your reading will be.

Orienteering

Using a map and compass can also be a fun and sometimes challenging experience. If it’s something you end up enjoying, try your hand at some of the popular permanent orienteering courses available at some city, state and national parks.

They usually have a variety of levels and they can be a fun way to perfect your skills and spend an afternoon outdoors. Just make sure that the markers are still available if you’re visiting over winter, as some parks may remove them over the colder months.

If you’re struggling to get started check out some local orienteering courses, they are often available in cities too, or try out your map-reading skills on routes that you know off by heart to get the hang of map reading in a safe environment.

Conclusion

Knowing how to use a map and compass for hiking is an essential skill. If you’re having problems getting started then remember practice makes perfect.

Take your map and compass out with you on all hiking trips and take time to stop and use your map and compass. This will help you to familiarize yourself with the basics and to gain confidence in your readings in a familiar environment.

As the saying goes, practice makes perfect, so find the time to brush up on your orienteering skills, it could prove invaluable when you’re out in the wilds of the backcountry or unfamiliar territory.

How To Buy The Best Hiking Boots On A Budget

Online shopping gives us access to a huge array of products, often at discounted prices. However, it can be difficult to separate the wheat from the chaff, particularly with brands you may not have worn before and cheaper models from non-specialist manufacturers.

While it is undoubtedly the safer option to pay more and buy from a well-known, quality manufacturer, if you know how to buy the best hiking boots on a budget, you could end up purchasing the same high-quality pair with a substantially lower price tag.

If you just want to check out some top hiking boots, then you can check out the best hiking boots for men, and the best hiking boots for women. You will find some great options there, for all types of hiking, all at a range of prices.

Read on to find out more and check out our money saving tips for great quality hiking boots at reduced prices.

The Importance of Good Quality Hiking Boots

Good quality hiking boots are essential to hiking, providing protection and comfort mile after mile and even year after year. They mold to your feet over time, protect you from the damp, rocky terrain and prickly vegetation.

To the uninitiated, they may appear uncomfortable, stiff and heavy, but once they are correctly broken in, they will provide you with the protection and support you need for happy feet out on the trail.

Naturally, all this comes at a price. While you may be happy walking about town in your sneakers, try even just several miles in them over rocky trails and you’ll be longing for a rigid midsole to protect your feet from the continuous impact.

Sneakers

Your feet will feel each and every pebble, tree root and branch, as you limp across uneven terrain. Not to mention the lack of waterproofing, heel stops for descents and spacious toe boxes, ankle protection, lugged soles for traction and so on…

While, of course, you can hike in just about any type of footwear, it’s about whether you would still want to again once you’ve arrived at your destination.

Not to mention the increased risk of a slip or a fall from wearing unsuitable footwear, sometimes miles from the nearest sign of civilization, with no cell phone coverage.

Common Shortcomings of Budget Hiking Boots

If it looks too good to be true, as the saying goes, it often is. Quality is more expensive for a reason. That is the design process, expert consultations and superior materials.

Specialist hiking boot manufacturers have a long tradition and will have ironed out any mistakes years back. They are also often at the forefront of new materials and cutting-edge technologies specially formulated to boost their boots’ performance.

All of this costs a lot of money and, understandably, this cost is reflected in the price of their products.

On the other hand, cheaply-made hiking boots are usually from a non-specialized manufacturer. They may look the part, but then again so do many fashionable boots when the latest popular style switches to an outdoor look.

Without the knowledge, specialized materials or even the desire to create an outstanding outdoor boot, you tend to get just that, a boot that resembles a hiking boot. Substandard protection, lack of breathability, poor waterproofing and substandard workmanship.

Some budget hiking boots, especially those from outdoor brands that have introduced a cheaper line, can still provide a good choice for less. However, it often really does pay in the long term to invest in the best quality that you can afford.

The better the boots, the longer they will last and the more comfortable your hiking trips will be.

Buying cheap boots is often a false economy and especially as hiking boots take some time to break in, you end up wasting both your time and money. Even more so considering some of the better brands have substantial guarantees.

How to Get the Best Hiking Boots on a Budget

So, now we’re focused on buying the very best, how can you get the best pair of hiking boots for less?

Best Women’s Hiking Boots

Basically, nothing comes for free and unless you happen to get lucky, you’re going to have to put in some time and effort to discover a great pair of hiking boots at a budget price. Here’s our tried and tested money saving tips.

1. Research

Research and then research some more. You want to know exactly what you want, what it’s called and who makes it. In the crazy world of quick discounts and prices that seemingly fluctuate by the hour, you’ll need to know your facts and RRPs off by heart.

Resellers often dump unwanted stock at bargain prices without the hype or even correct specifications, so if you happen to know what’s what you could avoid a costly mistake or make a great bargain.

Keep a list in your head of your top five pairs you would buy with a 25-30% reduction and know what range they are in, and what other boots in that range are a step up or down in price.

2. Online Deals

Check on your favorite hiking boots or shoes at a range of different stores. Look at how much they’re offering as a reduction if you sign up for the newsletter.

Hiking Boots Or Trail Shoes For Backpacking

Start with the specialist sites that tend to cost more but have better information and photos. Search for discount codes, add the boots to your cart and enter the codes to see if any work.

Repeat with other sites. Just be careful of scams, if you’re unsure and it looks too good to be true, check out the site’s contact information and look for any reviews of the site itself and the company.

On reputable sites, make an account and put in your birthday as being in a few days’ time, you may get 10-15% off. Sometimes you can get a discount code, just for signing up!

3. Sales

With discounts all year round, the sales are often overlooked. They can, however, still offer good value both online and in stores. You may want to plan your purchases around the traditional sale times of the year e.g, Black Friday, after Christmas, etc.

Remember, you’ll need to be armed with your thorough research. That way not only will you know that you are getting a decent bargain (and not just buying something that has been bumped up to knock down), but you’ll actually come away with a decent pair of hiking boots that you really want.

Unless they’re really, really what you want, don’t be afraid to hold out for extra discounts. If you’ve got a few options, hold out and wait for the final reductions, and then some.

4. Timing

If this all seems like too much stress and you just want to make a simple, relaxed purchase, wait until there’s a new release out or look at the outlet sections of your favorite sites.

Often when a new version of a hiking boots is released, prices are automatically cut on older models to simply get rid of stock.

In some cases the new model may just be something as simple as a color or logo change, and you can get pretty much exactly the exact same pair of hiking boots at a discounted price.

5. Pick the Best of the Rest

Your hiking trip is coming up, there are no bargains in your size and you really can’t afford to spend the extra. Pick several of the best pairs that you can afford and read all of the reviews carefully before reaching a balanced judgement.

Pay particular attention to reviews that mirror your needs and disregard those that don’t. Be wary of all positive or all negative reviews and try to find out as much information as possible.

Trail Shoes

If time is short and the climate and terrain are appropriate, consider a pair of trail shoes or hiking sandals from a reputable brand, they tend to cost much less than hiking boots, do not need as much in terms of breaking in, and they benefit from the know-how and quality that comes from an established, specialist outdoor wear manufacturer.

You could wear them around the house and in town too, meaning you’re not spending money on something you’ll never wear again. This could also be the better option for a one-off hiking trip.

Conclusion

While you do tend to get what you pay for, there are definitely some great bargains to be had with a little planning, research and luck.

While you may not get exactly the pair that you hoped for, at the price that you wanted, taking time to consider how to buy the best hiking boots on a budget will give you the edge and the confidence to bag a true bargain.

Remember, that if you are looking for some potential options for great new hiking boots, check out our best hiking boots for men, and best hiking boots for women.

We hope you found this useful, please like, link to and share if you did, it helps us a lot 🙂

How To Dress For Hiking In Summer

Summer can be a great time of year to hit the trail and go exploring. With long days and warmer temperatures, you can also probably get away with carrying less gear, meaning a lighter backpack.

However, in spite of the good weather, it’s essential to be prepared. Aside from carrying extra water and remembering other details such as sunscreen and bug spray, you’ll also need to put some thought into your summer hiking wardrobe.

Here’s our guide on how to dress for hiking in summer. We’ll first look at some general ideas, before moving onto specific garments and accessories, so you can remain comfortable out on the trail when the mercury rises.  

Summer Hiking

When you’re planning hiking trips over summer, it’s essential that you plan ahead. While some items of summer hiking clothing can overlap with other seasons, others you’ll need to purchase specifically for hot weather hiking.

Remember that summer can also feature storms and torrential downpours. If you’re hiking at altitude then you’ll still need to wrap up, and if you’re hiking through mosquito areas then your clothes will also need to help to protect you from bites, as well as the sun’s rays.

Basically, you’ll need to get a whole range of uses from your summer hiking clothes, so let’s take a quick look at some of the main features you’ll need when choosing how to dress for hiking in summer.

Material

It’s important to pay close attention to what your summer hiking clothes are made from. Ideally you want a light, breathable fabric, preferably UPF rated, for protection from the sun’s rays.

If you’re not planning on purchasing clothes with a UPF rating, then you should know that polyester and nylon are both highly rated for disrupting UV light, while silk and wool perform moderately well, with rayon, hemp and cotton providing little protection without specialized treatments.

UPF ratings aside, while cotton is generally best avoided by hikers, as it tends to retain moisture and is slow to dry, it can be useful for these very properties during hiking in very dry hot weather or desert hiking.

However, note if you do decide to wear cotton for hiking in summer, remember to take a change of clothes for evening time when a sudden dip in temperature could see you catching a chill with only a damp cotton garment.

Also bear in mind that any damp clothing is more likely to chafe. Nylon and polyester are also good hot weather hiking clothes’ materials as they breathe fairly well and are both lightweight.

Fit

When you’re hiking over the summer period, you’ll want to wear loose fitting clothes that allow increased airflow to help your body to better regulate your temperature.

It is important to wear clothes that will keep the sun off your skin, keeping you cooler, so opt for full length sleeves over tank tops.

It’s also necessary to consider where you’ll be hiking as you may also need protection from overgrown vegetation or rocky terrain.

Features

Air vents, detachable lower legs, pockets there are plenty of useful features. Anything that can increase air flow, while protecting you from the sun’s rays is a great option to go for.

Zip Conversion of Hiking Pants Into Shorts

Colors

Darker colors tend to absorb the heat from the sun, while lighter colors reflect it.

So it makes sense to choose lighter colored tops for summer hiking, just be aware that it can also be useful for safety reasons to have a bright colored item of clothing spare so that you’ll stand out in case of an emergency.

Summer Hiking Clothing, Footwear & Accessories

We’ll take a look at what clothing footwear and accessories you’ll need for summer time hiking and how these items differ from what you wear at other times of the year.

Summer Hiking Footwear

With hotter weather and less chance of mud and rain, a lot of hikers opt for lighter hiking boots, or even trail shoes.

Trail shoes have the advantage of offering excellent grip and traction, whilst being lightweight and comfortable. However, they do not provide the same level of support as hiking boots, especially if you have a fully loaded backpack to carry.

You could also try out a pair of hiking sandals, especially if you are thinking of trying any trails that involve any creek exploration or crossings.

How To Choose Hiking Sandals

Hiking sandals are lightweight and dry quickly, although they may not provide adequate protection and support for all terrain, so plan your footwear according to your route.

Some hiking sandals have closed toe areas to provide enhanced protection, while others are completely open.

If you are opting for more traditional footwear, make sure that your socks are light wool or synthetic as your feet are more likely to sweat in the heat.

You can wear lighter, thinner socks than in winter, however cotton socks are not recommended as your feet will stay wet and sweaty, possibly leading to slipping as well as discomfort.

If you’re planning a long hike or going backpacking, you will be better off taking at least one spare pair of socks to allow you to change into a dry pair while you dry out your other pair. 

Base Layers

Depending upon the temperature and your trip, you may or may not need summer base layers.

It’s important to remember that temperatures can fluctuate hugely, so if you’re backpacking or day hiking into the evening, or even heading to higher altitudes, you may prefer to take a lightweight silk or synthetic top.

Sunny Day on the Haute Route Switzerland

This will likely come in use anyway on a backpacking trip and can double up as camp clothes. Likewise, if you are setting off on an early morning hike, you may prefer to wear a lightweight base layer that you can later remove.

Lightweight base layers can also provide extra protection from UV rays, if you wear them under a loose fitting, open weave top that provides good air circulation but would otherwise leave you over exposed.

It can be useful to wear an absorbent base layer to prevent chafing, if you sweat a lot and it leaves you feeling uncomfortable, a synthetic t-shirt will help to keep you dry. 

Summer Hiking Tops

You should be looking for a long sleeved top that will provide you with adequate protection from the sun. Synthetic materials such as nylon or polyester will provide you with good protection against UV rays.

If you’re hiking somewhere hot and dry, like a desert, then you could wear cotton as it will retain any moisture near to your skin that will help to keep you cool.

Cotton is generally not advised for hiking because it can cause chills leading to hypothermia, so be sure to take a change of clothing for any drop in temperature.

Hiker In The Desert

This is particularly important in desert-like areas where the temperature can drop significantly after sunset.

Ventilation

Summer hiking tops may have air vents which will allow you to cool off with increased air circulation, without exposing your skin to the sun’s rays.

Air vents situated at the back of your garment can help to prevent sweat building up that could make your backpack uncomfortable to carry.

You may also like to take a lightweight fleece for hiking at altitude where it will be colder, or for use at night time. As fleeces are highly packable and very lightweight, you could always pack one just in case.

If it is too warm to wear it, you could use it as a pillow, especially if you tend to sweat a lot on hot summer nights, as its absorbent qualities and fast drying properties will help keep you dry and comfortable.

You could then rinse it out in the morning and tie it onto your pack to dry. Don’t forget that summer is often a time for spectacular rain storms, so it can be useful to take a light waterproof jacket.

This can also double up as protection against mosquitoes if you’re passing through an area where you’re likely to get bitten.

Summer Hiking Pants

As your legs are less exposed to the sun’s rays, you might want to wear shorts, or even better a pair of hiking pants that detach below the knee, so you can choose between pants and shorts when you’re out on the trail.

Best Shirt For Desert Hiking

You may prefer the protection from long pants in certain areas, especially if there is any overgrown vegetation to contend with.

Summer hiking pants will likely be lighter weight and more breathable than insulated winter ones. However, they will still need to be fairly durable.

You may prefer a slightly closer woven variety if insects are likely to be a problem, especially mosquitoes, to protect your legs from bites.

In most cases, provided temperatures are relatively high and you have a light waterproof jacket, you are unlikely to need to pack any waterproof bottoms.

Summer Hiking Accessories

When you’re planning going hiking on hot summer days, summer accessories can make all the difference to your comfort levels.

Hiking Hat

A good hiking hat with a decent sized brim is extremely important. A hat can help to keep the sun off your face and allow you to see better without squinting.

When you’re faced with challenging, rocky terrain, it is important to be able to focus upon your footing and a hat can help to shade your face enough to make this possible.

Neck Protection

It is also important to protect your neck from the sun’s rays. Tubular scarves such as the multipurpose Buff are also available in summer versions.

They exist in treated versions that protect against UV rays and they can also be used as hats, hair bands and scarfs. If you’re also wearing a hat, ducking your Buff in a creek before putting it on between your head and your hat can be very effective at helping you to stay cool.

You could also use a neck gaiter or even a lightweight cloth. There are also special types of polymer-crystal filled neck scarves that are designed to retain moisture for longer periods of time, ideal on hot summer hikes where water refill points are scarce.

Gloves

Hiking gloves can also be a good choice when you’re hiking in hot weather, helping to protect your hands from the sun. If you use trekking poles or a hiking staff you may also like to wear a pair of gloves for better grip with hot sweaty palms.

Sunscreen and Bug Protection

Sunscreen is essential for spending the day out in the sun, so be sure to regularly reapply it throughout the day. Sprays and stick formats often come in handy sizes that are easy to use when your out on the trail. Bug spray can be useful depending upon where you’re headed.

Inside your tent, it’s probably healthier for you to use bug nets over the vents or to set your net up over the opening and to sleep with it open, rather than spraying chemicals in a confined space.

Sunglasses

hiker-with-sunglasses

Sunglasses are also an important addition to your summer hiking outfit. Certain landscapes reflect the sun’s light more than others and the glare that is given off can make your hike unpleasant to say the least.

Sunglasses will help to protect your eyes from the sun’s glare and reduce eye strain. It is best to purchase a good, solid pair of sunglasses with decent coverage.

You should also invest in a cord to make sure that they don’t fall off, or get knocked off by any vegetation or left up a hill. 

Local Climate

If you’re traveling some distance or are going summer hiking abroad, be sure to take the local climate into account. Check the data for recent years, and if possible find out about the specific area.

If you’re uncertain, you may want to pack a few lightweight extra layers just to be sure. For example in countries such as the UK, it’s not uncommon to have a very cold and wet day during the summer months.

If you are traveling to a mountainous part of a country, bear in mind that they can also have their own unique micro climates that can vary greatly to the climate in the neighboring flatter regions.

Summer Hiking Tips

When you’re hiking in hot weather, be sure to drink water regularly and take breaks in shaded areas whenever possible.

How Do Water Filters Work and Some Essential Tips

Make sure that you are aware of the first signs of heat stroke which can include nausea, dizziness, confusion and a lack of perspiration even when temperatures are high. Don’t take any unnecessary risks and if you feel unwell stop and try to cool down.

If you usually use water bottles, you may like to try out a hydration bladder, an easier way to transport larger amounts of water.

The drinking tube allows you to drink without stopping, which could help you to drink more regularly out on the trail and to stay more hydrated than drinking less frequently from a bottle.

Hydration bladders also take up less space than water bottles, so if you’re looking to take a smaller backpack out with you for summer hikes with less equipment, then they could also be a good choice for that too.

When possible try to choose trails with plenty of shaded areas or creeks so you can cool down on the trail.

Hiking early in the morning or in the evening can also be a better idea when temperatures are lower, try to avoid the hottest times of day or plan to take a long break somewhere cool or near a creek or lake.

Water Purification

Trails with creeks can also provide refilling points, so don’t forget to take your water purifying kit. This will allow you to lower your pack weight by carrying less water and a lower pack weight means less exertion. Just be sure to have a backup water refill point, just in case.

Be careful when hiking at high elevations in the heat, higher elevations have lower oxygen concentrations and the effect of UV rays are stronger.

Also, if you’re on a high up exposed area and you start to suffer from the heat, you’ll be further away from any sources of assistance.

Conclusion

Now you know how to dress for hiking in summer to really make the most of the warmer weather. Remember, even on cloudy days it’s still important to protect yourself from UV rays and a good summer hiking shirt or blouse can keep you cool as well as safe.

Your clothing and footwear choices will generally be lighter weight, however take care not to compromise on safety, especially if you’re heading out into the backcountry.

Accessories are especially important including hats, neck protection and sunglasses. Wherever you choose to go hiking this summer, be sure to take plenty of sunscreen and drinking water.

Research your destination well ahead of time and pack accordingly. If you’re heading off into any remote areas, make sure that you stay safe and always have a backup plan.

How To Pack An External Frame Backpack

Although external frame backpacks are much less common these days, and arguably less useful than internal frame backpacks, they still have plenty of advantages and can even be considered preferable to using an internal frame backpack in certain scenarios.

External Frame Back Pack Inside

However, before you consider dusting off your old external frame pack for your next hike, let’s take a look at how to pack an external frame backpack and why it’s important to get it right.

We’ll also consider the merits and the shortfalls of external frame backpacks, as well as where and when they can be preferable to use.

Differences Between Internal and External Frame Backpacks

Most obviously, external frame packs have a visible outer frame. External frames tend to be longer and bulkier than internal ones and the pack sits farther away from your torso, with the load positioned higher.

Most internal frame packs are more compact, and they usually have one or more aluminum stays. These rods support the pack load close to your back and can be bent to fit your spine curvature, for extra comfort. Internal frame backpacks carry weight lower than external ones.

As for the pack itself, internal backpacks tend to have a large internal capacity with one or two main compartments. There may also be a couple of attachment points for equipment.

External frame packs generally offer more sections, compartments and pockets, and equipment can be attached directly to the frame itself. They tend to have large load capacities which can be a positive.

Another noticeable difference is their price. External frame backpacks are less common today and they usually come at a cheaper price than their internal frame counterparts.

In fact, there are a great many more internal framed backpacks available for purchase, whereas finding a decent external frame backpack takes a certain amount of tracking down.

Advantages of External Frame Backpacks

In the vast majority of cases, in our opinion, an internal frame backpack, like the one in the image below, is going to be the most preferable choice.

Best Backpacking Packs for Women

They’re streamlined, weigh less, move with your body and maintain your natural center of gravity. Without a doubt, internal frame backpacks are much better when it comes down to balance. 

However, we’re all different and sometimes it simply comes down to a matter of personal preference. Preference aside though, external backpacks do have some notable advantages over internal frame backpacks. Here’s some of the main advantages of external frame backpacks.

Ventilation

As external frame backpacks hold the weight higher, with the pack further away from your torso, the frame area provides an excellent ventilation corridor.

This can help to keep you cool on hot days and prevent a build-up of perspiration between your back and your pack.

Heavy Loads

External backpacks are better for very heavy loads, thanks to their solid frame and large capacity.

They make heavier loads easier to carry, thanks to their better weight distribution, see below.

Better Weight Distribution

As your pack load sits higher on your back with an external frame pack, this allows for a better transfer of weight to your lower body.

This in turn, makes it easier for you to walk with a straighter back, unlike internal frame backpacks where the lower load encourages you to lean forward slightly, in order to better transfer weight to your lower body.

Carrying Bulky Items

If you’re looking to carry excessively bulky items, then an external frame backpack can make doing so much easier.

You can strap items to the frame directly, without hindering your access to the rest of your gear inside your pack. The larger pack capacity can also be useful for larger items too.

When, Where and Why you Might Use an External Backpack

Consider the main advantages of external frame backpacks and it becomes apparent that they do still have their uses.

In certain scenarios external frame backpacks can provide an equally good or even better choice than an internal frame backpack.

So, when do external frame backpacks make a better choice than internal ones? External backpacks can be the better choice year-round, your choice will mainly depend upon other factors.

They can be great in winter for carrying extra equipment and bulky layers. They can also be a good summer choice for transporting heavy extra water on trails that don’t have any refill points.

Plus, don’t forget their excellent ventilation that will prevent perspiration from building up and down your back.

Location will narrow down your choice of backpack significantly. You don’t want to be covering any tricky terrain with an external frame backpack.

They are best for flatlands and actual trails as the frame can get caught in any undergrowth, you may get through just fine with your internal frame backpack.

Any other type of terrain will probably be better suited to an internal frame backpack, which will help you to maintain your balance by keeping your natural center of gravity, with your load held close to your body.

In general, you’ll probably prefer to use an external frame backpack over an internal frame one, when you’re looking at taking a long flatland trail with a considerable load.

You might also want to consider using one for any special equipment you may wish to take on certain trips such as fishing or hunting gear, camera accessories or if you’re attempting family camping off grid.

Basically, any trip where you will need a large capacity and the ability to strap on larger items.

How to Pack an External Backpack

So, now you may have a trip in mind where an external frame backpack would be ideal. But just how do you go about packing an external frame backpack?

Well, the truth is, pretty much like an internal frame one, albeit with a few small differences. Thanks to their external frame, external frame backpacks can appear more forgiving of your packing technique.

The video below highlights some important differences between packing an internal and external frame backpack, worth a look!

The weight isn’t right up against your back, it’s distributed better to your lower back and you’re not going to risk having any items digging into you through the back panel.

However, as external backpacks do not hug your body like internal frame ones, if you don’t pack it correctly, its top heavy design will cause you to become uncomfortably unbalanced.

For this reason, it is recommended that you pack your heaviest items near the top and close to your back, when packing an external frame backpack.

This will help to ensure that the load is correctly distributed to your hips through the frame, allowing you to support the heavy load with a straight, upward stance.

Packing an External Backpack

  1. Place any lightweight items that you won’t need access to throughout the day, such as your sleeping bag, at the very bottom of your external frame backpack.
  2. Medium weight items should then be placed in the middle and furthest from your back.
  3. Place the heaviest items at the top of the pack, next to your back.
  4. Use the side pockets for go-to items you’ll need throughout the day such as drinks, snacks, waterproofs and maps.
  5. Strap any awkwardly shaped, long or bulky items to the frame itself, making sure that they are correctly balanced and securely attached as not to impede your gait by swinging.

Water, pans, and your stove are likely to be among your heavyweight items. By packing them near to your upper back, the external frame will be able to transfer the load more effectively to your hips.

If you pack them elsewhere, you risk the load pulling back on your shoulders. Not only will this cause discomfort, it’s also going to put you off balance.

In any case, don’t forget to keep any emergency items close to hand, in an easily accessible place and remember to pack in layers, securing heavier, harder items with softer ones to prevent them from moving around within your pack.

Any movement from the interior of your backpack could also set you off balance, causing discomfort and possibly even a fall. 

Further Resources

Why I still pack an external frame backpack – A good article on one person who likes the external frame backpack.

How to pack and hoist a backpack – An interesting article on packing and loading a pack on your back from the folks in REI.

Conclusion

If you’re looking to carry a lot of equipment over flatland trails, then an external frame backpack is going to be a good choice for carrying the extra bulk.

Think western desert flatlands and trail hiking in general. With their superior weight capacity and ventilation, external frame backpacks also make easier work of carrying extra water in the heat.

Just be sure you know how to pack an external frame backpack correctly to ensure optimal weight redistribution and balance.

However, for other terrain with your average hiking gear, you’re probably going to be better served by your regular internal frame backpack for better balance and ease of movement.

Although if you get the chance, try out an external frame backpack on your next appropriate trekking trip, it may change your mind about the old external frame style backpacks, or it could just reconfirm your faith in today’s internal frame lightweight and compact backpacks.

  • 1
  • 2
  • 3
  • …
  • 16
  • Next Page »
  • Facebook
  • Pinterest

What are you looking for?

Copyright © 2023 · Cool Hiking Gear

Cool Hiking Gear is a participant in the Amazon Services LLC Associates Program, an affiliate advertising program designed to provide a means for us to earn fees by linking to Amazon.com and affiliated sites.

  • About This Site
  • Privacy Policy
  • Affiliate Disclosure Statement
  • Contact
This website uses cookies to improve your experience. We'll assume you're ok with this, but you can opt-out if you wish.Accept Read More
Privacy & Cookies Policy

Privacy Overview

This website uses cookies to improve your experience while you navigate through the website. Out of these, the cookies that are categorized as necessary are stored on your browser as they are essential for the working of basic functionalities of the website. We also use third-party cookies that help us analyze and understand how you use this website. These cookies will be stored in your browser only with your consent. You also have the option to opt-out of these cookies. But opting out of some of these cookies may affect your browsing experience.
Necessary
Always Enabled
Necessary cookies are absolutely essential for the website to function properly. This category only includes cookies that ensures basic functionalities and security features of the website. These cookies do not store any personal information.
Non-necessary
Any cookies that may not be particularly necessary for the website to function and is used specifically to collect user personal data via analytics, ads, other embedded contents are termed as non-necessary cookies. It is mandatory to procure user consent prior to running these cookies on your website.
SAVE & ACCEPT