coolhikinggear.com

  • Men’s
    • Best Hiking Rain Jackets for Men In 2024
    • Best Men’s Hardshell Jackets Of 2023
    • Best Hiking Pants For Men In 2023
    • Best Ultralight Rain Pants For Men
    • Best Men’s Daypacks For Hiking In 2023
    • Best Backpacking Backpacks For Men In 2023
    • Best Base Layers For Men In 2023
  • Women’s
    • The Best Hiking Rain Jackets For Women In 2023
    • Best Women’s Hardshell Jackets Of 2023
    • Best Hiking Pants For Women In 2023
    • Best Ultralight Rain Pants For Women
    • Best Daypacks For Women
    • Best Backpacking Backpacks For Women In 2023
    • Best Base Layers For Women In 2023
  • Hiking Accessories
    • Best Hiking Poles
    • Best Trekking Pole Monopod Camera Mount
    • Best Hiking Headlamps
    • The Best Hiking Watches In 2023
    • The Best Hiking Gloves In 2023
    • Best Hydration Bladders For Hiking In 2023
    • Best Compass For Hiking Our Top Picks
    • Cool Hiking Gadgets
  • Footwear
    • The Best Men’s Hiking Boots In 2024!
    • Best Hiking Shoes For Men In 2023
    • The Best Women’s Hiking Boots In 2023!
    • Best Hiking Shoes For Women In 2023
    • Best Hiking Sandals
    • Best Hiking Sandals For Women in 2023
  • Hiking Guides and Resources

How To Tie Hiking Boots For Downhill

While it’s important to have securely tied hiking boots throughout the duration of your hike, it’s even more important when you’re faced with steep or sustained downhill sections.
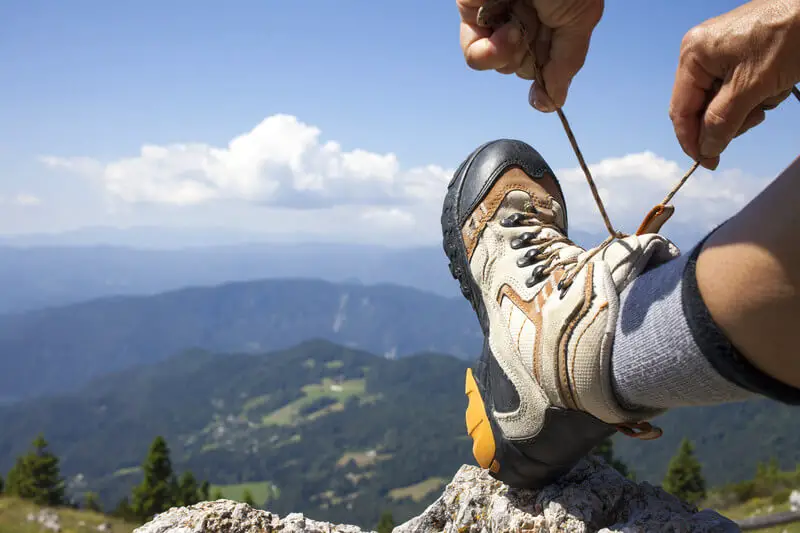
It’s essential to know how to tie hiking boots for downhill hiking, so let’s refresh some basics and take a look at some of the best ways to tie hiking boots.

Why it Matters

You may think that tying your hiking boots should be no different from tying your everyday footwear for the office or about town.

Aside from the differences between hiking boots and everyday footwear, you also need to consider the terrain and location where you’ll be hiking.

Apart from all but the gentlest strolls on short paved trails, you’re going to be relying upon your hiking boots to protect your feet and potentially prevent deadly slips and falls.

Any variations in terrain, problematic obstacles, including slippery mud patches or boulders, ascents, descents and contouring hills, not forgetting difficult rocky screes, will all require your hiking boots to provide you with a secure footing complete with grip and traction.

If your hiking boots are not correctly laced and tied, your feet will likely move within your boots which will undermine their grip and stability.

Furthermore, if your feet aren’t secure inside your boots, continual movement can lead to rubbing and blisters which will likely ruin your day, no matter how stunning the scenery, if you’re experiencing fresh pain with each and every step.

Blisters and rubbing aside, consider the consequences of a slip or a fall in an isolated area. The likelihood of such an occurrence can be greatly reduced by ensuring that your hiking boots are correctly tied to provide you with a maximum of stability.

When you’re faced with lengthy downhill sections, your feet can slide forward inside your hiking boots, potentially injuring your toes.

Ensuring that your boots are correctly tied will also help to provide greater ankle support and reduce ankle fatigue over challenging terrain and long distances.

So, now you know the importance of making sure your hiking boots are correctly tied, especially for downhill hiking, let’s take a look at how it should be done. 

How to Tie Your Hiking Boots

When you’re tying your hiking boots, it is of the utmost importance to separate the bottom section from the ankle collar section.

This will allow you to adjust each part quickly and independently whilst out on the trail, so you can ensure that your foot is stable and far back enough into the heel section, as well as being able to increase ankle support and reduce fatigue by tightening the upper section independently as necessary.

In order to tie your hiking boot correctly, you’ll need to focus on the part where the collar meets the boot in the lower ankle area. This should be easily noticeable by a change from eyelets to hooks in your boots’ lacing system.

Surgeons Knot

Where your laces cross to meet the first hooks that are located closest to your heels, you should tie a surgeon’s knot. Basically, this involves wrapping the laces around each other twice and then pulling them tight. See the video below for a more detailed look at tying a surgeons knot.

You can then place them around the hooks, having secured your lower foot. You want your lacing to be tight enough to keep your foot in place, without being too restrictive.

Once you have passed the laces through the first hook, repeat the previous step with another surgeon’s knot, before passing through the next set of hooks, then finishing off by tying your laces as normal.

The surgeon’s knots will keep the tension in your laces. It’s important when you tie your laces to always make these three sets of knots for maximum security.

When you follow this technique you’ll greatly reduce the risk of toe rubbing and slipping on downhill sections. If you feel you need extra support you can simply tighten the laces and then retie your final knot.

Alternatively, on uphill sections, you may wish to loosen the top section should the ankle support begin to dig into the top of your leg.

By tying your hiking boot laces in this manner, you can quickly and easily adjust the tension of both the ankle area as well as the lower foot area, reducing your risk of slipping or getting blisters.

For general hiking on the flat, once you have tied your hiking boots in this manner, your feet should be secure in your boots for the whole day ahead.

New Boots

If, however, your hiking boots are new, you may have to make a few minor adjustments during the course of your hike. This is normal and will be necessary until your new laces have used up all of their slack.

On more challenging terrain, you may wish to alter the tension to feel what works best for you and your hiking boots. While it can initially seem like overkill, with time you’ll instinctively get a good feel for how your lace tension is holding up and adjusting it when necessary will become second nature.

If you’re having difficulty visualizing quite how the finished result should look, then check out this other excellent video provided by hiking specialists REI.

You can again see how to tie your hiking boots using a surgeons knot, as discussed above, as well as other neat tips and tricks, such as window lacing (to avoid certain pressure points) and how to lace your boots to avoid toe pain.

Conclusion

It’s an extremely simple yet effective detail, however, learning how to tie hiking boots for downhill hiking can really make a huge difference.

While tying your hiking boots correctly will make your hikes safer and more enjoyable, if your feet still ache when wearing your hiking boots, you may need to change your size or style.

Remember that new hiking boots can take a while to break in fully, so don’t take them out on any long hikes straightaway during their break in period.
How To Waterproof A Backpack

Many backpacks are now made from water-resistant materials, however, water can still get into your backpack via stitching and seams.

It is essential to know how to waterproof a backpack before setting off on your hike. Sadly, you can’t always rely upon manufacturer’s water resistant backpack ratings.

Whether you’re expecting wet weather or not, it makes sense to always be fully prepared for any sudden downpours, because once your pack gets wet through so do your clothes, sleeping bag, gadgets and supplies, essentially ruining your trip and possibly causing some expensive damage.

If you can’t change into dry clothes for the night, you’re not only going to be extremely uncomfortable, you’ll also be risking hypothermia.  

Here’s what you can do to keep your backpack and its contents dry. While it may look like a lot of preparation for a few drops of rain, getting into the habit of preparing your backpack and its contents will mean you’ll have less to worry about should the weather turn unexpectedly.

Leaving you to make the most of your trip, safe in the knowledge you can get changed into warm dry clothes at the end of the day, no matter how torrential the downpour.

Proofer Spray

If you own a water-resistant, treated backpack, a few extra sprays of water proofer every so often won’t do any harm. Of course, this won’t make any difference when faced with a heavy downpour.

However, it can help in those first few moments while you get your rain cover set up. It can also help to keep your backpack dry in damp conditions, encouraging water to bead and drip away rather than sit on your pack fabric and slowly sink through. A useful first line of defense, although not much more.

Backpack Rain Cover

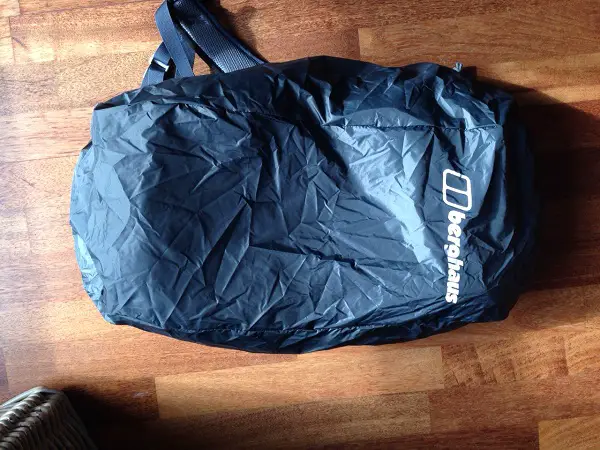
The majority of backpacks tend to come with a built in cover or one that you can purchase separately. A backpack rain cover should keep the worst of the weather off your pack, although it’s still not going to make it fully waterproof during heavy downpours.

Day Pack With Rain Cover On

Suitable for light rain and drizzle as well as waterfall mists, backpack rain covers should be quick and easy to put on in a hurry. You shouldn’t, however, rely solely upon your rain cover to keep your pack contents dry.

This is especially important when you’re out backpacking overnight and in need of a dry sleeping bag and a change of clothes. So, while rain covers are handy, you’ll need to go one step further and waterproof your essential pack contents.

Personally, I think these are not a great option, especially if they are not tied to your pack as part of the design. Often with rain, comes wind, and wrestling with a backpack rain cover in the wind to get it to fit to a backpack is not fun, and even when tied on, it can still blow off in strong enough winds

Backpack Liner

A backpack liner is an excellent way to protect your entire backpack contents. While it’s also advisable to protect individual items too, using a pack liner is an efficient way of providing your gear with an extra layer of protection against wet and damp weather.

Whilst a backpack liner probably won’t keep 100% of rain out, it is an excellent way to ensure that water does not enter your pack from the ground.

While your rain cover should protect your backpack pretty well from rainfall, it’s all too easy to set down your heavy pack in the damp after a long day’s wet hiking.

And if you’ve got your nice down sleeping bag unprotected at the bottom, it’s unlikely to stay fully dry for long.

Backpack liners can vary in price and dimensions. In its most simple form, you could just use a bin liner or a regular plastic bag to line the inside of your backpack’s main compartment.

A simple, easy step that’s sure to go a long way towards keeping your gear dry. However, for important or fragile items, you going to need to go a step further.

Dry Bag

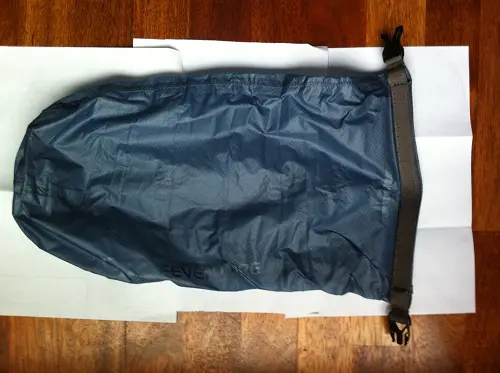
Dry bags are usually used for watersports such as kayaking. They seal completely to keep water out and are designed to keep your possessions dry should they take a tumble into the water.

Dry Bag 3

While this may sound like overkill for a hiking trip, remember, it’s not uncommon to experience a sudden flash downpour, or to have a leaky water bottle or hydration bladder.

In any case it’s better to be safe than sorry and once you’re in the habit of packing for the worst case scenario then it will soon become second nature. Dry bags are my go to choice for this purpose.

If dry bags are a bit too pricey and take up more space than you can spare, check out our next item, the ever popular Ziplock bag.

Ziplock Bags

Chances are you probably already use Ziplock bags for your food supplies, toiletries or various other uses. They’re inexpensive, seal quickly and easily and they’re also waterproof.

So, why take the risk? Ideally, you would have a few different sized bags, a large one for your water bladder or bottle of water and another for your sleeping bag, as well as smaller ones for clothes, supplies and gadgets.

Remember even when the rain has stopped, until you actually set up camp, you’re not going to be able to get anything out of your backpack very easily without getting water on it, and then water into your backpack.

Having individual items packed in Ziplock bags, means you can open your backpack after the rain without having to worry they’ll get damp while you set up camp.

You can also check your phone or gadgets without having to remove them from the bag.

If you hike in an area with high precipitation levels, you may want to purchase a specially designed electronic gadget protective cover so that you can make full use of your phone or tablet without having to remove it.

Using Ziplock bags can also be a smart way to section your gear as well as ensuring your pack contents stay dry. They can help to keep your camp clothes clean and protected ready for evenings, as well as keeping any smelly items confined to their own bag.

Typically zip loc bags are see through which is handy, so you can see the contents without opening the bag.

Further Resources

How to go Backpacking in the Rain – An informative and good all round article on backpacking in the rain from the folks at REI.

Conclusion

When you’re out on the trail it is essential to know how to waterproof a backpack and to ensure that your clothes, equipment and sleeping bag do not get wet or damaged by the rain.

Wet clothes and low temperatures can lead to hypothermia and it’s important to be able to change into something dry to warm up.

I personally use a combination of all the above for my backpacking trips, but if I had to pick just one, I would go with dry bags.Hiking in the rain can be a magical experience, but it can also be unpleasant.

However, the damp, mud and unrelenting rain needn’t put such a damper on your spirits if you’re prepared and confident in the knowledge you can dry off with your pack contents safely protected.

How To Fit Hiking Pole Replacement Grips And tips

If you use trekking poles or a hiking pole, chances are with a fair amount of use the tips will need replacing. You may also like to customize your poles by changing out the grips, or replacing them if they’ve been damaged.

So let’s take a look at how to fit hiking pole replacement grips and tips, for an easy way to extend your trekking poles’ lifespan.

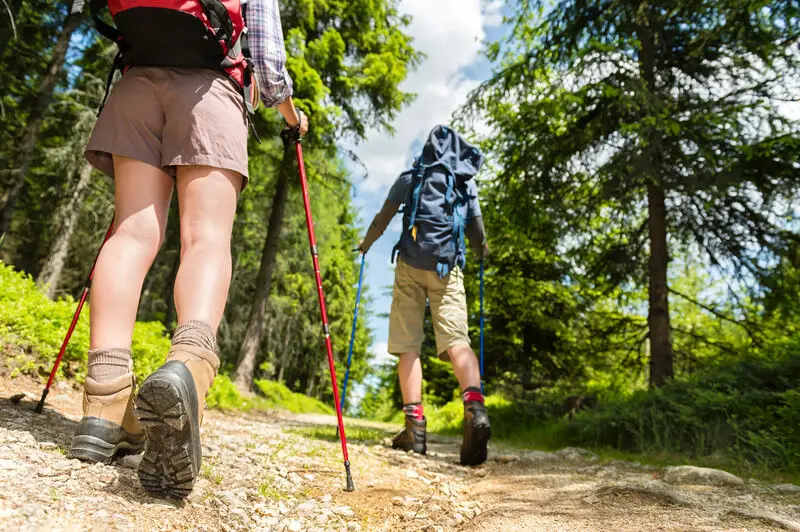
In case you don’t already own a pair, trekking poles are useful for hiking, especially over tricky, uneven ground. They can also be great for descents, helping ease the strain off your knees and providing extra security and grip.

The same goes for ascents and obstacles such as rocky areas and creeks. Of course, not everyone uses trekking poles on the trail. They can, however, also be an essential part of certain shelters such as tarp tents, or serve a variety of on-the-spur uses.

Trekking poles are usually sold in pairs, but you can purchase individual hiking poles, it all comes down to a matter of preference and how you intend on using them.

Be aware that a good, lightweight pair of trekking poles can be quite expensive, so it’s best to consider how to fit replacement tips and their availability before purchasing, to ensure the maximum lifespan of your product.

You can see our top hiking pole recommendations here, there are a lot of great options for every type of budget.

Replacement Trekking Pole Tips

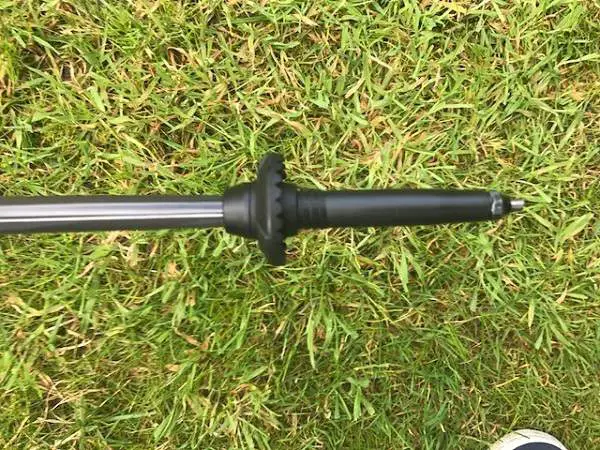
Trekking pole tips protect your poles from hard-surface damage. Replacement trekking pole tips vary in length and diameter.

Alpine Carbon Cork Trekking Poles Carbide Tips

In general, they consist of a heavy-duty rubber housing that contains the actual tip and fixes it onto the end of the pole.

You’ll often find that it’s the housing that wears down first, and removal can become pretty difficult if you allow them to wear down too much before changing them.

So, make sure you change out your tips once they become worn, the longer you leave them the more difficult it is likely to become to remove them, and in cases of severe wear, you may risk actually damaging the pole itself.

We go into the how further down the page, but first let’s get some background on …

Replacement Trekking Pole Grips

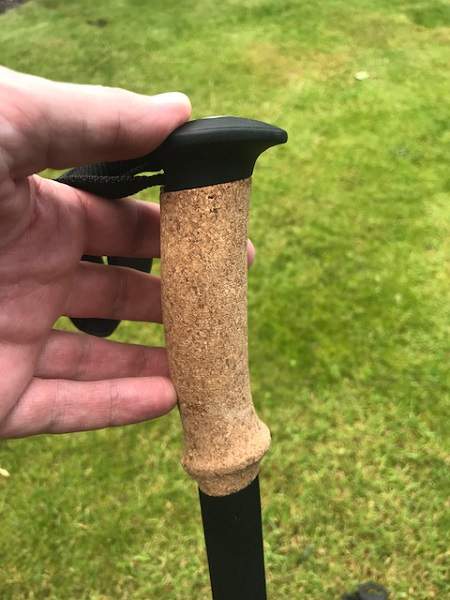
Trekking pole grips are located at the top of your poles and provide you with a comfortable grip to hold. They are made out of a variety of different materials such as cork, foam or rubber.

Alpine Carbon Cork Trekking Poles Cork Handle

Your choice of grip will be determined by your personal preference, as well as what kind of climate you intend on using them in.

For example cork or foam grips absorb moisture well so you will still get a good grip on hot days, whereas rubber can become slippery, but it is a good choice for colder climes, insulating hands from the cold and shocks.

In most cases, you probably won’t have to replace your grips, except if they become damaged.

Damaged grips aside, you may choose to change your grips for others that greater suit your personal preferences, resulting in customized trekking poles. Weight, comfort and looks are typically the main factors.

Again, we go into the how further down the page but a point of note first.

Finding the Right Replacement Grips and Tips

A word of warning here, you may be best advised to check out the availability of replacement tips for your trekking poles before you purchase them.

For the rest of us who already have their trusty pair and are looking for replacements, there are some brand specific and other generic types available.

Basically, trekking pole diameters tend to vary between manufacturers, so where possible go for a brand specific replacement tip or grip for the best results.

However, as all trekking poles tend to taper off towards the end, you will often find that one replacement brand tends to fit another.

While it’s pretty rare for one type to be completely incompatible with another, some may be a little mismatched and you may find that the tip can sit a little differently than was originally intended.

Although this is unlikely to affect the usage of your poles, you might have to bear in mind any new height modifications when adjusting your poles.

In any case, one thing I will say, it’s definitely well worth trying out changing your trekking pole tips, rather than having to replace the poles themselves.

If your poles happen to size a little differently and you end up trying a few different types, it’s still going to be much cheaper than paying out for new poles unnecessarily.

How Much do they Cost?

Replacement trekking pole tips generally cost less than $10, some much cheaper, others nearer the ten mark. Replacing your grips can cost you a bit more, but around $20 is probably a reasonable figure.

Personally, due to the hassle of changing out trekking pole grips, I’ll only do it for some real good, comfortable grips, so I’d prefer to spend good money on a set of replacement grips that I really like if I’m going to go to the time and effort of changing them out.

How to Fit Replacement Trekking Pole Grips and Tips

As the saying goes, a picture speaks a thousand words, so I thought I’d share some useful videos that will allow you see what exactly is involved in changing out your hiking pole tips and grips.

Just to make things clearer, I’ve also provided a rundown of the main points you need to be aware of when you’re changing your trekking pole grips and tips.

How to Replace Trekking Pole Tips

The easiest and arguably the best way to change out even difficult trekking pole tips is to use boiling water and a pair of pliers or a crescent wrench.

The video below is a good guide to show you whats involved.

Steps

  1. Separate your pole, remove any baskets and submerse the end in boiling water for around 20 seconds.
  2. Remove using a pair of gloves and use a pair of pliers to pull or twist off the tip. The boiling water will help to soften any adhesive.
  3. If you’re having difficulty, try taking a crescent wrench and adjust it so it slides over the pole but not the tip.
  4. Run the wrench forcibly down the pole so it hits the tip all around with force. Repeat several times if necessary, or try heating it up again in case of difficulty.
  5. Replace the tip with the new one, you can leave any leftover adhesive.
  6. Bang the end of the new tip on a hard surface several times to be sure that it’s correctly and securely in place.

Note: if you’re having any major difficulties, maybe you’ve let your tips wear down too far and it’s proving impossible to get them off, then you might want to try sticking your pole in the freezer. This can help by causing the metal to contract.

Try it out after boiling the tip, if you’re still having problems. If nothing works, you could as a last resort try cutting through the tip with your Dremel or hacksaw, just be careful not to damage the pole itself.

Yet another useful video with tips below 🙂

How to Replace Trekking Pole Grips

Replacing your trekking poles grips is not a particularly complex task. It can, however, take time to get the job done right, with most of the time-consuming bits being related to removing traces of the old grip and its adhesive.

As above, the video below is a good guide to show you whats involved. We listed out the steps from that video below the video, for those who prefer to read through them.

Steps

  1. Firstly, you want to cut the old grip off, by making an incision down the length of it.
  2. Once you’ve pulled off the main part, saw off the top of the old grip with a hacksaw or a Dremel.
  3. You’re probably going to have various bits of stuck-on grip and adhesive that you’re going to have to use plenty of elbow grease on. Once you’ve got most of the remnants off, try soaking the area with lighter fluid and leave it to work for ten minutes. Peel off any remaining adhesive film.
  4. Be sure to thoroughly sand the area where your new grip is going to go. This will ensure a better contact and remove any last stuck on bits. Make sure you pay particular attention to the top of the pole where you cut off the top of the old grip. You want to make sure this is sanded off nice and smooth, or else you’ll risk damaging your new grip.
  5. Don’t forget to rinse out your pole to get rid of any dust or debris.
  6. Slide on your new grip.

Note: If you’re having difficulty getting your new grip to fit (it may be made for a slightly narrower pole), try warming it in the oven for a few minutes. The heat will help make it more pliable.

If it’s still proving a challenge, you could also try putting your trekking pole in the freezer so it contracts, then trying again with a warm grip.

It can also help to make a little mark when you remove the old grip so you know how far down you’ve got left to aim for when fitting the new grip.

If you didn’t you can check if the top wiggles about any, to make sure it’s fully in position.

Conclusion

Knowing how to fit hiking pole replacement grips and tips can extend the life of your trekking poles, saving you a substantial amount of money.

Changing out your trekking pole grips and tips can also allow you to customize your poles, so they meet your weight, comfort or design criteria.

Both are relatively easy to do, although changing out the grips can be a little more time consuming.

If you’re thinking of buying trekking poles, do your homework first and make sure you can get replacement tips easily, to keep your poles in prime condition.

Best Tent For Hot Weather

Summer, with its long days and sunny skies, can be one of the best times to go backpacking. But when things start to heat up a little too much, you might feel uncomfortable in your regular tent.

So, what is the best tent for hot weather you may well ask? Read on and find out what makes for the best way to spend a night’s backpacking when the mercury rises. 

Season Specific Tents

Tents, like your sleeping bags and jackets are also designed to take into account the seasons.

When you’re purchasing a tent, be sure to check out its season rating to make sure that it’s appropriate for the time of year during which you intend to be using it most.

When you’re choosing a tent, your main choice will be between a two season, a three season or a four season tent. There is also a sort of halfway tent rated as a three to four or a three plus that comes somewhere between the two.

For very hot weather, you’re going to be better off selecting a two season tent.

Two season tents are generally mainly constructed of mesh fabric for improved air circulation during the hotter months, but they are only designed for fair weather camping.

If you’re likely to be dealing with a lot of rain as well as the heat, you may be better opting for a three season tent with functional mesh panels and a good rainfly for improved protection.

Three season tents can withstand downpours and most weather scenarios, however, they are not quite as sturdy as four season tents. Three season tents can be tough enough though, I once used one in winter and it worked pretty well.

Four season tents tend to have less mesh panels and can get rather stuffy during summer or on warm days. They are designed to withstand colder, harsh weather conditions including strong winds and snow.

Best Type of Tent for Hot Weather

Aside from a tent’s seasonality, you’re going to need to focus on a range of features depending upon the sort of hot climate you will be camping in.

Dry heat, such as you’ll experience in desert-like conditions, is very different from humid, tropical heat as you might encounter in a rainforest.

The features that your tent will need will ultimately depend upon which kind of heat you’re faced with on your backpacking trip.

Tent Features for Hot & Humid Climates

When you’re looking for the best tent to spend the night backpacking in hot, humid conditions you’ll need to ensure that your tent is predominantly mesh with a rainfly cover to hand when needed.

Tent-Door

You’ll need to have continued airflow even when you’ve got your rainfly on to prevent moisture build-up within your tent.

A fan can help improve air circulation and angled tent windows or ones with extended awnings over the windows, will allow you to leave them open in rainy conditions, thus improving air flow.

Bear in mind that hot humid climates are home to various insects, including mosquitoes, so mesh tent walls, are really are going to be the best option here, allowing air to enter while keeping the insects out.

You may wish to go for a tent with enough space to sit comfortably in, as if there are a lot of mosquitoes about in the evening, you’re going to need to spend more time inside your tent to avoid being bitten.

Even with excellent insect repellent, it can just be unpleasant to be surrounded by mosquitoes and bugs. 

Wet and humid conditions also mean that you’re going to need a tent that has a ground sheet or ideally a footprint, to ensure that moisture stays out of your tent from the ground below.

Make sure that you have a good fitting rainfly and that all seams are weatherproofed. 

Tent Features for Hot & Dry Climates

When you’re backpacking in hot, dry conditions, you’re going to need to try to shade your tent as much as possible from the sun.

Although not as big a deal at night, it is relevant during the day, some place can heat up very quickly as soon as the sun is up.

Your rainfly can be used to do this although a tarp stretched above will better protect your tent from the sun, while leaving the mesh sides free to allow air to circulate.

If possible, make use of any shade provided by any structures such as walls, or vegetation.

Advantages of Purchasing a Tent for Hot Weather

You may think that purchasing a tent especially for summer use may be an unnecessary extra expense.

However, doing so will make your summer backpacking trips much more agreeable, and will help to improve your quality of sleep on the trail.

It is not uncommon for many backpackers to only camp out in fairer weather anyway, not too many people want to head out into heavy rain and wind to camp.

In addition, you will find that tents designed primarily for summer use are lighter than your average tent, meaning a lighter load to carry.

The vast majority are also cheaper than tents designed for colder weather conditions.

Hot Weather Tent Price Range

Prices for small, basic mesh tents vary, however you’re probably looking at prices ranging from around $80 for simple models, of questionable quality, to much higher-priced ultralight models designed for fastpacking and ultralight hiking at several hundred dollars.

Don’t forget if you’re going for the most basic, cheapest option, you may need to add on a ground sheet or tarp, and it could be a good idea to pick up a bug net just in case you experience any quality control issues.  

Other Options for Hot Weather Camping

When the weather’s warm and the nights are long, you could spend the night under the open skies with just your sleeping pad and liner or a light sleeping bag.

Some people can’t sleep well in the open without the security of a tent or other type of structure, while others have no difficulty with sleeping in the open air.

If insects are going to be an issue, then again remember that you will also need a bug net.

Other great hot weather sleeping options include pitching your tent with only the rainfly and footprint. This way you’ll have a the familiar tent feel, but with plenty of space for air to circulate between the fly and the ground sheet.

Ideal for those who like the sensation of sleeping surrounded by a structure, but with plenty of air circulating. The rainfly will also provide shade from the early morning rays as things start to heat up.

Another main advantage is you don’t need to purchase another tent, just use what you already have for the structure, rainfly and footprint.

You could also make yourself a simple tarp shelter to lie under. Bear in mind this will not protect you from any damp, although it will keep the sun off you, and you can angle it to protect you from the first warming rays.

While the last two options can be rather uncomfortable and don’t provide any bug protection, possibly the best alternative solution for a lightweight way to sleep on a hot summer night is to invest in a hammock tent with bug netting.

As you’ll be sleeping suspended off the ground you will be more comfortable and protected by the netting from any bugs. Just make sure that your planned stopover point has plenty of sturdy trees to attach it to.

You could also sleep on the ground in either a bivy sack, a breathable barrier sack, in your sleeping bag, or in a bug shelter, made from bug netting held up with trekking poles.

Conclusion

The best tent for hot weather really depends on the kind of heat that you’re experiencing. In areas of high humidity you’ll want to keep yourself and your possessions as dry as possible, with extra protection against mosquitoes and other insects.

In drier heat, you’ll need to try to keep your sleeping quarters shaded and aerated. Purchasing a summer tent makes good sense as they are lighter and often fairly inexpensive.

However, there are plenty of other great options available, such as hammock tents or making use of your rainfly with your footprint. A good bug net can be added to any set up plus a ground sheet if you’re in a humid area.

So, in fact the best tent for hot weather may not actually be a real tent at all, but a combination of various tent elements set up to your liking, tailor-made to deal with the challenges brought on by the climate where you’re hiking.

And most importantly a set up that you feel comfortable and secure enough to sleep in.

How To Carry Water While Hiking

It goes without saying that’s it’s important to have an adequate supply of drinking water when you’re out on the trail.

However, it’s not quite immediately as evident how to carry water while hiking, once you’ve figured out how much you’ll need, especially to folks new to hiking.

How Much Water to Carry When Hiking

The amount of water you’ll need to carry with you varies according to several different factors, and how much you’ll need can influence your choice of how you carry water while you’re hiking.

Finding the right amount can be tricky for beginners, take too much and you’ll be weighed down unnecessarily, take too little and you’ll risk dehydration.

Here’s some factors you should take into account to help you to decide how to carry your water for your hike.

Once you’ve taken all of these variables into account, you should have a better idea of how much water you’ll need to take with you and consequently how to best carry it.

Length of Your Hike

The longer your hike, the more water you’ll need to factor in. Don’t forget when you make the change from a day hike to an extended backpacking trip, you’ll have to factor in the evening and morning time’s hiking refreshment.

It won’t suffice to simple double the amount you take with you on a day hike, and you may need to factor in water sources as you travel.

Temperature

It is kind of stating the obvious, but you’ll need to drink more water in hotter areas or during hotter periods of the year. to replace extra water lost through perspiration.

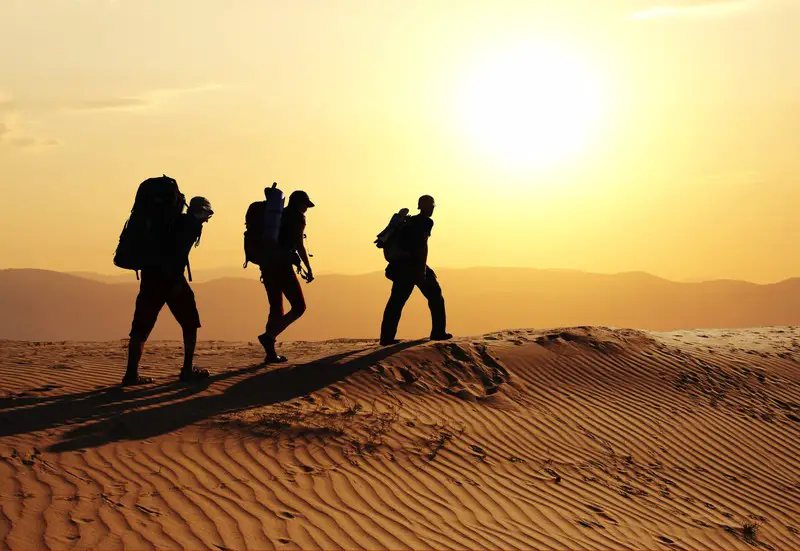
Hikers In The Desert

Pay attention to the weather and the atmosphere e.g. hot and humid vs. hot and dry, and so on. You will need plenty of water either way, but if you happen to head out on an extra hot day, you may need to take a little bit more.

Physical Exertion

Again maybe obvious to some, but it is worth mentioning. A tough, physically-demanding hike will require you to drink more water to stay in top form.

If you’re on a tough day hike, you can also plan to drink a lot more water before and after your hike.

Location

Research your location through reputable, up-to-date sources. If you’re not heading out into the backcountry, there could well be sources of drinking water in the vicinity to your trail including nearby villages or towns.

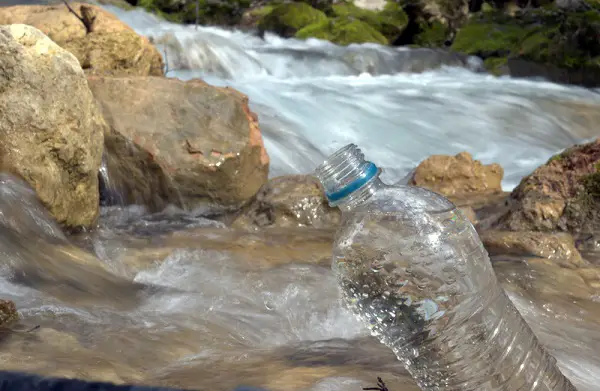
River Water Bottle

State and national parks will often indicate water refill points. The location of any creeks or other water sources will feature on maps, so make sure you have appropriate water purifying equipment.

Food & Hygiene

Don’t forget to factor in any water you’re planning to use for cooking and washing purposes on extended hiking trips.

Using water you’ve boiled to cook food is a smart way to get more use out of the fuel, water, etc. I am obviously referring to food being heated up in packs, not water directly mixed with food … just saying 🙂

Equipment

As touched on above, with the wealth of different equipment available nowadays to purify water from most natural sources, you could cut back the amount you need to carry by a significant amount.

Of course, you’ll need to be as certain as possible that the sources you’re planning on using are not dried up, as well as having a back-up plan just in case.

Personal Preference

Some people drink a lot of water when they’re out hiking, while others drink less.

If you tend to drink more after a long hike bear this in mind if you’re planning for your first extended trip over several nights.

I drink a ton of water when I hike! I have a good hiking friend who drinks maybe a quarter of what I drink! It really can be very different for different people, so getting to know how much your body needs is a really good idea.

This comes over time as you hike more and more, you naturally learn how much you need. When starting out, it’s of course better to have more than less!

Hydration Bladder vs Bottles of Water

On the trail the two main ways to transport water are via a hydration bladder or traditional water bottles.

Both have their own advantages and disadvantages, with the main deciding factor coming down to personal preference.

Some people even prefer to use a hydration bladder with a spare bottle in their backpack for handy refills or for drinking when taking a break. I utilize this myself when I need to carry extra water.

Here’s some of the main pros and cons of using both hydration bladders and bottles while you’re hiking.

Water Bottles for Hiking

Plastic bottles are lightweight and handy to use. You can pick them up just about anywhere and reuse and refill with ease.

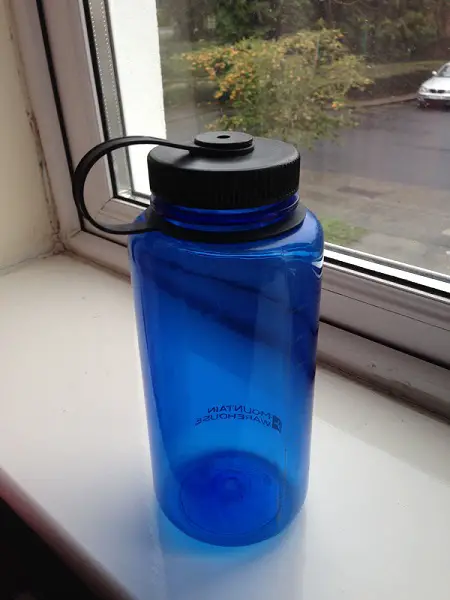
Water Bottle

When you use them in your backpack side pockets you can usually reach them without having to take your pack off, although when the weather’s hot your water will heat up pretty rapidly.

Putting them inside your backpack will mean you’ll have to stop and remove your backpack for every sip. In any case you’ll probably at the very least need to pause to unscrew your bottle and drink if you want to avoid tripping up.

Aside from having to stop regularly and possibly risking drinking less if you don’t tend to take regular breaks, bottles also have a relatively small capacity compared to a hydration bladder.

This puts them at a distinct disadvantage for longer trips, however they are extremely useful for refilling and for this reason alone, we think it’s well worth taking some sort of bottle with you.

Collapsible bottles can be useful to carry when using a hydration bladder and they take up much less space when they’re not in use.

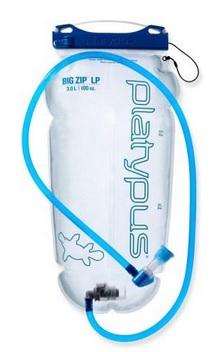
Hydration Bladder

Hydration bladders allow you to carry a lot more water and to drink on the go. Most good modern backpacks have compartments specially designed for hydration bladders so the load is easy to carry and doesn’t move around.

Platypus Big Zip LP Reservoir

Although they’re also made of plastic, a good hydration bladder will last a long time, making them more ecologically responsible and environmentally friendly than disposable bottles which end up getting replaced much more frequently.

You can of course get a good refillable water bottle too, and we of course recommend that over plastic bottles from your local store.

As you can drink on the go, you’re also less likely to become dehydrated by drinking more frequently throughout the course of your hike.

Unfortunately hydration bladders are literally not to everybody’s taste. Although many people don’t experience any issues with their hydration bladders, others experience an unpleasant plastic taste.

When you’re preparing for a hot day’s hiking, you won’t be able to stick your hydration bladder in the freezer, to have cold water while hiking, like a bottle as you’ll risk splitting the pipes.

However, you can put some ice in it just before setting off. Bear in mind that the water in the tube is going to get warm in hot weather.

You’ll either have to spit out your first mouthful or gulp down extra to get to the cool water from further within. Once again, this doesn’t bother some people at all, while others find it more off putting.

Other Options

You may want to consider other types of bottles to use either alone or alongside standard bottles of water or your hydration bladder.

Using a bottle with a sports cap can make drinking on the go much easier. In hot weather you may want to consider using a insulated bottle designed to keep your drink cold for several hours.

Such bottles often also work well in winter for keeping drinks warm, if you like to take a hot coffee or chocolate for a mid-morning break on a winter day hike for example. 

If you’re looking for ways to cut back on carrying a lot of water, you can also carry specialized water filters or water treatment chemicals allowing you to refill your bottles or hydration bladder out on the trail.

Iodine Tincture

Note, if you’re using a water treatment process that takes several hours (as opposed to more instant on the go results like with a filter), you’re going to need a plastic bottle to store the water in while it’s being treated before putting it into your hydration bladder.

Always be super careful when filtering water and make sure you do it right, be sure to know how to use your filtering tool properly, and with an appropriate water source.

You could take a collapsible bottle with you for this and help save on space in your backpack.

Conclusion

If you’re still wondering how to carry water while hiking, the best way to carry water for longer hikes and extended trips is probably going to be using a hydration bladder.

However, keeping a bottle of water to hand too, can also be extremely useful for refills and can be more pleasant to drink from when you’re taking a break.

Whether you prefer an hydration bladder or a water bottle, whatever works best for you is ultimately the best choice.

Just be sure that you plan ahead and take enough water for the duration of your hike, or until you can reach a confirmed refill point with well thought-out contingency plans, especially in hot climates.

How To Make Your Backpack Lighter

If you’re wondering how to make your backpack lighter, packing smarter and focusing only on appropriate gear can shave pounds off your base weight.

How To Make Your Backpack Lighter

Read on for some simple, effective ways to get your backpack weight down without compromising on the essentials.

Correct Backpack Size

When you’re planning a hike, be it a short day hike or an extended backpacking trip, be sure to use the correct sized backpack for the trip.

Taking a backpack that has a much greater capacity than you need will encourage to you pack more than you actually need, resulting in a heavier load.

A half-packed, larger backpack is also more difficult to carry than a fully-loaded, smaller backpack, even if the two weigh in at around the same. So be sure to use the correct capacity backpack for the trip

Plan Thoroughly

Before setting off on any hiking trip, preparation is the key. By planning your trip thoroughly, you can not only cut down on unnecessary items but also make sure that you have the essentials that you will need for that particular area, time of year and terrain.

For example, if you plan where and when you can refill your water supply on the trail, then you can plan how much you’ll need to take with you to get you between stops.

Knowing as much as you can in advance about the area, the terrain, any wildlife and insects will allow you to be able to plan more efficiently for exactly what you need.

This means you can then cut out what you don’t need and see if there’s any room for any non-essentials that you’d like to take. This is much more practical than packing everything you think you’ll need, then sticking in a lot of extra last-minute, might-come-in-use items.

Only Pack The Essentials

It may be hard at first, but try packing just the very bare essentials for your trip.

Backpacking Gear

Remove any unnecessary packaging from any items before packing and with your detailed plans pack only what you will need. Remember food and water will substantially add to your pack weight.

Don’t forget that especially on extended trips into the backcountry, your life may well depend upon what you’ve packed, so although you’ll have a more enjoyable trip with a lighter load, don’t take it to the extreme where it becomes unsafe.

Remember to always ensure you have the “Essentials” when heading off into the backcountry, even just for the day.

Reducing Your Base Weight

With some careful thought and meticulous planning you can get your base weight down without compromising on the essentials.

Reducing your base weight can be done gradually mainly by cutting out non essentials and replacing heavy items with lighter ones.

Here are some tips …

Invest in New Gear & Multipurpose Items

When you replace items or have the opportunity to purchase new ones, you can potentially save a lot of weight, although often at a greater price.

By paying attention to the weight of any replacement items and choosing new lightweight ones, you can gradually reduce your load without having to cut back.

Quality gear, that is lighter does tend to be more expensive, however, good gear usually has a longer life and so you get more use from it.

Purchasing multi-use items can also allow you to save weight and space in your backpack. Here’s some ideas on how you can choose new essential gear items that will help you to lower your backpack base weight.

Backpack

Choosing a lighter weight backpack can make a big difference, just be careful that you’re not compromising on comfort or durability.

Best Backpacking Packs for Women

Having a slightly heavier backpack that is more comfortable is well worth the extra weight.

However if your backpack weighs a lot more than necessary, especially for shorter trips, then you may be better changing it for a lighter weight model.

Tent

Ultralight tents for one person often weigh in at around two pounds, making use of one of your trekking poles.

If you’re camping during the summer months and you’re not anticipating any storms or mosquitoes on your trip, swapping your tent for a tarp tent or bivy sack could save you extra weight.

Alternatively if you’re not hiking solo, then you could share the weight of your tent by offloading some of the rest of your items to a partner or other group members, in return for carrying the sleeping arrangements.

Sleeping Pad

You could consider going with an inflatable sleeping pad or a torso-length one. Remember to take durability and your personal comfort levels into account.

Stowing the Mattress In the Carry Bag

If you’re uncertain about any new sleeping arrangements, be sure to test them out before heading off into the wilderness.

If you’re too uncomfortable to sleep well after a hard day’s hiking, then the next day your light weight load will feel much heavier regardless, which kind of defeats the objective.

Sleeping Bag

If you can, go for a water-resistant treated down sleeping bag. Down is lightweight and highly compressible, saving you weight and space. It’s also very warm.

Best Sleeping Bag Liner For Warmth

Stove & Utensils

Alcohol stoves are light weight and a popular choice for cutting back on the pounds. If you’re hiking in a group, you could bring a heavier stove and split the weight between you.

Special lightweight systems, such as the Jetboil, will provide you with boiling water for dehydrated meals and instant coffee within minutes.

As far as utensils go, if you want to really cut back on weight you could use an all-purpose spork.

Clothing

Cut back on clothing and only take the essentials depending upon the weather and climate, as well as your personal preferences.

Down jackets are lightweight and compressible for colder seasons or destinations, while multipurpose items such as a Buff can serve as a scarf, protection from the sun or a water filter when using purification tablets.

Reducing the Weight of Consumables – Water, Food & Fuel

Water

Plan where you can refill carefully and avoid carrying more water than you have to. Drink a large amount before setting off and at all refill points.

Drinking Water In The Heat

You could also use a mini water filter to cut down on the amount of water you need to carry. A LifeStraw or similar will allow you to stop off and drink quickly at any water sources you may pass.

You should also pay attention to the weight of any bottles you’re carrying, soft, collapsible bottles can weigh much less than rigid ones.

Food

While you’ll need to carry a lot of calories to keep you going, your food rations don’t have to weigh an awful lot provided you choose calorie-rich, instant items.

Dehydrated meals can save on weight and preparation, requiring only boiling water. Ready-to-eat items such as protein bars, nuts and dried fruit are lightweight and easy to snack on to help keep your energy levels up.

Fuel

This will depend upon your choice of stove or other equipment. Whatever you have decided upon, don’t take more fuel than you’ll need.

Remember by eating instant items at lunch, you should only need to use your stove once in the evening and again in the morning at the very most.

Hygiene

Don’t pack full-sized items for a few days hiking. Wet wipes can be used for general cleaning and travel sized hand gels (aim for biodegradable if using in the wilderness) for washing your hands.

Other mini travel size items such as toothbrushes and toothpaste will also come in handy and you can portion up tissues or toilet paper as required.

Conclusion

With a little planning and imagination, you can reduce your backpack weight and enjoy hiking with a lighter load.

So now you know how to make your backpack lighter, you can put these ideas into action and see where you can make changes until you find your ideal comfort vs weight balance.

Remember to stay safe and always pack the ‘10 essentials‘ to ensure that you’re prepared for any eventuality.

Best Tent Zipper Lubricant

Tent zipper lubricant is one of those things that you might only think about when it’s too late, and you’re already battling with your stuck zipper as the approaching storm clouds start to unleash their torrential downpour.

If you like to be prepared, which is recommended when you’re out backpacking, then you might want to check out what is the best tent zipper lubricant to make sure that your extended hiking trips go smoothly.

If you’re in a rush, and just want to know what lubricant is best, we recommend the Gear Aid McNett Zip Care Cleaner and Lubricant,
it’s an excellent product that the does the job really well!

Why Use Tent Zipper Lubricant?

Tent zippers are often the most problematic part of your tent. They can be costly to repair and replace, so it makes sense to take good care of them.

When you’re out camping in your tent, you’re relying upon your zipper to keep the cold and wet out (and possibly insects too), while allowing you get out and in quickly.

Using tent zipper lubricant can help to reduce wear and tear on your zipper. This in turn can increase the lifespan of your tent. It also helps to prevent wear and tear on the fabric surrounding the zipper from over exerting force at a particular sticking point over time.

Tent zipper lubricant can also save you time and hassle, who wants to spend minutes struggling with their zipper to get out of their tent in the morning. It can also prevent the accompanying frustration which can be a bit of a downer on trips.  

Purchasing  and using tent zipper lubricant could save you time, hassle and money. In extreme cases it could even save your tent, preventing scenarios where the zipper seizes completely and you have to resort to cutting yourself out, not fun!

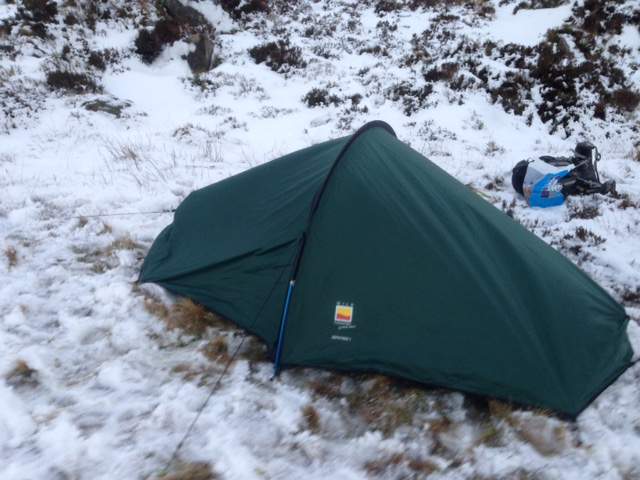
Terra Nova Zephyros 1 Person Tent

When to Use Tent Zipper Lubricant

Convinced? So, when should you use tent zipper lubricant and how often? I’d recommend scheduling it with any other regular tent maintenance so you don’t forget.

If you’ve not been experiencing any particular problems with your tent zipper getting stuck, you should probably aim to use it every few months. If you use your tent a lot, you may need to use it more regularly.

I find it’s best to store my zipper lubricant with all my hiking equipment. Before heading off on a long trip, I inspect all my gear and check everything’s in working order.

After checking over my tent I use the lubricant to ensure that I won’t have any problems when I’m out on the trail. You can also lubricate your tent zipper when you get home from a trip too after cleaning your equipment.

Inspect your equipment before storing it and note any repairs that will be needed before planning your next trip.

As I often go on day hikes, I regularly use my tent zipper lubricant on my day pack to help prevent wear and tear. I also treat my other backpacks before and after trips.

Your hiking jacket can also benefit from a quick application when you’re treating the rest of your zippered gear.

How to Use Tent Zipper Lubricant

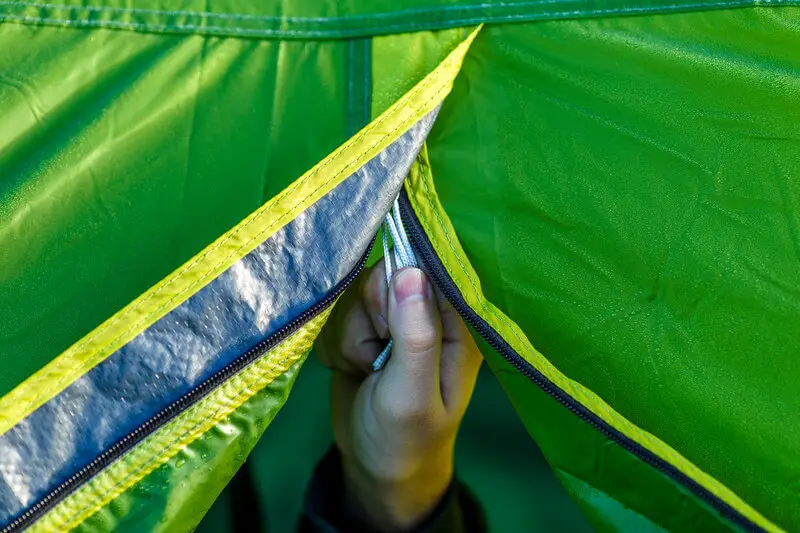
Tent zipper lubricant is easy to use and generally comes in handy-sized bottles. Some may have a brush attached to the nozzle cap. Whether yours does or not, be sure to thoroughly clean your zipper before applying the lubricant.

Trapped grit and dirt are one of the main causes of a malfunctioning zipper and they can cause serious damage. So begin by opening the zipper full length and brushing out any dirt.

Next, apply the lubricant. You want to apply an even amount to the entire length of your zipper on both sides. On tents with a large zippered area you may prefer to enlist the help of a friend. Once you’ve done this pay particular attention to the zipper foot, making sure it is adequately lubricated.

Finally, close your zipper fully, making sure its slides, or rather glides, with ease. Repeat to ensure the product is adequately dispersed over the entire length and within the individual teeth. And voila, a clean, lubricated tent zipper ready for your next camping trip.  

How to Choose a Tent Zipper Lubricant

It’s pretty simple, however, there are a few considerations to bear in mind, namely your zipper material and your preference of application format.

When you’re choosing your tent zipper lubricant be sure to check that it is suitable for your tent zipper material. Some are made especially for plastic zippers, metal or nylon. Others are multipurpose, so just check before you purchase.

If you’re planning on using it for your backpacks and jackets too, you’ll also need to bear those zipper materials in mind.

Application formats can vary widely. For the most part it comes down to personal preference and what you find easiest to use. You may also like to purchase an additional mini format to take with you just in case of any malfunction, especially if your hiking buddies are less conscientious types.

If you camp often in sandy, gritty places, you may prefer to purchase a lubricant with a brush top, to take with you to remove dirt and debris from the zipper. Other formats includes sticks, sprays and fine application nozzles.

Recommendation

We recommend using Gear Aid McNett Zipper Cleaner and Lubricant. This is my favorite for several reasons, mainly because I find the non-stick formula to be the best I’ve tried so far.


Get the Gear Aid McNett Zipper Cleaner and Lubricant on Amazon now!

I mean what is the point of cleaning and lubricating if you’re just going to attract extra dirt? Aside from its non-stick formula, I like the handy brush head.

You could even stick it in your backpack and give your tent zipper a quick brush over before packing up. Lastly it’s non-toxic and also provides protection against salt, rust and corrosion. Use it on plastic, nylon or metal zippers, it’s a great product that does what it says!

Conclusion

Zippers are often an integral part of most essential hiking equipment, and they do the job so well that we tend to forget about them until they begin to malfunction.

Using a zipper lubricant can extend the lifespan of your hiking equipment and help to reduce wear and tear. Using the best tent zipper lubricant will prolong the life of your tent, potentially saving you money and making your trip a more enjoyable experience.

If you don’t already own one, we sincerely recommend purchasing a bottle today. We hope you found this article useful, please share it round your networks if you did 🙂

Best Compass For The Money

With the advent of modern technology, knowing how to read a compass is becoming an increasingly unpracticed skill. Little wonder that if you’re looking to purchase one for hiking, you’re probably left scratching your head a little when it comes to seeking out the best compass for the money.

Some seem terribly complex, while others look overly simplistic. So, what should you be looking for in a compass for an average hiking trip? Let’s find out.

Why you Need a Compass for Hiking

Having a map and compass (and knowing how to use them) could save your life, especially if you’re out in the backcountry. If you get lost, take a wrong turn or your trail peters out, using a compass can get you back on track or help you to find the shortest route back to civilization.

Although smart phones with their huge range of applications and GPS technology have revolutionized our lives, they are not infallible.

Three main factors, for all of their ease of use, put your phone at a distinct disadvantage to a compass, namely: battery life, fragility and signal. All it takes is one drop and a cracked screen and you could be missing for days.

A recent cold spell killed my phone battery from 70% to zero within minutes, luckily I wasn’t relying upon it, but it was an inconvenience. And you can bet that you’ll lose signal on that scenic hike with ravines and forested areas or out in the backcountry.

All of these disadvantages go for any handheld electronic positioning device that you may use to navigate. Nine times out of ten you may have no issues whatsoever, but taking unnecessary risks is not smart. Especially when it’s so simple to pack a compass and forget about it until you need to use it. So why take the risk?

Different Types of Compass and Features

Whether you’re unfamiliar with compasses or it’s been a while since you last used one, if you’re looking for a new one, it helps to know a little more about the different types and features on offer and what they’re used for.

After all, you may have slightly different needs or circumstances than the average hiker.

Here’s a quick look at some of the main compass types and features, followed by my personal recommendation and why I think it’s the best choice for the average hiker.

Baseplate Compass (Orienteering Compass)

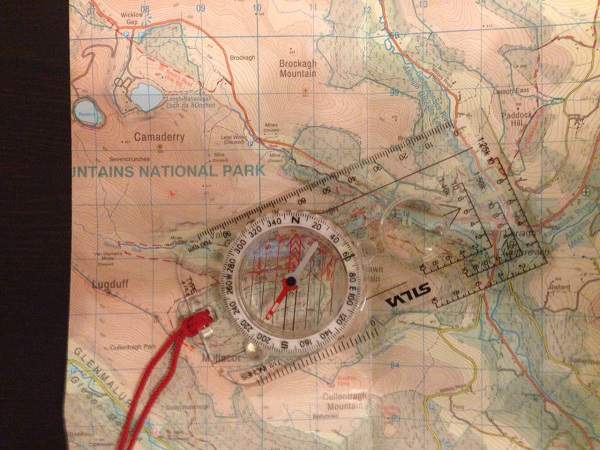
The baseplate or orienteering compass is a compass and protractor combined, making it extremely useful for using with a map.

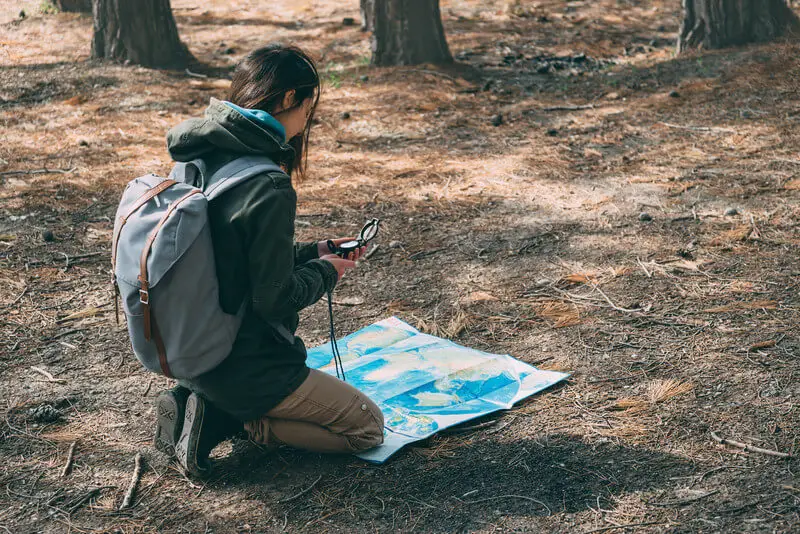
Map and Compass

You can also use it as a sighting compass. A standard baseplate compass will be more than adequate for your average hiking trip.

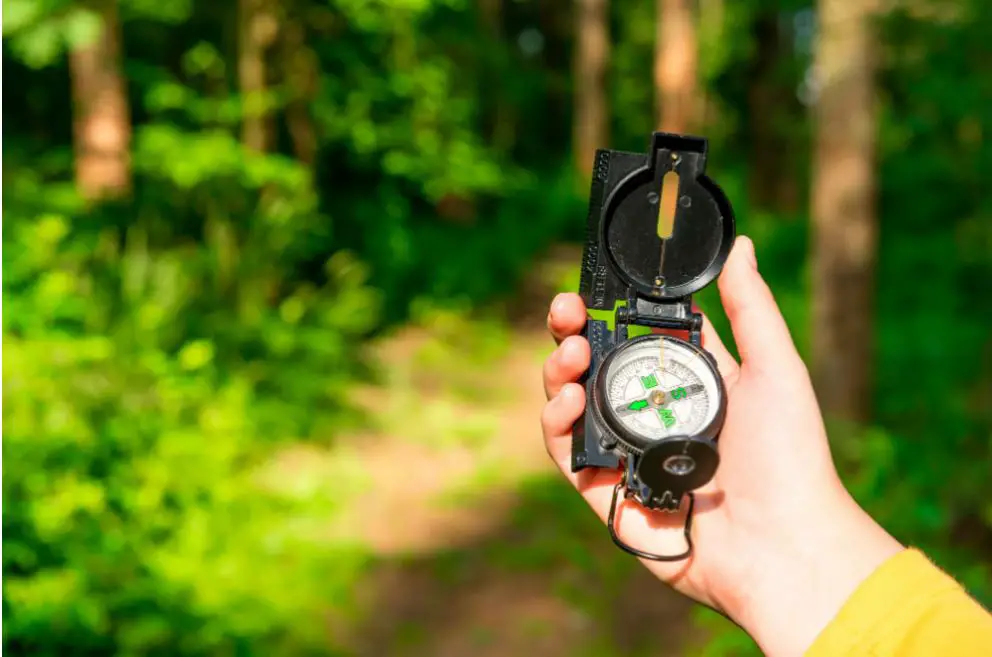
Lensatic Compass

Used by the US military, the lensatic compass is slightly more accurate when it comes down to determining the specific compass direction to a designated position.

Lensatic Compass

However, unlike the baseplate compass, you’ll need a separate protractor for using it with your map.  

Prismatic Compass

Primarily a surveying compass that uses a prism to provide a highly accurate reading. This goes beyond the needs of hiking navigation in general.

Extra Features:

  • Luminescent needle and markings – Bordering on the essential, luminescent needle and markings allow you to navigate in poor light and at dusk.
  • Magnifying lens – Some compasses may have a small magnifying lens built in to the baseplate. This can be a useful feature to make out small details on maps.
  • Mirror – A sighting mirror can come in useful to help you to aim for a distant landmark with greater accuracy. It can also come in useful for emergency signaling.
  • Declination adjustment – With adjustable declination you can set the declination for your trip and forget about it. Reminder: Declination is the difference between true and magnetic north. Your compass points to magnetic north and your reading will need to be adjusted to show true north to use it on the ground.
  • Clinometer – clinometers enable you to measure steepness, for example the vertical angle of a slope.  

Hiking Compass Recommendation

For the average hiker, a standard baseplate compass provides everything you need and more. I personally use the the Suunto A-30. Suunto is a respected, high-quality compass brand that is based in Finland, where they make their compasses.

Here’s why it’s my Number One Hiking Compass:

1. Simplicity: Sometimes less is more. When you’re out in the backcountry in unfamiliar territory and possibly with a storm on the horizon, you want a simple, hassle-free way to navigate.

If you’re not a habitual compass user and you simply need to navigate your way using a map and local landmarks, then in my mind, it’s pointless complicating the process. The less distractions and supplementary readings, the better and the more confidence you will have in your readings.

2. Solidity: When you’re out over rough terrain, things get dropped and occasionally broken. If you’re going to be relying on your compass to potentially save your life, it needs to be a solid piece of kit. This compass fits the bill.

3. Transparent baseplate. Easy to use with a map, you can easily position this compass without losing sight of potentially important information.

4. Lightweight: We’re not all fast packers, but why weigh yourself down unnecessarily?

5. Easy to read: With an uncluttered layout and luminous bezel and markings for navigating in poor visibility. This really is an important point. While a more complex layout may look good, the clearer the better when you’re trying to take a bearing in harsh conditions.

6. Magnifying lens: For reading those tiny map symbols with ease.

7. Fixed declination correction: Allows you to set true north for your trip.

8. Scale markings: Handy for easier map reading and trail planning.

9. Price: Why spend more on features you don’t need and that could cause confusion, or make a simple reading more complex than it needs to be?

That said, if you choose to go for another compass for hiking, make sure that it a good quality model and is from another reputable brand.

10.  Lifetime warranty: I’m not suggesting you’ll need to use it, however, the fact that this compass comes with a limited lifetime warranty shows the confidence that the manufacturer has in this product.

If you have other needs apart from those of the average hiker, you may of course wish to look for a compass with additional features.

I’ve been hiking for many years with a basic baseplate compass and even on more difficult, technical hikes, I’ve never needed anything more complex than a standard baseplate compass.  

Tips for using your hiking compass

Take the time to learn how to use your compass. If you need to brush up on the basics or learn from scratch, make sure you do so well before heading off into the wilderness.

The video below shows you how to take a bearing, this is just a flavor, and as you can see that in and of itself, it is straightforward and easy to do.

However, you need to have the knowledge on how to read maps properly, align them to the land, etc. so taking a proper navigation course is my recommendation.


Try out your compass in familiar territory, near your home or on a well known trail and use it to find your way. This will help build your confidence and take some of the mystery out of compass and map reading.

Be careful where you read your compass. Metallic objects can throw your compass’ accuracy off course. Check the vicinity for large metal objects, for example, don’t check your reading in your car or with your map spread out over a metal-based picnic table.

Store your compass away from electric fields and magnets, they can lead to permanent damage over time by demagnetizing your compass’ needle. This is especially important if you’re going to be putting your compass away for long periods of time.

Check the immediate vicinity of your storage place for magnets and electric fields, this also includes simple things like magnetic clasps that keep certain items closed.

Test your compass from the comfort of your home if you’ve not used it in a while, it’s better to be safe than sorry as the adage goes!

Remember, if you’re planning any far away trips, bear in mind that may need to change your compass. Purchase a southern hemisphere compass for trips south of the equator, or if you’re from the south visiting the north, you’ll need to change to a northern hemisphere compass.

Conclusion

If you’re not accustomed to using a compass, finding the best compass for the money can seem like a complicated decision. However, both novice map readers and experienced hikers alike can benefit from the simplicity of a basic baseplate compass.

Check out our top compass recommendations, the Suunto A-30 is my personal favorite on that list. I think you’ll struggle to find another high-quality, easy to read compass for the same price.

Whichever compass you decide to choose for hiking, make sure that it’s from a reputable brand and learn how to use it before you head out into the wilderness.

While mobile phones and electronic positioning devices have made life easier in many ways, our over reliance on electronic gadgets that can fail when we need them most, can make some hikers unnecessarily vulnerable. Hence the importance of always packing a compass and map and knowing how to use them.

We hope you found this useful, please share it round your networks if you did 🙂

Hiking Time Per Mile

Knowing your average hiking time can be useful in a number of situations, especially when it comes down to figuring out how long a hike will actually take you to complete.

Hiking Time Per Mile

If you would like to find out what your personal average hiking speed is, read on to learn how you can calculate your hiking time per mile and how you might put this information to good use.

Why it’s Useful to Know Your Hiking Speed

If you enjoy hiking to destress and relax, you may not be that interested in knowing your hiking speed. However, at some point, you’re going to wonder what time you’ll need to leave by to make it back before nightfall, or where you should aim to stop over on an extended hiking trip.

As much as you might want to keep your hikes spontaneous and natural, at some point if you want try out new places and trails, you’re going to have to do some minor, organizational planning.

When you’re planning on hiking as part of a group, it can be useful to agree on a common hiking speed before committing.

If the group is newly formed or a one-off trip, it can be useful to know what range of speeds members generally hike at to reach a consensus before starting as well, so as to plan breaks as well as departure and arrival times.

Your hiking speed can also be good to know if you are looking to improve your physical condition and intend to use hiking as part of your training plan.

Knowing your current hiking speed and aiming for a faster one, can help you to get into better shape. Of course if you are aiming to step things up a gear and take on a thru-hike or start fastpacking, then you will naturally be interested in knowing your current hiking speed and how you can improve it.

How to Calculate Your Average Hiking Speed

To start with, you should bear in mind that the average walking pace is around three miles per hour (approx. five km/h). Of course, many people will walk faster and many others much slower.

However, when you’re hiking, it’s not quite the same as going for a walk around the block. There are plenty of other considerations to take into account which will ultimately affect your hiking speed.

Here’s some of the main factors you will need to consider when calculating your average hiking speed.

Terrain

Obviously, your pace will be faster on flat, easy-going terrain than it will be on steep inclines with uneven footing. If you’re planning on hill walking, you could use Naismith’s Rule as a guide to help you to account for uphill sections.

Basically you allow one hour for every three miles forward and add another hour for every 2,000 feet (600m) you ascend.

This improved figure can be useful, however, you need to remember that certain sections of trail can be more difficult and time consuming than others, regardless of the incline and that descents can often take longer than ascents.

So, by all means use Naismith’s Rule to help, but don’t forget to also factor in any other possible terrain-related factors, such as overgrown vegetation, rocky ground, or tricky descents.

It’s also worth noting that Naismith’s rule is generous, and any reasonably fit and regular group of hikers, will likely go faster then it.

Load

A short day hike in ideal conditions shouldn’t require you to carry a load that will slow you down too much. However, even long day hikes with average loads can slow you down a little, not to mention when you’re on a backpacking trip carrying a full 60L backpack.

Backpacker Packing A Pack

You’ll need to take your pack weight and bulk into consideration when you’re working out how long a particular trip is going to take you.

Weather

The weather can hugely influence your hiking speed. Unexpected winds, heat, storms, low visibility can all bring even the fastest of hikers down to a crawling speed.

Even once you’ve factored in slowing down for weather conditions, you will also have to possibly reconsider your pack weight again, and how that might slow you down further.

For example extra water for a heatwave, extra layers in a cold spell and various tools such as pick axes in extreme winter weather conditions.

Company

In general, unless you’re training together and challenging each other, hiking in company tends to be slower than hiking solo. Social interactions on the go will undoubtedly slow down your average hiking speed.

Nothing wrong with that, and chatting on the trail is part of the fun too, but it’s something to keep in mind when planning how long you will be out, especially if you are leading a group.

Physical Condition

If you’re in good shape and keep active regularly then your hiking speed is likely to be higher over some difficult parts than it would be for someone out of shape, even if your natural walking speed is on the slow side.

As your body will be more used to exercise, you’ll need less time to stop and recover after tricky sections, and you should get into your stride faster and be able to keep going at a comfortable pace for longer.

Experience

Unless you have plenty of hiking experience, you won’t be able to factor it in for it! Knowing your average speed and where your strengths and weaknesses are, how well you take ascents and descents, how to deal with any navigation issues or any other problems that may occur out on the trail.

All of your experience out hiking combined with knowledge of your own endurance, will give you the best estimate you can get for how long a certain trail will take you.

If you regularly work out your average speed, you will reach a certain point where you become aware of how fast or slow you’re traveling and can adapt your speed to suit your needs. Using a smartphone and an app to track your hikes will give you extremely accurate figures.

While your hiking speed will vary with the factors listed here, it can be useful to look at your speeds over the course of your hike and to gain valuable insight, enabling you to predict your speed over certain sections of future hikes based on past performance.

Conclusion – Putting it all together

If you would like to work out your average hiking time per mile, take the average figure of three miles per hour into consideration. If you know you walk particularly fast or slow, allow for this.

Then factor in the terrain using Naismith’s Rule for any ascents, bearing in mind the descents can sometimes be just as slow, or even slower when its steep, too. Allow for your load, weather and any difficult terrain and you should come up with an approximate figure that’s a useful guide.

With modern technology, you can easily use an app on your smartphone to figure out not only your average performance, but also where, when and why you were at your slowest. This can be invaluable to know and really provide a useful guide when you’re putting together an itinerary for a new hiking trip.

We hope you found this useful, please share it around your networks if you did 🙂

Happy hiking and stay safe on the trail!

  • « Previous Page
  • 1
  • 2
  • 3
  • 4
  • …
  • 16
  • Next Page »
  • Facebook
  • Pinterest

What are you looking for?

Copyright © 2025 · Cool Hiking Gear

Cool Hiking Gear is a participant in the Amazon Services LLC Associates Program, an affiliate advertising program designed to provide a means for us to earn fees by linking to Amazon.com and affiliated sites.

  • About This Site
  • Privacy Policy
  • Affiliate Disclosure Statement
  • Contact