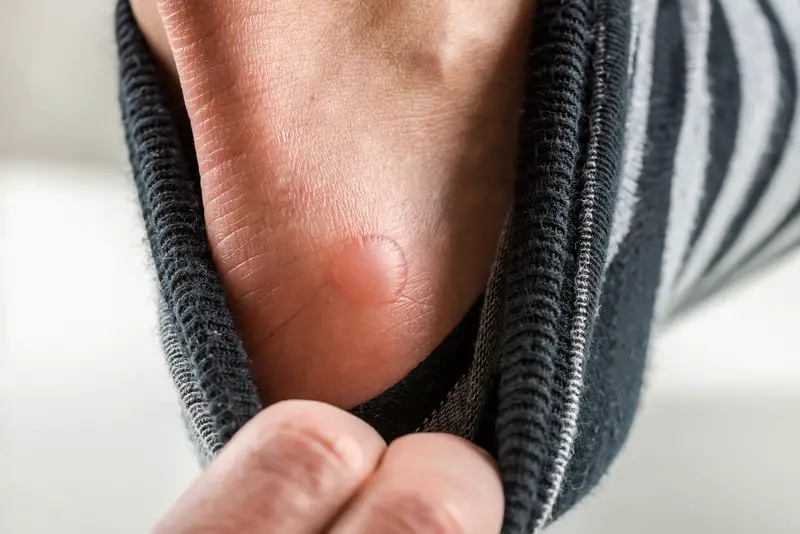
Ah the dreaded blister! The all too familiar nemesis of many a hiker 🙂
As I’m sure you know blisters are caused when too much friction is repeatedly placed between your clothes and your skin. Heat, dirt and moisture all play their part in a blister forming too. The main area where this problem is experienced is of course on the feet. Nothing can spoil your hike faster than a nasty blister and turn a pleasant experience into a very annoying one indeed.
Invariably they happen when you’re already half way up the mountain so you may have to wait till your hike is finished and you get the whole way back to your car to be able to to truly relieve it by taking your boots off!
OK, before looking at some tips on how to treat foot blisters on the trail, I wanted to to look at a few things you can do to not get blisters in the first place, prevention is always better than cure! Lets get started!
How Best Can I Avoid Blisters?
Listed below are a few simple pointers to help you avoid getting blisters in the first place:
- A blister can start off as a simple annoyance that you feel on your foot that gradually builds more and more as you walk. The first tip is to not ignore it as soon as you notice it. If a quick adjustment of your socks or boots will do the trick to alleviate the problem, take the time to do so!
- If the first step doesn’t work, you can put a plaster over the aggravated area. This is likely to look like a red spot in the early stages. The main point here is that you don’t need to wait for an actual blister to form before putting protective dressing over the affected area.
- Always be sure to wear the right hiking socks! I can’t emphasize this enough and I always think it’s as important to wear proper hiking socks as it is to wear proper hiking boots! Your socks should be smooth and be able to wick moisture, which can expedite blister problems, away from your feet. This should be standard with any good pair of hiking socks.
- As well as your socks, be sure you have good fitting boots that you have broken in adequately before you take them out on the trail. Better to take them out on shorter hikes first and build them up over time to give your feet time to adapt them.
- If you find yourself feeling a blister twinge or if your feet are getting too wet from sweat and so on, if it’s practical to do so, take your boots off when you can and let some air in at your feet to let them cool down and dry. Can do your feet the world of good blister wise and also just feels very pleasant if you’ve been hiking hard for the last few hours 😉
- I came across a neat little trick while hiking in the Alps in June this year. I did a full post on it but in short, if you’re hiking for many days in a row, smearing your feet in Vaseline can be very effective in preventing foot blisters.
How Do I Treat a Blister If I Get One?
It’s always a good idea to have a first aid kit in your day pack while out on the trail. You can make up your own kit or if you prefer, you can buy a ready made first aid kit. In that kit you should have things that can help treat a blister:
- The first step is to clean the area with sterile water, try your best to clean your hands first. Anti bacterial gel or ointment will be great for that.
- Now, the next step does go somewhat against advice you normally hear, or at least I have heard before. Assuming the blister is causing discomfort when walking, you want to pop your blister at its base with a sterile needle if you have one. Normally I believe the advice is to leave the blister alone and not to pop it if you can. However, as you’re hiking you will only continue to aggravate it and make it worse if you don’t pop it.
- Drain the blister in full and don’t remove the loose skin over it, this will help protect against infection.
- Clean the area again with antiseptic or a sterile pad and water. This really helps speed up the healing process. A sterile pad should be standard in any first aid kit. When finished dry it up, letting it air dry is great if possible, should only take a few minutes.
- Next, you want to apply a protective dressing. Again any decent first aid kit should have something for this as standard. A plaster, gel pad, etc. will all be fine to do this with. There are plenty of purpose made blister pads which are a great addition to any first aid kit if you don’t have any. Whatever you use, ensure the dressing is secure. If necessary, secure it using dressing tape.
- Finally, be sure to remove your dressing and let air at the blister when you can after your hike, it will help with the healing process. However, be careful with some types of blister pads, as they may need to stay on until they come off naturally i.e. they’re designed to help the healing process, so it might be better to leave them on.
Conclusion
As a hiker, blisters are definitely something you want to avoid on the trail as much as possible. The only time I have experienced minor issues with them myself has been on longer multi day hikes like when I did the Camino de Santiago. Nothing major and I knew what to do so it worked out fine.
Blisters have have never been an issue for me on day hikes but they do happen! Hopefully the tips provided above will help you avoid ever getting them in the first place or, if you’re unlucky enough to get a full on one, you will have some ideas on how best to treat it to enable you to continue on and enjoy your hike!
Have you any good tips for avoiding the dreaded blister on the trail? I’d love to hear them in the comments below!