coolhikinggear.com

  • Men’s
    • Best Hiking Rain Jackets for Men In 2024
    • Best Men’s Hardshell Jackets Of 2023
    • Best Hiking Pants For Men In 2023
    • Best Ultralight Rain Pants For Men
    • Best Men’s Daypacks For Hiking In 2023
    • Best Backpacking Backpacks For Men In 2023
    • Best Base Layers For Men In 2023
  • Women’s
    • The Best Hiking Rain Jackets For Women In 2023
    • Best Women’s Hardshell Jackets Of 2023
    • Best Hiking Pants For Women In 2023
    • Best Ultralight Rain Pants For Women
    • Best Daypacks For Women
    • Best Backpacking Backpacks For Women In 2023
    • Best Base Layers For Women In 2023
  • Hiking Accessories
    • Best Hiking Poles
    • Best Trekking Pole Monopod Camera Mount
    • Best Hiking Headlamps
    • The Best Hiking Watches In 2023
    • The Best Hiking Gloves In 2023
    • Best Hydration Bladders For Hiking In 2023
    • Best Compass For Hiking Our Top Picks
    • Cool Hiking Gadgets
  • Footwear
    • The Best Men’s Hiking Boots In 2024!
    • Best Hiking Shoes For Men In 2023
    • The Best Women’s Hiking Boots In 2023!
    • Best Hiking Shoes For Women In 2023
    • Best Hiking Sandals
    • Best Hiking Sandals For Women in 2023
  • Hiking Guides and Resources

Hiking Boots Or Trail Shoes For Backpacking?

Since their invention and an increase in the number of people taking up hiking, trail shoes, or hiking shoes, have seen their popularity explode. However, can they really replace the tried and tested, sturdy hiking boot or are they just another fad that will pass?

Let’s take a look at the advantages and disadvantages of each, to help you to find out whether you should pick hiking boots or trail shoes for backpacking.
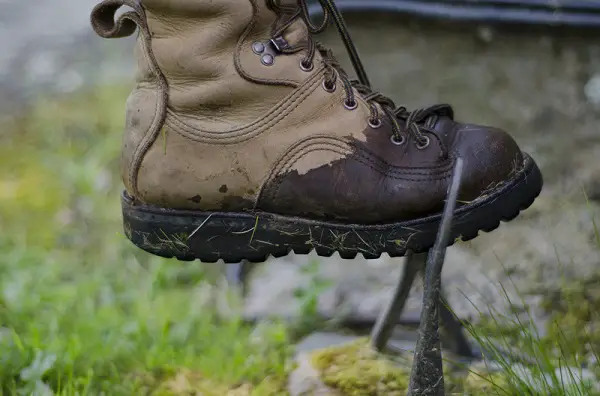
Hiking Boots Or Trail Shoes For Backpacking

Hiking Boots

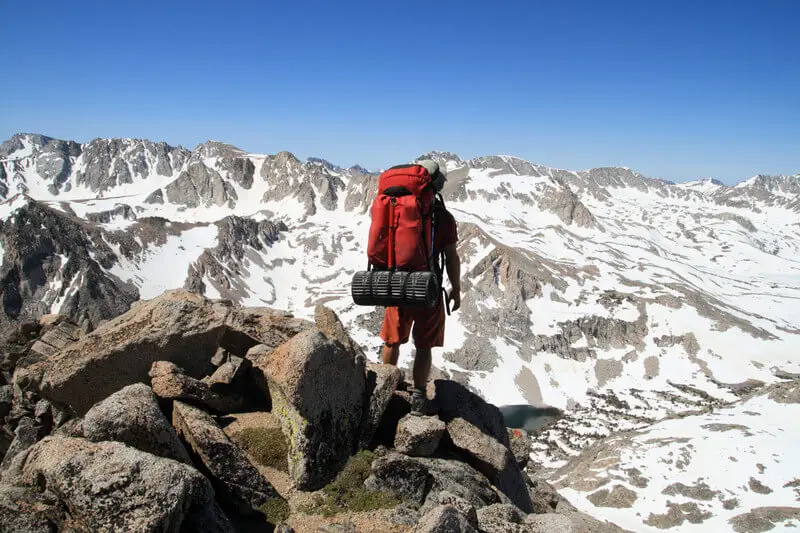
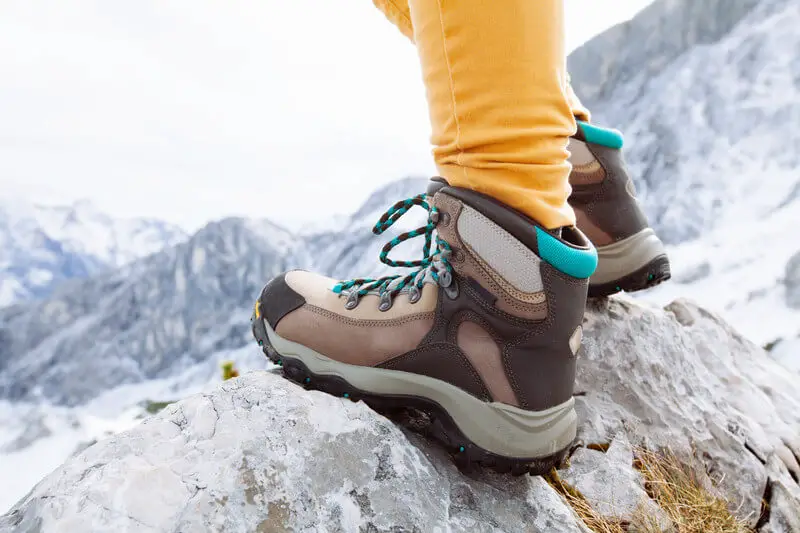
Hiking boots are the traditionally preferred choice for backpacking trips, offering all-round protection and a stable base to help you to support the extra weight on your back. Hiking boots typically offer a rugged outsole complete with lugs for grip, a rigid midsole for protection and comfort, complete with a waterproof upper for dry feet.

Their height is generally ankle high to provide extra support. Available in a wide variety of types and weights, hiking boots have made some evolutionary leaps with the times.

Although the general trend may seem to be heading more in favor of developing new types of hybrid footwear that begin to blur the distinction between an actual hiking boot and a sports shoe.

Advantages of Hiking Boots

Support

Hiking boots provide tried and tested support, essential for carrying heavy backpacks. With a good, solid pair of hiking boots that cover the ankles, you have a solid base.

This is especially important for heavy loads and those new to backpacking who may struggle with their balance while supporting the extra weight from their pack.

I think this is a big one, as I can’t tell you how many times I have nearly went over on an ankle while backpacking on tricky terrain, and it’s my hiking boots that have kept me good!

Comfort

Although comfort is more frequently associated with more flexible lightweight soles, hiking boots with their rigid mid and outsoles offer your foot enhanced protection and comfort.

Initially you may feel more comfortable in a more flexible shoe style type of footwear, however after several miles of lumps, bumps, roots and rocks, the soles of your feet will be aching much more than they would in a pair of more rigid boots.

Traction

Hiking boot outsoles are designed to offer excellent traction in all weather conditions and terrains. They will keep you on the trail even when there are loose underfoot conditions, slippery rocks and mud.

It is even more difficult to carry a fully-loaded backpack over difficult terrain and hiking boots provide the grip, through technologies like Vibram, that enables you to do so, minimizing the risk of a fall or loss of balance.

Protection

Ever been hiking through dense vegetation, brambles, stones, gravel, sand? Hiking boots protect your feet and ankles from vegetation and prevent stones and sand from getting into your footwear, meaning you can breeze ahead without having to stop to get out stones or sand every few yards.

This also means you’re free to take different routes without worrying about scratches or underbrush, particularly on overgrown trails. They also offer excellent toe protection and are ideal in colder weather, keeping your feet nice and warm.

Waterproof Upper

With their waterproof uppers hiking boots will keep you dry through mud, puddles, damp vegetation and while crossing shallow water courses. They’re also great at drier times of year when you might fancy setting out early before the sun’s up but don’t want to get your feet soaked with the dew.

Hiking shoes can have waterproof uppers too of course, but hiking boots generally offer more protection in this regard as they typically reach up your leg higher and under your pants/ rain pants.

Longevity

A decent pair of hiking boots will last you a long time. They will also mold to your feet over time and wear to suit your walking style. You’ll be free to wander without worrying about them getting ripped or scratched, while their durable, rigid outsoles are designed to last for hundreds of miles.

Hiking boots can be expensive, but good quality ones last, making them worth the price tag over time. Their longevity also makes them highly dependable, you don’t want to head out into the backcountry with a fully loaded pack and have a footwear problem, tens of miles from the nearest town.

Disadvantages of Hiking Boots

Time to Break-in

Hiking boots, especially really well constructed leather ones, are notorious for being uncomfortable the first few times that you wear them. They have to be progressively broken in, possibly earning a few blisters along the way, if you go too far too soon.

If you have a trip coming up in a hurry and no suitable footwear, you may be best looking at other options if you won’t have time to wear in a pair of hiking boots.

Heavy

Hiking boots can be heavy, think about the number of times you’ll be lifting their weight on a day’s backpacking and it’s easy to see how they add to fatigue.

Being heavier than other types of outdoor sporting footwear mean that hiking boots can also slow you down. Might seem crazy but when you’re pounding hard miles over mountains, every bit of weight adds up, and it’s not uncommon for boots to help make feet feel heavy and fatigued

If you’re trying to build up your fitness or include some cardiovascular exercise with a little jog to your hikes where the terrain permits, hiking boots are going to make that more difficult.

Less Flexible

Hiking boots are rigid for a reason, to offer your feet greater support and to protect them from the impact underfoot. However, especially over short distances this rigidity can sometimes outweigh its protective benefits in terms of lack of comfort.

Long Time to Dry Out

Should you get water into your hiking boots, either because you have failed to reproof them or by stepping in deep water, then they will take a long time to dry out. Several days even when you’re out and humidity is high.

Wet Hiking Boots

I always recommend letting your hiking boots dry naturally at room temperature if possible, and so it does take time for them to really dry out.

Poor Ventilation

If its summer, or you like a brisk pace, or even if you just have feet that tend to sweat, then you may find the lack of breathability offered by hiking boots problematic. The only solution is to keep changing your socks and try to air your feet when you stop.

This may mean more frequent stops that you’d like or else the sweat may build up too much and become uncomfortable. It’s also pretty unhygienic, so be sure to take good care of your boots.

I don’t really recommend this, but I have taken my boots off on the trail before, usually to dip my feet in an icy river though, can do wonders for your feet after a hard day backpacking 🙂
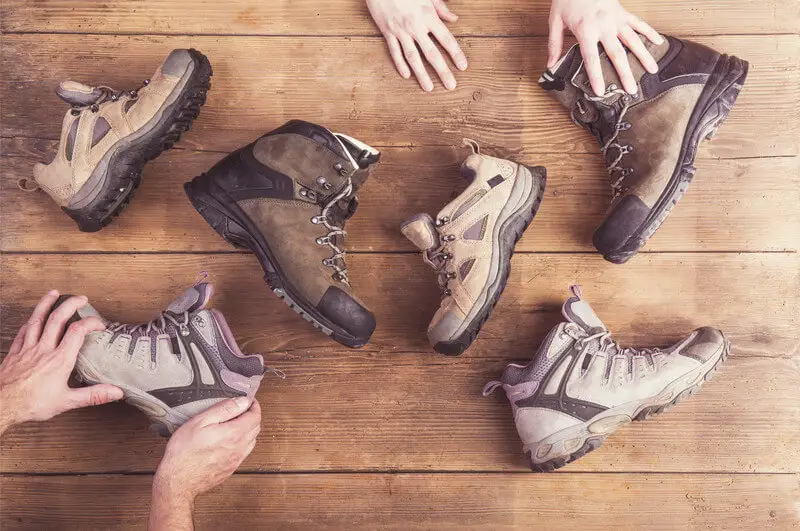
Trail Shoes

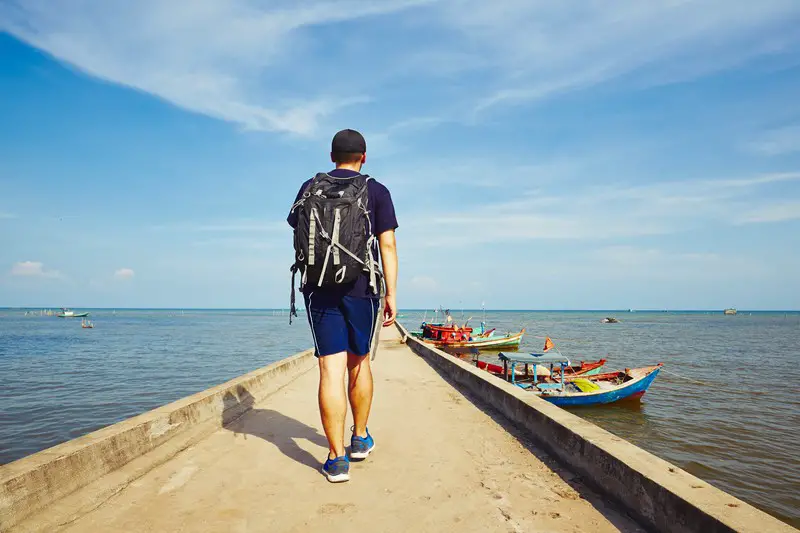
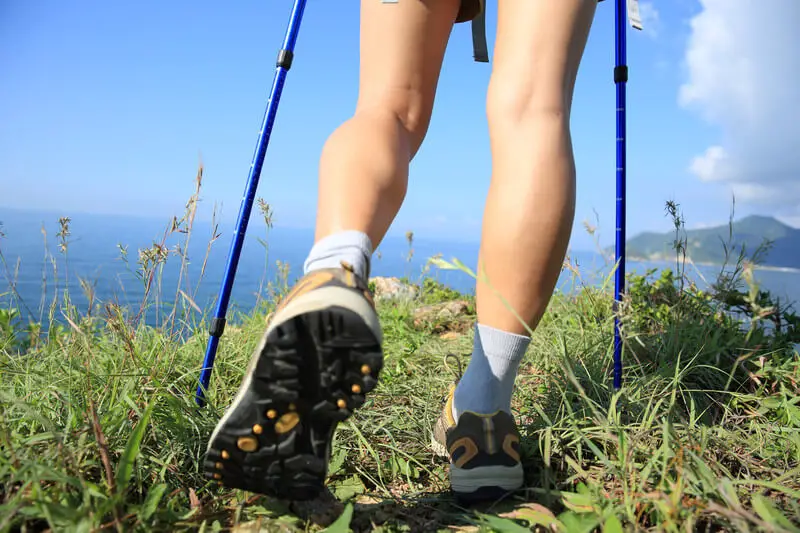
Trail shoes are extremely popular and are becoming increasingly used as an alternative to hiking boots. They combine good traction with a light weight, allowing them to be worn over a variety of terrain.

People looking to fastpack or clock up a lot of miles on thru-hikes often favor them for speed and completing a large number of miles over a short time. Trail shoes are available in a wide variety of styles with various specializations.

Advantages of trail shoes

Lightweight

Trail shoes are popular thanks in part to their lightweight design. As more and more people become interested in hiking, when they first try on a heavy boot it feels alien compared to their day shoes and sneakers.

A trail shoe, on the other foot so to speak, is a lot more like regular footwear and fits from the start with, usually, a minimal break in period required.

With the rise of popularity in running, fastpacking and outdoor exploration, more people are attempting longer more ambitious hikes over shorter periods of time.

Trail shoes provide a lightweight, go-to alternative that allows for greater speed while still provide a relatively good degree of stability and traction.

Breathable

For moving fast, high temperatures and sweat-prone feet, trail shoes provide a literal breath of fresh air.

They are made from breathable materials and their lower cut profile allows more heat to escape than from ankle height boots. Drier feet mean a more comfortable trek and less time rinsing and drying socks.

Quick Drying

Although they aren’t waterproof if you do get your trail shoes saturated, they will dry pretty quickly thanks to their breathable upper. Meaning you can get going again sooner with less discomfort.

Little to No Break-in Period

Trail shoes are ready to go off the shelf. You won’t have to worry about going slow and spending several careful hikes avoiding getting blisters while you break them in. You can pretty much put them on and you’ll be ready to go.

Disadvantages of Trail Shoes

Less Traction on Slippery Surfaces

Trail shoes have a pretty decent grip, however, they are easily outperformed by hiking boots when it comes down to more treacherous conditions such as slippery rocks and mud.

Whilst they will be fine on average terrain in dry conditions, if you’re heading off into the unknown then you would probably be best advised to wear a pair of hiking boots and to take it slower.

Some trail shoes have outsoles that are designed to give better traction on slippery surfaces however, they are primarily designed with speed in mind. If you use them for running over slippery rocks they should hold steady.

Try walking over them with a heavy backpack and they are not going to provide the same grip as a pair of hiking boots would at a slow pace.

Short Lifespan

While hiking boots are built to last, trail shoes are much less durable, especially if you are using them over more extreme terrain. If you’re using them for long thru-hikes at speed, then it’s not uncommon to go through several pairs at a pretty good clip over time.

Less Protection

With their lower profile, trail shoes understandably offer less protection, exposing your ankles to the elements and any branches, thorns and vegetation. Being lower cut, they also don’t offer any ankle support.

Whereas hiking boots will keep your toes safe, you may need to watch out you don’t stub them on rocks when wearing trail shoes in areas with loose rocky terrain and ascents.

As they have less durable uppers and are breathable, you will be less likely to want to use trail shoes for heading down overgrown trails or crossing over underbrush. You’re also going to get bits of stone, gravel and sand as well as bit of plant in your footwear much more frequently.

As a consequence, this can mean you’ll tend to keep your eyes down on the trail much more, looking for the next pebble, branch or rock, with less time spend admiring the view or catching glimpses of the local wildlife.

This one is interesting to me, as I know hikers who really prefer trail shoes as they like their feet to be more flexible and free to move. That’s all well and good, but when you foot accidentally slides into a rabbit hole you didn’t see, that flexibility and free movement could spell problems quite quickly.

For me, I prefer the protection of boots and I am happy to sacrifice some flexibility and freedom of movement in the ankle. Main point I want to make though is, each to their own 🙂

Not as Waterproof

Unfortunately, although some may offer a degree of water resistance, trail shoes are usually not fully waterproof.

That may be fine if you’re looking for footwear for warmer weather, however, you need to bear in mind that apart from the very height of summer there are usually chances of rainfall, wet vegetation, mud and creeks, waterfalls and so on.

If you’re used to having your feet protected from water then you may not realize just quite how wet it can be out on the trail, particularly in areas of dense vegetation.

And so?

As you can see, there is a lot to consider when you are considering whether to use your hiking boots or trail runners for backpacking, and which is the better option. I have a very specific preference, as most will i.e. in some cases, depending where you are backpacking, there is no definitive answer.

Before we wrap up, check out this video from the good folks at REI to hear their thoughts on this great debate.

Conclusion

In the contest of hiking boots or trail shoes for backpacking, there’s no clear winner, although the odds are definitely in favor of hiking boots as the better, more reliable all-rounder.

It really depends upon several factors, namely, the time of year, the terrain, your load and speed. Personal preference also plays a significant part in this too.

If however, you’re carrying a heavy backpack then without a doubt, you will benefit from the stability provided by hiking boots, and you’re not likely to be travelling very fast. This is even more so the case when you factor in rough terrain and bad weather.

The only times that trail shoes really outperform hiking boots consistently, is when you are looking to travel quickly and carrying a light backpack on a well-traveled trail without mud or precipitation.

Given their easy-to-wear nature and immediate comfort, trail shoes will only continue to grow in popularity as more people take to the trail to get fit, live better and enjoy time spent away from modern life in the great outdoors.

How To Use Backpack Loops

Once you know how to use backpack loops effectively, you can increase your backpack’s volume and prevent wet, smelly or dirty items from spoiling your clothes, sleeping bag and other gear.

How To Use Backpack Loops

Backpack loops are a great way to carry extra items, yet they should be used sparingly, you don’t want a huge extra weight sat at the back of your pack, nor any items that swing and could potentially cause a fall. Let’s take a look at the best uses for backpack loops and how to use them to your advantage.

If you are interested in learning about our top backpack suggestions, then please check out the best backpacking backpacks for men and the best backpacking backpacks for women. There are loads of excellent options available there!

What are Backpack Loops?

Backpack loops are webbing loops that are securely stitched into your backpack, allowing you to attach a variety of objects. Backpack loops can come in a series, known as daisy chains or they can also be individual loops located at various points around your pack.

Although reinforced nylon webbing is by far the most popular choice of material, thanks to its strength and durability, you may also come across finer plastic loops.

Backpack loops also come in a variety of sizes, some are large, ideal for attaching bulky heavy items, while others are very small and can be used for smaller items or to construct your own rigging to hold items in place.

How to use Backpack Loops

Most standard backpack loops allow you to simply clip on extra gear with a carabiner or a webbing strap. If you’re attaching heavy items it’s important to ensure that they are well attached and stable. It makes sense to attach heavy items to at least two backpack loops so they do not swing and put you off balance.

Some manufacturers include a series of small backpack webbing loops designed to be used with cord. If you’re looking to use them to carry soft bulky items, simply tie on some elasticated cord and interlace it across your pack.

This will create a custom rigging that will securely hold extra layers or other voluminous, squishy items. You can still clip them on for maximum security.

To create a custom rigging for heavier items, which will help stop them from swaying and bring their center of gravity a little near to yours, attach heavy items as per usual with carabiners or straps.

Then use a non-elastic cord to securely strap them in place by interconnecting your small backpack loops with the cord. Basically, this is like having an extra-strong, very large-weave, customizable mesh pocket, that will work with any item.

What can I use them for?

Backpack loops are designed to carry anything you don’t want to put inside your pack. This includes items that may be pointy or have sharp edges such as trekking poles or ice axes.

They are also ideal for reducing bulk within your pack, saving precious space for items that require more protection. Backpack loops are also great for attaching helmets that would otherwise take up an enormous amount of space in your backpack.

Attaching dirty items to your loops will prevent you from getting your gear inside your pack dirty. This also saves on time as you may need to reuse dirty gear several times before washing it, so you won’t have to stop to rinse it off and dry each time before repacking.

Obviously, the same goes for wet items. Attaching them to the outside of your pack will not only keep your other items dry inside, but it will also enable them to dry and prevent bad smells and bacteria from building up inside your pack.

This is a common site on the Camino de Santiago for example, where people often attach washed socks and so on to their pack, to dry as they hike. Dirty or wet items may include clothing, footwear, accessories and anything you may have just dropped in that muddy puddle.

You may also want to attach any items that smell strongly in your backpack, rather than placing them inside with your clothes and sleeping bag. This is especially true for stoves that may have retained some fuel residue, saving you from having to pack extra layers around it to contain the smell.

Frequent Use Items

Backpack loops are ideal for attaching frequent use items. One quick clip and your hands are free, yet gear such as your trekking poles or ice axes are just to hand when you need them.

Laminated maps, external pouches containing smaller items or snacks and water, even messenger bags are all typical examples of items you may want to attach to the outside of your backpack.

You may also find that any last minute, nearly forgotten items from camp are more conveniently clipped on and repacked later when stopping. Especially when travelling in a group and everyone’s ready to go. The same goes for shared items that you’re taking in turns to carry.

Many people also tie parts of their sleeping system, like a roll mat, to the outside of their pack as they can be quite bulky to carry and won’t fit inside a backpack well, if you use one.

Apart from attaching dirty, bulky, pointy, smelly and frequent-use items, backpack loops can also come in use to tie down your pack securely when traveling.

You’ll feel much more secure knowing your pack and gear are tied down on to a luggage rack for example or the back of a pickup. Heavy falling backpacks are not likely to damage your stuff, but they could concuss somebody or fall off a moving vehicle.

Disadvantages

Before you start attaching items to your backpack, it’s important to remember that heavy items need to be properly secured. Heavy items should really be carried inside your pack, close to your back and center of gravity.

Having a heavy item attached to the rear of your back is going to pull down on your shoulders and tip you back. So, if you’re thinking of going for any distance with a heavy item clipped on, you may want to think again.

Also, items that are clipped on, are prone to swinging and can destabilize you. This is especially true for heavier items. Apart from being irritating, this can be dangerous when you’re faced with narrow paths, inclines, descents and rocky, crumbling terrain.

Aside from causing slips and falls, swinging items can also cause your pack to chafe or give you shoulder ache.

Any bulky or pointy items that you have attached to the outside of your pack can also prove hazardous for other people hiking in your group and will most definitely slow you down.

This is particularly true in wooded, dense areas or narrow sections of trail where you may end up tangled up in the vegetation.

In summary, be sure that anything you attach to your backpack using backpack loops is secure and is not freely moving about.

Conclusion

Once you know how to use backpack loops correctly, they will become an invaluable feature that will save you time and hassle, keeping your pack better organized, cleaner and allowing you to fit in what you need most.

Whether you choose to attach gear such as helmets or ice axes, wet or dirty clothing, even other attachment points, the real benefit of backpack loops is their flexibility and ease of access.

Just make sure that you’re comfortable with any extras attached before setting off, rather than having to stop early on to attempt to repack stuff, that’s always a pain 🙂

How To Pack A Backpack For Travel

If you’ve got a trip coming up and you’re planning on covering some ground, either sightseeing, hiking or country hopping, a decent backpack is going to be indispensable.

With a backpack, you’ll have your hands free for photos, messaging and refreshments, and you won’t have to worry if the terrain is anything other than smooth and level.

How to Pack a Backpack for Travel

If you’re wondering how to pack a backpack for travel, read on and get the low-down on how to plan, organize and pack when you’re using it for all your varying adventures.

Plan

Before you can even think about starting packing, its essential to plan what you really do need. Not only will this prevent you from over-packing, it will also help you to ensure you have all of your essentials, rather than having to unpack and check for various items.

It helps to visualize all the gear you’re planning to take. What’s more, this will give you some perspective of whether it is going to be practical, or even possible, to take everything you think you’ll need.

Once you have your stuff set out in front of you, go over each item carefully and if you’re not 100% certain you’ll be using it frequently then put it to one side.

If you manage to scale back your packing to a reasonable weight, you can always add one or two items back in. While you’re in the planning stage, favor multi-use items or clothes that easily mix-and-match.

Any valuable items, or large stocks of disposable and inexpensive, everyday items should be ruled out. You don’t want to risk losing anything that will be difficult to replace and unless you’re heading off into the wilds of nowhere, you’ll be able to purchase supplies at the other end as needed.

If you’re not checking your pack, this is especially true to save having items confiscated. Even more so if you’ve got connecting flights in different countries where take-on rules may vary.

Organize

Once you’ve decided upon your everything you need to pack, it’s really helpful to organize your gear. In most cases, you’re probably going to be packing and unpacking several times and in any case, it always helps to have your pack organized so you’ll know where to find what you need in case of an emergency.

Stuff sacks and dry bags are essential for protection and make repacking a breeze. Roll your clothes where possible for less creases and more effective use of space.

Don’t forget as time passes you’ll need extra bags to store dirty laundry and any new purchases. It’s always good to pack a few empty plastic bags for this type of thing.

You’ll find that dirty laundry seems to take up more space than neatly pressed clean stuff and you’ll need somewhere to store souvenirs, emergency bulkier replacements and the like, so aim to have at least 20% of your pack’s capacity free at the beginning of your journey.

Main Compartment(s)

To best utilize the space available, you should place your sleeping bag, sleep sack or other bedding at the bottom of your pack. You’re only going to need this when you’re stopping for the night, and a lot of packs come with bottom zipper access.

Place any other lightweight, compressible and soft items at the bottom of your pack. Not only will this save you space, it will also make your pack easier to carry and provide an internal shock absorber for your back.

Note, you’ll want to have easy access to both a waterproof and a warm layer, so set these aside for later.

On top of this layer you should place your stuff sacks with items you’re not really going to need access to throughout the day or whilst on the go.

So, pack your clothes whilst placing any heavy items near to your back, for optimum weight distribution. It’s wise to place any electrical items in waterproof bags and to surround them with softer padded items if you’re not taking a messenger bag.

This section of packing is also a great place to store a spare bank card, emergency cash and a photocopy of your ID, just in case you lose your wallet or are a victim of theft.

Just make sure you have all the details with your other cards of how to cancel this one should you become parted with your backpack. Many backpacks will have a hidden pocket for just this purpose, to keep things that extra bit safe.

The Top

The top of your backpack should contain items you’re going to need on the go, such as a warm layer, waterproofs for you and your backpack and any other gear you don’t want in the outer pockets.

Bear in mind that what you may stash in your outer pockets for hiking, you may want to place within your pack whilst navigating busy airports and train stations, city streets and so on where pockets can be easily opened and emptied in the blink of an eye.

Once you’ve packed up, you should give your pack a good testing and make sure it’s comfortable. You don’t want to be unpacking and repacking on the go, or suffering with aching shoulders.

Take it for a walk around the block and make sure nothing is moving around and the weight is evenly distributed. Use your compression straps to keep it all in place if you’ve managed to keep that extra space spare or remove some items if the weight is not comfortable. You can always buy things on arrival if you really need to.

Outer pockets

Use your outer pockets for disposable, low-value items that you use frequently such as snacks, drinks and a book. Don’t forget airline regulations on liquids if you’re not checking your pack.

You might also want to stick in items such as sun cream, bug screen, hand gel, your Buff, maps, emergency contact info and any other go-to items in your outer pockets. Some of these can also be picked up along the way or on your arrival depending on your travel choices.

Security

If you’re checking your backpack on a flight, you’ll want to invest in a lock for it. I use this  Lumintrail TSA approved lock, and it works well.

TSA locks can be opened by airport security without damaging the lock or your backpack, so you can enjoy protection without worrying about security cutting your bag open if they decide to select it for a random deep search check.

Locks are much more useful than you realize. Even if you’re not checking your bag on a flight they’re great for any time when you might be separated from your pack or if you want to have a quick snooze on public transport.

If you’re travelling by bus or train for any part of your journey, you’ll relax much more knowing your pack is securely fixed to the luggage compartment rail. Locking your pack will provide you with a greater sense of security, especially around tourist hot-spots and if you’re using hostels.

Conclusion

It can be tough deciding what you can and can’t live without for a trip away, however, in most cases you can probably do without all but the very essentials and purchase any other items if you do really need them.

The downside about travelling with a backpack is having to unpack things to get at all your gear, so spending some time thinking about how best to pack it, is a good idea, to save you having to take loads of stuff out to get at something small.

There are lots of great backpacks now that have a large front compartment zip access as well, so you can access it like a normal suitcase, while also enjoying the convenience and comfort of carrying it on your back.

If you are interested in learning about our top backpack suggestions, then please check out the best backpacking backpacks for men and the best backpacking backpacks for women. There are loads of excellent options available there!

Now you know how to pack a backpack for travel, don’t forget to bear in mind any local, airline and travel restrictions before you go. Happy travelling!

Yikes, My Hydration Bladder Tastes Like Plastic!

If you have recently purchased a new hydration bladder and are trying it out for the first time, you’ll might find that your new hydration bladder tastes like plastic.

Hydration bladders often give water a slight plastic taste during the early days of their use. However, in most cases, provided this is just a faint taste and you’re not hypersensitive, it should pass, especially if you try rinsing it through with one of the solutions listed below.

Water Bladder

Why Does my Hydration Bladder Taste like Plastic?

Hydration bladders are made from plastic. When they are new, therefore, it is not uncommon for them to smell and taste slightly of plastic. This is especially true when you consider the plastic tubing.

Air is trapped within the tube, so the smell of the plastic takes a long time to go given its length and confined nature.

Water of course does not have a very strong taste, if any, and is easily flavored by what it is served in. Also, smell can cause us to taste things differently.

So, if you can smell the plastic of a new hydration bladder, you’re much more likely to taste a plastic taste in your water, even after rinsing it out.

In some cases, people taste plastic in their water due to the contact with the plastic mouthpiece. You essentially have a piece of plastic in your mouth so you are going to have a plastic taste. However, this is more disagreeable to some than others.

Note, not everyone has the same perception of taste and what tastes like plastic to one person may be imperceptible to another.

Do all Hydration Bladders Taste like Plastic?

Some hydration bladders taste more like plastic than others, and pretty much all new hydration bladders will have a slight plastic taste to them. Through use and rinsing out, a faint plastic taste or smell will usually fade.

Certain brands such as Platypus and Camelbak, to name just two brands, produce some of the less plastic tasting models, and as a general rule of thumb, you tend to get what you pay for, with some cheaper or non-branded bladders smelling and tasting much worse.

However, this isn’t always the case 100% of the time. If you only detect a slight plastic taste, get a second opinion. If your tester can’t taste any plastic, then you may want to stick with it.

When you’re out on the trail and really thirsty you may find yourself drinking from your hydration bladder without noticing any plastic taste.

How can I get Rid of the Taste of Plastic?

Here are some of the most popular ways to remove that plastic taste from your hydration bladder. Note in all cases, you should let the solution stand for a minimum of several hours and thoroughly rinse. It’s recommended you let your hydration bladder air dry naturally before using it again or testing it.

If your bladder has a very strong plastic taste, then it’s unlikely that any one of these solutions will work first time around, repeated rounds of cleaning can sometimes help if that is the case.

Don’t forget to also submerse your mouthpiece in your chosen cleaning solution. If you do succeed in removing the plastic taste from your hydration bladder, it will be pointless if you’ve not also done your mouthpiece.

Rinse Thoroughly with Water

If you are rather fussy about tastes and smells, you may be best trying to rinse out your hydration bladder with just plain old water, at least to start with. That way you won’t end up being bothered by another taste or smell from any cleaning solution.

The more you rinse out your hydration bladder, the less like plastic it should taste. However, in the majority of cases this is just not going to be enough unless you’re extremely patient and are willing to spend an awful lot of time rinsing it out again and again.

Mild Soap Solution

Make up a mild soap solution with warm water and your regular dish liquid. Leave it to stand in your hydration bladder for several hours. This may remove the plastic taste although, you may have to repeat several times.

Frequently, the plastic taste will be replaced by that of the soap, so you need to be careful when you plan to actually drink from it. Be sure to rinse thoroughly and try leaving water in overnight to remove any remaining soap taste.

Baking Soda

Baking soda can help to reduce the plastic taste from your hydration bladder. Dissolve two tablespoons of bicarbonate of soda into several liters of warm water.

Leave to stand in your bladder overnight and thoroughly rinse the following day. This generally works well, although you can add lemon juice for extra efficacy, although you may be left with a hint of lemon flavor to your pack, see below.

Lemon Juice

Add several cups of lemon juice to water and leave to stand in your hydration bladder overnight. Rinse thoroughly to remove all traces of lemon juice.

This is a popular, pretty effective technique, although you may need to repeat it a few times. This also leaves a faint lemon taste, which is a bonus if you like lemon in your water.

Note, this is probably not going to remove very strong plastic tastes, but it will remove and subsequently mask a faint plastic taste. Bare in mind that the acidic nature of the lemon can negatively affect the lifespan of your hydration bladder

Baking Soda and Lemon Juice Combo

Add a couple of tablespoons of baking soda to several liters of water in your hydration bladder. Shake, then add several cups of lemon juice. Be careful as the mixture will foam up, so you will be best doing this in over the kitchen sink. Leave the mixture overnight in your hydration bladder for maximum effect. Rinse thoroughly.

This is quite an effective combination and provided you like the taste of lemon, it can enhance the taste of water from your hydration bladder. You may wish to try repeating this a few times on strong plastic-tasting bladders for maximum effect.

Tomato Ketchup

Believe it or not, although I haven’t personally tried this I should add, tomato skin oil is renowned for its smell-removal properties. Washing your hydration bladder out with a ketchup solution sounds a little crazy, but it’s worth a try.

Add ketchup to water and stir until it’s well mixed. Add to your hydration bladder and leave overnight or for at least a few hours. Your bladder will need to be very well rinsed afterwards.

Ketchup often gets rid of the plastic taste, especially when it is only faint to start with. However, it contains sugar which is bad news for your hydration bladder.

It’s important to ensure that you rinse and clean it well afterwards, as any residual sugars could lead to an increase in bacterial growth within your hydration bladder. You might be left with a slightly strange taste, but this will soon rinse away.

Overall, be careful with this method, as you could introduce bacteria into the process, and you want to be very careful with that.

Denture Tablets

A personal favorite of mine, for cleaning thermos flasks and hydration bladders, is ti add denture tablets to water at the recommended concentration. Leave overnight for maximum effect.

As denture tablets are designed to thoroughly clean dentures they should have no problem with your hydration bladder. They are great for removing mild odors and tastes, however, be careful in your choice as you may not want minty-fresh tasting water, although I quite like this fresh remnant when I use it to clean my hydration bladder.

Out of all these methods, this is our favorite.

Bleach

Bleach is a dangerous chemical, so please take all necessary precautions when using it. You will only need a very small amount, one tablespoon of bleach for several liters of hot water, depending upon the size of your hydration bladder.

Leave the solution to sit in the bladder for a couple of hours before rinsing well.

Bleach will kill off any bacteria in your hydration bladder which can be useful for future cleaning. It can help to remove the plastic taste of your hydration bladder, but in doing so you’re likely to be left with a chlorine smell and taste for a short while afterwards.

If you drink anything other than water from your bladder, this method can help with the prevention of the growth of unwanted bacteria from sugar and so on, left behind if you are drinking a sweet drink from your hydration bladder.

Conclusion

If your hydration bladder tastes like plastic, you’ve got plenty of options to try to take that taste away, just don’t forget to treat your mouthpiece too.

For very strong plastic-tasting hydration bladders, it is much more difficult than removing a faint taste. In some cases, this fades over time and you will become used to it.

However, some cheaper, stronger plastic smelling and tasting models may never lose that original plastic taste.

If your hydration bladder still tastes of plastic after plenty of cleaning and rinsing, then you may have to try another brand, or simply stick to water bottles if this is something that you aren’t prepared to live with.

Our top bladder recommendation is the Platypus Big Zip LP reservoir, I use it personally and had no plastic taste issues with it from day one, which was great. You can check our best hydration bladder recommendations too, for more possible options.

The Best Hiking Boots For Yosemite

Choosing the best hiking boots for Yosemite can seem a little complicated. No doubt you’ve planned some hikes, picked out a few must-see landmarks, but maybe the boots you’ve seen seem a bit like overkill? Or perhaps you’re concerned that your boots offer too little, and just aren’t up to the task?

Best Hiking Boots For Yosemite

There is of course a wide range of features in hiking boots. In this article we help you find out which hiking boot features you really do need, and why, to help you settle on the right pair of hiking boots, so you can make the most out of your Yosemite trip.

Yosemite Hiking

With over 800 miles of trails, stunning scenery and famous landmarks, Yosemite is the third most visited national park. With approximately four million visitors per year, the park prides itself upon making the great outdoors accessible to a huge variety of people.

However, despite certain amenities and some easy hikes, featuring short paved trails, there are still many reasons you should take a pair of hiking boots with you for your visit.

In late spring and early summer, you may get away with a suitable pair of hiking sandals that are adapted for walking on wet rocks, if you stick to the short well-traveled circuits.

You will also see a lot of tourists wearing their running or tennis shoes, and although this may be an option depending on the weather, why risk ruining your footwear, limiting yourself to a handful of popular paved trails and the increased possibility of a slip or going over on an ankle?

If you want to get away from the crowds and have a truly personal experience you’re going to need some sturdy hiking boots.

There will be so many more options open to you with the correct footwear, and the stunning views you’ll get from the ascents and going a bit more off the beaten track, will really make your trip extra special.

Here’s what you need to look for to find the best hiking boots for Yosemite.

Comfort

It goes without saying that your hiking boots will have to be a good fit. However, if they have not been sufficiently broken in before your trip to Yosemite, you’re going to risk ruining your enjoyment of the park, a nasty blister can upset anyone’s day on the trail.

Break your boots in by wearing them for short periods, building up to day hikes, before your trip.

A complaint people often make when they’re not used to wearing hiking boots, is that they feel too rigid. In general, you should actually be looking for a hiking boot with a relatively rigid midsole, this will help to protect your feet from feeling every stone and tree root on the trail, as you would do with non-specialized footwear.

After several hours hiking your feet will feel much better in hiking boots with an EVA or even a firmer polyurethane midsole.

Now, be careful not to go overboard here, for general average hiking your outsole should still be flexible to some degree i.e. you can bend it with a reasonable amount of pressure between your two hands.

You will need extra foot support if you’re planning on taking on some of the more strenuous Yosemite hikes, such as the Half Dome Day Hike. Look for boots with good shanks or plates, or even both.

Shanks are thick inserts between the out and midsoles that add extra stiffness, whereas plates are thin and can flex. Plates help to protect the feet from bruising caused by uneven terrain and protruding objects such as roots, stones and rocks. Broadly speaking, shanks are the more common in hiking boots.

Traction

No trip to Yosemite would be complete without visiting Yosemite and Bridalveil Falls. You will need boots with a good outsole to prevent slipping on any wet rocks you may encounter.

In spring and early summer, when the waterfalls are at their most powerful, this is especially important. You will also need great grip during the colder months to navigate any icy areas that make traction difficult.

If you’re planning on taking the Yosemite Falls Trail, which is open year-round, you may find yourself struggling in summer with loose decomposed granite on the trail, in spring, there’s the waterfall spray and in winter, the upper part receives little to no sunlight so ice can be a problem, combined with snow.

Look for hiking boots that have effective lug patterns on the outsoles. These will give you much needed grip and help to stop mud from building up. Boots with heel breaks are well worth considering for safer descents, reducing the likelihood of a slide or sprained ankle.

Ankle Support

The support provided by hiking boots complements their comfort and traction. While a full hiking boot is often credited with providing ankle support, preventing sprains, it is also provided by a secure and rigid footbed and an excellent outsole.

On the Yosemite Falls and the Nevada Fall Trails, sprained ankles and knee injuries are a common occurrence, due to the many sandy areas and rocky terrain, combined with significant elevation differences.

Slippery footing calls for good support, so having your ankles supported is important. When your feet have a solid, stable base and are securely strapped in, you will be much less likely to have an injury.

Hiking Boots With Good Ankle Support

Another benefit to having a full ankle height boot is that it will keep out the majority of stones, twigs, leaves and sand out of your footwear.

This will keep your feet much more comfortable and will be much safer than having to stop and balance on a dangerous descent to pick out stones. You’ll also be able to focus much more on your descent without the discomfort of pieces of gravel digging into your toes.

Waterproof Upper

Mud, rain, melting snow and powerful waterfalls, mean that you’ll need to make sure your hiking boots are fully waterproof whatever time of year you visit. Wet feet can ruin even the most spectacular of hikes, so when you’re looking for hiking boots for Yosemite pay attention to waterproofing.

Leather boots are traditional, durable and will flex over time to the shape of your feet. You can clean and reproof them as necessary to keep them in prime condition for happy, dry feet.

Leather does, however, take a long time to wear in, so if your trip is coming up soon, you may want to choose another type, especially if you’re not planning on doing much regular hiking afterwards.

There are also a number of synthetic boots available. Usually made from nylon or polyester based materials, these boots tend to be less durable, but they are lighter weight and wear in much quicker than traditional leather.

Conclusion

So, we have looked at what the main characteristics are that you need to consider when thinking about getting hiking boots for Yosemite. For specific hiking boots recommendations, any of the hiking boots listed here for men and here for women will do the job well.

However, please be sure to keep your requirements in mind. If you are planning on a few a short hikes to the Falls, a full on backpacking boot would be a bit overkill for the job. Similarly, if you are planning on doing a bit of wilderness hiking, a lighter hiking boot or trail shoe, may not be the best option.

If I was pushed to recommend an all round pair of hiking boots for the job, I would probably go with the Lowa Renegade Mid GTX hiking boots, for both men and women. They tick a lot of the boxes you need for most levels of hiking in Yosemite, from Spring through to Fall.

The best hiking boots for Yosemite are, above all, ones that you feel comfortable in and that you have broken in well.

Any hiking, not just a quick mooch around the visitor center followed by a short stroll down a paved path, will require waterproof hiking boots with a sturdy outsole and solid midsole to help you to make the most of your time at Yosemite and to get to experience its amazing scenery close up.

We hope you found this article useful, please share it around your networks if you did 🙂

Trekking Pole vs Walking Stick, Which Is Better?

Trekking poles and walking sticks (or staffs) both provide extra support and stability when you’re out on the trail. Opinion is often sharply divided over which one is the most advantageous, so let’s take a look at the two head to head, trekking pole vs walking stick, and see if there’s a clear winner.

Trekking Pole vs Walking Stick

Walking Sticks

Walking sticks, also known as staffs, are used individually. They can be crafted out of a variety of materials, although the classic wooden walking stick is the main one that more frequently springs to mind.

Some people even recycle wooden sticks from household items to transform into staffs, or select a suitable tree branch before starting, or during, their hike.

Walking sticks can be purchased in non-hiking specific stores and they may have various decorations or insignia. As with anything these days, the amount of choice is endless.

Common usage

Walking sticks are often used for extra support over uneven terrain or when crossing water. Although some people may use them when ascending or descending they are generally best used on flat terrain.

Modern hiking staffs can be made from a variety of materials, and may also include additional features such as shock absorbers and camera mounts.

Advantages

  • Makeshift walking sticks can be picked up on the trail if there are plenty of trees around. They can also be left behind for other hikers and, therefore in these cases, don’t cost a penny and aren’t subject to any transportation issues.
  • A walking stick can help to provide extra support and stability, preventing trips and falls.
  • They can be used on an as-needed basis and don’t really require you to train to build up a regular rhythm with them.

Disadvantages

  • Walking sticks can cause you to overly lean to one side for support which can be dangerous on steep descents. If the stick is on the opposite side to where you need support then you may not be able to switch hands before slipping.
  • Also, the way that your hand typically grips a walking stick causes your body to dip on one side, which could even lead to a stumble or fall on terrain than is not flat.
  • Traditional staff models are also non-adjustable.
  • Walking sticks are best used with little to no load, so if you’re thinking of trying backpacking or going for a long day hike, and you need extra support, a pair of trekking poles would, in our humble opinion, be a wiser option.
  • Traditional hiking staffs can also be heavy and cumbersome to transport or carry when not needed, and you can’t always rely upon finding a suitable branch for a makeshift one when you’re out.

Trekking Poles

Trekking poles are designed to be used in pairs, although they can be used on as a single pole, and are generally made from modern, lightweight, man-made synthetic materials. There are a huge range of brands and different types available.

Unlike traditional hiking staffs, most trekking poles are adjustable in height, allowing an individualized configuration, which can be altered on the go to adapt to the terrain.

Trekking poles are designed to be used with their wrist straps, which provide support, with the hands only touching the pole handles when walking.

However, be careful with wrist straps, as if you take a tumble and you can’t loosen your hand, you could easily twist your hand or wrist. Generally speaking, we recommend you avoid the straps.

Common usage

Trekking poles offer excellent support. In particular, they are extremely useful for taking pressure off the knees during steep or prolonged descents. Unlike hiking staffs, trekking poles are designed to be used over a wide variety of terrain.

As mentioned, they can be adjusted in height, so they can be effectively used for ascents by reducing their height, descents by lengthening, and even contouring hills with one longer than the other. There are many benefits to trekking poles.

Advantages

  • Trekking poles are lightweight and easily attached to a backpack when not needed.
  • They provide greater support and stability on varied terrain and are especially useful for hill walking.
  • As they are generally used in pairs, they can provide much greater support.
  • Their adjustable length means greater safety and security on steep gradients, meaning less falls and slips.
  • Trekking poles can be utilized in certain tarp and tent configurations and so can help offer a much lighter solution than carrying a classic tent.
  • The use of trekking poles will also increase cardiovascular activity and upper body movement.
  • Trekking poles can also help you to speed up your hikes and feel less fatigued at the end of a long hike.

Disadvantages

  • Trekking poles can be expensive if you’re looking for a quality lightweight model.
  • They can also be difficult to take on planes if you’re planning on hiking overseas, you may need to check them before travelling to your destination and back home again.
  • Although using trekking poles is generally a quick learning curve, it can still take a while to really get used to them.

Which one should I choose?

If you’re unsure which one to go for, in our opinion, trekking poles generally offer the best support, and they are easily stowed on or in your pack when you don’t need them. However, it really is a matter of personal preference and what suits one person, will not necessarily suit the next.

It is also important to take into account what kind of terrain you will be hiking over as this can affect your choice and preference. Some people use a walking stick to push vegetation out of the way, for creek crossing and rocky terrain without ever feeling the need to try using two poles.

For steep gradients and hill contouring with narrow paths and loose footing, trekking poles can greatly improve stability and prevent accidents from happening.

They can also help reduce fatigue and provide support. Trekking poles can of course also be used to help push vegetation out of the way, for creek crossing and rocky terrain.

If you’re planning a long hike over mixed terrain with plenty of hills and a heavy backpack, then trekking poles would seem to be the obvious choice.

Conclusion

When it comes to the trekking pole vs walking stick head to head, we feel trekking poles are the clear winner. They are just more versatile and they are going to provide you with more support over a wider variety of terrain.

You can to some degree also mimic a walking stick / staff by using one trekking pole, so you can have the best of both worlds to some degree. However, there are people who feel uncomfortable with trekking poles and prefer to use a single walking stick.

The most important issue is that you feel comfortable and enjoy your hike in safety. If you don’t have a marked preference for one or the other, try a few different hikes over varying terrain with different walking sticks and trekking poles and see how you get on. The proof is in the pudding, or the eating of the pudding I should say 🙂

We hope you found this short article useful. Please share it around your networks if you did.

Can Walking Reduce Cholesterol?

In the period between 2013-2016, nearly 12 million adults over 20 years old in the US had dangerously high cholesterol levels, with may more in the borderline high zone.

Although progress is being made, cholesterol remains a problem for a huge number of people. Getting active is an essential way to help solve or reduce the many health problems that are exacerbated by a sedentary lifestyle.

Can Walking Reduce Cholesterol

If you’re affected by high cholesterol and you’re not particularly sporty, you’re probably wondering can something as basic as walking reduce cholesterol?

Let’s take a look at what cholesterol is and how the benefits provided by regular walking can help. Why walking? Well, if you ever wanted to get started on an exercise plan to improve you help, there is no easier doorway than to start walking regularly!

What is Cholesterol?

Cholesterol is the name given to a fatty substance that our bodies produce or that is found in certain types of food. Not all cholesterol is bad and we all need cholesterol as it is essential to keep our bodies functioning.

However, when cholesterol levels get too high they can cause problems and exacerbate other conditions, often leading to fatalities. It is recommended you get your cholesterol levels checked every four to six years.

Can Walking Reduce Cholesterol?

Walking, along with any other form of exercise, can reduce cholesterol. The Surgeon General recommends that all adults exercise at a moderate intensity for two and a half hours per week.

This can help to prevent many other problems associated with a lack of exercise that can also become exacerbated by cholesterol.

Cholesterol causes problems by blocking the arteries and can significantly increase your chances of having a heart attack or a stroke. Regular walking is an exercise that has been proven to reduce cholesterol levels and the associated risks.

By exercising regularly your body will start to increase levels of HDL, also known as the “good cholesterol”. HDL removes fatty deposits from your blood stream, where they risk clogging up the arteries, and transports them to the liver. There they will be broken down and go on to be expelled from the body.

Walking regularly will also help you to keep your weight down, by burning extra calories. This is especially important if you have high cholesterol levels as being overweight can cause the amount of unhealthy cholesterol in your blood to increase.

Furthermore, walking has been proven to reduce high blood pressure and this will additionally help to keep your blood vessels and heart in excellent shape, further reducing the risk of a heart attack.

Why Walking Over Other Sports?

If you suffer from high cholesterol levels, regular walking is an excellent way to help reduce them. Although other sports will be of equal or even greater value, walking is something that can easily become a part of your every day schedule, making targets easier for a greater number of people to achieve.

Walking is free and something we can almost all do without needing to acquire any specialist skills. Of course, if other activities take your fancy, then go for it. For those struggling to find an effective way to lower cholesterol, walking offers a gentle way to get started.

Aside from incorporating walking into your daily schedule, such as walking to work if possible, walking to the shops, taking the stairs, walking to complete errands, it’s also important to go for longer more purposeful walks as your stamina increases.

Over time as you feel increasingly comfortable walking further and longer it may be time to increase your intensity. Walking faster will increase your aerobic fitness and provide a better workout.

To increase your fitness level and further reduce your cholesterol levels, without going to the gym or trying out another sport, hiking might be for you.

Getting Started Hiking

Hiking offers all the benefits of walking and more. As opposed to walking, hiking usually involves longer, set distances along a specific trail across countryside.

This gives you a target and often helps to rapidly improve fitness levels thereby reducing cholesterol. By keeping up regular walking you will be in good shape for weekend hiking, so you should be able to get off to a good start

Planning is important. Although walking round the block and on errands might have been getting pretty boring, there’s a lot we take for granted when we’re in the middle of civilization.

When you’re on a hike, even just for two or three hours, you’ll need to plan ahead and take a small daypack with a couple of emergency items, water and extra layers of clothing as needed.

To start with you can use the same footwear as you use for walking, although over time you may wish to upgrade to a pair of hiking boots for more support and to cover a wider range of terrain.

So Many Benefits!

Steep gradients, rocky ground, and walking on sand will all help to lower your cholesterol levels, burn up calories and workout your muscles. The longer and more difficult the trail, the more you’ll improve. Just don’t forget to start off slow and know your limits. This will keep things enjoyable and manageable.

Hiking will not only help lower your cholesterol levels and keep you fit and healthy, it will also improve your stress levels and pick up your mood.

Spending time outdoors in natural settings has been proven to be important for mental health, especially in our increasingly ever connected world. By hiking to improve your physical health you can also improve your sense of well-being and mindfulness at the same time.

It’s also a great way to explore the country, make new acquaintances, discover wildlife and the beauty of nature. In reducing your cholesterol, you could also discover much more to life than you could from a gym or a sports class. In summary, the benefits of hiking are many.

Conclusion

So, can walking reduce cholesterol? Without a doubt, provided it’s regular and undertaken with some level of intensity. Walking is one of the best ways you can incorporate losing cholesterol into your lifestyle.

This ensures that once you’ve reduced your levels they will stay down there at a healthy level. It’s easy to get started, costs you nothing and you will most likely enjoy the process.

when you are comfortable with walking regularly, you may want to expand on your regular walking activities by expanding into hiking.

As mentioned above, hiking can help provide a greater physical workout and will keep you interested, allowing you to explore different areas of the country. It will also increase your general sense of well-being and appreciation of the great outdoors. Overall, it’s a win-win 🙂

We hope you found this article informative and useful. Please share it with your networks if you did.

How Do Water Filters Work

How Do Water Filters Work and Some Essential Tips

It’s easy to understand why most people rely on a water filter either while they’re at home, on vacation, or out in the wilderness, especially when you can never guarantee the quality of water you’re drinking.

Unlike other types of contaminants that are relatively large and easy to see in unclean drinking water, when you learn how water filters work, you would realize that these devices are designed to clean out the things you can’t see.

In plenty of places around the world, you can find crystal clear water, but it may also be filled with microscopic bacteria, viruses, and heavy metals that can make you quite ill.

Being able to answer, how water filters work will give you a clear understanding of where clean drinking water comes from and its benefits.

What is the Most Common Type of Water Filter?

There are four main types of filters that you can find examples of in today’s society: activated carbon, ion exchange, reverse osmosis, and distillation. In terms of water filters that you use while hiking, you’re most likely to experience the benefits of activated carbon versus any of the other types of filtration.

Activated Carbon Filters

Also used in household water filters, any filtration straws or pumps that you use in the wilderness will also have activated carbon in them. These are small granules of activated carbon (or charcoal) that help pull impurities out of the water.

What makes them such great filters is that each granule has a large surface area that attracts plenty of contaminants and traps them during adsorption. Adsorption, similar to absorption, is when liquids and gasses will get trapped inside of liquids or solids.

Activated carbon/charcoal filters are phenomenal for getting rid of common contaminants including chlorine, pesticides, some toxic solvents, and more.

What makes the activated carbon in household water filters different from specialized filters, such as the ones designated for hiking and survival, is that the specialized filters can also get rid of some heavy metals, microbes, and fluorine.

How Do Water Filters Work, Particularly Activated Carbon?

Now that you have a general answer to on how water filters work, it’s time to go through the process of how dirty and murky water transforms into clear and safe water as you consume it through a water filter straw or pump.

Step 1: Extracting the Water

Depending on the device you’re using, you will likely have to use a hose to access the source of water you’re going to use. This hose is responsible for bringing the water from its source through the filter and then to the spout once it has been cleaned.

No matter how high-tech you believe your water filtration device is, it’s always best to avoid water sources that could possibly contain toxic chemicals, as you won’t be able to tell if all of the harmful elements have truly been removed without the help of a microscope.

Step 2: Purifying the Water

As the dirty water is brought into the filter, the activated charcoal will seek out any contaminants and based on the type of filter you have, contaminants as small as 0.01 microns can be removed, giving you cleaner water than you would ever imagine.

The majority of activated charcoal filters will have a three-step filtration process.

  • Pre-filtering: During this stage, any traces of algae and bacteria will be removed from the drinking water.
  • Second filtration: At this point, a second carbon filter will get rid of traces of heavy metals and generic pollutants.
  • Ultrafiltration: For added protection against viruses, the third filtration step will remove up to 99.9% of other contaminants that could make you ill.

How to Store the Filtered Water?

Once the water filter has done all that it can to remove as many contaminants as possible, it’s your responsibility to make sure that you have a clean and safe place to store your purified water.

Again, depending on whether you’re using a water filter pump or straw, you can either consume the water right away or store it in a hydration bladder or jug for your family or hiking buddies to enjoy.

However, it’s important to remember that you’re able to continue to protect the water against other contaminants such as bugs; otherwise, it certainly won’t be as clean as it was when you first harvested it.

How to Clean and Store the Filter?

The vast majority of water filters will require a small amount of maintenance to make sure they’re cleaned and ready to use the next time you need to filter some liquids.

Not only are you going to want to make sure that all of the parts of the filter have been dried, but that they are also cleaned out. The last thing that you would want is to filter dirty water, have contaminants stuck in between the filter, and then find their way into your next batch of clean water.

In most cases, your water filter will give you instructions on what to do if the filter gets dirty. For example, some devices recommend that you throw the filter away and buy a new one, whereas others will come with a cleaning syringe to help pluck large contaminants out of the filter.

When it comes to storing your water filter, it’s the next important part of answering the question “How do water filters work?”

You’ll need to make sure that the filter and all of its parts have had more than enough time to dry as you won’t want any traces of mold and/or mildew appearing in its nooks and crannies, essentially rendering it useless for your next outdoor excursion.

Our Final Thoughts

No matter if you’re getting all of your hiking gear together or if you’re planning a trip overseas, having access to a water filter could mean the difference between life and death.

Although there are exceptions in both directions, as a general rule, the human body is only able to survive for three days without water, and the last thing you’d want is to be in a position to where you’re forced to drink contaminated water that will only make you sick.

With the help of these unique devices, you’ll have the comfort of knowing that up to 99.9% of harmful elements have been removed from the beverage you’re about to consume, no matter where you are.

Additionally, it can be a fun experiment to see the quality of your drinking water at home and how much fresher it will taste once it has been purified with the help of activated charcoal or another type of filtration.

What’s The Best Sleeping Bag For a Tall Man

The average male height is around 5 feet 10 inches, with the majority of sleeping bags aimed to comfortably accommodate a 6-foot man. So, if you’re taller than this, you may struggle to get a comfortable night’s sleep in a standard sleeping bag.

Sleeping Bag for a Tall Man

Fortunately, there are larger models available, they’re just not always that easy to find. Read on to find out how to evaluate what’s the best sleeping bag for a tall man and make your decision without compromise.

Standard Size Sleeping Bags

As mentioned above, standard sleeping bags for men tend to cater for a height of around 6 feet. However, even when purchasing a standard bag, many people often underestimate the amount of room that they actually need, not only in terms of length, but also width, with extra space on top if you tend to turn a lot in your sleep.

In fact, a standard size sleeping bag aimed at a 6-foot man should really have an actual length that’s around another 6-8 inches longer. This extra length is necessary to accommodate a sleeping person.

Think about it, when you lie down your spine relaxes and your feet point forward, so everybody, regardless of their actual standing height, is going to need at least an extra half a foot in terms of length.

If you’re a reasonably tall person and you’re thinking you will probably just about fit in a standard-size sleeping bag, you may want to do your calculations again, using your lying down length rather than your standing height.

XL Sleeping Bags

There are a number of larger sleeping bags readily available, they’re just not always clearly marketed. It helps to write out the measurements you need before starting your search and to check the manufacturer’s specifications in each case rather than relying on descriptions.

If you’ve now realized that you might need to go in for a larger-size sleeping bag after all, let’s take some factors into consideration to help you to make an informed choice in selecting your larger sleeping bag.

Fit

All sleeping bags are not going to be a perfect fit for everyone, we are all different sizes and have different preferences and styles of sleeping.

However, if you consider for one moment the actual purpose of a sleeping bag, as opposed to a quilt or blanket, you’ll realize it’s designed to keep warmth in by trapping a layer of warm air between your body and its fabric.

If the sleeping bag is too small, you body will crush the insulation and there will be less air storing the heat next to your body, so you’ll not only feel uncomfortable, but you’ll also lose a lot more heat.

If, on the other hand, your sleeping bag is too big, you’ll also lose heat as it will just escape. Ideally for maximum insulation, you need to have several inches space between your body and your sleeping bag to maximize warmth and comfort.

In other words, if you are very tall and the measurements just aren’t adding up, you may want to consider reading some customer reviews to find out how certain bags match up with certain heights. It’s always best to learn from other’s mistakes, when possible.

Value For Money

A larger sleeping bag is going to cost more, as it’s made from extra materials and takes slightly longer to make, whilst taking up more storage space. So, you should expect to pay more.

There’s also not the same amount of choice, and where there’s less competition, prices can be unjustifiably high. In other words, use caution. You’ll have to pay more, but it shouldn’t be a huge amount more, not unless you’re planning to get one made to measure that is.

Features

While there may be less choice than for standard models, you’ll still have plenty of options for different features, such as shapes and styles, fillings, zipper types and so on.

When you’re looking for a suitable sleeping bag and you’re worried it’s going to be a little on the snug side, make sure that you take any extra features into account. For example, a mummy style hood is going to more strictly limit the length of a sleeping bag than one without a hood.

Dimensions

Aside from the length of the sleeping bag, you’ll also want to consider its width. Even if you’re not at all bulky, if you are taking up a few extra inches in height, this is going to have an effect upon the width and the whole shape of the bag. A slightly wider sleeping bag will give you more room to turn over and move about, even if you’re reaching the maximum limit lengthwise.

Another consideration to bear in mind when choosing a sleeping bag for a tall man, is its folded dimensions. As longer sleeping bags will be bulkier, if you’re planning a hiking trip you may find you will need to factor in extra space to carry it, or you may wish to consider using a lighter model or one that stores into a more compact space.

Product Review – Teton Sport Celsius XXL

If you’re struggling to find a larger-sized sleeping bag, we’ve reviewed one of the most popular, reasonably priced ones. While the Teton Sport Celsius XXL is an entry level product, it does offer excellent value for money. So, if you’re hesitating over buying yourself  a sleeping bag because of your height, this would be a great one to start with.

At 90 inches long, the Teton Sport Celsius XXL is recommended for heights up to 6 foot 6 inches. With a width of 39 inches, you shouldn’t have to worry about your above average height restricting your width, even if you’re on the bulky side.

To find out more about its features, pack size and temperature rating, visit Amazon for the full product specification.

Conclusion

What’s the best sleeping bag for a tall man? If you’re over 6 feet tall then your best option is to look for a sleeping bag in an XL range or one created specifically for taller people.

If you are extremely tall, over 6 foot 6, you might struggle to find one suitably long, and you may have to consider camping quilts or a made-to-measure sleeping bag.

We hope you found this article useful. As always, if you did, please comment and share around your networks 🙂

  • « Previous Page
  • 1
  • 2
  • 3
  • 4
  • 5
  • 6
  • …
  • 16
  • Next Page »
  • Facebook
  • Pinterest

What are you looking for?

Copyright © 2025 · Cool Hiking Gear

Cool Hiking Gear is a participant in the Amazon Services LLC Associates Program, an affiliate advertising program designed to provide a means for us to earn fees by linking to Amazon.com and affiliated sites.

  • About This Site
  • Privacy Policy
  • Affiliate Disclosure Statement
  • Contact