Today, continuing on in our series on getting started with hiking, I wanted to do a short post on planning a hiking route. At the start of this series we looked at where you should go for your first inaugural hikes and how far you should go. When you have those things worked out, you then want to start thinking a bit more about your actual route that will fit the criteria you’ve laid out.

Now, as I mention throughout this series of getting started with hiking posts, it’s a good idea to keep your first hikes well within your comfort zone and to stay on very well marked paths and trails, so much so that you could probably get away with hiking on them and making your way back to base without a map.
Overall, the main priority is to stay safe so you have the freedom to enjoy your hike and get familiar with being out on the trail. The best way to do that is to do some good route planning in advance. For this I’ve listed some pointers below to help guide you through the best way to do this.
1. Plan Your Route in Advance
Stating the obvious here but, in short, no matter your level of hiking experience, you should always plan your route in advance!
Try and get an up to date map of the hiking area. An up to date map is important as things do change over time and trails once marked on the map may
no longer be in existence! Also, be sure to keep in mind that some basic land features like forests, even an up to date map, can change. For example, they are often cut down for maintenance purposes. When you go looking for it on your map, it may not be there which could lead to confusion.
Now this post is part of a series mainly targeted at beginners who broadly speaking, probably don’t have finely tuned navigation skills. However, it is very possible that you could have someone who is new to hiking but knows a lot about navigation. If you fall into that category and you do happen to have good navigation skills get a hold of a route planner and write out your route including coordinates, key points, distance between key points, timing (how long you estimate it will take you to get from one point to another), etc.

When you get more familiar with route planning, you can use certain tools and guides to help you work out more detailed information about your hike. For example, you can calculate the length of time your hike should take. Many people use traditional tools like Naismith’s rule to help them in that process, which although not perfect, is popularly used to give an idea of how long in minutes you should factor in when you ascend by an increment of 10 meters.
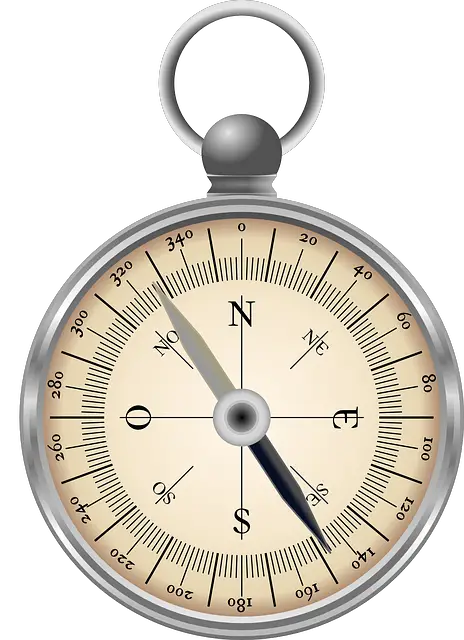
These days, there are lots of really cool smartphone Apps which you can utilize too. For example, I’m a big fan of Viewranger. It’s very easy to plan out a route once you buy the relevant map. While apps like that can also be used as a guide on your route, I strongly recommend that you don’t rely on that method alone. I do use Viewranger but I always keep the traditional method of map and compass close at hand. Batteries in phones can die, typically at the most inopportune times 🙂
I won’t go into too much detail on navigation this post, I do plan to start a series on navigation at some point though which should give a bit more information on the basics of navigation. In short there are plenty of tools and methods you can use to help you plan your route as you get more experienced. At the start though, I recommend you ….
2. Stick to Marked and Open Trails
If you’re new to hiking or if you’ve only been hiking a short while but do not have reasonable navigation skills, using a map and compass etc., then you should stay on established trails and marked treks. I really don’t recommend that you go venturing out into the wilderness and stray away from established paths as it is very easy to get lost if you do not have the navigation skills to guide yourself safely across open terrain.
It is also very possible that you could encounter difficult terrain e.g. cliff edges. While this will be marked clearly on any map, if you can’t read a map correctly it will mean nothing to you. All you’ll see are a bunch of squiggly lines very close together 🙂
The weather is another key factor here as if fog or mist develops you could be in difficulty if you can’t establish your position on a map and don’t know how to take a bearing to guide yourself safely out. If you’re hiking in a new area for the first time, it is also advisable to ask some locals or people who have hiked there before for any information on your route. The internet is a wealth of information of course.
3. Hike in a Group
Generally it is a good idea to have a few people hiking together. If one or two people get into difficulty, the odds are that someone is still able to raise the alarm and get help.
It is also a really good idea to try and hook up with some experienced hikers when you’re just starting out, that way you shouldn’t risk getting lost as their experience will keep you on the right trails etc. a great way to do that is to join a hiking club or group. You’ll not only be safe as you get started but you’ll likely make some new friends too.
4. Tell People Where You’re Going
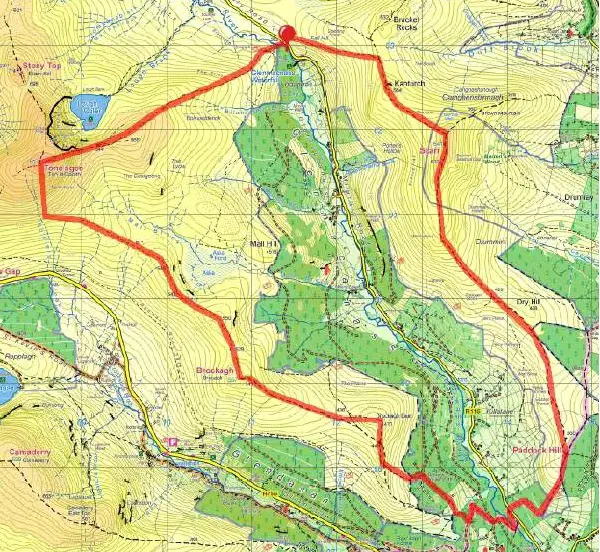
A simple but often neglected safety tip is to simply tell people where you are going hiking and give them the route you plan to take. A useful idea for this can be to photocopy the section of map you plan to hike and mark out the your hiking route clearly on it. That way, if you don’t show up for dinner, they have a pretty good idea where to send the search and rescue party!
 Again, Apps like Viewranger make this really handy and easy to do. I plotted the route above using it.
5. Easy Access Map
When you set out on your hike it is wise to have your map, with the hike route clearly marked out on it, fully open and with easy access to reference. Maps, as you know, can be big and unwieldy so you may need to bend them about a bit to get the relevant area clearly and fully visible.
 Another good tip here is to invest in a map bag, pictured above, to keep your map in. A map bag will keep your map dry and protected from the weather as you reference it while you hike. If you’re tight on funds a good food zip lock bag can do the trick just nicely!
Conclusion
So there you have it. Whether you’re brand new to hiking or a very experienced hiker, these same tips always apply. There are many more things to consider but these are some fundamental tips, if you will, on how to plan your hiking route and of course stay as safe as possible in the process.
When you’re at the stage of planning your route, you’re probably very close to hitting the trail and have all the other bits sorted out. Next up we’ll take a look at something everyone should be aware of when they’re out on the trail and that is to Leave No Trace. If you would like to start from the start of this series of posts on getting started with hiking, please click here.
If you found this post useful, please share it or leave a comment 😉