A key part of keeping all your hiking enjoyable is of course safety. A key part of safety is how you plan and set up your hiking route. Also, when you’re out on your hike, how you follow your planned route successfully and take any required alternative action, should your route need to change, is also a key element that go towards keeping you and your hiking party safe.
So, why the long contextual introduction? Well today I wanted to start looking at a key skill that all hikers should be familiar with as they get more and more hiking experience. That skill is navigation.

Now, if you’re a member of a hiking club and all your route planning etc. is already taken care of and you feel you don’t need to worry about all that technical navigation stuff, that’s fine.
However, there may come a time when you need to know a bit more, especially if you choose to go out hiking on your own or outside of your normal hiking club or group. This is bound to happen at some point so taking some time to learn some of the basics is a good idea. What’s more, it’s fun!
Navigation is a huge topic in and of it’s own right so I will try to go through it in such a way so as not to be too much at once.
I’m going to try and approach this in manageable chunks, as much for my own benefit 🙂 , so I will split it out into separate posts. With that in mind, I will try and keep each post at a reasonable size covering topics as the series progresses.
Today I want to look at our first topic in the series, map reading basics.
Map Layout and Scale
So, let’s start from the start. What is a map, or more precisely, what is a topographic map?
Basically a topographic map is a two dimensional representation of the land, features etc. in a three dimensional space or area. If you can, imagine you’re looking at some mountains and somehow, someone squished them down flat, that would more or less be what your topographic map looks like.
The map then uses a variations of lines and symbols to represent the physical attributes of the land e.g. height or altitude using contour lines and so on.
A map will normally be laid out in grid format (That may not always be the case though). Each line in the grid may have a letter and or number assigned to it. This letter or number helps define what part of country and or area the map is representing. These are also used to enable you to make grid references, we’ll look at all that in detail in another post though.
Maps will always be laid out in a scale. A couple of examples of common Scales are 1:25,000 and 1:50,000. So, taking the 1:50,00 scale as an example, this basically means that 2 centimeters on the map equals 1 kilometer on the ground (1cm = 50,000 centimeters, so 2 * 50,000 centimeters = 100,000 centimeters or 1km).
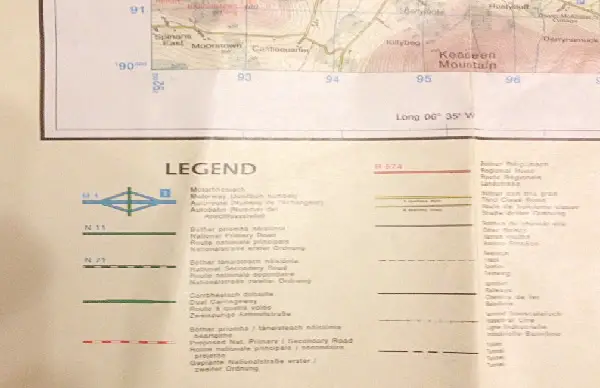
Nearly all maps I use are based on the metric system, (centimeters, meters, etc.) but there is usually some kind of accommodation for the imperial system (inches, miles, etc.) too. I’m sure there are imperial only based maps too. Every map will have a scale on it somewhere. Below is an example of a 1:25,000 scale on a map.

The scale will also be listed on the front of the map when you buy it. Basically, the lower the scale, the more detail you can expect on your map. It is good practice to get used to navigating off of different scaled maps though.
Codes and Symbols
All good maps will have a ‘Legend‘ of some kind which, as well as including things like scale above, will explain what all the various symbols on the map represent on the ground e.g. a dotted black line = a track, and so on.

There are also standard ways to represent similar things on all maps e.g. contour lines to represent height or altitude as mentioned above. Depending on the scale, the distance between each contour line will represent a level of rise in height. For example, the distance between two contour lines on an Ordnance Survey 1:50,000 scale map in the UK is 10 meters.
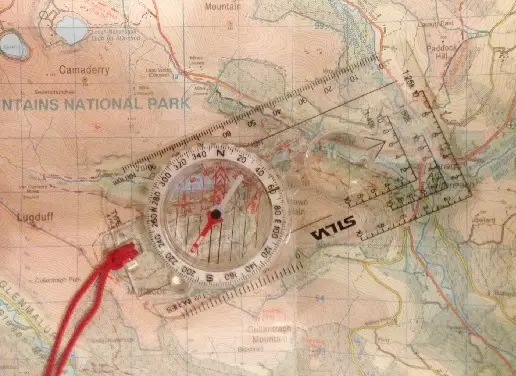
I’ll look at contour lines in more detail in a future post of this series but for now, see the wavy lines that run around in circle like patterns in the map picture below for an example of a contour line.
Grid (or Map) North, True North and Magnetic North
Huh!? Surely there is only one North I hear you cry? Well, not quite … let’s break it down.
Grid North
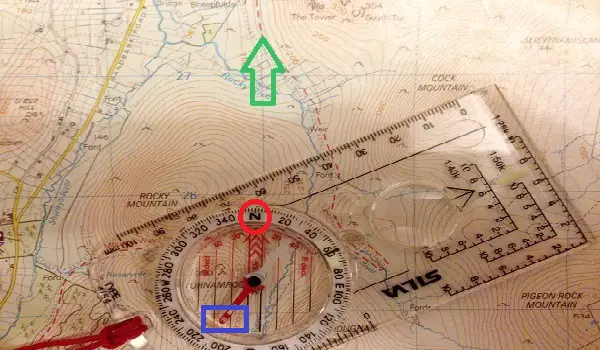
The top of a map always points to what is referred to as Grid North sometimes also referred to Map North. Grid North is north depicted by following the directional lines of a map. That is, the grid lines running upwards to the top of your map follow grid north as illustrated by the green arrow in the map below. Similarly, Map North is the top of your Map should no grid be present.
True North
True North is the line you follow, aka longitudinal lines, along the earths surface to reach the North Pole. This is very close to Grid North and although there is a slight difference, for basic navigation purposes we can take them as the same.
Magnetic North
Finally, Magnetic North is the direction in which a compass needle points. See the Red arrow in the blue square on the compass in the picture below.
So, why do we have all these different ‘Norths’? What is one in relation to another? OK, this is where it can get a little confusing so bear with me. For the detailed scientific stuff behind each of these, the links above will take you to Wikipedia where all that is explained.
What I will try and do here is to show you the practical use of these i.e. what you need to think about in real life.
Using Grid North and Magnetic North
In short, you need to know about and understand Grid North and Magnetic North. Now, this post is not supposed to be on how to take a compass bearing (although that will be done in this series soon) but I will use a compass bearing to help illustrate the required point here.
When you are looking at your map and you want to get from position A (rocky mountain on the map below) to position B (cock mountain on the map below) on it, you will take your compass and line it up appropriately between these two points.
You then align the North 360 degrees arrow, highlighted in the red circle below, with the grid lines on your map i.e. your compass arrow in the compass housing points North in line with the grid lines.

You now have a bearing from point A to point B using Grid North. However, to make that bearing something that you can actually use you need to account for the magnetic declination of the earth. You do that by adding the magnetic declination to the bearing you just took.
So for example, say my bearing from Point A to Point B was 60 degrees but I am in a location on the planet with a magnetic declination of 5 degrees. I now need to add those 5 degrees to my bearing before I can use it to accurately take me from point A to point B on the ground. My bearing now becomes 65 degrees and that is what I follow to get me from point A to Point B.
Your map will tell you the magnetic declination you need to account for in the legend information. However, it is important to point out here that Magnetic Declination changes from place to place and year on year as Magnetic North moves. So always keep that in mind, especially if you’re taking a declination number from an old map, it will likely be out of date.
As mentioned above, this post is not supposed to be on how to take a compass bearing, that will follow in this series in due course. However, I wanted to use this example to help explain the practical use of Magnetic North though.
Conclusion
OK, I think that’s enough for today! Hopefully it has helped you get a feel for some of the basic features on a map. This is only the first post in a series of many with regards to navigation so there’s plenty more to come.
It is worth noting that not all maps are made equal. In the UK and Ireland, one of the main map providers is the Ordnance Survey UK and Ordnance Survey Ireland. They tend to be pretty accurate and reliable. In the US, you can start with the US Geological Survey to find maps for your area.
Most countries have an official mapping body who take on the task of mapping their country but there are still places on the planet that haven’t been very well mapped out.
If you have any links to official mapping bodies in your country, please add a link to the comments below and I will add it to a list of resources here.
Next up, we’ll look at how to set a map.