If you use trekking poles or a hiking pole, chances are with a fair amount of use the tips will need replacing. You may also like to customize your poles by changing out the grips, or replacing them if they’ve been damaged.

So let’s take a look at how to fit hiking pole replacement grips and tips, for an easy way to extend your trekking poles’ lifespan.
In case you don’t already own a pair, trekking poles are useful for hiking, especially over tricky, uneven ground. They can also be great for descents, helping ease the strain off your knees and providing extra security and grip.
The same goes for ascents and obstacles such as rocky areas and creeks. Of course, not everyone uses trekking poles on the trail. They can, however, also be an essential part of certain shelters such as tarp tents, or serve a variety of on-the-spur uses.
Trekking poles are usually sold in pairs, but you can purchase individual hiking poles, it all comes down to a matter of preference and how you intend on using them.
Be aware that a good, lightweight pair of trekking poles can be quite expensive, so it’s best to consider how to fit replacement tips and their availability before purchasing, to ensure the maximum lifespan of your product.
You can see our top hiking pole recommendations here, there are a lot of great options for every type of budget.
Replacement Trekking Pole Tips
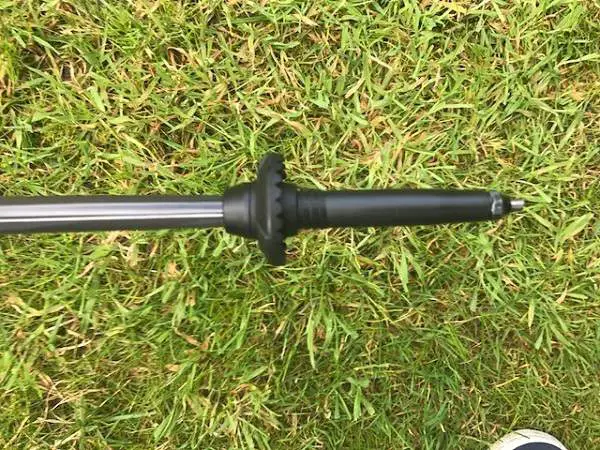
Trekking pole tips protect your poles from hard-surface damage. Replacement trekking pole tips vary in length and diameter.

In general, they consist of a heavy-duty rubber housing that contains the actual tip and fixes it onto the end of the pole.
You’ll often find that it’s the housing that wears down first, and removal can become pretty difficult if you allow them to wear down too much before changing them.
So, make sure you change out your tips once they become worn, the longer you leave them the more difficult it is likely to become to remove them, and in cases of severe wear, you may risk actually damaging the pole itself.
We go into the how further down the page, but first let’s get some background on …
Replacement Trekking Pole Grips
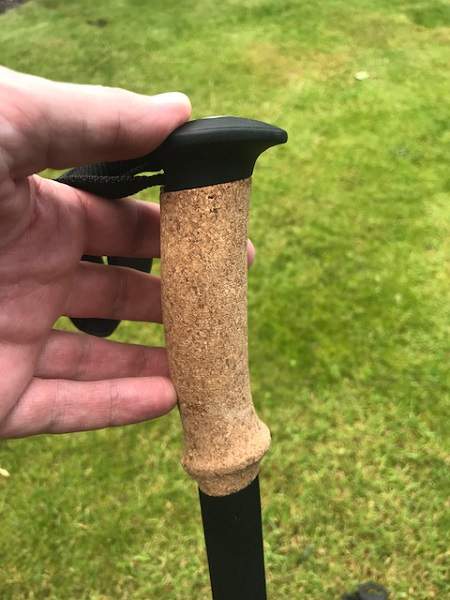
Trekking pole grips are located at the top of your poles and provide you with a comfortable grip to hold. They are made out of a variety of different materials such as cork, foam or rubber.

Your choice of grip will be determined by your personal preference, as well as what kind of climate you intend on using them in.
For example cork or foam grips absorb moisture well so you will still get a good grip on hot days, whereas rubber can become slippery, but it is a good choice for colder climes, insulating hands from the cold and shocks.
In most cases, you probably won’t have to replace your grips, except if they become damaged.
Damaged grips aside, you may choose to change your grips for others that greater suit your personal preferences, resulting in customized trekking poles. Weight, comfort and looks are typically the main factors.
Again, we go into the how further down the page but a point of note first.
Finding the Right Replacement Grips and Tips
A word of warning here, you may be best advised to check out the availability of replacement tips for your trekking poles before you purchase them.
For the rest of us who already have their trusty pair and are looking for replacements, there are some brand specific and other generic types available.
Basically, trekking pole diameters tend to vary between manufacturers, so where possible go for a brand specific replacement tip or grip for the best results.
However, as all trekking poles tend to taper off towards the end, you will often find that one replacement brand tends to fit another.
While it’s pretty rare for one type to be completely incompatible with another, some may be a little mismatched and you may find that the tip can sit a little differently than was originally intended.
Although this is unlikely to affect the usage of your poles, you might have to bear in mind any new height modifications when adjusting your poles.
In any case, one thing I will say, it’s definitely well worth trying out changing your trekking pole tips, rather than having to replace the poles themselves.
If your poles happen to size a little differently and you end up trying a few different types, it’s still going to be much cheaper than paying out for new poles unnecessarily.
How Much do they Cost?
Replacement trekking pole tips generally cost less than $10, some much cheaper, others nearer the ten mark. Replacing your grips can cost you a bit more, but around $20 is probably a reasonable figure.
Personally, due to the hassle of changing out trekking pole grips, I’ll only do it for some real good, comfortable grips, so I’d prefer to spend good money on a set of replacement grips that I really like if I’m going to go to the time and effort of changing them out.
How to Fit Replacement Trekking Pole Grips and Tips
As the saying goes, a picture speaks a thousand words, so I thought I’d share some useful videos that will allow you see what exactly is involved in changing out your hiking pole tips and grips.
Just to make things clearer, I’ve also provided a rundown of the main points you need to be aware of when you’re changing your trekking pole grips and tips.
How to Replace Trekking Pole Tips
The easiest and arguably the best way to change out even difficult trekking pole tips is to use boiling water and a pair of pliers or a crescent wrench.
The video below is a good guide to show you whats involved.
Steps
- Separate your pole, remove any baskets and submerse the end in boiling water for around 20 seconds.
- Remove using a pair of gloves and use a pair of pliers to pull or twist off the tip. The boiling water will help to soften any adhesive.
- If you’re having difficulty, try taking a crescent wrench and adjust it so it slides over the pole but not the tip.
- Run the wrench forcibly down the pole so it hits the tip all around with force. Repeat several times if necessary, or try heating it up again in case of difficulty.
- Replace the tip with the new one, you can leave any leftover adhesive.
- Bang the end of the new tip on a hard surface several times to be sure that it’s correctly and securely in place.
Note: if you’re having any major difficulties, maybe you’ve let your tips wear down too far and it’s proving impossible to get them off, then you might want to try sticking your pole in the freezer. This can help by causing the metal to contract.
Try it out after boiling the tip, if you’re still having problems. If nothing works, you could as a last resort try cutting through the tip with your Dremel or hacksaw, just be careful not to damage the pole itself.
Yet another useful video with tips below 🙂
How to Replace Trekking Pole Grips
Replacing your trekking poles grips is not a particularly complex task. It can, however, take time to get the job done right, with most of the time-consuming bits being related to removing traces of the old grip and its adhesive.
As above, the video below is a good guide to show you whats involved. We listed out the steps from that video below the video, for those who prefer to read through them.
Steps
- Firstly, you want to cut the old grip off, by making an incision down the length of it.
- Once you’ve pulled off the main part, saw off the top of the old grip with a hacksaw or a Dremel.
- You’re probably going to have various bits of stuck-on grip and adhesive that you’re going to have to use plenty of elbow grease on. Once you’ve got most of the remnants off, try soaking the area with lighter fluid and leave it to work for ten minutes. Peel off any remaining adhesive film.
- Be sure to thoroughly sand the area where your new grip is going to go. This will ensure a better contact and remove any last stuck on bits. Make sure you pay particular attention to the top of the pole where you cut off the top of the old grip. You want to make sure this is sanded off nice and smooth, or else you’ll risk damaging your new grip.
- Don’t forget to rinse out your pole to get rid of any dust or debris.
- Slide on your new grip.
Note: If you’re having difficulty getting your new grip to fit (it may be made for a slightly narrower pole), try warming it in the oven for a few minutes. The heat will help make it more pliable.
If it’s still proving a challenge, you could also try putting your trekking pole in the freezer so it contracts, then trying again with a warm grip.
It can also help to make a little mark when you remove the old grip so you know how far down you’ve got left to aim for when fitting the new grip.
If you didn’t you can check if the top wiggles about any, to make sure it’s fully in position.
Conclusion
Knowing how to fit hiking pole replacement grips and tips can extend the life of your trekking poles, saving you a substantial amount of money.
Changing out your trekking pole grips and tips can also allow you to customize your poles, so they meet your weight, comfort or design criteria.
Both are relatively easy to do, although changing out the grips can be a little more time consuming.
If you’re thinking of buying trekking poles, do your homework first and make sure you can get replacement tips easily, to keep your poles in prime condition.