As a regular hiker, it’s inevitable that at some point you’ll end up out hiking at night. While hiking at night is another really beautiful way to enjoy the mountains, it may not be everyone’s cup of tea. Believe it or not, you can get some spectacular views when all the stars align, as they say.
However, more often that not, your visibility is of course not going to be that great and so the views not always that spectacular. It is night after all 🙂
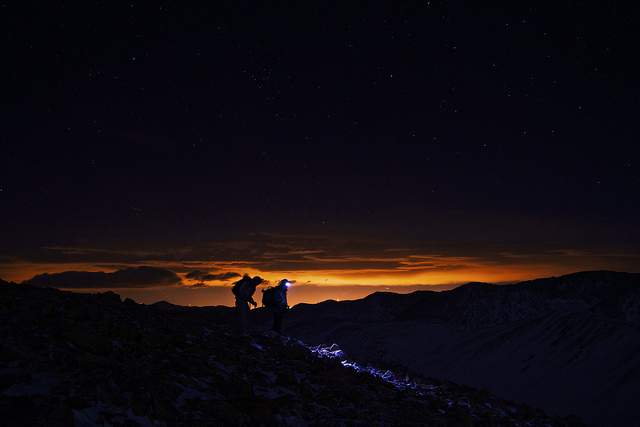
However, aside from intentionally going out night hiking, there is a strong possibility that a time will come when you’re out in the mountains at night but not by choice. On a summit for example on a hike in Winter where things may not go according to plan.
Picture this …
How Easy could this Happen?
You’re on a Winter day hike, setting out at 10am and you reach your destination around 1pm. It’s lunch time so you stop to have a bite to eat before making your way back to base.
Night falls at 5pm so you’ve got plenty of time, 3 hours there, 3 hours back with 1 hour, minus the time you stop for lunch, to spare. All good!
However, as you enjoy your lunch and take a hot drink in, the clouds start to close in quickly and the weather takes a turn for the worst. You know you’ve 4 hours maximum to get back before it gets dark so you decide to cut your lunch short and set out on your return journey.
Visibility is getting worse by the second, it starts to pour with rain and the wind starts to go up a few gears. You check your route plan and start to follow a bearing you took when you planned your hike last night.
Unbeknownst to you though, your compass has taken a knock in your pack and is now broken and pointing you in the wrong direction by 10 degrees. Unaware of this you push on.
That seemingly small margin or error means you’re now going further into the mountains in the wrong direction as opposed to back to your car.
The visibility is getting worse, so it’s a while before you figure out that something is up. You notice the land under your feet should be sloping steeply down by now for the route you should be travelling, but it is in fact going upwards.
At this point, an hour has passed before you’ve realized your error. With no visibility and not knowing your exact location, you have no choice but to spend another hour trying to get back to where you were to first confirm your position.
Your compass isn’t working and unfortunately no one else in your hiking party brought a compass along and you didn’t pack a spare.
The Long Journey Back
You manage to get back to the place you first made your error, that means you’ve just added at least 2 hours to the journey to get back to your car. You are now faced with the problem of getting back to your car from there, again with a damaged compass in zero visibility.
It will be slow going and it will take a lot of your mental resources to get out of that one. Let’s say that adds at least another 2 more hours to your trip back to your car.
So, now your initial 3 hour trip back to your car will now take at least another 5 hours, 2 hours for the mistake and 5 hours back to your car. You’re now looking at 7 hours return journey in total, assuming you go the right way too of course. The earliest you can hope to get back at is 8pm!
The Importance of Having a Headlamp
In terms of hiking, the story above may seem like a very drawn out way to state what may seem obvious to some, however it may not be so obvious to others.
In the scenario above, which could happen to anyone, whether you wanted to or not you’re going to be hiking at night. A lot of the time, especially in Late Autumn, Winter and early Spring, carrying a headlamp is a very smart thing to do, even when you only plan to go out for a day hike.
Should you get stuck in the mountains late in the evening, you will at least have some artificial light to help you see your way safely back.
Another great advantage to having a headlamp is that you can use it hands free so while you’re trying to figure a route out on your map or sort out whatever problem you may be confronted with, you don’t have to hold a torch in one of your hands.
Also, should be unable to walk, it can really help a rescue team find you at night. An emergency whistle is another critical piece of kit but if the wind is drowning the sound of that out, a flashing headlamp in the distance, assuming visibility is reasonable, is a really easy way to pin point your position.
Aide from these advantages in terms of hiking, if you enjoy any outdoor activity at night, a headlamp will come in handy. For example, if you like camping, a headlamp is a lot more handy to use than a handheld torch.
While you’re rummaging about looking for your stuff, it’s a really easy way to have good light to see what you’re doing.
In summary, a good headlamp is a really important piece of your hiking kit. It’s not only practical and functional, but it can play a significant role in helping to keep you safe on the trail, and can potentially even be a life saver.
What is a Headlamp?
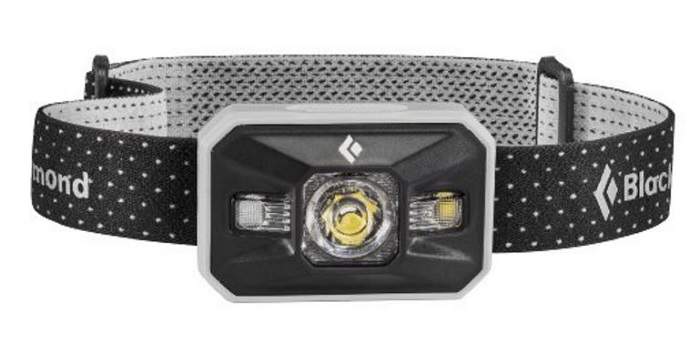
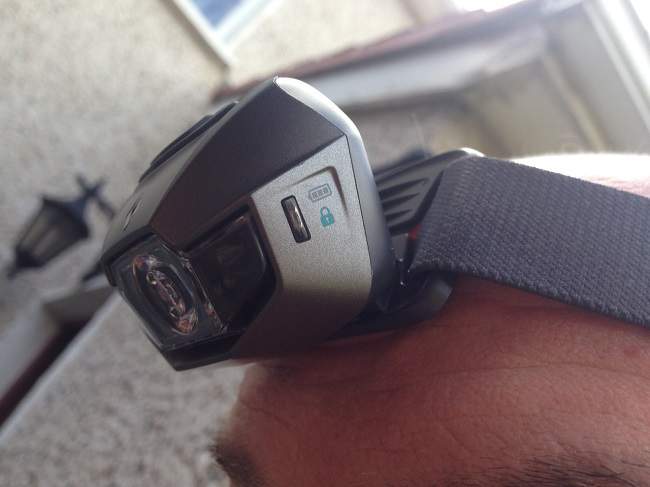
OK, so let’s start from the start. For those who don’t know what a headlamp is, it’s pretty much a lamp that attaches to your head. It usually comes in a strap that can be adjusted to fit your head size. The lamp itself pivots at the front as shown in the picture below.
All headlamps are operated by a button or two on the lamp itself, see the black button on the center of the lamp in the picture above.
The lamp above is my current headlamp, the Black Diamond Storm. You can check out our best hiking headlamp recommendations to see some excellent options availble on the market today.
Headlamps are designed with all manner of outdoor activities in mind. From cycling, to hiking, to camping, they can be utilized for lot’s of different outdoor activities. The one above is a typical one you would use on the trail for hiking purposes.
What Should you look for?
Headlamps are broadly rated using three key measurements / indicators.
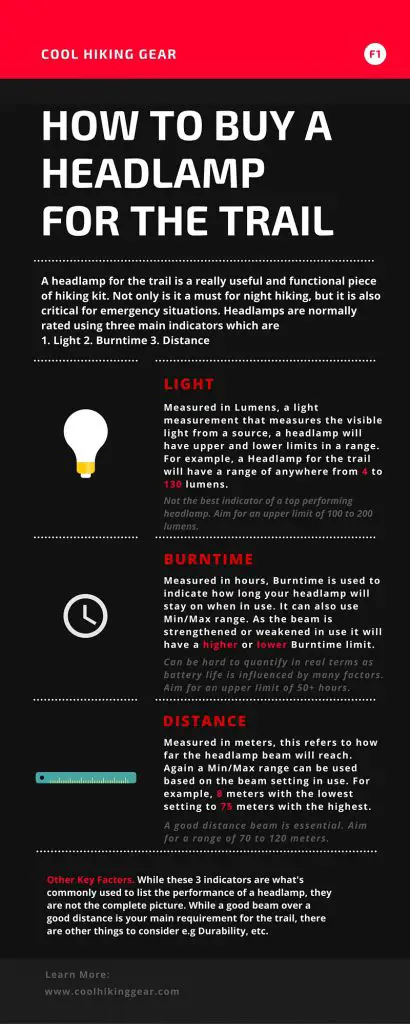
These items are usually listed on the side of the box on any good headlamp like in the picture below.
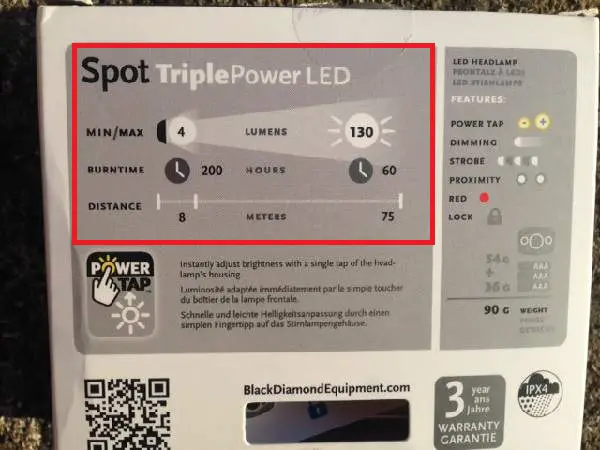
While these measurement ratings are important and fundamental things that you need your headlamp to have decent capability in, don’t take them too seriously. There are so many factors at play, it can be hard to say how useful the indicated ratings really are.
For example, Light capability and Burn Time will simply fade with use but some lamps do of course fade quicker than others. However, these 3 key performance indicators do provide a general performance expectation guide.
On top of that though, there are other essential components and things you should consider when thinking about buying a headlamp so let’s look at those next.
Durability and Construction
You will most likely be carrying your headlamp in your pack and so it will be getting shaken about and possibly even banged into things every now and then, if your pack bumps a tree or some rocks for example.
This is where a tough and good design is critical. If your headlamp is built in a flimsy way, it won’t be able to take a knock or two.
You need something that is designed and constructed with tough outdoor use in mind. We are of course primarily interested in hiking, so most of these are small 3*1*1 inch devices that sit on your head.
It’s worth noting, that you can get much bigger and more powerful headlamps for other specific outdoor activities. I happened to use a cycling headlamp, at least that’s what I was told it was for, one night for a night navigation exercise I was doing once.
I didn’t have my normal headlamp for some reason and the outdoor center lent this to me for the night. Anyway, this thing was HUGE! It was big and chunky and sat heavy on my forehead.
Not good in terms of size, weight or packability for hiking, but man could this bad boy light up the place lol 🙂 you could have landed a plane with it, it was that powerful!
As mentioned, I think it was a headlamp specifically used for cyclists who are moving fast and need good visibility from much further away. Excellent light but not really practical for hiking.
Waterproof
If you’re wearing your headlamp on the mountains, at some point it will take a battering from the elements. So as well as being durable it needs to be able to withstand the elements and be able to continue to work fine in very wet conditions.
Again, the physical make-up and design will have a lot to do with this. Keep this in mind when you’re shopping around for one.
Ease of Use
I think this is really important. Most headlamps will come with some form of pivot on them, as in the picture above. that is the lamp itself can be pivoted to point in several different directions. For example, straight ahead or pointing down.
Useful depending on what you want to do. For example, you can aim a flood light function straight ahead to survey a broader area in closer proximity or target a specific feature further in the distance with a spot light.
As well as that, ideally you want something that is easy to operate with gloves on. If the headlamp is too fiddly, you may need to take gloves off to work with it which isn’t ideal in cold and wet conditions.
Most headlamps will have several settings options in them e.g. to make the beam stronger, to use a strobe feature, etc.
Ideally these functions can be easily accessed and utilized without having to do anything too complicated in terms of fiddling with buttons and so on.
Functions
There are a lot of functions that can be available in a headlamp. Normally, in terms of hiking, there will be a:
Floodlight:
This is the main beam that is most employed on the trail at night, certainly the one I use the most anyway. It’s effectively the main beam and will light up a broad area in a closer proximity.
Excellent for a campsite or taking a look in your immediate area for some land features, that type of thing.
Spotlight:
Some headlamps will have a spot feature. this enables the user to focus all the power into one much smaller but more targeted beam. Say you want to focus on something off in the distance for example.
This can be very useful for night navigation as if you’re looking for a specific feature in the distance, you can focus in on it. Very useful when trying to confirm your position using specific land features.
Red Night Light:
Most headlamps will have a red (or green) night light setting. The main purpose for this is that it can be a little less heavy on juice and apparently, red light can be seen easier at a distance than white light. So, if you’re in a rescue situation, it will preserve battery life and help identify your location easier.
I also read somewhere that the red light setting doesn’t spook animals and so will not draw their attention to your position. Possibly useful for hunters but also if you don’t want to freak a herd of animals out as you walk by them.
This function isn’t something I have ever used to be honest. Thankfully I haven’t been in a rescue situation before and hopefully I never will.
Price
Price is a lot of the time directly correlated to quality when it comes to hiking gear, and I have definitely found that to be the case with headlamps.
I have in the past bought a cheap headlamp but the performance was rubbish and rather than saving a few bucks, I felt I wasted the purchase price. Frankly, it was dangerous trying to hike in the dark with it.
I only did this once though. From that point I decided I’d get a good quality headlamp and spend a bit more on it to ensure I had good quality. The price range of a headlamp for the trail will be anywhere from $15.00 at the cheaper end of the scale to $200.00 at the higher end.
I think you can get a good headlamp for in and around $40.00 to $60.00 so you don’t have to break the bank.
As a warning though, headlamps are one of those hiking gadget areas where you can get really expensive lamps that are terrible performers and very reasonably priced ones that are a top performers. Go figure!
It’s worth doing your research well and as it’s an electronic product, it’s good to shop for one online as you will get better deals with sales, coupons and so on.
What I Recommend
I think for the trail you need to of course take all the factors listed above into consideration. However, I specifically recommend the items below
- As mentioned above, starting with the 3 key standard rating indicators, as a guide, when it comes to:
- Light: aim for a range of between 100 to 200 lumens and a light lock feature is a good idea so it isn ‘t turned on accidentally in your pack
- Burntime: aim for an upper limit of 50+ hours and ideally a meter gauge to display the power left
- Distance: aim for an upwards range of 70+ meters
- Ensure the headlamp is on a movable / inclining pivot that is practical and functional. This gives you a range of areas in which to fix point the headlamp e.g. you can incline the light to point it down towards the ground or out in front of you and so on.
- Look for an adjustable head strap that works well so you can find a comfortable fit. This means other folks can use it too should they need to, just need to adjust it to their head size.
- A variety of a beams is a good idea. I like to have a:
- Good main flood beam
- Functional spot light
- Night light option (red or green usually)
- Some flashing or strobe capability (can be very useful in an emergency)
- You don’t have to break the bank but I think you should be willing to spend at least $40.00+
- While it gives no guarantee, choosing an established brand name with lots of good user reviews is sensible and a good brand will stand over their kit should something not work or fail.
What I am Currently Using
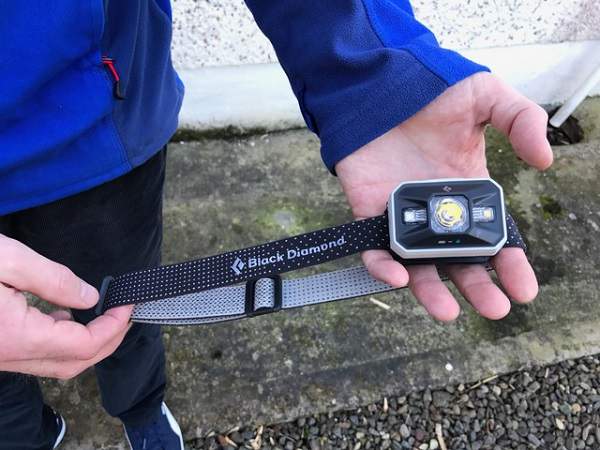
I am currently using the Black Diamond Storm Headlamp and I have been very happy with it. It’s got a tough and sturdy build with a nice design, and it’s a cinch to operate all the light settings on it from one main button on the top of the headlamp. It’s also easy to operate with gloves on which is awesome.
It also has a simple to use lock feature and a power gauge to indicate how much juice is left in it which works well, but if I have one criticism of it, it is that it is hard enough on batteries and can burn through them quite quickly.
Conclusion
Choosing a headlamp for the trail is surprisingly detailed. There are a fair few things to consider for sure. There are also so many different headlamp options available, it can be hard to know where to start.
I hope this buying guide has went some way in helping to make the whole process that bit simpler and helps you in the process of buying a headlamp for the trail.
Always establish your needs before you buy and even if you’ve no interest in night hiking, think of it in terms of emergency use if a situation, as I started out this guide with, should arise.
In that scenario, an emergency when you need it most, you will really want it to be functional and working well. You will be grateful you spent a bit of time, taking the time to choose a good headlamp and parted with those few extra bucks to get a good one.
Remember to check out our top hiking headlamp recommendations if you’re in the market for one.
As a final note, always carry spare batteries with you and should you be heading into the wilds for a longer trek, it can be a really good idea to bring a spare headlamp with you. Yes, I mean a complete replacement should the other one fail. Better to be safe and all that.
If you liked this guide and found it useful, please like and share it 🙂
