coolhikinggear.com

  • Men’s
    • Best Hiking Rain Jackets for Men In 2024
    • Best Men’s Hardshell Jackets Of 2023
    • Best Hiking Pants For Men In 2023
    • Best Ultralight Rain Pants For Men
    • Best Men’s Daypacks For Hiking In 2023
    • Best Backpacking Backpacks For Men In 2023
    • Best Base Layers For Men In 2023
  • Women’s
    • The Best Hiking Rain Jackets For Women In 2023
    • Best Women’s Hardshell Jackets Of 2023
    • Best Hiking Pants For Women In 2023
    • Best Ultralight Rain Pants For Women
    • Best Daypacks For Women
    • Best Backpacking Backpacks For Women In 2023
    • Best Base Layers For Women In 2023
  • Hiking Accessories
    • Best Hiking Poles
    • Best Trekking Pole Monopod Camera Mount
    • Best Hiking Headlamps
    • The Best Hiking Watches In 2023
    • The Best Hiking Gloves In 2023
    • Best Hydration Bladders For Hiking In 2023
    • Best Compass For Hiking Our Top Picks
    • Cool Hiking Gadgets
  • Footwear
    • The Best Men’s Hiking Boots In 2024!
    • Best Hiking Shoes For Men In 2023
    • The Best Women’s Hiking Boots In 2023!
    • Best Hiking Shoes For Women In 2023
    • Best Hiking Sandals
    • Best Hiking Sandals For Women in 2023
  • Hiking Guides and Resources

How About Using Sailing Salopettes As Rain Pants?

I always like when I come across a functional cross over in terms of gear. That is, when something is made and designed to be used in one particular activity but turns out to be very functional and useful in another.

I came across one of these examples recently with a friend of mine. He’s a mountain guide but works mainly in rock climbing. We were out on the hills for a hike and we got to talking about a camping trip I had coming up in the not too distant future.

I expressed that one of my concerns about the trip was the weather. It was three days and two nights in the West of Ireland which is well known for days and days of heavy rain.

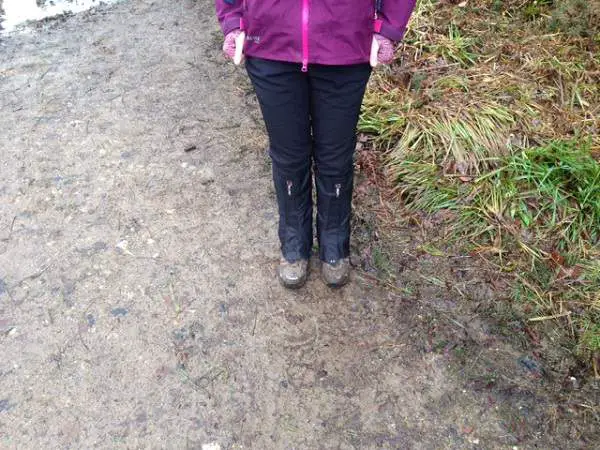
Although I am very fond of my current rain pants and think they’re great, I wasn’t sure how they would fair in persistent rain like that if we were to get caught in it for the entire trip.

There was no doubt in my head that they wouldn’t hold out. That was when my friend suggested to get a pair of what he was wearing.

Sailing Salopettes

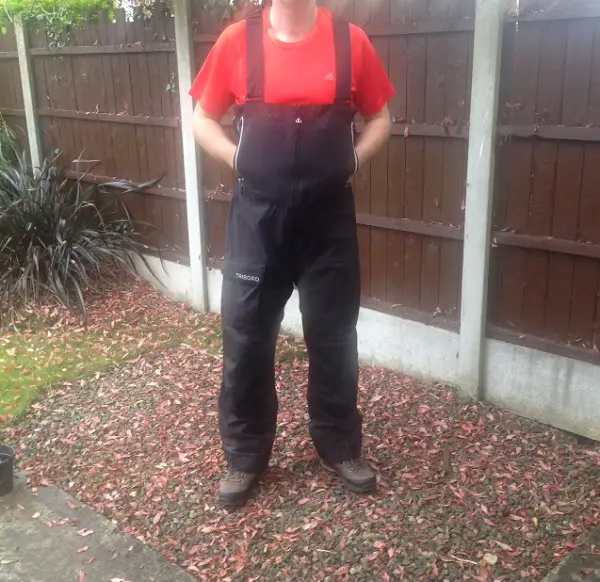
I hadn’t noticed but he was wearing what looked like Dungarees. He unzipped his jacket so I could see them. I was interested and asked what kind of hiking pants they were.

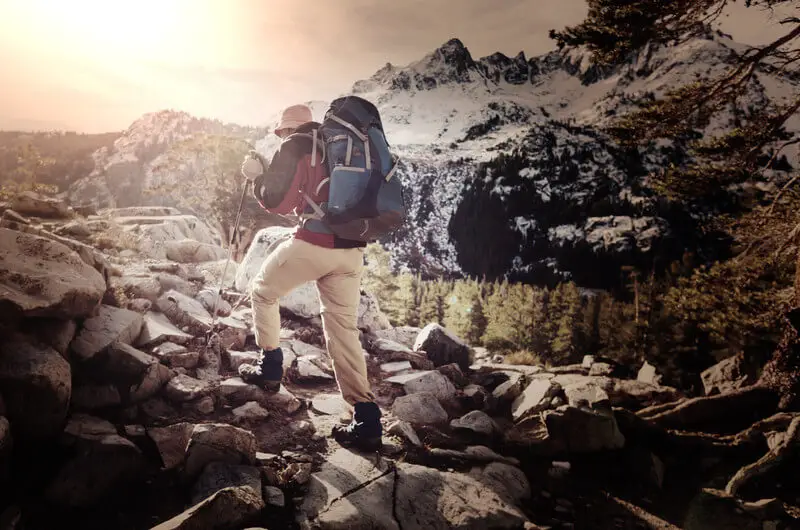
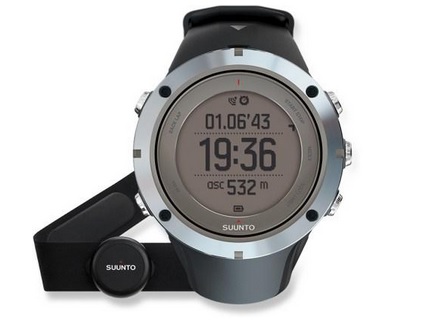
He smiled and said that they weren’t hiking pants but were actually sailing salopettes. Please note the salopettes shown in the promo picture directly below are not the same ones I use in the photos below.

I was fascinated! Sure, I’ve been out on a sailing boat before but my knowledge of sailing gear is zero as I don’t sail. I have also used salopettes before but only in the context of skiing so I’d never really thought about using them for hiking. Pictured above are the Bib Pants from Navis.

He started to list off the advantages of using sailing salopettes for rain protection. I’ll go into some of those below but as he went through them I was impressed with the simple idea of using something designed for sailing, for hiking.

He does do a bit of sailing too so although I didn’t ask him, that was how I assume he came across the idea.

I trust his judgment and after some consideration, a few days later I ordered a pair of them online to try them out.

They had a much better chance of keeping me dry should there be a deluge on my camping trip and I was pretty sure that even if I didn’t use them then, I would use them again throughout the Winter.

The Advantages of Using Sailing Salopettes for Rain Protection

Well, the most logical place to start is with what they’re designed for. When I first took them out of the packaging, I could see they were really sturdy.

Before ordering, I had of course checked the specifications and they had a mighty 29,000 mm water resistance rating. That’s some serious protection for sure!

salopette-front-view

This is their first really good advantage, they were seriously water proof. Heavy and bulky yes, but you could tell they would take a hell of a beating from the rain and still keep you dry.

This of course makes sense, who is likely to get wetter, a Guy in a sailing boat or a Guy on the Trail!? Both can get pretty wet but I would have to assume the Guy in the boat would be getting the worst battering, possibly from the heavens and from the waves.

As mentioned, the ones I got were pretty thick and bulky so they needed to be very breathable. They were listed as breathable as well but I found this to be one of their disadvantages which I’ll look at further below.

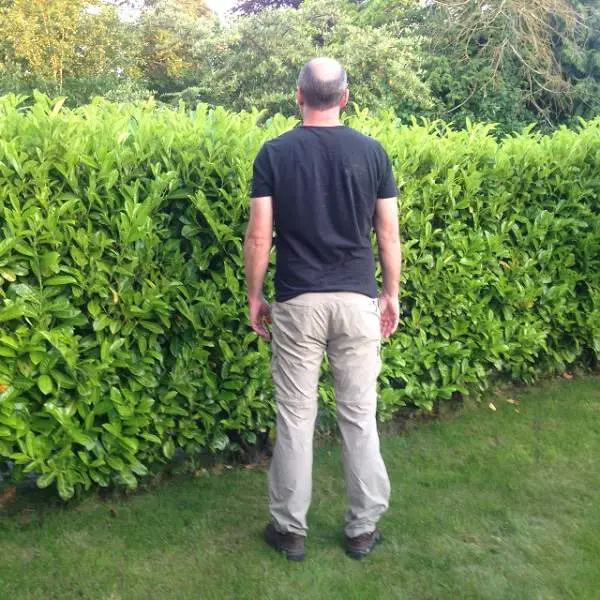
As mentioned, they are like dungarees, when combined with a good rain jacket, you have a pretty good protective shell around you.

Very Adjustable

That is rain that hits your jacket can’t roll off and down into your pants as they run up your torso. This is also further enhanced by a fasten belt at the waist so you can get a secure and snug fit.

salopette-waist-fastener

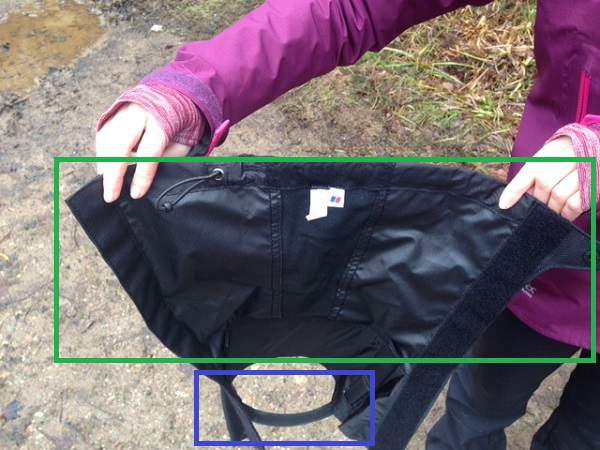
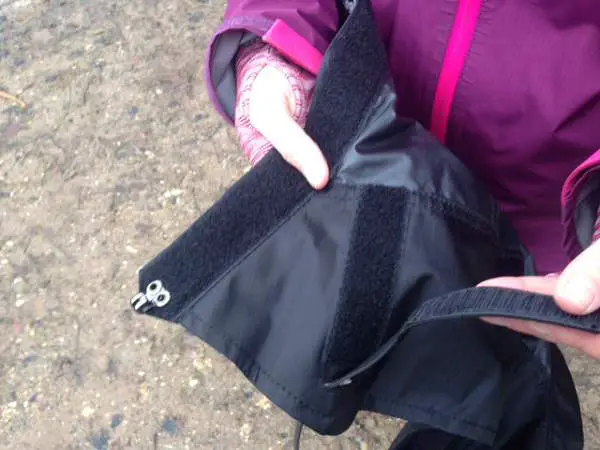
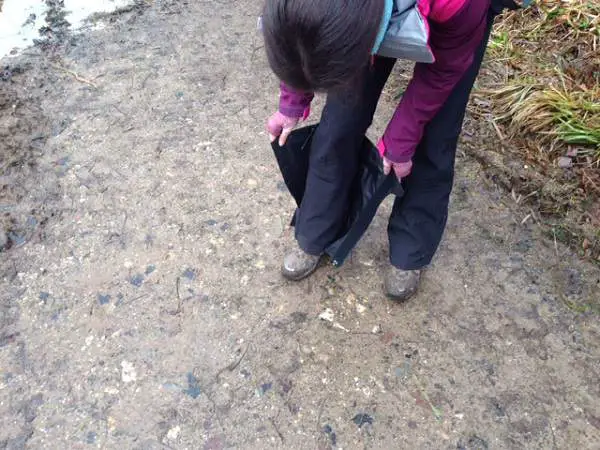
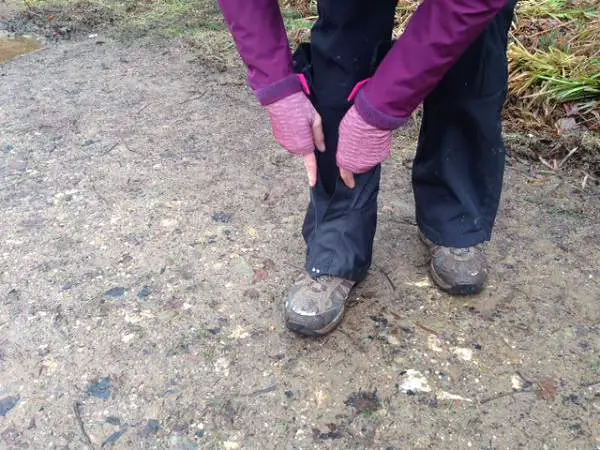
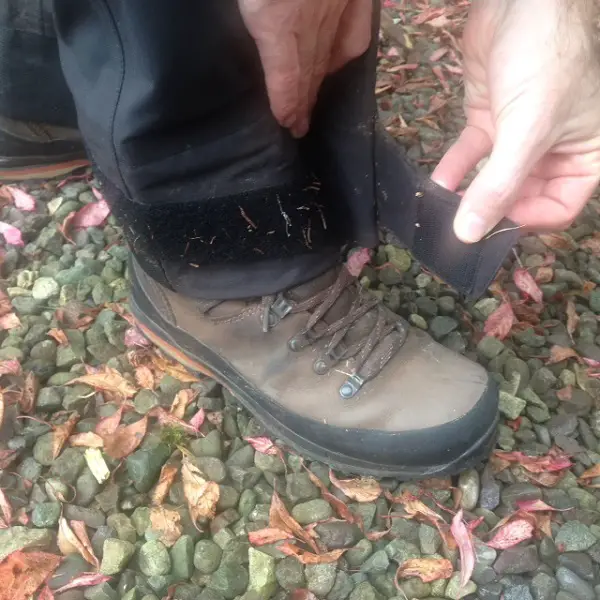
The shoulder straps are also fully adjustable using Velcro so it was easy to get a comfortable fit. The bottom of the pants also have fully adjustable Velcro straps which you can adjust snug over your boots. Combined with gaiters, that’s pretty formidable protection for your hiking boots to stop stuff getting in.

All in all, in conjunction with a good rain shell, you can build a very solid wall of rain, snow, etc. protection around your whole body.

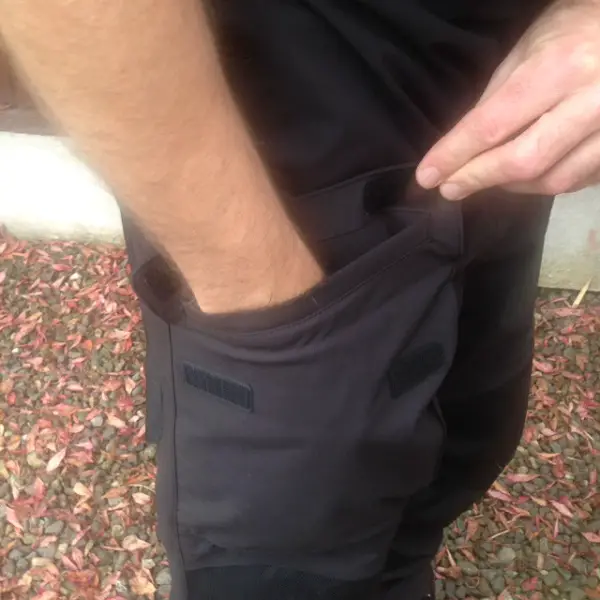
Another interesting thing in the Salopettes I bought was built in padding on your rear and your knees.

This makes sense for sailing as you would of course be kneeling and sitting on hard surfaces so built in padded protection got kneeling and sitting makes sense. The padding can also be removed, as shown in the photo below, should you not require it.

salopette-reinforced-seat-pad

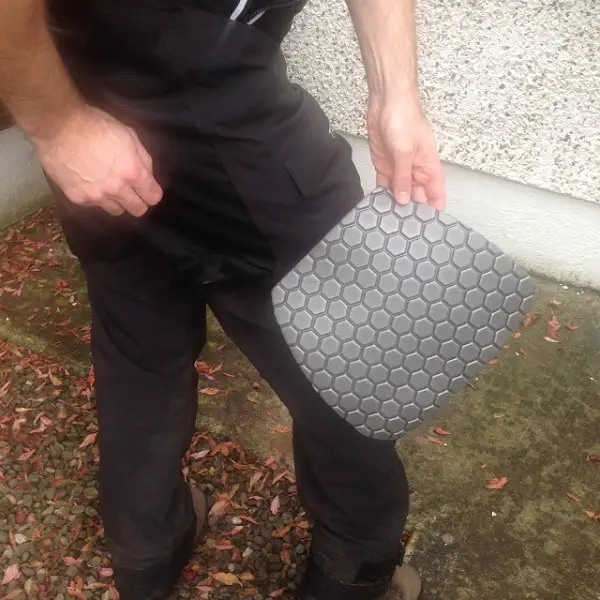
Transfer this to the trail, having a built in seat in your pants is very practical. Even reinforced knees could also serve a protective purpose, say when scrambling.

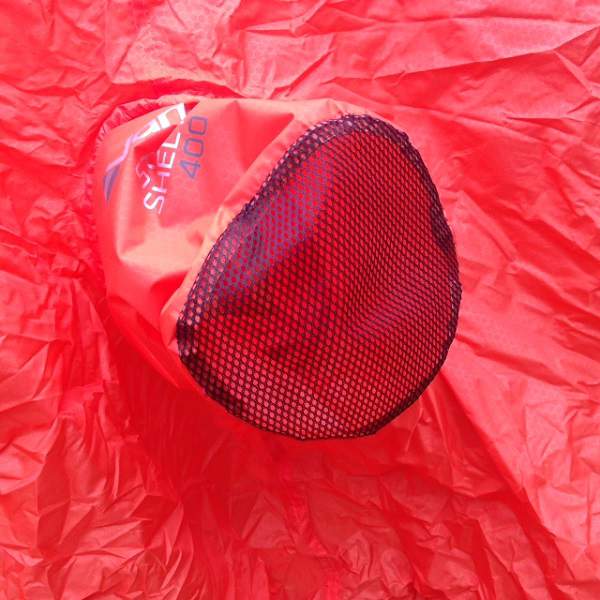
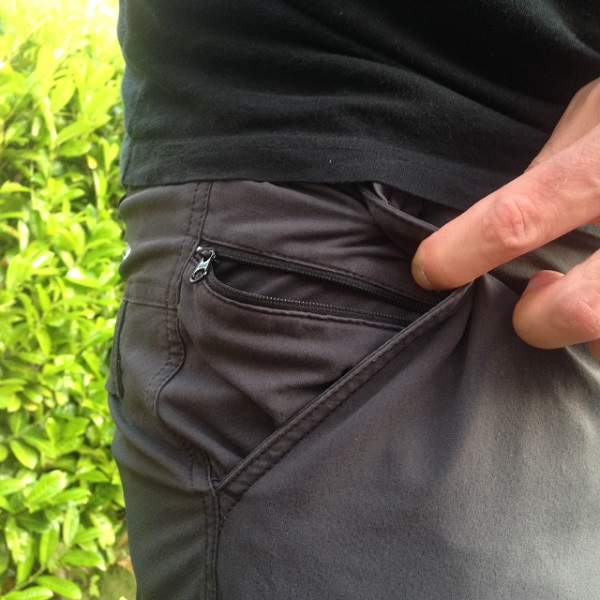
The final thing to mention was they storage. The salopettes have very big waterproof zipped pockets on each side and they are very roomy and functional with that added benefit of a fleece cover inside for hand warming.

Plenty of storage capability but you would of course have to open your rain jacket to get at them.

salopette-side-chext-pocket

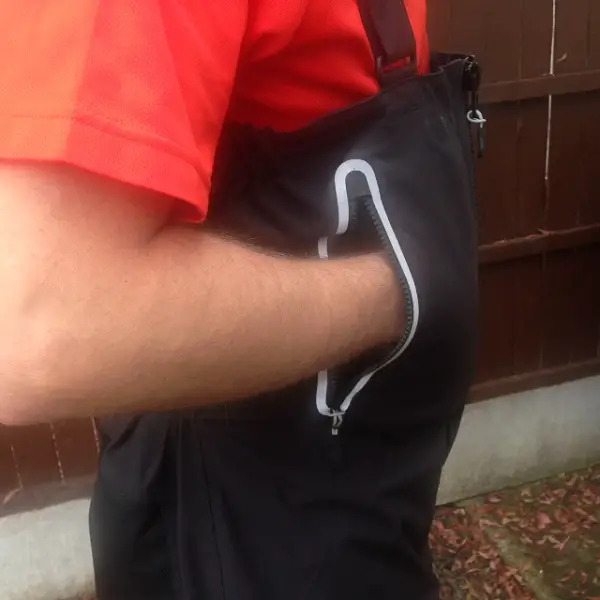
They also have a large pocket on the hip which is again very roomy and functional.

salopette-leg-pocket

The Disadvantages

OK, so I’ve listed the pros from my experience with them but it wasn’t all great in terms of functional use.

First off, that added rain protection and the built in reinforcements on your rear and your knees isn’t lightweight. While it is serious protection against the elements, it is not really practical in terms of carrying them in your pack, they’re just too bulky.

Also, you need to put them on before putting your hiking boots on, so if you’re wearing them out on the trail, you’re wearing them from the start to the finish of your hike!

salopette-waist-fastener

I was caught in several heavy rain showers and the rain protection was truly excellent. However, a different problem presented itself for me. Namely, getting wet from the inside.

My salopettes didn’t seem to be the most breathable and so while they kept me warm, my hiking pants did get damp while I was using them from the heat and moisture build-up inside.
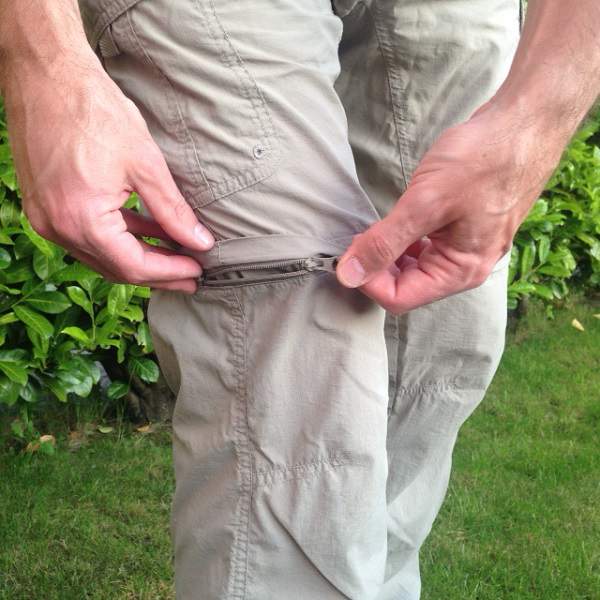
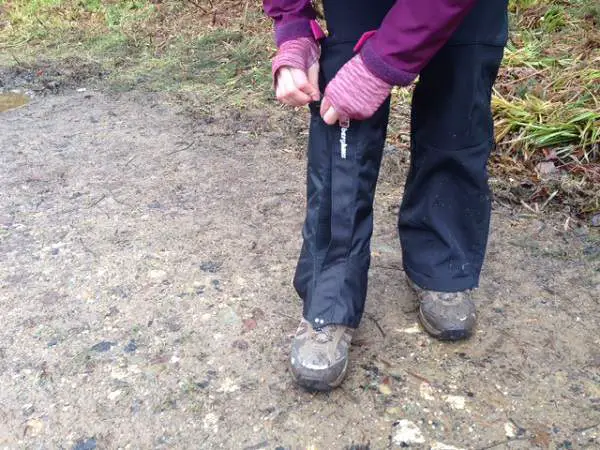
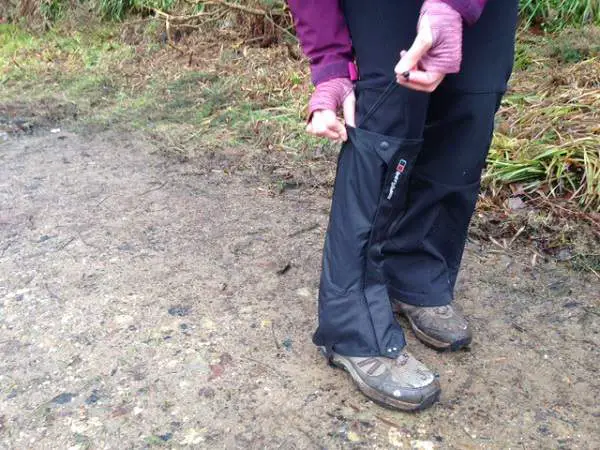
Zippered Closer

The salopettes are closed using a zipper right up from your navel area to your chest. This can be opened to let some air in and cool things down around the torso but it doesn’t really help the internal moisture in the leg area.

This is a downside for sure but it was still pretty warm when I was using them so this may not be as big a problem in winter.

This also could just be these particular Salopettes, another pair may have much better breathability. Perhaps you could get ones with a bit less reinforced design that are a bit lighter and breathable.

Next up … at first, I thought the built in seat padding would be really handy. A built seat on the trail would be very practical indeed.

However, this only exacerbated the breathability problem making my hiking pants damper so I removed them (which is easy to do using the Velcro straps on the padded pockets i.e. pop open the velcro and slide the padding out).

Conclusion

Overall, I was pleased with the sailing salopette experiment. Although the particular ones I bought are not suitable for warmer times of year, I think they will work well in late Autumn and Winter, when I will need the extra protection most!

As mentioned at the start, my friend has been using these for years but my hunch is that he may have a lighter pair than the ones I got. As it turned out, the initial camping trip I bought these to potentially use on turned out to be an absolutely beautiful weekend in terms of weather. Not a drop of rain!

However, if you are planning to do some hiking into tough wet, windy and cold conditions, this could be something to look into as a viable alternative to standard hiking rain pants.

I certainly don’t regret buying them as I will use them again in the mountains for sure and it has opened up a new possibility for me which I was previously unaware of so that’s pretty cool too.

Price-wise, they aren’t cheap, but they’re so sturdily built that I know I’ll get a long run of use from them.

Have you ever used sailing salopettes on the trail? What do you think, good or bad idea? Would love to hear your thoughts on this.

Can You Wear Sneakers Hiking?

So, can you wear sneakers hiking? Well, the short answer is yes, but you could probably wear stilettos too however you are not likely to get very far in them 🙂

In all seriousness though, this is a question that there are a lot of differing opinions on so I thought today I’d do a short post giving my two cents on it.

Sneakers

If you don’t want to go through the whole article, the synopsis is that we don’t think hiking in sneakers is a good idea, you are far better off with buying hiking boots or trail shoes.

You can check our best hiking boots for men and best hiking boots for women, to get a low down on some of the best hiking boots available on the market today.

If you prefer a shoe as opposed to a boot, then check out our best hiking shoes for men, and our best hiking shoes for women. Not the best option for anything off trail or on rocky or challenging terrain, but still very functional for light trail hiking and way better than standard sneakers.

Some Definitions to Begin …

First thing, I think is important to clarify before continuing, is what we mean by ‘sneakers‘. In this article I am referring to anything from tennis shoes to standard running shoes (not trail running shoes).

Next up, we need to define what we mean by ‘hiking’. Hiking can mean lot’s of different things to lot’s of different people so I think context is important.

By hiking, I am referring to walking up and into mountainous terrain both on and off trail. With that in mind, terrain is a good place to start so let’s look at this under that heading first.

Terrain

For me, the terrain you are hiking in must play a huge part in what you wear on your feet. If you are heading out into a marsh or boggy area, sneakers are not going to cut it. They will get waterlogged very easily and I can see no way how that can be a pleasant experience.

If however, you’re hiking on well marked man-made trails and paths, it’s probably more reasonable to wear sneakers (Not that I recommend this I hasten to add).

Again though, there are other factors to consider. For example …

Season and Weather

If it’s mid winter and you are out hiking on the same very well marked man-made trails mentioned above, but they are covered in snow and ice, obviously, sneakers are definitely not a good thing to be wearing on your feet.

Hiking in Snow

Even if it’s Summer but you’re up high enough in the mountains, there will quite possibly be plenty of snow and ice. Would I personally want to walk into that environment in sneakers? No, I can’t say that I would.

Also, if you are unfortunate enough to have something happen to you and you can’t walk out, you have to sit and wait in the elements for help to arrive.

If it starts pouring rain, your Nike or Reebok tennis or road running shoes aren’t going to be able to keep your feet too dry or warm for any length of time, and it is possible, depending where you’re hiking of course, that things like hypothermia could start to pose a threat.

A sturdy pair of hiking boots on the other hand, will obviously hold out the worst of the weather and keep your feet warmer for longer in bad conditions.

Grip and Traction

One thing you need on the trail is good grip, especially if you go off trail or like to scramble a bit. Crossing rivers, using stones to step across is another common example where you need good grip to prevent you from slipping.

Sneakers just aren’t made to take on that kind of job. Hiking boots and trail shoes will have specially made soles with lugs on them, as pictured below, designed to give good grip.

HiTec Mens Bandera Mid WP Hiking Boot Multi Directional Lugs

They are also commonly made from materials which are much better at handling wet and slippy terrain.

Ankle Protection

I see many debates on whether hiking boots are better to protect your ankles as opposed to trail shoes. From what I can pick up, many hikers prefer the freedom of motion trail shoes provide and they think it is better than the restrictive limits of hiking boots. This is especially true for people wanting to hike very fast.

I can see the logic of this and I of course have and use trail shoes but for me, even though I love them, they just don’t provide the same level of protection as when I wear a pair of my hiking boots. We are talking about sneakers here though, not trail shoes.

Whether hiking on mucky trails or stony paths, I think ankle support is really important and you never know when you will really need it.

Trekking Pole Picture

To help illustrate my point, just last weekend, I was out hiking in and area I had never been hiking in before. My route was to be dictated on the day by the map.

All good. I followed my route on the map and it was going fine. After reaching the summit of the main peak I was hiking to on the day, I headed down towards a trail I wanted to pick up.

On the map, all looked fine. The contours were well spaced out so the land wasn’t too steep and there were no obvious map key indicators of anything that could cause problems. I decided to head for that trail and pick it up to get me back to the forest and a further path back to my car.

Things aren’t Always Straightforward

When I got to that area, the summer over growth was significant. There were lot’s of overgrown ferns covering the trail for the starting section of it.

I didn’t really have much of a choice and it didn’t look too bad so I continued. The ferns were very thick for about 400 meters, not a large stretch really which was one of the reasons I pushed on.

However, as I got to the end of the patch of ferns, they got even thicker and I had to really tread carefully, which I did. However, just 20 meters from the end of that patch, my right boot went down into a hole in the ground that I couldn’t see because of the ferns, even though I was paying close attention.

I twisted my ankle, letting out a yelp at the time 🙂 , and one week later, it is still sore. However, I was lucky as although it was sore when it happened, I was able to walk out with it.

The way my foot landed, I could feel the support of my hiking boots stopping me from twisting too far. If I had been wearing sneakers, I dread to think! Most likely a snap could have been on the cards and time for calling some emergency help!

Conclusion

To conclude, if you are looking for the best sneakers for hiking, given the context and definitions of hiking and sneakers I listed at the start of this article, I personally do not think it is a good idea to wear sneakers (tennis shoes or standard running shoes) out on the trail.

Even if it is on well marked and even trails, I think you are much safer and better to be in trail shoes or hiking boots.

Personally, I always wear hiking boots when I go hiking. I do use trail shoes a lot but normally for day-to-day use. When I go into the mountains, I nearly always wear a pair of my hiking boots.

I vary between different pairs depending on the conditions. For example, in Summer I wear lighter mid style Gore-tex boots, in the depths of Winter I wear tough and heavy leather boots.

Of course, as always, you need to take the circumstances and your requirements into consideration but as a general rule, I think wearing tennis shoes and sneakers to go out hiking on the trail is not a great idea. At the very least, I feel a decent pair of trail shoes is the minimum requirement.

What do you think? Do you think it’s OK to wear sneakers out hiking in the mountains? It’s an interesting question with many different opinions.

Remember to check out our best hiking boots for men and best hiking boots for women, if you are looking for a great pair of hiking boots. Or, if you prefer a hiking shoe, check out our best hiking shoes for men, and our best hiking shoes for women.

We hope you found this useful, please share, like, link to and generally display love for it if you did 🙂

What Is A Bothy Bag?

Today I want to take a quick look at a Bothy Bag. I recently bought the the Vango 400, pictured below, which is a 4 person Bothy Bag. I bought it a couple of months back.

Vango 400 Emergency Shelter Bothy Bag

I have of course tried it out but thankfully I haven’t needed to use it in a real life situation i.e. in a tricky situation where I needed to provide emergency shelter to me and my group while out hiking. I hope I never do have to use it!

What’s a Bothy Bag?

Starting from the start, for people who don’t know what a Bothy Bag is, it’s a basic portable emergency shelter you carry with you in your pack on the trail to provide protection from the elements should you get into difficulty.

It’s kind of like a bag that you take out and pull over yourself and your group to form a cocoon of shelter around you. Bothy Bags are made from a tough material like rip stop nylon and polyester but are normally pretty lightweight do easy to carry.

My Vango 400 weighs, you guessed it, 400 grams. So, this sheltered cocoon keeps rain, snow etc. off you and it will also provide an additional layer of protection from the wind.

In bad conditions, getting wet in cold winds is one of the most common ways people get into difficulty. When you stop moving, you cool down rapidly in wet and windy weather. In those conditions, it doesn’t take long for hypothermia to set in.

With that in mind, the shelter not only keeps elements out, but as people bunch together inside it, the temperature inside the shelter starts to go up from body heat and so provides a much warmer environment to sit in.

Imagine This

A typical scenario where this would be required would be that you are out leading a hike with a few folks, say in Autumn. It’s a wet and windy day and one of your party has a bad turn and slips and twists their ankle. They’re not able to walk on it and so can’t continue.

You’re 3 to 4 miles from the nearest road, so all you can do is call for help, make the injured party as comfortable as possible and wait for help to arrive.

You get your emergency blanket out and get the injured party resting on it to keep them off the wet ground. However, you’re not moving anymore and so the injured party will start to cool down fast.

As well as that, you have a few other people in your group with you. They’re newbie hikers and don’t know how to use a compass or map and so on the day that’s in it, you can’t send them back to their cars on their own while you stay and wait with the injured party for help to arrive. Logically, they’re going to start to cool down as well, as you will too.

As you can imagine, pretty soon, you could have a much bigger problem on your hands as people start to shiver, etc. You can’t send the others on so they have to stay with you.

You can’t leave the injured party as you have to stay with them until help arrives which you know will be at least 3 to 4 hours. Enter the emergency shelter.

Crisis Avoided!

You get your party to huddle together around the injured party and pull the emergency shelter over you. This will keep the cold wind and rain off you as well as form the warm cocoon as mentioned above.

Everyone is now safe to wait it out until help arrives and when it does, you can take the rest of the group back to safety.

They may be a little tired and maybe even grumpy but they should  be safe. Incidentally this is also why carrying a head lamp with you is critical. It’s a perfect example of a scenario where because you have to wait hours for help, you won’t be able to hike back in daylight and so need a light to guide your way.

Also, it’s worth mentioning that it doesn’t have to be an emergency situation. Say you want to stop for lunch on a tough day, the emergency shelter could be a good idea to help keep people that bit warmer as they break.

My Bothy Bag

So, back to the Bothy Bag. They come in different sizes that usually range from a 2 person bag to a 20 person bag with 4 person bag, 8 person bag and 12 person bag in between. 20 is the largest size I am aware of. A shelter can be bulky enough but they fit in pretty well to any good pack.

Bothy Bag 4 Person Size

To give you an idea of the size, the picture above shows my Vango 400 Both Bag (for 4 people) sitting on my hand. As you can see, it’s not too big. From this you can derive that a 2 person would be roughly half the size, the 8 person more or less double and so on. The Bothy Bag stows into itself as in the picture above. There is a rip cord at the top of it to tighten it closed.

Unpacking the Bothy Bag

To use the Bothy Bag you pull it out as shown above.

Bothy Bag Out of Bag

When the bag is fully out it will look something like in the image above.

Bothy Bag Full

When you have it fully out, you pull it over your group as shown above.

Bothy Bag Stowing Away

When finished, you just roll it back up into itself to stow away and tighten the cord to make it snug.

Bothy Bag Features

Bothy Bags will usually have seats in them. So my Vango 400, for four people, features four seats inside it.

Bothy Bag Seat

As pictured above, these seats are just 4 small black tabs in the inside edge. The main function of these is just to form a protective layer between your butt and the ground. You can of course beef that up by sitting on your pack or a seat if you have one with you.

Bothy Bag Air Vent

Bothy Bags will feature air vents, like the one pictured above, which is of course required to let air circulate, otherwise it would get damp inside with condensation and possibly even too warm, believe it or not!

Bothy Bag Window

Bothy Bags will also usually have a window at the side so you can see out of which of course also lets some light in. Most Bothy Bags will have similar features as standard but these are what you should look out for.

As I mentioned at the start, thankfully I haven’t needed to test this out in a real life situation, hopefully I never will! However, from taking it out and trying it out, it does seem to work pretty good.

It’s easy to use and easy to pack away for carrying. My Vango 400 Bothy Bag isn’t too big so as to be awkward to carry in a decent sized pack so it works well in that regard. Also, it is effective at keeping rain and wind at bay and you definitely do start to feel warmer inside it with a few people in it.

Conclusion

Overall, the Bothy Bag is a functional and effective piece of kit. It will see you good in an emergency situation as described above or for that bit of extra comfort when taking a break in bad conditions.

It’s a standard part of my kit and if you are leading groups of hikers, it is a really good idea to get one and keep it in your pack just in case an emergency should arise. It will really help keep you safe until help can reach you.

I remember when I first saw a Bothy Bag years ago and my immediate reaction was that I was dubious! I just couldn’t see how something that looked kind of flimsy and loose could be effective and useful.

However, I was soon to find out, after trying one out, that they really are very effective in keeping a group warm and the worst of the elements at bay.

I hope you found this useful. If so, please like, comment and share 🙂

What’s The Best Insect Repellent?

With Summer in full flight, it’s that time of year again for the resurgence of every hikers sworn enemy, the bug! Mosquitoes are probably the best known insect irritant but there are any number of bugs that can make a hike a nightmare.

Swarm of Mosquitoes

From flies to midges, ticks to chiggers there are no shortage of pests that will want to either make a meal out of you or just annoy, aggravate and generally drive you to distraction!

It’s a little ironic as in many places, like in parts of Europe, you get the best weather at the same time. So, you have great weather to hike in but lots of bugs and insects to contend with. What can you do!

It’s not easy, that’s for sure, but of course through the marvel of human ingenuity man has of course fought back and come up with all sorts of ways to help keep the bugs at bay.

With that in mind I thought I’d run through some of the options a hiker has to protect themselves from bugs and insects on the trail. I see this as an ongoing project or work in progress, if you will, as I no doubt won’t cover and don’t know every way to repel insects.

Only last week I learned of a new solution to help fend off bugs while hiking. With that in mind, I will update this post on an ongoing basis.

So, lets start at the beginning …

What Options are there?

There are actually quite a few options available so I thought it would be useful to go through them one by one and try to list the pros and cons of each. 

I have not used all of them but I will add in as much useful information as I can and update them as I learn more over time e.g. when I use a product I haven’t used as yet.

Please note, any products pictured in this post are available at the bottom of this post. You can learn more on any of the listed products by clicking on the product picture.

Standard Insect Repellent

This is probably the most well known one and so I am putting it first. Now, I am referring here to standard bug spray that is probably the most commonly known one.

DEET (aka diethyltoluamide) is one very well known insect repellent chemical but there are a bunch of them. The one in the image below is Repel 100, which performs pretty well.

Pros:

  • From my experience DEET, or similar chemical type sprays of this kind, do work pretty good … there’s no doubt about that
  • Very affordable, probably anywhere from $5.00 to $10.00 will get you a good sized spray bottle

Cons:

  • Leaves a sticky residue (I think this is part of what repels the bugs / protects you though)
  • Tastes nasty should you get any in your mouth … watch your eyes too
  • Not the nicest smell in the world 🙂

Natural Insect Repellent

This is broadly similar to the first option but it opts to avoid chemicals as such and focuses on natural ingredients to make up the spray.

There are many of these available too, pictured below is ‘All Terrain Herbal Armor DEET Free Natural Insect Repellent’. Now, that’s quite a mouthful! These do the same thing as the first category and work in the same way, they’re just not loaded with artificial chemicals.

I haven’t used this type of spray as yet. However, one Mountain Guide I know swears by it and says it’s the best stuff he’s ever used. Picture below is a popular natural insect repellent, Herbal Armor from All Terrain.

Pros:

  • Less man-made chemicals probably has to be a good thing for your skin and the environment
  • Affordable, probably anywhere from $5.00 to $20.00 will get you some of this
  • Apparently leaves less of a sticky residue than the chemical stuff and doesn’t smell as potent

Cons:

  • A little more expensive than the supermarket generic stuff but nothing too crazy

Avon Skin So Soft

This may well possibly fall under one of the previous headings but I am giving it a special mention as it is one that has been identified specifically to me by several experienced hikers. 

It’s also effectively a skin moisturizer which I think is used for normal day to day use. However, it is also meant to be very good at repelling insects.

I have heard that soldiers use Avon Skin so Soft it as it’s much nicer on the skin than the chemical stuff. I haven’t used it myself yet but I do have a bottle of it winging itself to me as I write, I ordered a bottle two days ago.

I’m curious to see how it feels to use, smell etc. and of course how it performs. I’ll update this post with the results 🙂

Pros:

  • Easier on the skin as it’s a moisturizer
  • Again, a much more fragrant smell than many spray bug repellents (maybe too fragrant for some manly men out there lol 🙂 .. kidding )
  • Inexpensive … same price as the standard bug spray stuff

Cons:

  • Only one Mountain Guide I know has used this and didn’t like it, he said it was very sticky on the skin … however, I know others who love it though

Citronella Oil

This is an interesting one and one a hiking friend of mine who is a Doctor told me to try out one time we went out on a night hike. Basically, you dab a few drops of the citronella oil onto your clothes around where your body is exposed and that does the trick.

As I said, I only used this once but it did seem to work pretty good.

Pros:

  • As I said, I only used this once and it did seem to work well
  • A nicer smell than many spray bug repellents
  • In and around €15.00 for a bottle so more expensive than standard bug spray

Cons:

  • This is nearly a contradiction to the pro above but, the nicer smell is very strong and pungent as you have to use a fair bit for it to be effective
  • The smell tends to stay on your clothes long after you’re away from the bugs
  • Maybe not as easy to get your hands on as the spray stuff (Although I could be looking in the wrong places 🙂 )

Bog Myrtle

Bog Myrtle is a flowering plant that is native to parts of Western Europe and parts of North America, and is apparently a very effective inside repellent. It will help keep midges, horseflies, etc. at bay. I believe it is a very popular natural insect repellent to those in the know.

I have not used this myself but I have heard stories that it is effective and as it’s very natural, much more pleasant to use.

Bog Myrtle

Bog Myrtle picture above taken from wikipedia

Pros:

  • A natural solution like this has definite advantages, just feels nicer to use normally
  • Apparently the smell is quite pleasant

Cons:

  • Probably not as easy to get your hands on but you can get it (I found this website which ships it from Scotland)
  • Might work out a bit more expensive than standard bug spray

My Recommendation

This is a tricky one at the minute as I haven’t used all of the options listed above. I am going for a two day wild camp this weekend and I will have the traditional chemical bug spray in my pack.

However, as mentioned I do have Avon Skin So Soft on it’s way to me and if it is half as good as I have heard, it could be my new favorite. I’ll report back in a week or two 🙂

Conclusion

So, that’s it for now. As I said at the start, I would like this to be an ongoing informational post so I will be updating as I go. I am sure I will learn of other good ways to keep the bugs at bay, there are probably many more ways to help with this problem on the trail.

I think this topic is relevant to nearly all hikers as you will get attacked by insects at some point. I was reminded of this a couple of weeks back on a hike I was on. I was camping the night before the hike in a campsite at the base of the mountain range.

It was a hot day and I arrived late, 9:30pm. With the natural light fading, I needed to get my tent up quick. I found my pitch spot and started to get organized. As soon as I was stationary for a few seconds fiddling with the tent, a swarm of midges descended upon me. It really was not pleasant!

And of course, I’d forgotten my bug spray .. yikes! … luckily my friend had some. I can’t imagine what it would have been like if he hadn’t had that. Would have been a very uncomfortable evening and most likely not feasible for me to stay there.

As stated, this is an ongoing informational project in a post so if you know of any good ways to keep the bugs at bay that I haven’t touched on, please do let me know in the comments below. I’ll add them in.

I hope you found this post on what’s the best insect repellent useful and if you did, please like and share 🙂

How To Choose Hiking Pants: A Helpful Illustrated Guide

Hiking Pants are another key part of your hiking kit. There are a myriad of options available and the quality that is available these days is exceptionally good.

Hiker on Trail 1

This is definitely one area where I have noticed real improvements over a relatively short period of time. The pants available today are definitely far more comfortable than their older compatriots.

The biggest difference I have noticed is in the material make-up, I personally find the material used in hiking pants to be much more comfortable these days, and seemingly getting more and more so as every year goes by.

So, this is a buying guide of course so I want to add some notes on what to look for when trying to choose the best hiking pants for your needs.

If you just want to know the best hiking pants available on the market today, you can check out our best hiking pants options for men and our top hiking pants recommendations for women.

Moving back to buying advice, there are several things to think about but overall, let’s start with the good news.

For an average hiker doing average day hiking, I don’t think you need to break the bank for a decent pair of hiking pants. We’ll look at price in more detail further below but I though a short note on that would be good, it’s nice to get started on a positive note 🙂

Where do you Hike?

Before getting into the detail of what to look for when choosing your hiking pants, the first thing you should think about, is where you go hiking. This is probably the primary determining factor in choosing hiking pants.

For example, if you’re an average weekend day hiker in temperate climates, then a relatively standard pair of hiking pants, combined with rain pants, should see you good most if not all of the year round.

Hiker In The Desert

If however, you hike in predominantly warm conditions, say a desert climate like in parts of California and Nevada, then you may only want a light pair of hiking pants that can convert into shorts.

If you’re planning to visit a jungle for some hiking in the near future, then you may have other things to consider, e.g. bugs and so on.

Without going on too much, the main point I want to get across here, is that where you hike and the climate you hike in, will have a major influence on how you make the rest of the decisions in the additional sub heading areas below, so get that clear in your head first.

Types of Hiking Pants

There are more or less three types of hiking pants. Lets start with a brief introduction to each kind. I won’t go into too much more detail in this section, I’ll do that in the further sections below.

Good Old Fashioned Pants

The first type are good fashioned pants. No different, except in function and design of course, to any other type of pants.

Convertible Hiking Pants

The second are convertible hiking pants. These are hiking pants on which the bottom legs can be removed to enable you to create a pair of shorts. The bottom part of the legs are usually removed using zips which run sideways around the leg.

Roll-up Hiking Pants

These are hiking pants that roll up into shorts or Capri pants. Can be handy for extra ventilation.

Material

This is the area I have noticed really significant changes over the last decade. Broadly speaking, synthetic materials such as nylon and polyester are the main materials you will find in hiking pants.

Hiking Pants Label

However, a lot of modern Hiking pants available on the market today come in a very comfortable and stretchable fabric made from a combination of nylon with some spandex or elastane.

I have really noticed how much more comfortable hiking pants that employ this type of make-up are than what was available even a few years back. I put it that all down to the material combination changes.

What I’ve also noticed is that this kind of material make-up can really lend itself to some of the other key items, that you want to have your hiking pants to have, namely breathability and water resistance.

This of course varies depending on the type of pants and their specific function. That is, a light summer hiking pant will of course be a lighter construction and fabric weave than a heavier winter pant.

A heavier pair of pants will also have a thicker and tougher fabric weave and likely some extra water resistance capabilities on the face of the fabric, more about that below.

One phrase you will come across in terms of material for good hiking pants, and other hiking gear, in terms of material construction, is ripstop. Ripstop fabrics are woven fabrics that are made using a special technique which reinforces them.

This of course makes them tougher and more durable, a perfect fit for the kind of things you will be putting you hiking pants through on the trail!

Is there a best material for hiking pants? I can’t say there is one specific material, a mix of materials like nylon, polyester, elastane, is the way to go.

You want a strong stretch fabric that will enable you to move comfortable as you hike. You also of course want to avoid cotton as it isn’t best suited as a material for hiking pants, neither is linen.

The material in your hiking pants will play a big part in the next thing we will look at which is …

Weight

Weight is a factor that will have more, no pun intended, weight in the buying choice for some than others.

What I mean by that is that a day hiker may be much happier to carry a bit of extra weight in their hiking pants, than a thru hiker or a backpacker heading out for a week or longer would.

Best Backpacking Backpacks

As a general rule, the more suited to hot weather your hiking pants are, like a summer hiking pant option, the lighter they will be. As mentioned, the material used also plays a big part in this.

It stands to reason that generally the material in summer will be less thick than a pair of hiking pants you would need to wear in winter, when it’s usually colder.

Now, I hesitate a little in saying that as even in areas with hot weather the temperature can plummet when night time rolls around. A desert is a good example of this.

Really hot during the day, but much cooler, sometimes very cold, at night. Similarly, in certain places in Winter on a sunny day, it can be very chilly in the shade but hot when in direct line of the sun.

For an average day hiker, weight shouldn’t be a major concern and you can pick what feels comfortable to you. For a backpacker, it definitely becomes more of a factor that you need to take into consideration, as you will probably want as light and efficient of an option as possible.

Sizing

Everyone will of course have their own preference for sizing. First and foremost you want your hiking pants to feel comfortable (of course). I think good mobility in them is very important so a certain amount of bagginess is a good thing. However, you don’t want to go overkill on this either.

You will definitely want good mobility in the crotch and knee areas. When you hike over varying terrain you will be moving those areas the most and into the widest variety of positions, so you want a bit of freedom in movement for sure.

Some pants will specifically have things like articulated knees and gusseted crotches so they can be good to look out for too, as they will offer more mobility with added resistance to abrasion.

Hiking Pants Fit Rear View

As a general rule, Summer hiking pants are usually that bit baggier than Winter ones. This makes some sense as you want more ventilation in hotter temperatures.

I always like some element of bagginess in my hiking pants. However, I have found that some more modern hiking pants, using the spandex combination mentioned above, can be quite snug in terms of fit but still be very flexible in terms of movement.

Overall, and this may be somewhat stating the obvious but, in terms of sizing aim for what feels comfortable to wear and pay a pit of extra attention to the knee and crotch areas.

A little bagginess can be good for hotter times of year, as air can circulate a bit better, but don’t go too crazy as too much and it will be a pain e.g. flapping in heavy winds.

Breathability

As with any hiking, you want your pants to be breathable. This is a lot to do with the material make-up from the previous section. Your hiking pants need some breathability to ensure you can let your legs breathe i.e. sweat can wick away from your skin.

While that is important, it is only part of the process and I think additional features like ventilation zips for quick ventilation are a great thing to have but we’ll look at that in more detail below.

Good breathability also lends itself to helping your hiking pants to dry out quicker if they get wet. I can’t overstate how important that is. Your hiking pants are going to get wet so the quicker they can dry off the better.

Water Resistance / Waterproof

I’m a little cautious of hiking pants that are categorized as waterproof. In terms of hiking, waterproof capability should generally be handled utilizing your rain pants in my opinion.

However, some element of water resistance on a thicker pair of hiking pants, for autumn / winter, can be a good thing to have. It just means that for a lighter shower of rain, you don’t need to get your rain gear out and on.

This will be provided by a DWR (Durable water repellent) coating of some kind. This sits on top of the material and beads the water letting it roll off.

The DWR coating won’t last forever though, so you do need to reproof the coating on your hiking pants, using Nikwax or a similar reproofing product, if you want to keep the water resistance working well.

For summer hiking, I don’t concern myself too much with water resistance in hiking pants. If the pants have good breathability and they get a bit wet they normally dry off pretty quickly in the warmer temperatures of summer.

If the rain is too heavy, I just pop the rain pants on over my hiking pants till it passes.

As I mentioned, for serious rain, I always prefer to rely on waterproof rain pants as an outer layer over my hiking pants but this may not always be as comfortable in certain scenarios, say in very muggy conditions.

You’ll need to see what set-up works best for your needs based on where you do your hiking.

Windproof

This should be more or less covered by the material make up, and the waterproof capability can help a bit with this too.

However, having god hiking pants that can hold off a blast of heavy wind is a good thing to have.

Again, this will depend on where you are hiking and when. If you head into the Scottish highlands on a blowy late autumn day, you will most definitely need your hiking pants to shield you from the wind.

If on the other hand, you are out on a hot summers day in Zion national park in Utah, it may not be high on your requirements list.

UPF

Some summer hiking pants will have an extra UPF (Ultraviolet Protection Factor) capability in the material make-up of them. Before getting into this, I think it’s worth covering the difference between UPF (Ultraviolet Protection Factor) and SPF (Sun Protection Factor) so as not to get confused.

hiker-with-sunglasses

An SPF rating is a rating that indicates how fast skin will burn. So the SPF ratio of 20 means that 1/2oth of the burning radiation will reach the skin.

So, if you use sunscreen with a factor of 20, it will take 20 minutes for an equivalent of 1 minute of burning radiation to get through to your skin if you were not using sunscreen. It’s only a guide though so if you’re hiking in the heat using sunscreen, it’s always better to top up on it regularly.

UPF on the other hand is a clothing rating that works by indicating the number of units of ultraviolet light an item of clothing let’s in through the fabric. It’s a ratio that works as follows.

If a clothing item has a UPF of 40, it means that if 40 units of UV fall on the fabric, only 1 unit will pass through to the skin. In summary, when we’re talking about hiking gear, we are only concerned with UPF, the rating for clothes.

It’s worth noting here that standard clothing alone will provide some element of protection from the sun. If you’re wearing your normal clothes out in sunny conditions, it is rare that you will actually get sunburn through them.

In Death Valley Heat

However, the sun is something you need to be very conscious of when out on the trail as on a good day, you’re totally exposed. Often times you are often that bit closer to the sun as well, as you’re generally higher up in terms of altitude.

The temperature can also be a little cooler in that scenario which can be a little deceiving as to the amount of UV you’re actually getting exposed to is much higher than it may feel to your body.

Similarly, if you live closer to the equator, the sun can be a lot stronger and you may burn a lot easier. Some folks also have skin that is more prone to burning than others, so this may be more of a red flag for some than others e.g. people with fair skin.

People are also of course different. Some people can handle a lot more direct sun than others. If you have pale white skin, then you are probably more likely to need more protection than others.

Overall, having a UPF rating is something to consider as part of your hiking pants buying decision should you hike in sunnier and hotter climes.

Personally, I think there is no harm in having some UPF capability in a light summer hiking pant if you hike in a lot of hot sunshine or in certain locations or environments e.g. deserts.

UPF is a broad topic and one that is worth learning more about. This article on REI goes into UPF and sun protection in clothing in further good detail. Worth a look as an additional resource, if you want to go into it in more detail.

Color

Color is important. Hiking pants come in a range of colors but again thinking in terms of heat, dark colors absorb heat and light colors reflect heat. So, this is why nearly all light summer hiking pants will be grey, beige, cream, etc. A much better color to have in hot temperatures.

Similarly, if you’re hiking in winter, a darker pair of hiking pants can help to absorb heat from the sun and help keep you warmer. It may sound a bit like overkill but it does have an impact.

Best Hiking Pants For Women

Again, for someone who is out for longer times, say trekkers and backpackers, this is something to really give more consideration too as the wardrobe you can carry on your back will be limited 🙂

Bug Resistance

Again, something to consider for many, bug resistance in your hiking pants will help keep bugs at bay. This can be a real problem in many places and so anything that may help with this may be worth considering.

If you’re planning on heading away on a hiking adventure, say to the Amazon or somewhere, that’s when capabilities like this may be much more important to help protect you from getting bitten by various bugs and whatnot.

In saying that though, mosquitoes, ticks, ants, flies, chiggers and midges are never too far away in most parts of the world.

I think most places at a certain time of year in their cycle will have some kind of explosion in bugs / mosquitoes, etc. Therefore, insect shield technology can be worth considering for sure.

Swarm of Mosquitoes

Of course, this an only ever be an aid to protect yourself from bugs. You need proper bug repellent as your main line of defense. Bug resistance in your hiking pants is only a bonus, and should never be relied on as your main shield of protection.

Pockets

Good pockets are a must on hiking pants in my opinion. I like deep ones, at least the standard two hand pockets should be deep. Hand pockets can sometimes be zipped, and usually zipped pockets in hiking pants will have a bit more water resistance.

You can see as an example below, that my Columbia summer hiking pants have a lot of pockets available.

Hiking Pants Pockets Side View

That’s just one side view shot in the photo above and it has four available pockets: one standard hand pocket, a zipped back pocket, a hidden secure pocket and the side pocket.

The other side has 3, less the hidden pocket, and the back pocket uses a Velcro closure. Point being, there is plenty of available pocket space. Really handy to have.

As in the Columbia hiking pants above, some hiking pants will come with a small zipped inner, almost hidden, secure pocket, usually just on the entry to the right hand pocket of the pants.

This can be used to store something you really don’t want to lose e.g. a car key. The space is usually quite small in the pocket though but it’s a neat thing to have.

Hiking Pants Secure Pocket

Hip pockets can also feature on hiking pants, one or two can be handy to have, but not always practical. They usually can be closed with buttons, Velcro or zips.

Rear back pockets are also common on hiking pants, not a major concern of mine as I don’t use the rear pockets a lot, but again no harm to have them.

Care

This could have slotted into the material section above, but it’s worth calling it out in it’s out section, to highlight it.

Nearly all good hiking pants should be relatively easy to care for. So to wash and drip dry should be pretty standard.

Care Label

However, it is worth checking on this before you buy. If you get hiking pants that have a very specific material construction, say to enhance their water resistance capability, then you may need to care for them in a more specialized way, using special detergents, or that type of thing.

I don’t like this idea, I want to be able to wash my hiking pants simply and easily, with other dirty sports gear. I have my rain pants that need special love and TLC, in terms of reproofing every so often etc., and that is enough for me.

Also, hiking pants that can be washed by hand are useful to have. If you are on a long trek and can’t get to a proper washing machine facility, even giving them a bit of a rinse in a bathtub or bucket with detergent can be helpful, to get them a bit less smelly after days of use 🙂

The material make-up of most hiking pants, lend themselves to this, but it’s something to keep in mind if considering care and attention.

Features

For summer hiking pants, I look for removable bottoms. This means you can easily turn your hiking pants into shorts, also known as, convertible hiking pants. I have a pair of Columbia light hiking pants that do this and it works very well.

Zip Conversion of Hiking Pants Into Shorts

There are two zips around the pants at just above the knee level and the lower part of the pants easily zip off. Really handy for when you’re not sure if the sun will make an appearance on the day or not.

While shorts in the sun is a good idea, be careful as if it’s too hot you might be wiser to leave them on to protect your legs from the sun.

Another handy thing about the removable bottoms is that they can be removed and washed really easily. When you’re hiking, the bottom of the pants will get the worst hit in terms of dirt.

If you can’t wash them for a few days while you hike, you can simply detach the bottoms and rinse them in a river or a sink, whatever is handy. I did this when I hiked the Camino and it worked a treat and kept me looking somewhat respectable after numerous days hiking lol 🙂

A similar effect, making your pants into shorts, can also be achieved using roll-up hiking pants. The bottoms on these can be rolled up to form shorts or Capri pants.

In truth, you can roll up most standard hiking pants just fine but these ones will have a tie feature available so you can secure them when rolled up.

Not something I’ve used personally but might be good to have if you find the process of removing zipped bottoms a hassle as you have to take your boots off.

In more durable hiking pants, a key feature I really like to have are ventilation zips. These work in the same format as pit zips in a rain jacket.

Hiking Pants Venting Zip Closed

They run along the side of the hip and usually have a mesh material under them which allows good air flow when you open them.

Hiking Pants Venting Zip Open Mesh

They’re a very effective way to quickly regulate the temperature in your hiking pants and I really like them. Breathable material is one thing but the quick venting option is the business in my opinion.

You can open them as you ascend a steep part of a mountain when you’re sweating that bit more with the extra exertion. Then when you get to a plateau or start heading downward, you can just zip them back up if it starts to get too cool.

In terms of zips, boot zips are also a popular feature to look out for. These are zips that run from the bottom of your hiking pants up to, approximately, the top of your ankle. When open, they can help with sliding boots on and off and they can also allow some element of ventilation.

Hiking pants will also often feature some way to secure at the waist. This will either be with belt loops to which you use your belt of choice but many hiking pants will come with an integrated Belt or drawstring of some kind.

Hiking Pants Waist Strap Buckle

Some kind of belt, integrated or otherwise, is useful as it allows an element of weight moderation, when you fill up the many pockets available to you with stuff, you need something to help keep the pants comfortably up and secure.

You can also look for a lined waistband, for example, a brushed Tricot-Lined waistband. This means that the waistband has a lining that makes it a little more comfortable to wear, as the waistband will be touching your skin.

Finally, if you will be using a harness, then you may want to look for hiking pants that specifically mention harness compatibility. Not a major requirement for most average hikers, but something worth noting.

Price

In terms of getting a very functional and comfortable pair of hiking pants for the trail, I really don’t feel you need to break the bank. You can of course spend a lot of money on hiking pants, as with all hiking gear there is a lower and upper range running from about €50.00 to €100.00.

However, I think spending in and around $80.00 (maybe a bit less if you take advantage of a sale or some coupons online) will get you a really good and functional brand name pair of hiking pants.

The more functionality you have in your pants, generally the more expensive they will be. What I mean by that is, all else being equal, a light pair of hiking pants should be a bit cheaper than a tougher and more durable Winter pair.

Keep in mind that brand name can have a big impact on price too. I do generally like particular brands over others, as most people do, but sometimes you won’t get much more in functionality and capability for the extra dollars you will pay for a name.

It is also true you can possibly find a bargain in a non brand pair of hiking pants on Amazon or in a local budget store. If you spend 10 bucks on a pair of pants though, set your expectations accordingly, you might get lucky and have found a really great deal, but you might not 🙂

My Recommendation

I recommend having at least two sets of hiking pants, a summer pair that are lighter and have some specific functions, which I list below, as well as a winter pair which are of course that bit heavier to keep you warmer in colder climates.

How To Dress For Hiking In Summer

The summer hiking pants should be convertible into shorts. I prefer the capability to remove the bottoms using zips as opposed to roll-ups but whatever you prefer should be fine and will have the same effect.

For the autumn / winter hiking pants, I recommend a tougher material construction for the hiking pants, they need to be considerably warmer but still breathable.

I like a mix of synthetic fiber like nylon / polyester with some spandex or elastane into the mix to allow a bit more stretch in the fabric. I recommend you look for ventilation zips in your winter pants as I think they are really effective in helping regulate temperature.

Breathability is also very important for both your summer and winter hiking pants. As mentioned above, generally speaking, the more breathable, the quicker the pants can dry and that is a definite requirement for hiking pants.

Look for at least two hand pockets in each pair and a couple of back pockets, can also be useful. A zipped pocket or two can also be good to secure something away.

If you’d class yourself as a casual hiker, I think it is feasible to get away with one year round pair of hiking pants, for that I’d choose a middle of the road hiking pant.

Ones that are not too light for winter but not too heavy for summer, ideally with removable bottoms so you can turn the hiking pants into shorts.

That combined with good waterproof rain pants should keep you covered in most conditions.

Conclusion

Hiking pants are a key part of your hiking gear, there is no doubt about that. The good news is that the quality available these days I think is really top notch at a price that is affordable.

You can check out our best hiking pants options for men here and our top hiking pant recommendations for women. We walk through a lot of excellent options to choose from in those articles.

As mentioned above, hiking pants are one area I’ve really noticed a big change in quality in over the last decade and they seem to be getting better and better.

As with all hiking gear, it will be interesting to see how technology advancements help further enhance the quality and capability of hiking pants over the coming years. It should only be good I think.

I hope you found this article on how to choose the best hiking pants useful. Please share it around your networks if you did 🙂

How To Break Hiking Boots In

Today I wanted to write some notes on how to break hiking boots in, specifically what I do to help with the process. I have written on this subject on the site before but I thought doing a post specifically on the topic would be useful as it does up come up for people regularly enough.

Breaking Hiking Boots In

First off, if you’re coming to this article and you want to get hiking boots but you’re completely new on what to look for when buying hiking boots, I recommend you read this post on how to choose hiking boots and trail shoes, as well as this article on how to find the perfect fit, where I list out some further tips to consider when trying to find the right boots for you.

Think of those articles as the critical foundation you need to get in place before choosing hiking boots and taking them out into the field so to speak.

If you’re in the market for a new pair of hiking boots, you can find our top hiking boot recommendations for men here and our top hiking boots recommendations for women here.

What is Breaking Boots in and why do I Need to do it?

When you buy new hiking boots, they’re more or less fresh off the manufacturing line or, if you’ve got a really sweet pair, straight from the cobblers hands by the time you get them. That is, they haven’t been worn to any significant level.

As with all parts of the body, each persons feet are unique. You need to get these fresh new boots molded and adapted to your feet by normal wear and use. That is essentially what ‘breaking your hiking boots in’ means. You’re adapting them to your unique foot shape.

Why you need to do this is that most hiking boots, especially good quality leather ones, won’t fit your feet perfectly from day one for the reasons listed in the last paragraph. So, if you put them on and head straight out on a 20 mile hike, you will most likely experience aggravation and upset on your feet.

This usually manifests as hot spots, blisters, small cuts, and that type of thing. To avoid that, you build up your use of them slowly, allowing your feet to adapt to the boots over a period of time. That is why breaking hiking boots in is so important. Trust me, you won’t too far with a blister being aggravated by your new hiking boots.

What I do

When it comes to breaking hiking boots in, there are several things I do to help the process go as smoothly as possible which I list out in the coming paragraphs. However, before getting into the detail, I think some general points are worth reviewing.

First off, it is worth noting at the start that some hiking boots need more breaking in than others. For example, leather hiking boots will nearly always take longer to break in than hiking boots made from Gore-tex.

In fact, from my experience, Gore-tex boots have never needed more than a minimal break in process, but that may not always be the case I hasten to add.

Similarly, a heavy leather backpacking boot, like Alico New Guide, pictured below, will normally take longer to break in than a mid sized leather day hiking boot, like the Alico Tahoe hiking boots.

Of course, as with everything on this beautiful planet, there are always exceptions to the rule 🙂 I have purchased heavy leather hiking boots before that I expected to take a few weeks or even months to really break in, but they were comfortable from the get go.

Alico New Guide Hiking Boots For Men Gallery

Although they probably didn’t need it, I still followed the same break-in steps listed below. However, I had every faith that I could have went on hikes of 20 plus miles in them after only a few times wearing them.

It’s Good to Have Confidence in Your Boots

It is nice when you feel that confident about a pair hiking boots from the start and it does happen but in the majority of cases, a reasonable breaking in period is required and advised.

So, with all the preamble above said, the tips I list below are valid for boots made from either leather, synthetic materials or a mixture of both. In fact, this general process really can be adapted and applied to most types of boot or shoe.

Wear Them at Home

When you buy a new pair of hiking boots, you normally have at least a 30 day period in which you can return them to the store as long as you don’t wear them outside.

Assuming you’ve spent time getting  a good pair of boots and getting a good fit, you are now in the latter stages of confirming the suitability of your boots for the longer term.

What I mean by that is, there is only so much you can do within the buying and fitting process to ensure you get a good pair of hiking boots. The proof is always in the eating so to speak and your only real guide is wearing them over a period of time.

In truth, that also means wearing them out on actual hikes where they are tested on various different types of terrain and so on. However, as already mentioned, as soon as you do that, you’re stuck with them whether your feet adapt to them or not.

So, the next best thing is to wear the boots in your house as often as possible. So, when you come home from work of an evening after having just bought your new hiking boots, get them on.

If you don’t normally wear shoes inside your home, this isn’t a problem as these boots have never been worn outside so they will be factory fresh! Be sure to wear your hiking socks with the boots as well so it will be exactly as you would have them while wearing them out on the trail.

Although this sounds simple, it is really important. You will only get a feel for the little rubs and nuance of the boots after wearing them for a longer period of time as you would out in the field.

Put Them Through Their Paces

Push them a bit too, for example walk up and down your stairs a few times in them to try and get a feel for a bit of up and downhill. Of course this doesn’t and can’t ever replicate the trail or the mountains but it is the best you can do before committing to them i.e. taking them outside.

All this talk of commitment and all this effort may sound daft to some but if you’re spending $200 to $400 on a pair of hiking boots, you want to be sure you’ve got the right ones. I don’t know about you but I don’t take that kind of investment lightly so it’s worth spending a bit of time on this!

Wear the Boots out on Short Walks

OK, so you’ve made the decision that the boots are for you. It’s time now to move to the next stage of the breaking in process. As soon as you do this next stage, all thoughts of backing out, refunds, etc. are gone out the window, as at this point you need to take them outside!

I recommend you start wearing them out on shorter walks, say 2 to 4 miles at first. If you take your dog for a short walk in the local park at night, that’s a good example of where to take them out for an initial test run.

However, play it by ear when you start. If your feet are starting to feel a little tired or sore after one mile, then stopping and heading for home calling it a day at a two mile round trip is wise.

Then, all you do is just build the distances up over time up. Move to 4 miles, then maybe 6 and so on. At this stage, you”re walking on normal roads and flat enough terrain so you’re not pushing things too hard. So now you can …

Wear Them on Short Hikes

When you’re happy your boots are comfortable for 4 to 6 miles walking in your local neighborhood, it’s time to take them to the mountains and onto the trails. This is wear they will get the tougher tests but as they’re probably more or less broken in at this stage, you should be good to go.

The extra breaking in comes in the form of the more challenging terrain you hike over which you won’t get in a local park e.g. rocks, marsh, etc. This all puts different stresses on your feet than a flat local road or path in a park would.

Hiking Boots Shot

As indicated above, I recommend that even if your feet are feeling great in your boots out on the trail after a shorter hike than you’re normally used to, still call it a day at a shorter distance.

I must confess that I have not always done this but I do believe it is the best way to go. Give your feet all the time you can to let them adjust to the new boots.

Ideally you still have your old hiking boots while you’re going through all of this breaking in process so if you need to go on a longer hike for a day, you can revert to the older boots while you’re breaking the new ones in.

All of this attention and effort is just to give your feet the time to really adapt well and the hiking boots to mold to your feet that bit more. As alluded to above as well, if you get a blister or another problem on your feet, you won’t get too much further so it is wise to take all the time you can to break your hiking boots in.

How to Stretch Hiking Boots – Additional Options

Sometimes you may find that the above works just fine, especially if you take plenty of time to stretch your new hiking boots little by little. However, sometimes you might need to resort to other methods, or you may want to try to speed up the stretching process.

If you need to break in your hiking boots quickly, then trying out these hiking boot stretching solutions could make getting your new boots trail-ready and more comfortable with less chance of blisters.

Localized Stretching

Sometimes with new, stiff boots you may find it is much easier to stretch them by hand to reduce the rigidity. Bend your boots by hand to encourage the creases that should form with wearing them where your toes meet the ball of your foot.

This will improve flexibility and also help to make the soles bend a little, as well as giving your feet more room to move.

Use a Boot Stretcher

If you need more space around your foot you may wish to use a boot stretcher for some extra slack. However, if you are really lacking on space, verify that your boots are the correct size for your feet.

You don’t want boots that are too small as not only do feet swell with exercise and heat, you’ll also need space in your toe box to prevent your toes from becoming squashed on steep descents.

If you’re not sure what a boot stretcher is, ask the all knowing Google 🙂

Heat

Heat is great for stretching boots, but be careful to use it in moderation as not to damage or weaken your new hiking boots. You could use a hairdryer on a low setting to help to stretch your boots.

Put on your hiking boots with hiking socks and gently blow them with a hairdryer, flexing your feet as they heat up. Start on low and if you are not seeing any results gently increase the heat or blow closer to the boot.

You could also put your hiking boots in a warm, but not too hot, place for an hour or so before walking around the house in them. This will also improve stretch and flexibility.

Again be rally careful if you resort to using heat, as it can easily go wrong and cause damage! It is another option that may help though.

Alcohol

Some people swear by dabbing a little alcohol on tight spots on their new hiking boots. Once dampened lightly in tight areas, walk around and flex your feet for added stretch where you need it.

While using rubbing alcohol on boots will help to stretch them, you’ll probably need to test how this affects their waterproofing and maybe re-treat them before wearing them out to make sure that they are fully waterproof.  

I’ve never tried this so can’t vouch for this, so do some research first and be sure to do it in moderation and see how it impacts the boots.

Extra Socks

If you have sensitive feet or feel like your boots really need all-over stretching you could try wearing an extra pair of socks inside your boots around the house.

While it’s not going to be comfortable, at least at home you can take them off as needed. Wear a soft, silky inner sock if possible to prevent chafing and then a pair of thick hiking socks or a standard pair of socks followed by a thick pair.

Walking about will probably be unpleasant, but you could flex your feet while sitting down and watching TV or reading. Try this after heating up your boots if they are resisting all your stretching efforts so far.

Other Suggestions

Still struggling? Want to see how it’s done? Check out this helpful video on YouTube to get some good tips and tricks on how to get your new hiking boots stretched and ready for use out on the trail.

Conclusion

I hope you found this post on how to break hiking boots in useful. It’s not a complicated process by any stretch of the imagination but it is worth paying attention too and doing right.

As mentioned at the start of this article, from my experience, leather hiking and backpacking boots, usually take longer to break in than boots made from synthetic materials but that is not always the case.

Overall, it is sensible to break any pair of hiking boots in and build up to full regular use over a period of time. Even if they feel great from the start, it will do your feet no harm to take a bit of time in the adjustment process.

As a hiker, as far as your feet go, your primary objective is comfort and avoidance of any sores, mainly the dreaded blister. Taking simple steps like these can go a long way to keeping you in good shape on the trail so it’s worth taking the time to do it.

Finally, remember, if you’re in the market for a new pair of hiking boots, you can find our top hiking boot recommendations for men here and our top hiking boots recommendations for women here.

Happy hiking!

How Long Should Hiking Boots Last?

I was chatting with a Guy new to hiking recently. He has been out a few times now with a group I hike with sometimes and I can see he is getting into it. Anyway, as what usually happens with most folks after they hike for a while, they start to think about what kit they need to get.

Hiker On Mountain Edge

On their first few outings, when they are just getting started, they tend to use whatever gear they either already have or get some cheap and cheerful options. This ties them over while they figure out if this whole hiking lark is something they want to get into on an ongoing basis.

Steve, the new Guy in my group is at the stage where he knows he wants to stick with it and so, he is starting to think about what kit he should get. As alluded to above, he currently uses a mixture of old gear he has laying around and an old pair of cheap hiking boots he had from some years back.

What Are Good Hiking Boots?

Anyway, the subject of hiking boots came up when we were chatting and he started to query me around how much a good pair of hiking boots would cost. I thought about it and said, to get a pretty decent pair of hiking boots that will protect your feet and stand up to the elements year round, if you factor in utilizing coupons and deals, you’re probably looking at spending between $150 to $300 for a pretty good pair of hiking boots.

He nodded and said, OK cool. Then he asked me another question, ‘how long will those boots last?’ This one was interesting as I thought about it. If I make an investment of $150 to $300 in a piece of kit I’d want to know how long it would last too. However, as I thought about it, it this wasn’t a straightforward thing to answer.

Before we continue, if you are in the market for a new pair of boots for the hills, check out some of the best hiking boot recommendations for men here, and the best hiking boot recommendations for women here.

How Long Will Hiking Boots Last?

This is really dependent on so many things, it’s a tricky one to give a specific answer on. There are many factors for sure. First off …

How Often do you go Hiking?

If you are a weekend day hiker, heading out once a week, you can expect a longer period of useful use from your hiking boots than say, someone who goes out hiking four times a week. You’re simply using them less than the person going out four times a week.

Hiking Boots Shot

Where do you go Hiking?

If you hike on very soft but firm trails, your boots will stand up better over time than someone who regularly hikes over rock, shale, scree and marshy ground. Clearly, the boots will just take less of a beating on nice even trails as opposed to tough and challenging terrain.

What Hiking Boots do you have?

Of course, there is a wide gap in quality when it comes to different types of hiking boots. If you spend $100 on a pair of boots or $300, you would expect that the more expensive model will hold out better. In most cases you can expect that to be the case but not always, there are always exceptions.

In summary though, the type of boots you have bought will have a big impact. The make-up and construction of them will have a large bearing on how they hold up.

Care and Maintenance

Do you wash your hiking boots down after every hike and let them dry out properly? Do you treat them, if they’re leather, regularly? How much you care for them will of course effect the longevity of your boots.

If you head out in boggy marsh and muck but just throw your hiking boots in the corner after every hike, yep, they’re going to go out of business sooner rather than later.

Your Weight

Your weight has an impact on how long your hiking boots will last. Logically, a heavier load will put stress on a pair of hiking boots more so than a lighter one. Common sense tells you this but it is a factor to be added into the mix for consideration.

Now, I should add here that I don’t necessarily mean weight in terms of a persons body mass, although that is a factor for sure. Think about backpacking though. If you like to do a lot of backpacking, you will be carrying a heavy load around most of the time and so the weight and stress on your boots will be much higher. Hence why backpacking boots and day hiking boots can be quite different in their construction.

How do I Factor all of this in to Make an Estimate?

Well, I think the best advice I can give is to think of the length of life of your hiking boots, a bit like the length of life of a car. How many miles do you do? If you day hike once a week and do an average of 15 miles, your boots will last much longer than someone who hikes four times a week doing 10 miles. Now, this assumes everything else like care and maintenance, weight, terrain etc. being more or less equal.

Using that context, from my experience, a decent pair of hiking boots in the $150 to $300 range should last anywhere from 500 to 1000 miles (805 to 1610 km’s). That’s a ball park number I have found to hold up pretty well. I have also found that, generally speaking, the further I go up in price range for a reputable brand pair of boots, the more miles I will get out of the hiking boots.

Tip to Extend The Life of Your Hiking Boots

When choosing hiking boots, be sure to educate yourself in the buying process first and foremost. You need to be clear on what you need your hiking boots for before you move to buying a pair.

When you’re ready to buy hiking boots, one tip to help get the most out of the life of the boots, could be to look for hiking boots that have a resoling option. If the rest of your boots, the uppers and so on, are well looked after, the resoling option could significantly extend the life of your hiking boots.

Cobbler At Work

Getting custom made hiking boots, should be resolable by default, is also an option but it is expensive, so if you can find a branded pair of hiking boots that can be resoled, it’s a nice middle ground that should work for most.

Conclusion

I was glad that Steve asked me this question as it certainly got me thinking. I kind of take all of this into consideration by default so it was good to sit down and have a proper think about it. I thought a short post on it might be useful for others thinking about this too.

I’m always learning though so I’m sure I’ll pick up more points of note about how long a pair of hiking boots should last as time goes on. Technology will no doubt get better and better as it usually does, and so in theory the quality and durability of materials, etc. should help add a few more miles to the hiking boot odometer.

However, I guess brand names don’t want their boots to last forever either though, not good for business I would think 🙂

If you’re in the market for a pair of hiking boots, check out some of the best hiking boot options for men here, and the best hiking boot options for women here. I hope you enjoyed this post, please like and share.

How To Put Gaiters On

I was in an outdoor gear store the other day and I saw a lady looking at gaiters. She gingerly took them off the rack and surveyed them. As she looked at the loops, the Velcro and the other constituent parts of the gaiters, you could see from the expression on her face that she was a little confused.

Outdoor Research Men's Crocodile Gaiter

Pictured above are the Outdoor Research Men’s Crocodile Gaiters. Click on the image to learn more.

My guess was that she was a bit of a newbie to the whole hiking thing and she had been instructed to get Gaiters. No problem there. However, she probably didn’t really know what gaiters are and decided the best way to approach the problem was to go to the shop.

My hunch seemed to be confirmed as after looking at the gaiters for a time, she then scanned the shop quickly, looking either for a sales assistant or to see who may be looking her way. There was no sales assistant and I was too far away for her to notice my observation.

She sat down on a stool and took one of the gaiters from the packet and started to put it on. I noticed immediately that she was pointing the gaiter opening towards the front of her leg i.e. she was trying to put it on backwards. She got it on in some form but she could tell something wasn’t right as she stood up to look at the gaiter on her leg. You can of course just tell when something isn’t on right!

As if on cue a sales assistant appeared and sensing she wasn’t in the ball park with her first attempt, she removed the gaiter and got his attention and proceeded to ask him for help. The question of course being, how do I put this damn thing on!?

It was funny as I actually recall being unsure myself way back in the day when I first bought gaiters. Unlike the lady in the shop, I didn’t attempt to try them on in the store, I just bought them and brought them to a hike. I remember when I went to put them on, I too wasn’t 100% sure how to put them on. I gingerly asked the guy leading the hike and he was of course very helpful and explained the process.

With all that in mind, I thought a post explaining how to put gaiters on would be useful for folks who are new to hiking, or just new to gaiters 🙂 . Below I walk through the steps on how to put them on properly. If you’re totally new to gaiters, check out this post to learn more about what gaiters are.

Pre-Purchase

I don’t intend this to be a buying guide for gaiters, I’ll do that separately and link to it from here. However, it is worth pointing out that you should of course get the right size of gaiter. They usually come in a small / medium / large bracket although a one size fits all option can be available too. Overall, it’s not too hard to find the right ones for your size.

The Main Parts of a Gaiter

Gaiters, broadly speaking, have two key parts, the gaiter itself, highlighted in the photo by the green box below, and the instep strap, highlighted by the blue box in the image below.

Open Gaiter

The top of the gaiter will have some kind of tightening feature, usually a button and a cord or a Velcro strap running horizontally along the top, highlighted below.

Next, if we look at the instep strap, you can see in the photo below that they are adjustable using Velcro straps. Any good gaiter will have some way of enabling you to adjust the size of the instep strap to fit your boots.

Gaiter Velcro Loop Adjustment

It may not be Velcro, some utilize a buckle for the strap. Either way, you need to be able to adjust the instep strap on the gaiter to your boots. When you’ve done this once, in most cases you shouldn’t’ need to adjust it again unless the strap slips somewhat i.e. your hiking boots remain the same size so once adjusted to fit once, you should be good to go.

Putting the Gaiter on

First off, it’s worth stating that a gaiter normally goes over your hiking pants and your hiking boots. You do not put your gaiter on over any outer rain pants.

Open the gaiter out fully and take it behind your lower leg as shown in the photo below. The instep strap loop points downwards as it will wrap around the instep (between the heal and the toe end) of your boot.

Putting Gaiter On Photo One

Assuming you’ve already adjusted the instep strap to fit your foot, bring the gaiter snug against the back of your leg and start to wrap it round to the front. One side of the Velcro part of the gaiter, the bit you stick the other side too, should run down the front center of your leg. You then bring the other side of the gaiter over and secure the Velcro strap down the front of your leg.

Closing Gaiter At The Front

It’s worth pointing out that not every gaiter will have a Velcro make-up like this but most do. I always have the Velcro part to be stuck too, wrapping round the leg from the outside in. I’m not really sure if that matters that much when putting them on but that’s what I do. Whatever feels comfortable is the broad guideline on that front I feel.

As you’re doing the adjustment listed above, also be sure that the instep loop is sitting snug between the heel and the front part of your hiking boots. One side of your gaiter, at the front, will have a little hook on it, this is used to attach to the tied laces of your boots (see the two metal dots on the gaiter in the picture above). This too should be adjusted to fit snugly on your laces while you adjust the final position of the Velcro.

Next up, some gaiters will have a button at the top of the gaiter. Once the Velcro is closed and comfortable, if there is a button, fix it in place as illustrated in the picture below.

Button Gaiter At The Top

Once you have the gaiter on, adjust and tighten the gaiter at the top till comfortable. There will usually be a strap or cord of some kind at the top as illustrated in the picture below.

Secure Adjustment At Top

Finally, make any other required adjustments to the instep strap or the lace hook. And that is that! You should now have a gaiter secured tightly but comfortable around the bottom of your leg. Simply repeat the process for the other gaiter on the other leg and you’re good to go!

Gaiters On

Conclusion

So I hope you found this short post on how to put gaiters on useful. This may seem very obvious to many but just like the woman in the shop that I mentioned at the start, it can be confusing to people who are totally new to hiking and have never heard of a gaiter never mind have ever worn one!

It’s easy to put one on if you know how but it can be a bit of a funny one if you’ve never done it before. If you’re still unsure, ask in any outdoor store or ask any experienced hiker, they’ll be able to tell you what to do.

Please like and share this post 😉

Be Careful Relying On Navigation Technology When Hiking

I have mentioned the key point of this post in other posts before but it was illustrated to me again last Sunday while I was out hiking. First off, I should state that I think technology is a fantastic navigation aid for helping you establish your position and where you are on your route.

There is an extensive range of GPS watches, devices and phone Apps available on the market today that offer a really awesome selection of capability for helping you find your way around in the mountains.

Suunto Ambit3 Peak Sapphire GPS Watch

Pictured above is the Suunto Ambit3 Peak Sapphire GPS Watch, click on the image to learn more.

Some of the Apps available on phones today are also really excellent and I love them and really think they’re very useful and very accessible. However, when you go to any mountain navigation course they will always tell you that your primary means of navigation should always be your map and compass. Why? Simply put, technology can break and / or not work in certain scenarios.

My Recent Experience

As mentioned at the start of this post, I had a reminder of this last Sunday while out hiking. Basically, I was out doing a recce for a hike I’m helping to lead the following weekend. I actually know the route pretty well but I hadn’t been up there in a while so I thought, why not take a hike up there on Sunday. No harm to get a reminder of the route and it would get me out for a nice hike in the process.

Now, recently I have been very taken with the phone App Viewranger. I’ve only been using it the last two weeks but I have had it on my phone for a while. No real reason why I hadn’t used it, I just preferred the traditional map and compass.

Well, I started to fiddle with it a few weeks back and, as I alluded to, I was really taken with it. It is a fantastic App. I bought copies of the maps I use and I can do all sorts of cool stuff with the App and online. For example …

  • I can make up a proposed route on my maps in minutes with just a few clicks, and I can then sync them to my phone to follow on the ground
  • I can record a track when I head out on the trail and it will detail lots of useful information about the hike e.g. route followed, distance, height, etc.
  • I can share tracks with others as .gpx files (GPS coordinate files) and I can download other peoples hikes if I fancy doing them
  • I can save photo’s at way points along the route
  • etc. etc.

That’s listing only some of the neat things the App can do so all in all it is brilliant!

Out in the Field

On Sunday I decided to record my recce hike. I was at the start, turned the App on and hit record. Good to go! Now, it is pretty sweet as when you look at the App on the phone it shows you where you are on the map which is of course really useful … as long as you have network coverage of course 🙂

So, I headed along the route and up to the top of one of the main peaks on it. The ground approaching the top, and the top itself, was covered in snow and there was a thick white mist so basically, the further I went up, the less visibility there was. This wasn’t an issue for the majority of the route as for the most part it is very well marked with trails, even when covered in snow. So I didn’t need to look at the App so couldn’t really test it in challenging conditions … as yet.

However, there was one part I wanted to do from the top of the first main peak. Again, in normal conditions nothing complicated, there are two separate paths going off in the direction to a particular landmark I wanted to locate. As the top was covered in snow though, there was no way to see any paths.

The Top

When I got to the top, it was very windy and cold but all was fine. This was an ideal time to try the App out in trickier conditions. I took out my phone and thought I’d give the App a go to try and locate the path I wanted to follow to take me to the landmark I was looking for.

I had the phone out and sure enough it listed that I was at the top of the particular mountain I was on. I had battery, about 50% (worth noting that the App is quite heavy on juice) and good network coverage so all was good. So, I started to head off in the direction of one of the paths using the phone app.

Hiker in Bad Visibility

Now, to stress again, visibility was pretty bad, I couldn’t see much further than 5 to 10 feet in front of me. With my eyes peeled on the App I followed the path using my phone, I was walking for about 10 to 15 minutes and while I was moving in the direction of the landmark I wanted, I noticed that my location marker on the App seemed to be almost stationary on the map.

I wasn’t sure what the story was but I knew I had walked far enough in terms of time and distance to not have came across the landmark and the marker on the map seemed to have just stalled. Hmmnn!?

Then I Spotted the Problem

As I stood there in the snow wondering why the little location Icon on the Viewranger App on my phone didn’t seem to have moved, I noticed than I had no network coverage. At the top, I had nearly full coverage so I assumed it would be fine. However, for whatever reason, as soon as I set off on the path, at some point the coverage just dropped.

I wasn’t 100% sure of how long the App had not been working so I couldn’t make any guess as to where exactly I was using the App, the blanket of white snow and mist surrounding me didn’t help of course.

Now, this wasn’t a major problem for me as I am an experienced hiker and know how to use a map and compass, which I had with me too of course. The main thing I was doing was trying to test the App out and get used to using it in real conditions.

So, with no coverage, I decided that I would just head back to the top. I wasn’t 100% sure where I was but I knew if I just kept going up, I’d get back to the summit, which I did.

When I got to the top, I took out the traditional map and compass and took a bearing from the summit to the landmark I wanted to reach. I also measured the distance so I could time and pace the distance to be sure I didn’t overshoot by too much. Using the traditional tools, 10 minutes later I was standing at my landmark, all good!

Food for Thought

As I said at the start, I’ve mentioned this point on the site numerous times before in various posts but I thought, as I had a very recent reminder of it, it would be good to write this post to help illustrate the point.

When I was at the top of the mountain on Sunday in snow and bad visibility, I was purposely wanting to test out the App. I wasn’t in any way concerned about getting lost as I know how to relocate (establish your position at another known point). Worst case, I would just do what I did and head back to the top of the peak, take a bearing etc. No problem.

However, can you imagine if that was someone who didn’t have a map and compass? Or did, but didn’t know how to use them. How would they have dealt with something like no network coverage in bad conditions? How would they react when they realized their phone hadn’t been working and they didn’t actually know where they were?

As you can imagine, they would probably be freaked out! They would at best be guessing what their position was and simple things, like relocating to a known position, would probably not even cross their mind, especially if they’re not a regular hiker. Those type of things tend to have the inclination to compound and more problems usually build on top and soon enough, they could be in real trouble.

Conclusion

Now, I should say again that I LOVE Viewranger, it’s a really cool App and I will continue to use it a lot! However, it will never be my primary means of navigation on the mountains for the same reason I listed above. As I also mentioned at the start of this post, if you go on any navigation course, they will tell you the same thing, technology can fail and while it definitely has it’s place, you need to be wary of ever relying on it completely! S**t will inevitably happen at some point 🙂

If you liked this post, please like and share it round your networks.

  • « Previous Page
  • 1
  • …
  • 6
  • 7
  • 8
  • 9
  • 10
  • …
  • 16
  • Next Page »
  • Facebook
  • Pinterest

What are you looking for?

Copyright © 2025 · Cool Hiking Gear

Cool Hiking Gear is a participant in the Amazon Services LLC Associates Program, an affiliate advertising program designed to provide a means for us to earn fees by linking to Amazon.com and affiliated sites.

  • About This Site
  • Privacy Policy
  • Affiliate Disclosure Statement
  • Contact