coolhikinggear.com

  • Men’s
    • Best Hiking Rain Jackets for Men In 2024
    • Best Men’s Hardshell Jackets Of 2023
    • Best Hiking Pants For Men In 2023
    • Best Ultralight Rain Pants For Men
    • Best Men’s Daypacks For Hiking In 2023
    • Best Backpacking Backpacks For Men In 2023
    • Best Base Layers For Men In 2023
  • Women’s
    • The Best Hiking Rain Jackets For Women In 2023
    • Best Women’s Hardshell Jackets Of 2023
    • Best Hiking Pants For Women In 2023
    • Best Ultralight Rain Pants For Women
    • Best Daypacks For Women
    • Best Backpacking Backpacks For Women In 2023
    • Best Base Layers For Women In 2023
  • Hiking Accessories
    • Best Hiking Poles
    • Best Trekking Pole Monopod Camera Mount
    • Best Hiking Headlamps
    • The Best Hiking Watches In 2023
    • The Best Hiking Gloves In 2023
    • Best Hydration Bladders For Hiking In 2023
    • Best Compass For Hiking Our Top Picks
    • Cool Hiking Gadgets
  • Footwear
    • The Best Men’s Hiking Boots In 2024!
    • Best Hiking Shoes For Men In 2023
    • The Best Women’s Hiking Boots In 2023!
    • Best Hiking Shoes For Women In 2023
    • Best Hiking Sandals
    • Best Hiking Sandals For Women in 2023
  • Hiking Guides and Resources

What Are The Best Hiking Boots?

OK, so the title in this post is a bit disingenuous 🙂 not to be trying to trick anyone or anything of course but the point I want to make is that, realistically, there is no such thing as ‘The Best’ hiking Boots. That is, in a nutshell, what is ‘The Best’ for you, won’t necessarily be ‘The Best’ for others.
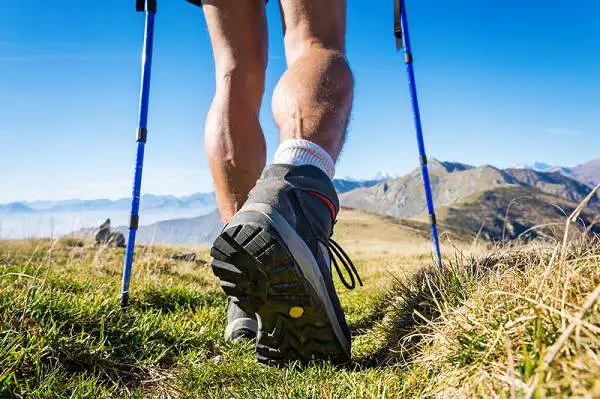
Hiking Boots Shot

Now, I don’t mean to suggest that there aren’t hiking boots that as a general rule can’t be called top notch boots. There are of course plenty of really top of the line hiking boots with loads of really great features, quality design and build as well as plenty of fantastic user reviews.

In fact, on this site, I myself of course make hiking boot recommendations about what I think the best gear items are. However, I really feel that when it comes to hiking boots, and other hiking gear, there is a large part of it that is personal taste and choice, there is no definitive answer for all people.

So…

The best fitting pair of hiking boots for me, could be the most uncomfortable design and build for you. It’s really very simple from that perspective, everyone has unique feet. Narrow feet, to wide feet. High arch, to low arch and everything in between.

So, am I saying that you can’t use online guides and peoples user experience, reviews and so on to help you make a decision about whether a pair of hiking boots are good or not? No, absolutely not. Some boots are not so good in terms of design and function, and some are great.

However, the point I am trying to make is that just because a pair of hiking boots doesn’t have oodles of great user reviews and so on, doesn’t necessarily make them a bad boot and, similarly, just because a pair of hiking boots does have oodles of really good user reviews, doesn’t necessarily make them the right boots for you.

Confused? 🙂

The best advice I can give to you is …

Start with Reviews etc.

This may seem contradictory to what I am saying above but it is the best place to start. You need to start narrowing the options down to some degree and this is a fine way to do that. Broadly speaking, I’d try and stay with 4 stars or more over a bunch of reviews. However, if something really grabs you and it doesn’t have a load of reviews, don’t necessarily rule it out.

Pay Attention to User Comments

Boots that have a reasonable selection of reviews will have very particular comments in terms of fit and size. For example, comments about who bought the boots because of all the rave reviews but as they’re a size 12 with wide feet, they really didn’t work for them. Stuff like that can be really useful if you have slightly differently shaped feet.

Try the Boots on

Nothing is ever going to beat this. You gotta wear the boots for a bit to see how you feel in them. You can go to the store but buying online is fine too. In this day and age, with so many options to buy online, you can easily get a pair delivered and wear them in the house for a bit, it’s more or less the same as buying from a store. If they’re not for you, you can send them back no questions asked.

Stick With a Brand

When you find a pair of hiking boots that ticks all your boxes, keep an eye on the brand and model. Many times, brands will keep selling the same model for years if it is successful, or they will slightly enhance it to try and make it better (That can go badly wrong sometimes too though 🙂 If it ain’t broke don’t fix it and all that).

However, a brand will tend to model new ranges of boots on similar foot shapes and design builds that they used in the past. Therefore, even if they ditch the old model, if you had a great fit with them, in all likelihood, if you buy one of their newer hiking boot offerings, they should fit just as good in terms of build and comfort. Something worth keeping in mind.

Buying a pair of hiking boots is a big deal! A decent pair will probably cost at least €150.00 to €300.00. Not cheap by most peoples standards, but a good pair should last you for 2 to 3 years if you look after them. So, it is worth spending a bit of time looking around to make a good choice that is right for you.

If you really can’t find something to suit and if you have some money to spend, you can always go down the custom made hiking boots route. It isn’t cheap but you’ll get a hell of a pair of hiking boots!

Conclusion

I hope you found this short post on ‘The Best Hiking Boots’ useful. I really just wanted to draw attention to some of these points as getting comfort in a pair of hiking boots is unique to everyone. If you’re new to buying a pair of hiking boots, keep all this in mind. Use the guidance available to you in reviews and demo’s etc., but don’t forget to give your personal feeling and experience with the boots a large piece of your attention when making your decision.

There is plenty of information available to anyone wanting to buy a pair of hiking boots. If you are looking for some guidance, you can check out the detailed hiking boots buying guide and when you’re happy you know what type of hiking boot or shoe to look for, check out some of the hiking boots listed on the best hiking boots page for men here and the best hiking boots for women here.

Again, the boots listed there are good options to review and look at, but remember to take everything in the buying guide as well as the points above into consideration when choosing a pair that’s right for you.

If you’re unsure about any of this or need any help getting started on the process of choosing hiking boots, feel free to leave a question in the comments or drop me a mail, I’m happy to help you if I can.
Do The Tongues In Your Hiking Boots Slouch To The Side?

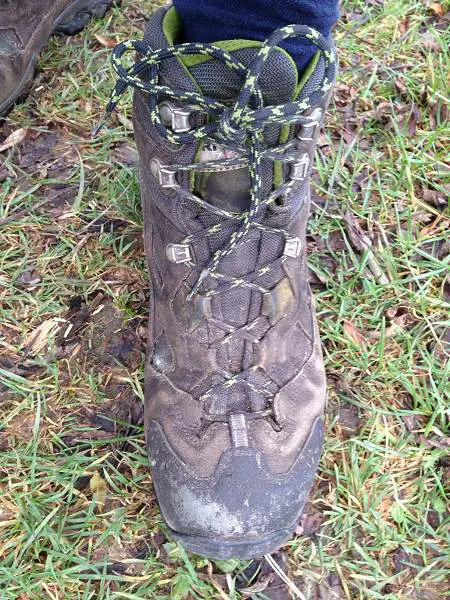
Have you ever had a pair of hiking boots or shoes, which after using for a while, you notice that the tongue starts to slip to the side? If you’re not sure what I mean, check the photo out below of an old pair of Scarpa boots I have.

Hiking Boot With Tongue Sliding To The Side

See what I mean? As you can clearly see, the tongue is leaning to the left hand side, from the front view. As you can see, it doesn’t look particularly good and it probably doesn’t help with getting a really neat fit on your feet.

So, what is this? How did it happen? Well, I have to say that this perplexed me for a while when I eventually first noticed it. I was wondering why the hell the tongues in these hiking boots, it’s the same in the other boot I should add, seemed to be slouching to the side.

At first I thought that it must be a design flaw. The boots just mustn’t be the best quality. However, I paid nearly $300.00 for these hiking boots at the time so for that kind of money, you can expect to have a decent design and build as well as durability.

If you’re in the market for new hiking footwear as well as insoles, then check out the best men’s hiking boots and the best women’s hiking boots.

If you are looking more for lower cut trail shoes, check out the best men’s hiking shoes and the best women’s hiking shoes.

So what Causes This?

Well, after a chat with a gear guru one day some years back, I eventually found out what the issue is and how a tongue on a brand new pair of hiking boots can quite quickly end up slouching to the side like this.

Basically, when you get a nice new pair of hiking boots, they will quickly try and adapt themselves to your feet. Now, no-one has perfectly shaped feet and in most cases, people will have a bit of bending or bowing in them.

When you put your boots on, nature, as always, seeks the path of least resistance and the tongue can very easily slide to the side where it feels most comfortable, or rather, has the least amount of hassle to find a resting position.

When you have your first few hikes with the tongues of your boots in this position, you of course sweat and, quite possibly, there’s some water in the form of rain or snow landing on your boots.

This dampness from inside and outside molds the tongue into the shape it has found for itself. This can happen after just a few hikes and once its started, it’s difficult if not impossible to undo.

How do you Prevent This?

The good news my friends is that this is very easily prevented. When you get your brand spanking new hiking boots and you take them out on their inaugural hikes, be sure you pay special attention to how you lace them up.

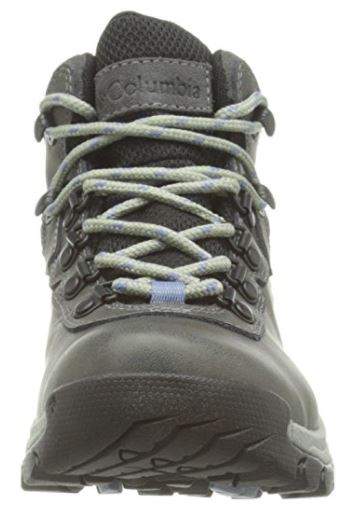
Columbia Newton Ridge Plus Hiking Boots For Women Laces

Take a bit more time on this and make sure the tongue stays dead center over your foot. Evenly tie the laces up till they are snug.

As with any shoes aim for the same length of lace on each side and be sure to keep the final knot even and balanced over the center of the tongue … the opposite of the picture of my old boots above 🙂 … The tongue should be comfortable on your foot and secure in a straight line aiming up your leg, not leaning to either side in any form.

If you have enough lace, once you have pulled the laces tight up to the top, try and loop them again at the second from top set of lace eyelets. Don’t worry if you don’t have enough lace to do this though, just run with the detail in the last paragraph.

If you get this embedded into the natural form of the hiking boots as they adapt to your feet, it will go a long way to keeping the tongues of your boots in a straight position.

Keep an eye on them as you walk through your first few hikes in them. If you notice them slipping to the side, readjust and get them aligned.

Do that a bunch of times and pay good attention to your boots when you tie them, and you should be good to go!

Conclusion

So, there you have it, a very simple tip to help stop the grand old hiking boot tongue slide from happening 🙂 I have to say that even with the lopsided tongues on my old Scarpa boots, they’re still pretty comfortable.

However, I think they would probably be that bit more secure and probably more comfortable if the tongues were aligned properly.

This is an easy thing to do when you buy a new pair of boots so it’s worth taking the time to prevent it from happening at the start.

Once the boots get aligned properly after regular use, they are unlikely to start to slip out to the side. However, don’t be complacent, as a rule, you should always tie your hiking boots evenly as listed above.

That’s it for today. If you’re in the market for a pair of hiking boots, remember to check out the hiking boots buying guide which goes into detail on all the things you need to consider when buying a pair of hiking boots.

Check out this other post on how to find the perfect fit too, it’s linked from the guide as well but worth mentioning here for convenience. Remember too the links to the best hiking boots and shoes at the start of this article.

Finally, here’s an article on Wikihow with some more ideas on how to prevent a tongue from slouching to the side, some more useful information to be found there.

I hope you found this useful. Please share, like and comment 🙂

What Is Pronation And Suppination?

OK, today I thought it might be useful to take a closer look at a common problem many hikers can experience when hiking on the trail. As noted on many occasions throughout the site, your hiking boots are a critical part of your hiking gear.

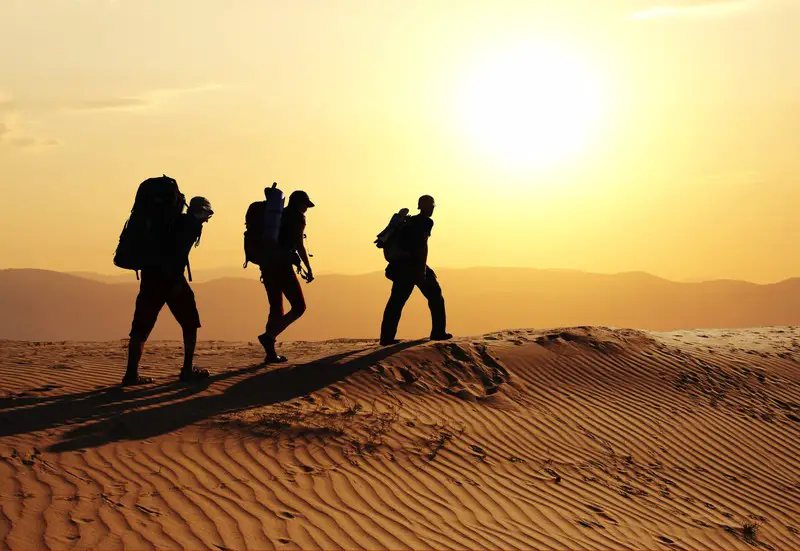
Hikers In The Desert

I consider hiking boots to be a must have item for heading out on the trail and so taking time to find the perfect fit and get the right model for you, is a really wise idea. Nothing will ruin a hiker’s day faster than a pinching blister or other sore coming from a pair of ill fitting boots.

I have reviewed the key items for buying hiking boots in the hiking boot buying guide. In that I cover pretty much all the main things you need to be aware of when considering the purchase of a good pair of hiking boots. For some of the best hiking boots available, check out our top hiking boot selection for men here and our top hiking boot selection for women here.

However, I thought it might be useful to start going into some elements within that sphere in a bit more detail. So today I want to hone in on two common problems that hikers, and folks in general, encounter when choosing boots and shoes. Let’s look at Pronation and Supination.

What is Pronation and Supination?

In a nutshell, they are the way your feet and ankles move and bend when you walk. Pronation is where your ankle bends inwards as you walk. Supination is where your ankle bends outwards as you walk. Pronation is, by my best estimation, the more common of the two.

What’s the big deal about that? Well, as you can imagine, if you keep on walking for a long period of time with your ankle, or ankles, bending or leaning inward or outward, there will be significantly more stress on certain muscles and your ankle as a whole. The ankle is designed, if I can use that word, to be in a vertical and aligned position to the rest of your body. So, if you pronate or supinate as you walk, it follows that you can expect pain to develop over time.

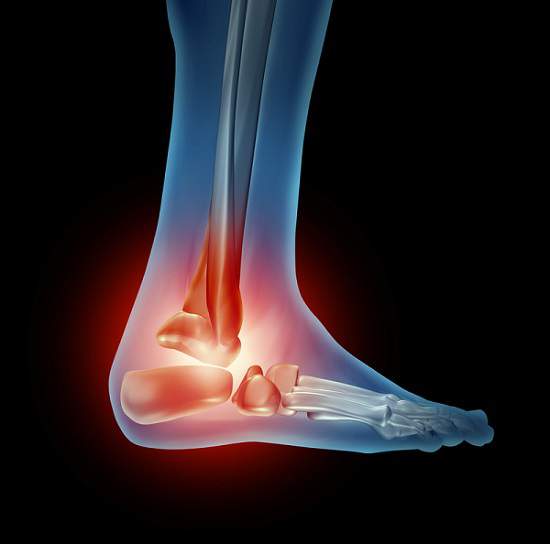
Ankle Pain

Now, some people will have pronation or supination to a greater or lesser degree. That is, many people in day-to-day life can just get on with things if they have only a little bit of pronation or suppination. This can be very deceptive though as all the time you walk on and don’t take remedial action, damage is quite possibly being done. So, something that is a minor annoyance can develop into a bigger problem over time.

As a hiker, you of course are often moving your feet in various and different ways. For example, when you hike upwards over a rocky slope, your ankle will be under a lot more stress and strain than it normally would from just walking on a normal flat trail or road. So, hikers can be particularly prone to experience more pronounced problems with pronating or suppinating feet.

How can I Tell if my Foot / Feet Pronate or Supinate?

Well, this is pretty easy to do. A pronating foot can be recognized by excessive wear on the inside heel of a boot or shoe. A supinating foot can be recognized by excessive wear on the outside heel of a boot or shoe. So, go get a pair of boots or shoes you have worn for some time and take a look at the heel and you should be able to tell if your feet pronate or supinate.

There are other ways to get an idea of how much you pronate or supinate. These days, in sports stores it is very common to see a machine that measures your feet and gait, the way you walk and run, to help you find the best running shoe for your feet.

A store assistant versed in shoes and how to use this machine will be able to give you an idea of how your feet and ankles are shaping up in terms of pronation or supination … you will of course have to pretend that you want to by running shoes though 😉

If you really have a bad problem with pronation and supination, you probably already know about it and have experienced pain or discomfort to some degree. That is, if it would cause you hassle hiking, when you are being a bit more various in terms of exertion on your feet and ankles, in all likelihood it has already caused you hassle in terms of walking around day to day.

Now, it is worth noting that minor pronation or supination can cause little or no problem to people. It really depends on the individual as to what degree you may or may not experience problems.

What can I do if my Feet Pronate or Supinate?

Well, first off, there isn’t anything, to the best of my knowledge, you can do to permanently rectify a problem with pronation or supination. If you have problems with it, it’s the way you’re built so you can’t do too much about it to remove the problem completely. While the leaps and bounds of technology are always pretty impressive, taking a trip to the ankle shop for a new fitting isn’t on the cards just yet 🙂

So, you have to live with it but for most people this is more than manageable. Your first port of call could be specialized insoles which will help keep your feet in a certain position providing the required support that you need.

Now, I should stress that I’m no expert on this area as I thankfully don’t have any major pronation or supination issues but pictured below are a pair of insoles, called Superfeet Green Premium Insoles, that are along the lines to what I am referring to. Click on the image to learn more.

Superfeet GREEN Full Length Insole

There are many different insole and heel support options available  depending on the level of the problem you experience with either pronating or supinating feet. So, as with everything in terms of hiking gear, it’s worth researching those different options, reading user reviews and so on to see if they sound like the right ones for you.

I think if your problem is minor to medium, you should be fine to try and find a solution yourself. Get some suitable insoles and try them out. If you notice a difference, happy days! If not, maybe try another type of insole and see if that works any better.

Bigger Problems

If, however, you have a bigger problem and you suspect you might have a potentially high level or pronation or supination, you may need to make an appointment with a podiatrist or orthotist. A podiatrist is basically a specialist doctor that deals with all things related to the feet and ankles. They will be able to look at your problem and give you a good course of action.

If you have a pronation or supination problem, you may also end up having some dealings with an orthotist. These guys are specialists in the prescription, manufacture and management of orthoses. An orthosis is something that is used to control, guide, limit and/or immobilize an extremity, joint or body segment for a particular reason.

So, In layman terms, these guys measure your feet, your gait, your ankles, etc. and then, similar to our insoles above, they would design a specialized insole or prop specifically for you to support your ankle to counter the pronation or supination.

Now, to the best of my knowledge, you can go straight to the orthotist to try and sort you out and skip the podiatrist but I’m not 100% sure. I think it really depends on the set-up where you are based and how bad your problem is. If it’s bad, it goes without saying that you should always seek medical advice first so if you just start with your local physician, they will advise you from there.

Conclusion

So, there you have it. I hope found this brief look at pronation and supination useful. Today was just a short trip into a problem that can be a real pain, literally, for many people. For some, it’s an annoyance that can be accommodated with some insoles. For many, it’s a bigger problem where professional help is required.

Each persons’ feet are unique so it follows that sometimes a very specific solution may be required to help address pronation or supination. If you have problems with standard boot sizes, you could also look into getting custom made hiking boots but that’s more for someone with general comfort issues or minor pronation / supination problems.

For bigger problems, an orthotic of some kind will most likely need to be used in conjunction with a pair of hiking boots and / or normal day-to-day shoes.

So, if you notice your ankles getting overly tired or sore after a hike, it will do no harm to take a quick look at an old pair of shoes and check where the wear and tear on the heel of them are. If there’s a noticeable wearing on the inside of the heel, you could have a higher than average level of pronation.

If there is a noticeable wearing on the outside of the heel, you could have an issue with supination. Either way, if you’re concerned, discuss it with your physician to get some advice.

I hope you found this article useful. Please like and share 🙂

Natural Disasters On The Trail – Forest Fires

This post is the first in a series looking at what to do in a potential natural disaster on the trail. The scope of a ‘natural disaster’ is pretty broad so I am going to work my way through this, one ‘natural disaster’ at a time, if that makes sense.

Thankfully I have never been caught in any type of natural disaster while out hiking on the trail. Broadly speaking, good planning should keep you safe most of the time. However, sometimes it is possible to enter an area on your hiking adventures that is more prone to a disaster than others.

All the best planning in the world won’t prevent a disaster from happening and so if you’re unlucky enough, you just have to deal with the situation as best as you can.

Today, I wanted to start with a natural disaster that is pretty common all over the globe, Forest Fires.

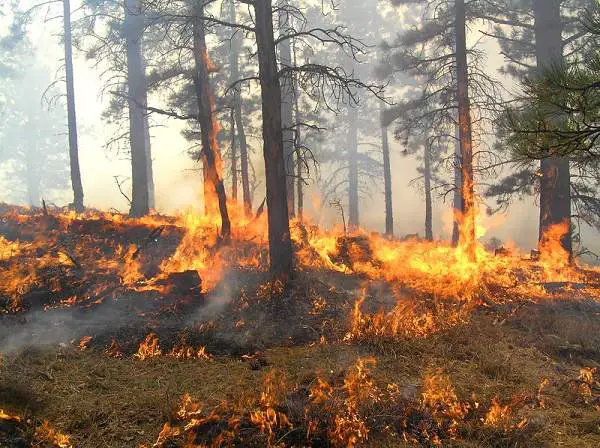
Forest Fire

What is a Forest Fire?

OK, well that is really kind of asking the obvious, it is of course a fire in a forest 🙂 However, it is worth thinking about what kind of things lend themselves to good conditions for a forest fire to occur.

Forest fires can be started both by nature and by humans. They can also be started accidentally and on purpose. Let’s take a look at each of these one after another.

Nature

Forest fires started by nature probably can’t really be termed as accidental as such. Similarly, a naturally occurring fire can’t be classed as intentional either. Who knows what the intentions of Mother Nature are 🙂

However, at a  bit of a stretch, they could be looked on as kind of accidental in terms of the expectations of a hiker. That is, a hiker wouldn’t intentionally walk into a tinder box that was likely to be sparked any time soon, aka a disaster waiting to happen.

An example of where nature starts a Forest fire could be something like a lightening strike on a very dry forest floor. Another example could be the heat of the midday sun in a very arid area in a time of drought, which might be enough to get a flame going. Once a fire starts, it will keep on burning and spread, no pun intended, like wildfire in those types of conditions.

Humans

When it comes to Forest Fires being started by humans, they do fall into both categories of intentional and unintentional.

Fires can often be intentionally started by forest management services. This is done to remove a whole patch of forest and is set up in a controlled manner. Usually, you would expect a lot of signs and safety measures taken before this was ever started, so as to prevent anyone from wandering into it by accident.

On the other side of the scale, in terms of being in control, another example of intentional fire starting by humans, could be arson. There is no shortage of idiots in the world and yes, they have been known to do dumb things both intentionally and unintentionally.

My Closest Forest Fire Experience

I mentioned above that I have never actually been caught, while out hiking, in a natural disaster. However, to help illustrate the last point above, I was hiking very close to one many years back.

I was in Southern Spain in mid summer, it can get seriously hot there, and the particular forest area we were in was as described above, a tinderbox. It hadn’t rained in weeks and there were real fears that a fire could be started by the intense heat alone never mind by people.

There was of course a ban on any open flames in the area. There were permanent barbecues set up in amenity areas for use during the Summer by people visiting the area. However, during this time, they were not to be used as the authorities were, logically, concerned about a forest fire starting.

Yep, you guessed it, sure enough a bunch of teenagers thought it would be a good idea to have a barbecue. Some sparks from the barbecue landed on the ground and baddabing, a massive forest fire was put into motion.

Impact

Now, to get across the damage that was caused by this fire, the economic damage in terms of cleanup ran into the many millions. However, even sadder, many people lost their lives, including firemen who were bravely trying to put this fire out when it eventually had evolved into an inferno!

On the day it started, we happened to be out hiking but about thirty miles away from the start of it. While the fire was kicking off, we were finishing up. So we were already on our way, leaving the area while it was just starting so we were in safety when we learned about it.

We did quickly see plumes of smoke developing in the distance though. To again illustrate how serious this fire became, whole towns had to be evacuated for fear of getting caught in it and it lasted for days. No fooling around for sure!

What to Look out for

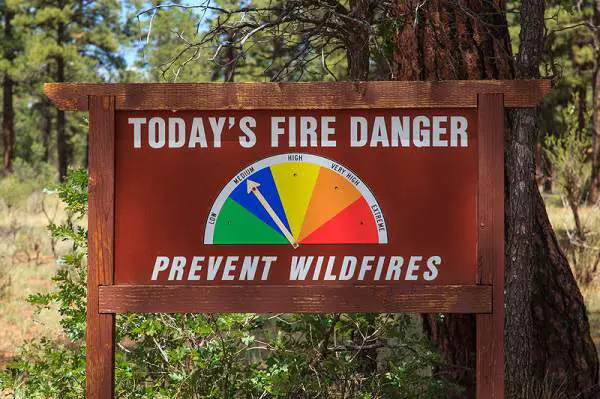
First and foremost, do your homework and check if the area you plan to hike in is prone to forest fires at the time of year you’re visiting. Normally, in managed areas, there will usually be signs, like the one below, warning about the level of wildfire danger if it is common.

Forest Fire Sign

However, even if it is not common in an area, don’t be fooled into complacency as any forest area can spark up given the right make-up and conditions. For example, a forested area populated with conifers which is experiencing a long period of drought will, after many weeks, become much more prone to catching fire.

Similarly, if the forest floor has lot’s of dead wood on it, think dead branches and twigs, it is perfect kindling for a fire to get going. If there happens to be lots of bush close by, then again you have a recipe for a potential forest fire and given those factors and conditions, it will spread very quickly.

What to do in a Forest Fire?

Sometimes, as with anything, you might just get unlucky and get caught up in a forest fire while you’re out hiking. If that is the case, below are a few tips to try and help you handle that type of situation as best as possible.

Note, these are only meant to be tips to get you thinking. It’s worth consulting with the appropriate authorities in the areas you plan to go hiking in, to check if they are prone to forest fires. They may well have local guidelines and tips for safety specific to that particular area that could be a life saver.

  1. Leave the Area if you can. This is stating the obvious but it should be your first consideration. Can you get away from the fire? If so, get as far away from it as possible as quickly as possible. If possible, ascertain the direction of the wind, it could have a bearing on the direction the fire will travel. If you can’t get away, look for suitable shelter to protect you until the fire passes.
  2. If there is a natural fire break, like a river or a road, cross to the other side of it. In forests close to where I hike regularly, there are man made fire breaks in the actual forests, a long line of space every so often, left between the trees. These are also marked on the maps I use so it is worth taking note of them if they happen to be listed on your map. The symbol should be in the map key.
  3. If caught in an oncoming forest fire, try and find an area where there is no vegetation that can catch fire. Think of a lake or very rocky area. The bigger the better as you will have more protection from smoke inhalation in the center of a wider area.
  4. Don’t descend into a valley where a fire is already burning. This is a really bad idea and it is much better to have as many ridges as possible between you and any fire. It will all provide some level of defense between you and the fire and help keep it busy while you try and make a safe escape.
  5. If the forest fire is just over, be very careful if you need to walk through any area with burnt ground or smoldering vegetation. Burning branches can fall from trees or fire flashes from the ground can still very easily happen so be very careful and keep your wits about you.
  6. If you get caught in a fire and there is no way to get away, first find the barest patch of ground you can i.e. with nothing that will burn on it. Lie face down and try and cover yourself with soil. With your mouth face down, put it against the soil on the ground and breathe through the soil. This should provide some element of air filtering and the soil on your body and clothes should hopefully go someway to protecting you from catching fire. Sounds pretty gruesome!

Conclusion

So, that’s it for today on the first possible natural disaster you could encounter on the trail, that I wanted to take a look at, namely, Forest Fires. As I noted above, they are not something to be trifled with.

If you happen to come across one on the trail, get as far away as you can, as quickly as possible. They move very fast and can engulf you in seconds, so stopping to take a happy snap for your buddies is a really bad idea!

As always, remember to do your homework if you’re planning on hiking somewhere new, or where forest and wild fires may be common. A little bit of planning could truly be the difference between life and death.

Keep your wits about you if you’re out hiking in areas prone to forest fires in ripe conditions, and always have a plan for an escape route i.e. a fast way to get to safety if the need should arise. That’s a good idea in general though, not just in terms of forest fires 😉 Also, be sure to look out for notices and check with other hikers or park officials in case they may know about something you don’t.

I hope you found this post useful, if so, please share it around 🙂

How To Measure Jacket Size For A Rain Shell Jacket

Today I wanted to do a quick piece on how to measure jacket size for a rain shell jacket. To try and elaborate a bit more on what I mean, picture this.

Measuring Tape

Photo Credit: Randen Pedersen

You’re surfing on the net and you come across a really great deal on a rain shell jacket, 50% off! You jump at the chance and click on the link to order online. You start the ordering process and as you’re filling in the form, you come to the size section and you have to select a size.

Now, you’re probably in one of two camps.

Camp 1: You know your jacket size so easy peasy and you’re good to go. Or …

Camp 2: You don’t know, or at least aren’t 100% sure of it so you need to measure yourself to find out what size you should be aiming for.

If you’re in Camp 2, or just curious, read on!

What are the Standard Sizes?

As you know, there are a standard set of sizes:

XS – Xtra small

S – Small

M – Medium

L – Large

XL – Xtra Large

XXL – Xtra, Xtra Large (At least I think the second X = Xtra too 🙂 )

Now, wherever you’re ordering from will most likely have an explanation of their actual sizing under each heading above. For example, it will usually be in a table, very similar to the one below.

MEN’S BODY MEASUREMENT (INCHES)

Size

Pant Size​

XS

28-30​

S

 32​

M

34

L  

36​

XL

40​

XXL  

44​

Neck14-14.515-15.516-16.517-17.518-18.519-19.5
Chest32-3535-3838-4142-4546-4950-53
Sleeve Length323334353637
Waist26-2929-3232-3536-3940-4344-47
Hips32-3435-3738-4041-4344-4647-50

Note: this table is for men only. You can use this as a guide for sure but it is always wise to check the table from the brand as there can be slightly different variations between manufacturers. For example, hip size for a size S could be 38-40 inches for one brand and, as above, 35-37 inches for another.

So, you have the great price, you have your sizing table but you don’t know your size. What do you do? Well, traditionally, if you’re in the store, you simply try the jacket on and see what fits. It’s a good idea just to get your measurements and write them down but if you really have no idea and you sometimes fit a medium size better than a large and vice versa, depending on the clothing item and / or the brand, it is wise to confirm your size before ordering.

However, when you’re buying online to take advantage of some great deals, you of course do not have the option of trying the jacket on so …

How do I Measure Myself for a Rain Jacket?

Now, first off, I should point out that if you get a wrong size, all good companies will replace it with a size up or down, no questions asked. That’s normal and should be the case.

However, if you want to try and minimize the chances of a back and forth over the postal / delivery service, you can take a measurement and link it in with the sizing table from the brand. How do I do that?

Tools for the Job

Well, first off you will need a couple of things. First and foremost, you need a measuring tape. Ideally one that a clothing store uses, you know, the ones that roll up into a coil nice and easy, like the one in the picture above.

If you don’t have one of those, you can shoot for a work man’s measuring tape. You know, the ones a carpenter would use when measuring a piece of wood to cut. Many people will have one of these some place.

If you don’t have one of those, well you’re down to a using a ruler and some string or any other long piece of cord. Note, it has to be big enough to stretch around the widest part of your chest. Using this method, you’ll need to measure the string against the ruler to get the measurements, not ideal but if you have nothing else, it will work.

The second thing you need is a willing assistant. A friend or family member should do the trick. I don’t recommend asking a stranger but if you’re desperate, you never know, someone might help you out 🙂

I jest of course, you can give it a go yourself but it will be a bit trickier, so you probably want to redo it several times to confirm the numbers you’re getting.

How to Measure my Size

OK, this is the nitty gritty. As per the table above, you can measure in numerous areas to ascertain your size. To get started, you need to be in a measurable position, so stand up straight with your arms to your sides. Stand in a relaxed position with normal posture breathing at a normal rate.

It’s a good idea to put a few layers on while you take the measurements, particularly on the torso, it will simulate you wearing your jacket at a colder time of year and your jacket with need to accommodate a few layers in the winter.

Working from the head down …

Neck

Measure round from the base of your neck, the thickest part essentially. Keep the tape firm but not too tight, think about how much space you need to leave to be comfortable.

Chest

This is one of the most important ones I think. Measure round from the back under the armpits. Be sure to go over the shoulder blades and the widest part of the chest. Again hold the tape taut but be sure to leave some room to be comfortable.

Taking a Measurement

Photo Credit: Phil Gradwell

See the picture above for an example on how to do this but remember, this is hiking so you will need to have some layers underneath when taking a measurement for a rain shell jacket! the method is the same so.

Waist

Measure the actual waistline, let the tape sit in a comfortable position resting on your waist.

Sleeves

Starting at the center of the back of your neck, measure across the shoulder and down towards the wrist.

Hips

Measure where your hips are fullest. This may not always be applicable for a rain jacket but is still good to have as a general guide.

OK, so you have your numbers. Where appropriate, round them upward. Next, go back to the sizing chart and see where your numbers fall in under each item. Obviously, where the majority of the numbers fall into, is the most likely best fit for your size.

If you have any borderline measurements, that is some in one camp but one or two in another, I would lean towards the side your chest measurement falls into. If you’re a normal body shape, there shouldn’t be wild variances but if you’re unsure, measure up again.

What next? Order your rain shell jacket and enjoy!

Conclusion

I hope you found this post on how to measure jacket size for a rain shell jacket useful. When you’re buying online, any decent retailer will have a sizing table on their website to reference for the brands they sell. These come from the manufacturer and so are accurate enough to get a good fit.

Also, if you’re unsure, you can call them or use their online help, they’ll be only too happy to help you out.

However, not everyone knows how to get the right size, and not every site will list how to take your measurements so I thought I’d add this up here for ease of reference. Hopefully it comes in useful.

Remember, even if you take your measurements, order the right size by the table but it is a bad fit when it arrives at your door, fear not, you can normally return it and get a different size. So, worst case, all is definitely not lost 🙂

If you are in the market for a hiking rain jacket, you can check out our top recommendations for men here and our top recommendations for women here.

Please share this post if you found it useful.

Do A Wilderness First Aid Course For The Trail

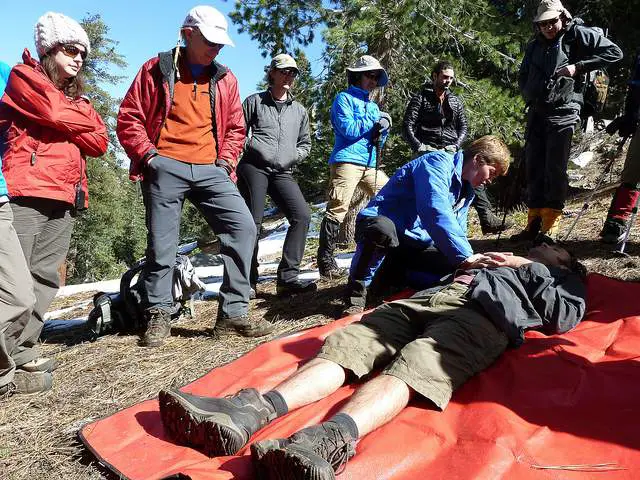
Last weekend I went on a remote emergency care / wilderness first aid course, basically first aid for the outdoors. I have to do this as part of the requirements for various qualifications in Mountaineering but I was also very interested to do it to learn more about what to do if I found myself in an emergency on the trail. It lasted three days, probably about 26 or so hours of training so pretty intense. Overall, it was really excellent.

Wilderness First Aid

Photo Credit: Michael R Perry

As you can imagine, when you’re out on the hills you’re, generally speaking, far away from populated areas and in places that are not the easiest to access by normal transport means. For example, a rocky crag on the side of a mountain isn’t somewhere that is easy to access should you need help from any emergency services trying to get there.

This is also of course the main appeal in hiking on the trail. You get to get away from the masses and into wide open spaces away from all things related to the hustle and bustle of the big towns and cities.

The very nature of these beautiful spaces is that they are, broadly speaking, not spoiled by human development and remain in their natural form. However, this very charm also of course lends itself to accidents as the terrain can often be uneven, rocky, slippery when wet, etc.

Accidents Happen

So with all that in mind, it seems that at some point it is very possible that an accident could happen to you or someone in your hiking party. Even with all the best gear in the world and taking the utmost care on the feet, a simple but unlucky turn on an ankle, and you could easily be immobilized and need to get help as you can’t walk out.

If you can’t walk out due to an injury or accident, it is wise to know how to keep someone, or yourself, as comfortable as possible while you wait for help to get there. To learn how best to do that, you should look into doing some kind of emergency first aid course for the outdoors. I highly recommend it.

In this post, I only want to give you a flavor of some of the awesome content we covered on the course. This isn’t meant to be an instructive post, it is instead informative to give you an idea of what is involved.

If you want to learn more I strongly recommend you search out an officially recognized remote emergency care or wilderness first aid course in your area and book yourself into one. You will learn a lot of great information that will really help you deal with an emergency in the mountains should you ever find yourself in one.

What we Covered

Wow, where to start lol 🙂 The course was excellent and really extensive. It’s hard to describe everything so I thought I would just run over one of the core themes we covered in the course. That was the main approach on how to approach any accident. This falls into the handy acronym DR ABCDE.

D – Danger

On witnessing or arriving at an accident scene in the hills, check around for danger. For example, are there loose rocks around that could come loose and land on you, your party or the casualties head.

Casualty

Photo Credit: Nicola Pickering

Also, try and establish what happened by surveying the scene or asking some of the group is there are other people present.

In terms of people, the order of importance in the situation is to protect:

a. yourself – You can’t be much use to anyone if you get hurt

b. the rest of the group – Make sure the uninjured people are not in a precarious position, you don’t need another casualty on your hands

c. the casualty – Following that, approach the casualty with caution so as not to startle or scare them and don’t step over them when you get there.

R – Response

Next up, check if the casualty is responsive. This uses another acronym called AVPU. Using this, you first check if the casualty is ‘A = Alert’.

Speak loudly as you approach them and listen for a response and look to see if they are aware of your approach i.e. their eyes are following you as you move closer. Assuming you get no joy from A, they’re most likely at some level of unconsciousness so you need to get on the phone to the emergency services. As a general rule, always contact help as soon as possible.

With the casualty not responding under A, you next move to ‘V = Voice’. Speak / shout loudly to them and into their ears when you arrive beside them. Are they reacting when you speak to them? Even a slight register on their face i.e. do they move their face when you speak to them or any other part of their body?

If not, you then move to ‘P = Pain’. Pinch the casualty in a suitable place, the nerve on the shoulder is a good place, to generate a little bit of pain. Does their face move or react to it?

If not, they’re fully ‘U = Unconscious’. However, they may still be able to hear you so you should keep talking to them.

Whichever level on the AVPU scale they are at, you make note as you will record it into your accident report for when you hand over to the emergency services when they arrive.

A – Airway

Next up, you need to check if their Airway is clear. If not, you need to clear it and we were shown various ways to do this on the course.

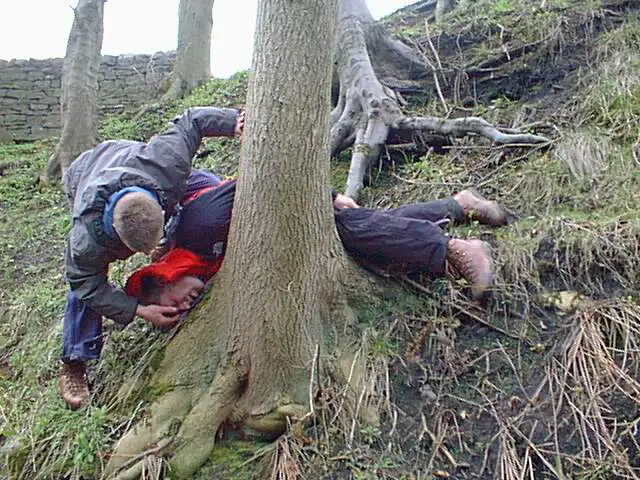
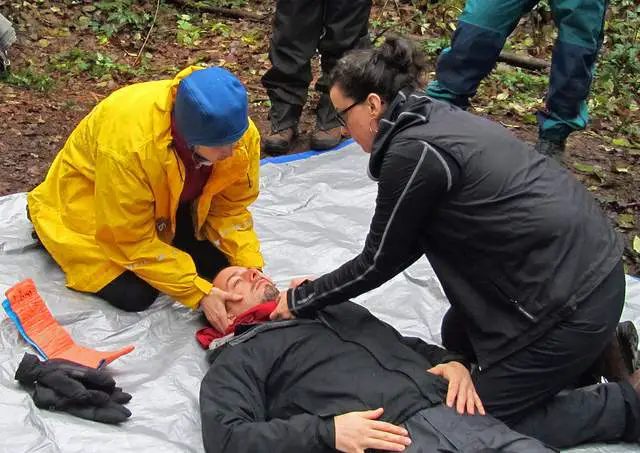
Securing Head and Spine

Photo Credit: Steve

You also may need to move them into the safe airway position, or you may need to keep their airway clear if they’re unconscious and you suspect a spinal injury. Again we were shown how to do this on the course.

B – Breathing

With the airway clear, you need to check if the casualty is breathing. You do this by checking the pulse, either at the neck or at the wrist, and the by placing your hand on the chest to count the breaths.

A healthy and normal pulse for a resting adult should be between 60 – 100 and breathes should be between 12-20 per minute. We were shown how to do this on the course and how to count it quickly using 10 seconds. We also went through the varying possibilities if these were too slow or too fast.

C – Circulation

The face is the main one at the start. What color is it? Flushed and red? Grey? Yellow?

Is there any blood around the casualty? Any obvious signs of bleeding? You also check for circulation on the hands and, if appropriate, feet.

D – Deformity

This is where you look for any obvious outward signs of injury. For example a bump on the head, an arm that is bent out of shape, etc. You find it and then start to think about what to do about it.

E – Environment

There were 3 ‘E’ elements to this. First off, just to ‘Ensure’ no further damage happens to the casualty and they’re as secure as possible until help arrives.

The next one was ‘Emotion’ provide emotional support if required, they could be very upset after a bad accident so keep that in mind. Talk to them and reassure them that all will be OK and help is on the way. Try and help them to stay calm.

Finally, you need to start thinking about your ‘Evacuation’ plan. Are they fit enough to walk out with support? If not, have you called for help This should have been done at the start but if not, get onto it.

And that is just a very brief summary of DR ABCDE!

Wow, just writing the above reminds me how much we covered over the three days as this was only one element of it and there was so much in this alone and we covered so much other stuff.

It really was a great course. From how to treat wounds, dress cuts, make splints out of hiking gear, deal with spinal injuries, CPR, deal with hypothermia, heat stroke, etc. it covered a hell of a lot of stuff.

Conclusion

In this post I have only touched on a very small part of the remote emergency care / wilderness first aid course that I did last weekend. I stress that this post is intended to be informative only and meant to indicate the benefits of doing a first aid remote emergency care course.

To learn this stuff, you need to do a proper and officially certified course from the relevant governing body / providers in your region or area. It’s a really hands on course and so the practical element is critical to really learn what to do in an emergency situation.

I really hope I never have to use any of this on the trail but I am really grateful that I now have a much better idea of what to do in an emergency, and it of course doesn’t just have to be on the trail. These skills are useful anywhere at anytime. Someone’s life, even my own, could depend on it!

Whether you’re an avid or casual hiker and enjoying getting out on the hills on your own or with a group of friends, I strongly recommend that you take the time to learn this type of thing. Always look for an officially certified course in your region as you want to be sure you are getting the best possible training. It’s definitely worth taking the time to do this!

Sanitation In The Great Outdoors.

Sanitation in the great outdoors is a topic that many folks, understandably, don’t like to talk openly about but it is something people need to know how to approach. You’re unlikely to find too many outhouses along your hiking route, that is for sure 🙂

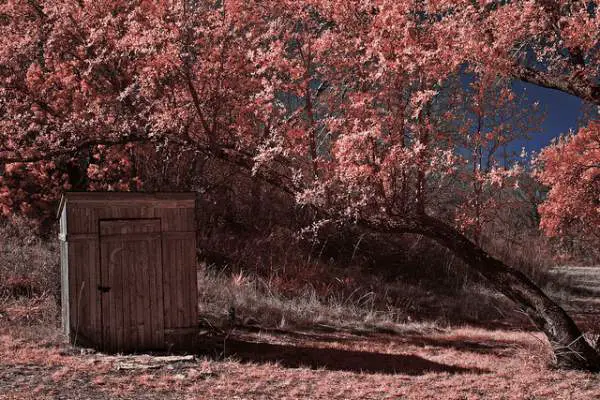
Outhouse

Photo Credit: Greg Westfall

The Great Outdoors is by its very nature a very delicate ecological balance and so when enjoying it we, as humans, need to be as careful as possible to not damage it. This is important not only for fellow outdoor enthusiasts today but also to help ensure we leave it in as best a condition as possible for future generations to enjoy.

The fact of the matter is that any human movements in wilderness will always do some kind of damage to it. That is just an unfortunate fact. The goal then has to be to minimize that damage as much as humanly possible. This is where Leave No Trace and so on plays such an important role.

Good Sanitation is Critical

Sanitation is of course something that can have a significant impact on both users enjoyment of the trail and the outdoors as well as damaging the delicate ecological balance. Too often I have come across human excrement just off trails. If it’s in plain sight, it’s a problem not only from an aesthetic point of view but from an ecological one too.

Animals and so on will be attracted to faeces and so it can easily lead to problems in many ways. As already mentioned, it is impossible to not have an impact of some kind on the local environment when you have to go to the toilet and no-on denies the fact that nature will call and so must be dealt with. However, there are a few simple things you can do when dealing with sanitation in the great outdoors to try and minimize any impact you have on the wilderness you are hiking through.

Numero Uno

When you gotta pee, you gotta pee 🙂 This is of course easier for men to deal with than women but the general rules in terms of sanitation of course apply to both genders. Firstly, you want to try and be as discreet as possible. So if you’re on a clearly marked trail, try and find a place where there are a lot of trees or bushes where you can go into out of the way to do what you need to do.

Be sure that are at least 50 meters away from any water source, for example a lake or stream. You don’t want to mix anything with a local water source that could be a source of drinking water for animals or even humans.

Numero Dos

OK, this one is of course the trickier of the two when it comes to sanitation as there is much more involved. The first thing to do is again, of course, be discreet and find somewhere well out of sight, so well away from the trail or any thoroughfares.

Next up you want to be sure you again go at least 50 meters away from any water source. To move onto the next step you will need the help of a well known and loved camping implement, a trowel.

A trowel is of course typically made of steel and used as a gardening implement. While you can of course use a standard one of these if it works for you, it isn’t ideal in terms of weight. A Camping and Backpacking Trowel is more designed for use in the Great Outdoors and so is made from tough plastic. While still tough enough to dig into the ground it is lighter in terms of weight and so easier to carry in a backpack than a steel one.

When you have found a suitable location satisfying the first requirements take the trowel and dig a sod up from the ground. Ideally you can cut out a square or rectangle, about 30 * 30 cms. Where possible, lift the sod or topsoil away first and set it to the side.

Next up, start digging down into the hole scooping out the soil underground. You want to get down at least 6 inches but this could be more depending on where you are. You want to be sure animals can’t smell anything as they will potentially dig it up, so some animals in certain places may be more acute to smells than in others so a deeper whole will be needed.

You’re Ready!

When you’ve dug out your hole in the ground, do what you need to do. When finished, put the lower soil back in on top first and then replace the sod you removed at the very start back on top. If done well, it can look like the ground was hardly disturbed at all and so you’ve done your best to return the visible environment back to how it looked before you came along. It can also help to roll a rock on top of the site so if an animal does happen come along after smelling it, it just can’t get at it.

Doing this in a deep hole and covering it up isn’t only for ascetic reasons. It is also to ensure the feaces is surrounded by soil. The various enzymes and what not will help break it down over time. Also, as already mentioned, in a deeper hole, it should keep animals from smelling it and so digging it up.

With regards to toilet paper you can use bio-degradable toilet paper but that isn’t always ideal as it’s not from the local environment. It can be a good idea to burn the toilet paper in the hole after use, before filling the soil back in, to help with the degrading process. Another option is that if you can use certain leaves or moss as toilet paper, that will be even better as it is local to the area and so nothing new for the local ecology to deal with.

With regards to cleaning your hands afterwards, carrying a little bottle of hand sanitizer and or using hygienic wipes should do the trick but ideally pack that out with you rather than dumping it after you’ve filled up the hole.

Sanitation for Women

When it comes to women’s sanitary and tampons towels, they should be packed out in a suitable bag. These are not suitable for burying as the scent of blood to an animal can be very enticing. With this in mind some planning in advance on how best to carry this out is required. Some airtight packaging is the most desirable to avoid attracting animals as you hike.

Washing

Foe cleaning hands, as already mentioned, I think a little bottle of hand sanitizer is great. Having some hygienic wipes are also a good option but remember to pack them out.

When it comes to washing yourself, clothes or cooking equipment, it should never be done directly into a water source. Instead use a pot or other vessel for washing by filling it full of water first. Then do your washing or whichever directly in the pot and when finished dispose of the dirty water away from the river or water source.

Again, bits of waste food or other chemicals can contaminate the water source so keep your washing away from it. When it comes to food, going down the boil or heat in a bag route definitely is a great option as in minimizes the need for cleaning afterwards and the water used isn’t mixed with any food so it keeps it uncontaminated from external sources.

Conclusion

OK, we did it 🙂 We just covered the topic that no-one really wants to talk about! I can’t think of a better way to address this actually than in a blog post. Easy to read at leisure.

The above are general guidelines to follow and should be suitable in most locations but it does assume that there is woodland or ground with soil, vegetation, bushes and so on, on your hiking route. However, if you’re going into a very different and / or extreme environment, say very rocky terrain or the Arctic as an extreme example, then you need to educate yourself as to what the best way to handle sanitation in that local environment is.

If you’re planning to set out on a long hiking trek or backpacking trip, it is worth adding sanitation as a research topic for the area you will be hiking in and travelling through. Someone will have gone before you so there should be information and tips on the best sanitation practices for that particular area which only local folks and people who have hiked there before you will know.

There may also even be religious or spiritual things to consider, for example, if you pass through a patch of ground sacred to a specific tribe of people, going to the toilet may be a huge no-no in places. I haven’t come across that yet on my own travels but it wouldn’t seem beyond the realms of possibility. The general idea though is just to educate yourself in advance.

Well, I hope you found this post on sanitation in the Great Outdoors useful. Please share it round and leave a comment 🙂

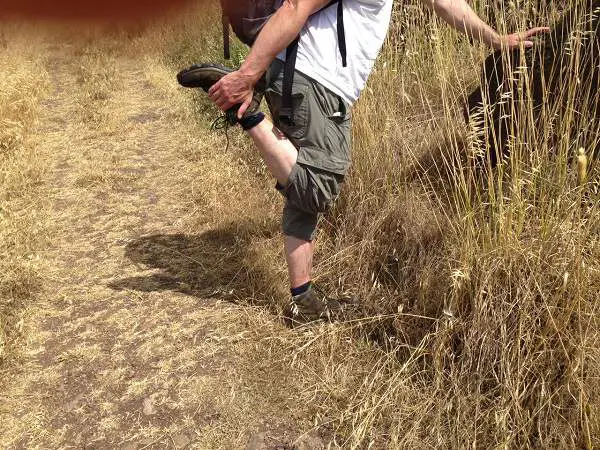
How To Prevent And Treat Cramp

Cramp is a common problem that will happen to every hiker at some point. While it is generally harmless and normally shouldn’t cause any long term damage, it certainly isn’t a pleasant experience as anyone who experiences it will attest to.

Colm Stretching

It will of course vary in severity depending on many factors so there is no expectation you can set with regards to it.

What is Cramp?

A cramp is where you experience a very sudden and intense pain in one of your muscles. It happens due to a muscle contracting or over-shortening. This process is not voluntary and so you have no control over it when it happens.

Cramp can be experienced in skeletal muscle, a muscle connected to the skeleton, or smooth muscle, muscle in organs, blood vessel walls and so on. The duration of cramp varies greatly and it can last anything from a few seconds to a few hours. It really depends where you get the cramp.

As a hiker, typically the cramp that is probably most often experienced is skeletal although smooth is common enough too, thing of having a ‘stitch’, that stabbing pain you can sometimes get in your rib cage as a result of exercising.

The most common area to experience skeletal cramp hiking is the legs in the calves and thighs but personally I also find that my lower and upper back can be quite prone to cramp too, probably from carrying a very full day pack.

What Causes Cramp?

There are a myriad of things that can cause cramp. Everything from hydration to hypoxia, a lessening of oxygen in the blood, from big changes in temperature to low levels of salt in your blood. There are a lot of possible reasons why you may get cramp.

Generally speaking, similar as mentioned above, from my experience, when hiking cramp is most likely to be skeletal and occur either at the start of a hike or after I have been hiking for a long time. This of course is indicative of two specific states your skeletal muscles are likely to be in.

With the first, when starting your hike, your muscles are likely to be colder and not as supple as they haven’t been stretched out. Normally hikes start early in the morning so you have probably just got out of bed and got into your car to drive to your hike. Therefore, your muscles may not have had as much time to stretch themselves out and get loosened up.

The second, after hiking for a longer period of time, comes due to the muscles getting tired. Tiredness means simply that the muscle is tired and wants to stop being used. Generating a cramp is a quick, efficient and very effective way for your body to tell you to STOP 🙂

How do you Treat Cramp?

Generally speaking, it’s a case of stretching and massaging the muscle when treating a skeletal cramp. Stopping what is causing it obviously helps too but sometimes you need to keep pushing on so some rest and good stretching should give you enough to be able to keep moving till you finish your hike. For really bad skeletal cramps, some heat application may also help but that is probably not very practical on the trail.

For both skeletal and smooth muscle cramps, good hydration should help as well as keeping your sodium, salt, at decent levels. So drink plenty of water and have the odd salty snack as you hike.

Some medications for cramp are available but I think in most cases you should be OK with a good stretch and muscle massage. For some internal cramps, say indigestion as an example, it may be better to treat them with a suitable pain killer or muscle relaxant. Vitamin B complex can also help with cramps and are generally good for helping your body run well overall so could be an option to take if you experience cramps regularly, that’s for preventative as well as for treatment purposes.

How do you Prevent Cramp?

Prevention is always better than cure 🙂

Broadly speaking, prevention is the same as the treatments listed above. Stretch your muscles well before you start out and every now and then during your hike, especially if you feel your legs or muscles tensing up as you hike. Take 5 and have a quick stretching session, this could easily prevent a cramp from developing.

While you may think you are being a real trooper by plowing on regardless, it will have the opposite effect and encourage the symptoms to increase more than likely leading to a nasty and sudden cramp which will stop you whether you want to or not, that I can guarantee 🙂

As above with treatment, stay well hydrated and try and optimize your sodium to help ensure there are suitable electrolyte levels that are balanced in your blood.

A really common one that people often under estimate is good physical preparation. Your body needs to be conditioned to be able to take on the hike your are planing to do. If you’re not adequately prepared, you’re opening up your body to cramp central and you will be miserable and sore at some point.

This is easily avoided by knowing your levels of fitness and only taking on hikes that are suitable for your fitness level. So even if you’re fit in another activity, that fitness may not carry over immediately to hiking if it’s a different type of fitness. Hiking will involve specific muscle groups that you may not normally use to the level you need to for hiking. So if you’re new to hiking, start small and build up distance and height slowly over time.

Conclusion

I hope you found this short post on how to prevent and treat cramp useful. Most people have experienced cramp at some point so it shouldn’t be an entirely new concept to most. What might be new is the way you get it, if you’re new to hiking in particular. Your legs will be taking more of a hit when you start out on the trail so you should pay a bit more attention to them if you take up hiking regularly.

A simple series of stretches before you start your hike, during your hike, should you feel a muscle tensing up, as well as after a hike should go a long way to keeping cramp at bay.

What do you think? Do you have any other tips on how to prevent cramp while hiking? I’d love to hear your thoughts in the comments below.

If you found this post useful, please share it out and about 🙂

What Is Scrambling?

Last weekend I was lucky enough to get out on a beautiful hike. It had been raining all week but the weather turned on Saturday and it turned out to be perfect weather. I was heading out with some hikers I regularly hike with and one of them had organized the route for the day.

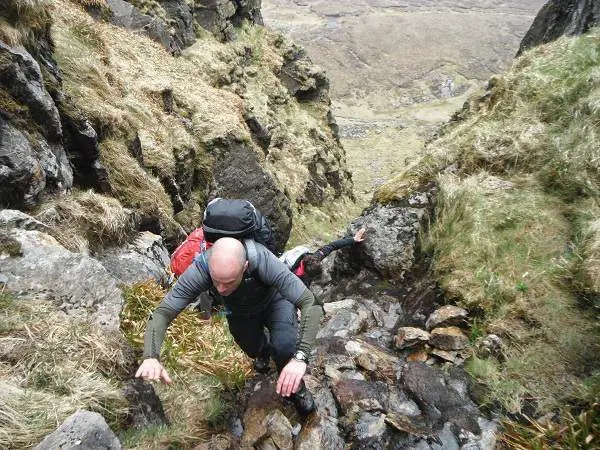
Scrambling

He’s an experienced hiker and has been all over the world hiking but he knows the local hills and mountains really well.

Anyway, the hike we had planned was about 22 km in total with about 1 km in elevation, give or take a hundred meters or so. It was over pretty varied terrain, boggy in parts and rocky in others with some pleasant rises and steep ascents.

There were two steep ascents both of which were up to the mountain peak, we went to the top twice. We came up one side ducked down another to enable us to head up the other steep part. You can see me on one of those ascents in the picture above.

Why on Earth do That?

Well, both of the steep climbs involved ‘scrambling’.

So Scrambling is?

Well, scrambling is when you have to use your hands to enable you to get up the mountain as the path is too steep to do it on your feet alone i.e. you’d probably fall and hurt yourself if you didn’t use them. Normally, it will be over tougher terrain where there are rocks, ledges and so on to grab on to. Now, it is important to note that this isn’t ‘climbing’ in the sense of pitching and using ropes, nothing like that at all.

However, I guess scrambling does move further away from hiking in the direction of climbing. I recall when I went to the top of Mont Blanc, I asked the head guide what the difference between hiking and mountaineering was. His short but succinct answer was that in mountaineering, you use your hands as well as your feet to move yourself forward, whereas in hiking you only need your feet.

Now, I mentioned in the post linked just above that there is probably a lot more to it than that but I thought it was a nice and easy way to summarize it. So, going back to my Saturday hike, you could say that part of our hike was more in the sphere of mountaineering as opposed to just hiking.

Not Everyone Likes Scrambling

It’s worth pointing out, that if you’re a hiker and you’ve never scrambled, it may not be for you. I know plenty of hiking folks who if confronted by a pass where they have to scramble to get up it, they would simply look for another route to the summit. It just doesn’t appeal to them as there is no doubt that it adds a bit more risk to the average hike.

However, I also know plenty of other folks, me included, who love to scramble! I find it really adds another dimension and a nice variation to a day out hiking.

That is also fascinating to me as while I love scrambling, which is moving in the direction of climbing, actual rock climbing with ropes etc. really does not appeal to me in the slightest.

Safety

As always, safety is paramount and so if you’re new to scrambling, try and do it first with an experienced group and ideally in a place that isn’t too challenging. Safety always should come first and too much too soon, while it may seem exciting and challenging, could end up just being dangerous.

When you do finally get out scrambling, be careful and take your time, especially if you’re new to the particular area and you’ve never scrambled there before. When you’re scrambling, things can get much more difficult quite quickly and it’s very easy to get into a situation where it’s very difficult to keep going up but it’s even riskier to try and go back down.

First Hand Experience

I have first hand experience of this on two separate occasions. Some years back, I was with a group of about 8 hikers, we were hiking a long a rocky ridge and suddenly the weather got very bad and a white out, fog, was coming in. We decided to veer down to one side of the mountain as we couldn’t see a clear way ahead where we were. However, we got about 40 feet down and it was even harder to continue across.

We could have went further down off the mountain, which may have been the wiser choice, but we went back up to a place where we could scramble to get back up to the ridge beyond the initial tricky piece we had came across. We started trying to scramble up, 4 of us got up but the other 4 couldn’t!

The ledge was such that once you committed to it you had to keep going. So basically, with heavy wind, rain and fog we, the four who went up, had no visibility or contact with the other 4 who couldn’t get up. With no phone coverage, it was a little concerning. We continued on, on the ridge, as did our 4 friends via a different route, and we eventually met further down the trail a couple of hours later. Thankfully the weather had improved too so visibility returned.

Planning

Overall, in truth the planning for the hike wasn’t very good and for us to get into a situation like that where we had to scramble to be able to move onward, was definitely not a great idea. We were reasonably experienced at the time but with the weather changing so quickly, it just goes to show how fast even experienced hikers can potentially get themselves into a pickle.

As if that wasn’t enough, the same mountain range a year later, a similar scenario happened again. A little different in that we could see clearly but the route chosen really had some very challenging scrambles, so much so that even I was a little nervy at times. In fact, one lady with us had real difficulty getting past those parts and had trouble getting off the mountain. We didn’t know it at the time but, panic had set in with her and she was having a tough time of it.

It ended up fine but it was another example of where you really need to be careful when you go scrambling. You never know what the terrain will throw at you and when you commit, sometimes there’s no going back!

Conclusion

With all that said though, I love scrambling 🙂 and I look forward to doing more and more of it in the future. As with anything hiking related, you have to be smart and be safe. There’s no point taking unnecessary risks. If the scramble starts to get too challenging, play it safe and back out while you can.

If you do want to do a bit of hiking, be sure you pack some gloves in your day pack. They can come in very handy when you’re grabbing on to sharp rocks and other things.

Do you like to do a bit of scrambling when you’re out in the hills? I’d love to hear about it in the comments below.

  • « Previous Page
  • 1
  • …
  • 7
  • 8
  • 9
  • 10
  • 11
  • …
  • 16
  • Next Page »
  • Facebook
  • Pinterest

What are you looking for?

Copyright © 2025 · Cool Hiking Gear

Cool Hiking Gear is a participant in the Amazon Services LLC Associates Program, an affiliate advertising program designed to provide a means for us to earn fees by linking to Amazon.com and affiliated sites.

  • About This Site
  • Privacy Policy
  • Affiliate Disclosure Statement
  • Contact