coolhikinggear.com

  • Men’s
    • Best Hiking Rain Jackets for Men In 2024
    • Best Men’s Hardshell Jackets Of 2023
    • Best Hiking Pants For Men In 2023
    • Best Ultralight Rain Pants For Men
    • Best Men’s Daypacks For Hiking In 2023
    • Best Backpacking Backpacks For Men In 2023
    • Best Base Layers For Men In 2023
  • Women’s
    • The Best Hiking Rain Jackets For Women In 2023
    • Best Women’s Hardshell Jackets Of 2023
    • Best Hiking Pants For Women In 2023
    • Best Ultralight Rain Pants For Women
    • Best Daypacks For Women
    • Best Backpacking Backpacks For Women In 2023
    • Best Base Layers For Women In 2023
  • Hiking Accessories
    • Best Hiking Poles
    • Best Trekking Pole Monopod Camera Mount
    • Best Hiking Headlamps
    • The Best Hiking Watches In 2023
    • The Best Hiking Gloves In 2023
    • Best Hydration Bladders For Hiking In 2023
    • Best Compass For Hiking Our Top Picks
    • Cool Hiking Gadgets
  • Footwear
    • The Best Men’s Hiking Boots In 2024!
    • Best Hiking Shoes For Men In 2023
    • The Best Women’s Hiking Boots In 2023!
    • Best Hiking Shoes For Women In 2023
    • Best Hiking Sandals
    • Best Hiking Sandals For Women in 2023
  • Hiking Guides and Resources

How To Make River Water Safe To Drink

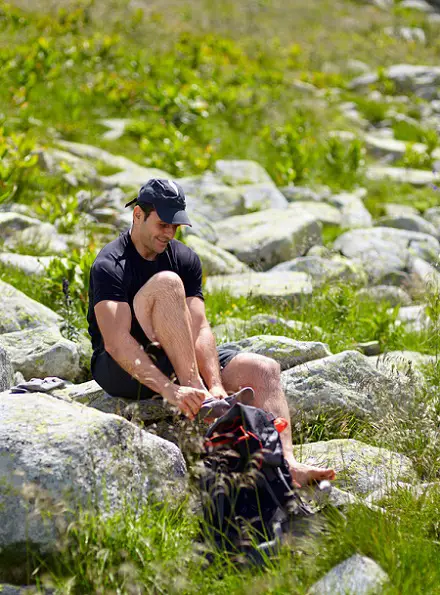
Today I wanted to look into something that probably comes up for every regular hiker at some point either on a day hike or, more likely, on a multi-day trek.

So, let’s set the scene. you’re on the trail and, for a myriad of reasons, you have ran out of water and you need to drink water from a river in the mountains. The first thing that probably comes to mind is, is this water safe to drink?

River

In this article I want to review:

  1. Knowledge and Preparation
  2. What options you have to help purify river water to help ensure it’ safe to drink
  3. What should you look out for if you have no means of purifying water with you

Knowledge and Preparation

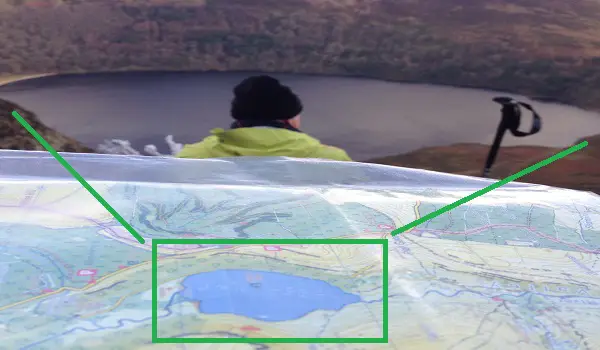
As with any hiking trip be it for a day or for a week, you need to your research in advance to ensure you have a safe and enjoyable experience. One simple thing you should check before starting out hiking, especially in an area that you’re not familiar with, is if the river water is, relatively, safe to drink.

Now, I should add here that as a general rule, you shouldn’t drink water straight from a river. However, many times in the wilderness, if you’re desperate you may be able to drink the water straight from a river without doing yourself too much harm.

It will of course depend on where you’re hiking so always check this out in advance. Even in good areas, there could be a dead animal in the river further upstream though so it is never 100% fail safe. If you’re hiking glacial mountains there’s a fair chance the water should be good to drink. If you’re hiking in a humid jungle, probably not so and you shouldn’t drink from the river directly.

Even if the river water is relatively safe to drink, there are some precautions you should take e.g. where to drink from. We’ll look at some of those in more detail further below.

As part of your preparation, always educate yourself in advance and if you know the water isn’t safe, it is advisable to have a back-up alternative emergency solution with you.

Finally, if you’re using any of the methods reviewed below it is always a good idea to filter the water to remove gross material, using a t-shirt or something similar, before you start to treat it. Sometimes some river water will just has too much crap floating in it that you need to get those bits out first.

Similarly, too many ‘bits’ in the water, then you’re probably better leaving it and looking elsewhere for a better part of the river with less stuff floating in it. With that in mind, what are your options? Let’s take a look …

Water Purification Options

1. Boil your Water

The traditional and best way of purifying your drinking water. Bring it to boil for at least a minute or so. This will kill most pathogens and bacteria.

This method of course depends on you having a stove or cooking system with you, or a means to start a fire as well as a couple of accessories e.g. something to boil your water in. Pictured below is a jet boil, a very efficient and easy to use way to boil water.

Jetboil Flash Cooking System - Carbon - Updated for 2018 If you’re out on a day hike, this will probably not be the case. that is, you’re unlikely to carry a stove with you unless you’re out for a longer trek.

However, if you carry a flint and fire starter pack with you, you may be able to fashion a fire from tree branches or the like. Again though, it’s a lot of hassle to be going to for a one off.

Pros

  • Kills most pathogens and bacteria
  • Probably the best way to purify water

Cons

  • Have to carry a stove and a billy can of some kind that can take boiling water
  • If you don’t have a stove, you will need a pre-prepared flint and fire starter pack to start a fire. Not the easiest in certain conditions and locations and could be very dependent on the weather e.g. if you’re trying to start a weather using kindling from a wet forest, it probably won’t be easy unless you know what you’re doing

2. Purify Water Using Iodine

This is probably the easiest method to use and possibly the most efficient. You can purify water using Tincture of Iodine 2%. Water purification tablets are another option that usually use iodine as their main active purification ingredient but they’re a bit more expensive.

J.CROW'S® Lugol's Solution of Iodine 2% 2oz

You simply pop a few drops of the tincture or a purification tablet into the water and it takes care of any nasties in the water. Pictured above is Lugols Solutionof Iodine 2%.

Pros

  • Easy to carry – either option shouldn’t take up too much space in your pack
  • Easy to use
  • Probably the most economical

Cons

  • There might be some minor taste issue but if you need water, this isn’t really a genuine concern and big downside. It hardly matters if you’re bursting for a drink, and if it’s a matter of keeping you alive to be able to walk out.

3. Water filtration System

There are any number of these available, picture below is the Katadyn Hiker Pro Microfilter. Broadly speaking there are two kinds. The first uses carbon or a ceramic filter to remove unwanted stuff and bacteria. The second uses a chemical such as iodine to treat the water.

Katadyn Hiker Pro Microfilter

These filters usually come in things that look like flasks and the filter is built into them. They’re not the cheapest option and they look to be very bulky. I don’t use one but I assume they do the trick

Pros

  • Depending on the filter, it should clean the water pretty good
  • Will take care of gross material in the water as well as nasty stuff you can’t see

Cons

  • Expensive
  • Bulky and more weight to carry

3. UV Lights

There are Steripens, pictured below is the Steripen Classic 3, and battery powered devices available that treat water with UV light which kills most bacteria and pathogens. You of course need to do a basic filtering of the water in some way first to remove any gross material. SteriPen Classic 3 UV Water Purifier and 40 micron Pre-Filter bundle. I’ve never actually used this method but have read it works very well. I have also read that if you’re really stuck, you can also leave water in a plastic bottle in direct sunlight, one day if sunny and two days if cloudy and the natural UV light from the sun will purify the water.

This is interesting but I guess in an emergency you may not be able to wait a couple of days to get water. Still good to know though. I think I will research this a bit more and do another post on it to see how viable it is and link to it from here.

Pros

  • Effective, it should clean the water pretty easily
  • Handy enough to carry – not too big

Cons

  • One of the more expensive options
  • Relying on anything battery powered for an emergency always runs risks of failure e.g. it breaks for some reason

What if I have No purification method with me?

It could happen that you take a slip and maybe lose your pack over a cliff edge or something like that. Assuming that you’re still mobile but you’ve just lost your means of purifying water, what can you do to get you by till you get to safety?

Well, if your pack is definitely irretrievably gone and there’s no chance of rain in the foreseeable future, there are a few tips you can try and use to keep you going.

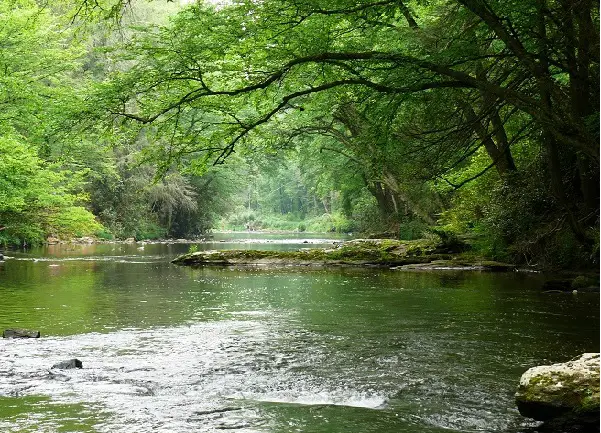
First off, look for a fast flowing part of a river. If you need to drink water from a river directly, drink it from there.

River Water Bottle

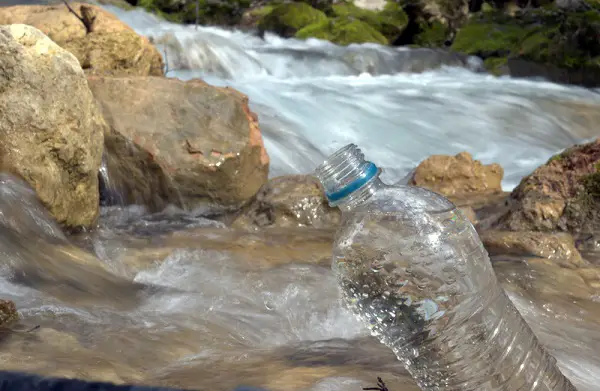
As much as possible, look for good flowing accessible streams, not full on river charges. Avoid stagnant pools and lakes, and look for any other dangers like dead animals in the water.

Where possible avoid flood water and also, if applicable, be mindful of any population centers. People further upstream can often, sadly, mean pollution.

Find a manageable part of the river to work with. That is, don’t choose a really wide part of it. Choose a part of it you can access without fear of hurting yourself or getting swept away. We don’t need to make a bad situation any worse now do we 🙂

Start up the river and walk alongside it, keep your eyes peeled for anything untoward in the river e.g. a dead animal. When you’ve found a good stretch that you’re happy is as clean and clear as possible, walk back down about 50 meters to a suitable drinking spot. Look for a place where the water is fast moving. Be careful as you lean in to fill your bottle.

Now, I need to stress here that this just isn’t as applicable in certain parts of the world as others. In jungle areas and so on, the water is probably full of all sorts of exotic microbes and bacteria. Put it this way, if I had to I’d rather drink water straight from an Alpine glacial stream than a river in a humid jungle 🙂

However, this is last ditch emergency stuff though and considering that you will die if you don’t drink water within 48 hours, you may not have a choice and just have to take the risk.

To summarize, look for fast flowing accessible streams rather then big rivers and take your water from there, be careful doing so.

Finally, clean your hands as best you can when working with your water, especially if you’ve had to do a number two recently. You will possibly have a lot of bacteria from that alone, so having some sanitary wipes stuffed in your day pack is always a winner of an idea!

Conclusion

All the options listed here are viable options for making river water safe to drink. The key thing, as with most things on the trail, is preparation. Ask yourself these questions:

  • Where am I going hiking?
  • For how long?
  • Are there fresh water streams?

If you know these answers, you can prepare accordingly. For example, if it’s Spring and there are fresh water streams higher up in the hills, odds are on that you’re going to be good to go and could be able to drink it directly should the need arise. Be sure check in advance though.

If you’re going to be hiking in a jungle for a week, you most likely can’t drink any river water. So, whats your plan for that length of time?

If you’re hiking and backpacking for a week, you will likely be cooking along the way so you have the boiling option. As a back-up though, you could opt for iodine or other types of purification tablets. Be sure to confirm that it’s a suitable method for that environment though. Also, be sure you bring enough back-up with you.

You get the idea. It’s always about preparation. Sometimes, no matter how careful you are, you might just get unlucky. Them’s the breaks as they say, but if you do your best to prepare you should be just fine 99.99% of the time.

Remember, you can survive without food for weeks. You can’t survive without water, and you can’t survive much longer than 48 hours without it.

Remember, and this is important to stress one last time, always do suitable research in advance. If you think you could end up having to drink river water in an emergency, in a particular location, try and get expert advice from local knowledgeable resources in advance, about whether or not water is drinkable. If not, be sure to know how best you can make it potable, and have the appropriate equipment with you.

I hope you found this post on how to make river water safe to drink useful. If you’ve any comments or thoughts on this topic, please do add them in the comments below.

Should I Pack Extra Gear For a Day Hike?

The short answer is Yes, and No 🙂

Looking specifically at a day hike, firstly, I do keep a spare set of clothes but I don’t carry them with me and they’re not hiking gear. Basically just a change of clothes I leave in my car that I can slip into after the hike is over.

Hiker Changing Clothes

It is handy to have some dry clothes after you’ve been on a good hike. You have likely been sweating in your hiking gear and your hiking pants may well have got damp, especially in and around the top of your hiking boots, so a chance to get those items off as soon as possible at the end is desirable.

What About While I’m Hiking?

When it comes to taking extra hiking gear (gear that I wear) with me on my actual day hike, I do pack some extra kit with me, obviously, specifically hiking gear. To that end I will carry extra layers for warmth, protection and insulation.

What extra do I carry?

Spare Base Layer

First on my list is a spare base layer (The one next to your skin). If you’re not familiar with a base layer, it usually covers your whole torso and sits quite close to your skin.

It should have wicking capability allowing your skin to breathe but keeping it warm and dry as you sweat. All good modern base layers roll up nicely and so are very packable and light so it’s no big deal to take an extra one with you in your day pack on the trail.

Extra Mid Layer

For me, depending on the time of year, this will be an extra tee or mid layer fleece. Again, as it’s purpose built hiking gear, it’s lightweight so it’s easily packed away and does not take up too much space in your day pack.

Think wind protection in this layer too. Sometimes it might be too warm to wear a heavy outer layer and more comfortable with just your mid layer.

In stronger winds though, you might have no option to put your outer layer on. If your mid layer has a bit of wind protection in it, this will help counter that and not have to put on an extra outer layer and be too warm on the trail.

Outer Layer

If the weather is such that my mid layers won’t be enough, I usually pack a very warm fleece to be worn just under my rain jacket.

This main purpose of this layer is warmth and insulation. I’ll pack it away if I don’t need it and use it as required e.g. as I approach a summit where it’s very windy.

Waterproof Kit

This is a must. If you’re not wearing these from the get go, you should always have your waterproof kit, a rain jacket and rain pants, packed away in your day pack.

On the odd day, if I know it’s going to be a blistering hot day, I might leave these in my car but that would be rare and as a general rule, always have these with you.

Hat, Gloves, etc.

I always have gloves (2 pairs in colder weather, 1 of them ski gloves), a cap or hat (beanie in winter, baseball in summer) and a neck gaiter (colder times only) packed away in my bag if I am not wearing them.

Keeping your hands and face comfortable and warm is very important so I always have these bits handy to easily slip on or off.

Should I Carry a Complete Change of Clothes?

I have seen some recommendations before to carry a complete set of hiking gear replacement clothes, all your underlying and base layer clothes anyways.

The idea here is that if you were to get completely soaked, say crossing a river, you have something to change into. My take on that is, as a general rule, is where possible don’t cross rivers. They can cause nothing but trouble so I think it worth it to avoid them if you can and so plan your route accordingly.

Now that is more for day hikes. If you’re on a longer trek, then yes, a full spare set of clothes makes more sense to me. Not least as you will want to change after being in the same clothes for a few days.

Even on a day hike, if you know you’re going to be traversing rivers, I can see how it makes more sense to carry more replacement gear carried in a dry bag, pictured below, should you be unlucky enough to fall into a river.

Carrying any spare clothes in a dry bag is very important as if you’re getting very wet, be it by slipping into a river or getting caught in a deluge, it’s pretty much a given your pack and it’s contents are getting soaked too. The dry bag will keep your spare gear dry even when that happens.

Outdoor Products Ultimate Dry Sack, Three-Pack

I started writing this post last Friday and as if to illustrate this last point, when I was out hiking two days ago, we had to cross a river. It was deep enough in places so we had to take care to find a good spot to cross. One lady slipped on a stepping stone and got badly covered in water, all her legs and one side of the top of her body.

She was fine. It wasn’t warm but not mid winter so she was OK to keep going and dry off a bit as she hiked. However, if that was Mid December, that probably wouldn’t have been as reasonable a prospect. That’s where reaching into your day pack for a dry bag full of dry clothes would be very much appreciated!

Also, if you’re hiking alone and get into difficulty and get soaked in a rain shower overnight waiting to get help, a set of dry clothes would be most welcome.

I think this is where judgement, as always, comes into play. If you’re going out for a day hike in a large group in an area you know well and you won’t be crossing rivers in the middle of winter, I think it probably unlikely that you will get into such a position where you need a full set of clothes to change into.

Should you be unlucky enough to get into difficulty, the people you’re with should be able to get help and your emergency blanket or bivi bag should keep you good till help arrives.

However, if the same group is going out in bad weather into an area with lot’s of rivers that is also unfamiliar, for sure carrying some more extra dry gear, base layers, boxers, and so on, makes sense.

Conclusion

In some ways I would like to be more precise in advice for this particular subject but ultimately, I think every situation is unique. You need to weigh up the challenge of the hike you plan to undertake to judge if carrying extra gear will be needed.

In most cases though, I think you’re good with some minimal spare kit, mainly for weather protection (to stay dry, warm and insulated), and not a full set of replacement hiking clothes. Waterproofs are nearly always a must though.

Finally, please note that I am only referring to clothing in this post. There are of course other key hiking accessories that I carry with me on a day hike but I will leave that for another post. Check out the complete day hiking checklist for a full inventory of kit I generally take with me on a day hike.

If you’re unsure, always ask for advice from more experienced folks or feel free to ask me in the comments below.

How To Set A Map

A recent post, called Map Reading Basics, was the first in a series on all things to do with Navigation. At some point as a hiker, you will probably need to consult and follow maps so it’s a good skill to learn and get familiar with using out on the trail.

In that first post we looked at some of the basics about a typical map. Today I want to take that forward and start to look at how best you should use a map.

With that in mind, let’s look at setting a map.

What is ‘Setting a Map’?

In brief, setting a map is aligning what is on your map to the surrounding landscape. For example, when you lay your map out in front of you, you will normally naturally point the top of the map, grid north, out directly to the front.

However, you are most likely not facing North while standing on the ground and so your map will automatically be out of sync with the surrounding area.

To rectify this, simply look at your surroundings and match them to what’s on the map. Then move your map to align to those landmarks. An example of this is outlined in the picture below (Please ignore my friends head in the middle of the picture below 🙂 ).

Setting A Map to LandScape

If you’re sitting reading this in your living room you may find this hard to relate to and odds are that you haven’t got a mountain range in your back garden as well as an accompanying map 🙂

To try and give you a feel for this, follow the steps below. They list out a simple way you can get a feel for setting your map and can be easily set up in your back garden or a park. Someone did this with me once and it is effective to get the fundamental idea across if you’re starting from zero.

1. Draw out the diagram below as well as the green line in it.

Setting Your Map Picture

2. Replicate the diagram on the ground in your back garden or in a park by using three meter spaces between each of the blue diamonds on the map. Each diamond represents a feature on the ground. To do this, place an object at each blue diamond measured three meters apart. Anything will do for this, you will need twelve objects in total.

3. Stand at the start as listed on the map. Now align your map to the objects on the ground. You now have your map set.

4. When you are happy with all that, follow the route of the green line in the direction of the arrow. Remember that all the while that you move from one object to the next you need to keep your map set. To do this you need to remember that when you turn the map needs to stay in the same position!

5. So when you to get to point B, What should your map look like as you hold it ? See below.

Setting Your Map Picture 2

6. When you’ve followed this the whole way round, draw out another route on the map and follow it again while keeping your map set as you go. So, how did you get on? Could you follow it easily? Although that is basic, it gives you an idea of what you need to do when out on the trail.

You set your map in line with the features you’re looking at and from there, you can start to follow your planned route on your map.

Why is ‘Setting a Map’ Correctly Important?

Well, it’s important as the fundamental principle of map reading is that in order to get to another place, you need to establish where you are first. In normal conditions where visibility is pretty good, setting your map is the first port of call to doing that successfully. As simple as this sounds, it does take practice to get naturally good at it.

What if Visibility is Poor?

Of course, it isn’t always nice, sunny and clear when you’re out on the trail and sometimes you have lessening degrees of visibility. To help you set your map there is a simple trick you can use to confirm you at least have it pointing in the right direction.

Simply hold your map out flat in front of you and drop your compass onto it. When your compass settles, move the map to align it in the same the direction of the North pointing direction arrow on your compass.

You’ve now aligned the top of the map, which you know to be grid North, to Magnetic north. This will give a rough approximation of which way the map should be set.

This little trick can be used in both good and bad weather if, for any reason, you want to doubly confirm that your map is set in the correct position and alignment.

Conclusion

OK, I’m going to stop here for now. Today we took another step into the world of navigation in the hills. It’s a relatively simple one but I highly recommend you give it a try in the real world.

Ideally, a clear day is best to give this a go as a try out. If you can, do it with an experienced hiker who knows a bit about navigation as they will be able to correct you if you are on the wrong track or if you have any questions.

I suggest you first set your map by matching the surrounding features of the landscape to your map. When you’re happy you’ve done that, orientate your map to align to the features of the land. Then, to confirm your results, drop your compass on the map. Magnetic North on the compass should be pointing in, more or less, the same direction as grid north on your map.

I hope you found this post useful. This is the second in a series on Navigation. The first post on map reading basics is available here. More posts will be added in this series in the future so do stop back for more. Next time, I think we’ll take a look at contour lines.

Do you have any questions on how to set a map? Please post them in the comments below and I’ll be happy to answer them as best I can 🙂

The Top 5 Men’s Hiking Boots 2015!

Today I wanted to list out the top 5 men’s hiking boots for 2015. The main criteria for all of them to make this list is that they’re, more or less, year round hiking boots.

As you probably know, I do a lot of posts on the site on hiking gear. The reason for that is to try and help people make some sense of the menagerie of gear available on the market today and it is a key goal of the site.

With that in mind today I thought a list of the top 5 men’s hiking boots options for 2015 might be useful. Now, before we go further I feel I should add that I purposely listed this as ‘the top 5 men’s hiking boots’ and if I am totally honest, I’ve been a little disingenuous with the title 😉

Mens Hiking Boots 2015

So, what do I mean by that? Well, realistically I think ultimately there are so many factors involved in choosing a good pair of hiking boots that it isn’t really possible to say, these 5 boots are the top 5, full stop!

Every person is different and one mans meat is another mans poison as they say. For example, if you have flatter, narrow feet, the pair of boots best suited to you may not be the same as someone who has high arched broader feet. The main point being that I feel it’s hard to use a one size fits all approach.

Instead I thought it would be more productive to list what I think are 5 of the top hiking boots available today. That is, if you’re in the market for a pair of boots and you’re starting to do some research these are 5 good options to get you started and they might just fit the bill.

Your Needs

Before going into the the hiking boots I also feel it is important to make it clear from the get go that there are many different types of boot cuts and styles to choose from.

You need to be very clear on what you will be using hiking boots for i.e. terrain, weather, etc. Check out this guide on how to choose hiking boots to learn more about this as it is really important you factor all of the things listed there into account if you’re new to buying a pair of hiking boots.

Finally, in this list I am targeting boots that are good for use, more or less, all year round in most conditions in temperate climates, not extreme conditions. What I mean by that is, for example, that if you’re planning on going trekking in the Arctic Circle anytime soon, this is the wrong list to be looking at, as it will most likely not apply 😉 You will need more specialized gear!

So let’s get to it! Listed below, in my order of recommendation, are the 5 top men’s hiking boots available in 2015!

Click on images to learn more about each pair of boots.

1. Salomon 4D GTX

Starting in the Gore-tex world, the Salomon 4D GTX hiking boots are a pair of top men’s hiking boots and my number one recommendation.

Salomon are a heavy hitter in the world of hiking boots.Salomon Mens Quest 4D GTX Hiking Boots They’ve been around a long time and are renowned for the quality and performance of their hiking boots.

One thing worth mentioning specifically about these boots is that while they have high and strong ankle support for off-trail hiking, they come in on the lighter side in comparison to other hiking boots.They’re designed with this in mind so good for hiking and another great option for a longer backpacking trip.

They’re waterproof, breathable and have a lot of great features I would look for in a pair of hiking boots.

They have a more technical look about them than the other Gore-tex based boots listed here, see Lowa boots below, but that’s neither here nor there when it comes to your comfort on the trail.

Overall, a really good all year round hiking boot. A viable option for the newbie and experienced hiker alike. Ideal for any hiker planning to do some off-trail hiking over more challenging terrain.

2. Alico New Guide

Next up, we move to a pair of hiking boots in a classic Alpine style that are pretty full on. That is, these probably are more mountaineering boots as opposed to just hiking boots.

ALICO NEW GUIDE MOUNTAINEERING HIKING BOOTS (FOR MEN)The Alico New Guide are a pair of hiking boots for the hiker who plans to go off trail. They’re tough enough to keep you stable on trickier terrain. The boots provide a lot of ankle support which is crucial when going off trail.

While they are a bit more specialized than a standard pair of hiking boots, they still of course fulfill all the basic requirements of year round hiking boots too.

Waterproof and crampon compatible, they’re definitely for the more seasoned hiker. no problem to buy these as a newbie if you have grand plans of adventure ahead of you. If you’re just testing the waters though, you might be better opting for something cheaper.

All in all a great pair of men’s hiking boots with lot’s of great feedback consistently over time.

3. Lowa Renegade GTX Mid

The Lowa Renegade GTX Mid is a seasoned all round hiking boot. Perfect for day hiking and suitable for longer trekking trips too.

I think these boots are perfect for the new and seasoned hiker. That is, they tick all the boxes and have a lot of really Lowa Renegade GTX Mid Hiking Boot For Menpositive user feedback again over long periods of time.

If you prefer Gore-tex to leather, then these boots may be just for you. With a nice mix of nubuck leather and gore-tex, these hiking boots are waterproof and very functional.

The boots have a reasonably high cut so will provide decent ankle support for most off trail terrain but they’re probably not as strong in that department as the Alico Guide boots above as they’re a bit lower cut than they are.

Again though, this is a pair of year round hiking boots that will suit most hikers from the newbie to the experienced trekker.

I also really like the look of these boots too. They would look just fine wearing them with a pair of jeans walking across town. Not really what we’re concerned with here but I think they look really good 😉

4. Merrell Wilderness

The Merrell Wilderness are kind of like the Grandfather of all the boots I have listed here. I mean that in the sense that they have been around that bit longer.

MERRELL MEN'S WILDERNESS HIKING BOOTS - THE ORIGINALThe make-up and design is classic in these boots and performance is very functional. What more could you want!?

Like the Alico Guide boots above, they can be resoled so providing you take good care of them, these boot’s should last you a very long time. I see these boots like having a love affair, of some kind.

That is, you get them, break them in and then spend that many years enjoying them, that it’s nearly emotional to have to part with them when the day comes to either resole or buy a new pair lol  But that day will be a long way away 🙂

Again, a functional year round hiking boot. As with the Lowa boots though, I see these boots as very much multi-purpose. When you’re not hiking in them you can easily wear them for day-to-day purposes. Whether that be going to the store for groceries or doing man stuff in your man cave (garage), I think these boots would fit right in 😉

Anyway, I digress. They’re a good classic style hiking boot with a long history of happy users. Can’t complain with that resumé.

5. Alico Tahoe 

The final pair of boots on the list is another great pair from Alico, their Tahoe hiking boots. I see these boots as perfect for a newbie to hiking.Alico Tahoe Hiking Boots For Men

Why do I say that? Well, I think they’re a no nonsense does what it says on the tin pair of boots. Very functional and, like the Merrell Wilderness, they have that classic style about them which never really goes out of fashion. I think these are another good value pair of quality hiking boots.

Again, they’re a year round pair of hiking boots. Ideal for hiking on trails but maybe not as suitable for going off trail as some of the other hiking boots listed above. Not that I would rule that totally out though but the cut looks a little lower than say the New Guide boots. Nothing wrong with that though!

Again, it’s back to what you plan to use them for. If you know you’re going into high steep mountains you need to be looking at the first option on this list and possibly move into the mountaineering boot category. I say that only to illustrate that, like any boots, these boots are great as long as you get them for the right uses.

As with all the boots on this list, they have a long history of happy customers with loads of good user reviews and feedback.

The Tahoe are another good all round hiking boots that will work as well for someone dipping their toes into hiking for the first time, as for for someone more seasoned who likes to stick to hiking on well marked trails with maybe a bit of off trail thrown in every so often.

Conclusion

So, that’s it for today. I hope you’ve found this post useful. As stated at the start, the goal of this post is really to give you an idea on what I think to be some very good year round men’s hiking boot options.

While different in style, function etc., they are all well known and trusted options for men’s hiking boots.

All these also boots have lot’s of positive feedback and user reviews and they have all been around for quite a while so they are holding their quality mark over the test of time which, I feel, is a crucial thing to look for.

There’s no doubt about it, choosing a pair of hiking boots is a very personal thing. Every man will have his own preferences, whether that be full leather boots or gore-tex, low or high cut, the list goes on!

Remember though, your first port of call should always be function. Know what you need your hiking boots for and where you will be using them. There’s no need to spend a couple of hundred extra dollars to get tough mountaineering boots if you never plan to leave well worn low lying trails.

Things are always changing so I will be listing my ongoing hiking boot recommendations here, and also if you’re new buying hiking boots, check out the hiking boot buying guide.

OK, so let me have it 🙂 What do you think should or shouldn’t be on this list? I’d love to hear your thoughts in the comments below!

5 Top Reasons Why You Should Buy Trekking Poles!

Recently I’ve been considering buying Trekking (Hiking) poles. I’ve been weighing up the pros and cons of them and I have decided that they are definitely a good investment.

In this post I wanted to take a look at the top 5 reasons why I have come to this conclusion and why I think they’re a great addition to your hiking kit.

Pictured below are my current favorite trekking poles, the Black Diamond Alpine Carbon Cork Trekking Poles.

Alpine Carbon Cork Trekking Poles Official Promo Image

My Use of Trekking Poles

First off, I thought I’d start by explaining my history with using trekking poles. I have never actually owned a pair but I have used them on occasion and I will be getting myself a set in the not too distant future.

Every time I did use them I found them to be very handy and useful. Listed below are the top 5 advantages I found with using them.

Great on Steep Downhill

When you’re out on the trail, at some point you will have to negotiate a steep downhill. Even if this is on a well-worn trail, it can still be tricky to descend, especially if you have to do it several times in a row on a day hike. That is, a lot of steep uphill followed by steep downhill.

Where this is even more relevant is when you’re hiking down over open mountain, where there is little or no marked trail.

This is where hiking poles can be really beneficial. A key thing to look for when getting hiking poles is that they’re extendable and retractable. That is, you can make them longer or shorter. This should be standard with most good modern hiking poles.

When you’re on a steep downhill it can be a great help to extend your hiking poles that little bit longer. That gives you that little bit more stability as you hike downwards.

On a personal note, on hard hikes, I have found my knees can get a little sore and wobbly after lots of steep descent. Using hiking poles helps counter this as it enables me to spread the pressure into my arms as well as my legs and so alleviating the load my knees have to take.

Overall, trekking poles ease the weight on your joints and spread it more efficiently making you less tired. Definitely a plus!

Great on the Uphill

As with steep downhill, the same principle applies for steep uphill, albeit somewhat reversed. When you’re heading up very steep uphill, it can be useful to make your poles a little shorter. You can then use them as a kind of pivot to help pull yourself up the trail.

Now I don’t want to give the impression that you drag yourself up a mountain, it’s not that extreme. On the uphill it’s more like an extra bit of stability that can again take a bit of pressure off your legs. It all helps!

Even on gradual uphill with your hiking poles at their normal extension, they will still add a bit of extra support as you ascend. This all goes towards taking pressure off your legs which should keep them from getting too tired too soon.

Stability on Tricky Spots

Hiking poles really come in useful when you need to cross a tricky spot on the trail. For example, say you need to cross some stepping stones to get across a river. Being able to extend your hiking poles and stick them into the water to get a bit more stability is really useful.

Now, I want to add a caveat to that last statement. I am referring to crossing over stones on a very small river. As a general rule, try and avoid crossing rivers but if the river is shallow, say up to the tops of your feet or just below your ankles, you should be fine to cross it.

Any higher, I advise that you don’t cross it. Rivers can be very hard to judge with currents and so on. You can easily be taken off your feet with a relatively small amount of water and get swept downstream into faster currents. Good judgment and experience is crucial!

Some other tricky spots where a hiking pole can be useful is hiking in snow or where there are patches of ice. Again, they can come in very handy for a little bit of extra stability when you come to a tricky spot.

Finally, if you’re fond of trekking into the wilderness for a few days camping, hiking poles can really be a great addition to your kit. With a fully loaded backpack on your back, you are of course less stable.

A wrong movement or minor slip and you can very easily lose your balance and topple over.

Hiking poles again can provide that bit of stability if you have a slight slip. This also applies on a day hike with a small daypack. If you slip or walk over a tricky part of terrain, the poles are there to enable you to steady yourself.

Walking over bush and heather is one I regularly experience. The odd time you can easily Komperdell Pure Carbon Trekking Poles Carry Loopsstep into a deeper hole.

As its not visible you can’t see it to avoid it and you also won’t know how deep it is. Most importantly you won’t be expecting it!

Having a hiking pole handy to lean on to steady yourself can be really good for situations like that.

Hiking poles also have carry loops, see the picture to the right, so even if you lose your balance and your hand comes off the handle, they will stay attached to your arm so you can easily get them back into your hands to use them to get yourself back on your feet.

Lightweight and Easy to Carry

Next thing worth mentioning is that hiking poles are designed to be lightweight. Also, most good backpacks have the loops to hold them while they’re not in use.

I also recommend you look for retractable trekking poles too. This means they can be retracted up into a smaller pole which can be more easily put away in your pack when not in use.

For example, walking through the forest with two big poles sticking out of your pack will be a pain for sure as they will catch and get tangled in things. So, look for good retractable length for storage purposes.

The overall point in this being that if you don’t want to use them or need them on a particular stretch of trail, you can easily attach them onto your pack and they won’t add a lot of weight or cause you any bother.

Additional Uses

This is more a bit of fun here but I have seen hiking poles being used very creatively before, especially on longer multi-day treks. I’ve seen them used as an extra tent support pole, where one was missing.

My favorite was as a way to fashion a clothes line to dry gear in the sun after it got wet. Two poles on two ends with, what I think was, some tent cord between them. Very clever I thought and it worked well.

Also, you can get poles that also act as a camera mount, that is you can attach your camera to the top of the pole handle. Very handy to have if you want to get that all important group photo at the summit, with everyone in it, after a long day’s hike!

Finally, it’s worth adding that you don’t always need to have two hiking poles. I know many folks who only ever use the one and you can buy them individually in some cases.

Conclusion

As mentioned at the start of this, in all my years of hiking, for some reason I never thought to buy a set of trekking poles. No real reason I can identify as to why.

I used them on occasion and I always found them useful when I did so I’m not 100% sure why it has taken me so long to finally get around to buying a set of my own lol 🙂

I have started my research and I will be sure to add up onto the site some good options that I find, including the ones I actually end up purchasing.

I’ll add a short guide on what to look for when buying hiking poles soon too but if you’re in the market for a pair today, I suggest looking for a pair that are lightweight, durable and extendable / retractable.

There will be a bit more in the buying guide but they’re the fundamentals I am currently looking for myself.

In this post I wanted to review the top 5 reasons as to why I think adding trekking poles to your hiking kit is a really good idea. I hope you found it useful.

Finally, if you do use hiking poles, please always be conscious of other hikers and watch where you point them!

So that’s it for today. Do you use trekking poles on your hikes? Are you a fan of them? Do you find them useful?

What’s The Best Way To Dry Wet Hiking Boots?

This weekend I was reminded of a great tip to help get your boots dry quicker when they get wet. I was hiking with some friends who were doing a three day hike.

Wet Hiking Boots

It was quite a task they were undertaking to hike the 80 miles of the Wicklow Way in Ireland over three days. I couldn’t go along for the whole weekend and only joined them on one of the days, day two.

I think I did about 27 miles with them that day and I was exhausted at the end of just the one day! They had done about the same the previous day and would do the difference on the third day. A great achievement and pretty tough going!

The main reason I mention this was that day one for them started in a day of torrential rain. Not a nice way to start 🙁 The only plus side was that it is Summer so at least it wasn’t freezing cold although still not exactly warm on open mountains.

Needless to say, their gear, after eight hours hiking in heavy rain, got very, very wet. They of course then had the challenge of getting all their gear dry by the following morning of day two to be able to start out in dry clothes.

We were chatting about it the following day and that is where I thought a post on some tips on how to dry your hiking boots as quickly as possible would be useful.

This is only really relevant for any kind of multi-day hike where you get your boots wet but need to use them the following day. Ideally, you don’t want to be putting on a wet pair of boots when you set out the following day, so anything you can do to help them dry quicker is a good thing.

So here are a few suggestions that should help you dry your boots as quickly as possible.

If you’re in the market for new hiking footwear, then check out the best men’s hiking boots and the best women’s hiking boots.

If you are looking more for lower cut trail shoes, check out the best men’s hiking shoes and the best women’s hiking shoes.

Clean your Boots as Soon as you Remove Them

Regardless of whether your hiking Boots are wet and dirty, the first step is to clean them as soon as you take them off. This can be a pain to do when you’re tired after hiking all day long but it I strongly advise it. There’s more detail on tips on how to clean your hiking boots here.

How To Clean Leather Hiking Boots

Of course cleaning your boots may not be your top priority if you’re out camping over a multi-day hike but definitely the first port of call when you’re done.

However, even if you are camping out, if you can get a splash of water over them at the end of the day, it will do them no harm at all.

Remove the Insole

If you have a removable insole, take it out of your hiking boots. This will let air get into the insole itself and to circulate in and around the boot itself. Most good hiking boots will have a removable insole so this should be feasible in most cases.

Remove the Laces

Now, this is something I have to be honest and say I have never really done but it is an option if your boots are saturated wet. It shouldn’t have a major effect on the overall boot drying process but it will do no harm either. At the very least, give them a good loosening.

Put Your Boots in a Cool Room

Now, first off I should state that sometimes this isn’t practical. When I go away on weekend hiking trips, many times I will stay in a guest house, hotel or bed and breakfast.

In situations like that, where I need to use my boots the following day, most of these types of places will have a warm room of some kind like a hot press or a boiler room. If not a specific room, they may have a warm living room with an open fire that you can utilize to help dry your boots.

Obviously, if I need my hiking boots the next day, a cool room isn’t going to do the trick! In those instances, I utilize a warm room if available … but …

Warning: be careful putting hiking boots too close to a direct heat source or in too hot a room as it could damage them!

Now, you’re just confused huh 🙂

Well, let me explain. In the normal run of things, ideally you want to avoid a direct heat source and if possible use a cool room to dry your hiking boots. To help illustrate this, if you are out on a day hike and you have a whole week to dry your boots, leaving them in a cool room (room temperature is fine) to dry naturally over a longer time is the best option.

However, if you need to get out on the trail again the next day, you may need to utilize a heat source in some form to try and speed the process up. I hope that makes sense!

Of course, when you’re on a multi day hiking trip, the luxuries of a nice guest house may not always be on the cards so this may not always be an option. For example, if you’re backpacking through the wilderness you might have to get a bit more creative.

Backpacker

In this instance, if you get the opportunity to, utilize the sun and air as much as possible.

That is, if you can get a break in the weather and there is some direct sunlight providing some element of suitable heat and / or a warm breeze, leave your boots out in it to help them dry out. Don’t leave them in the sun for too long though!

If you have a camp fire at night, the natural tendency is to put your boots beside it. I don’t recommend this. The same warning above re: a direct heat source very much applies here so be careful.

Even sitting with your boots on close to a camp fire for an extended period could cause them problems so be very mindful of the distance you put your boots close to one even when wearing them. Too close and it will mess with the glue bonding and possibly even melt parts of your boots! Nightmare 🙁

As stated above, ideally, in normal circumstances, after you’ve cleaned your boots down, if you can, leave your hiking boots at room temperature or a bit cooler to dry naturally.

This will help ensure that the stitching of the boots don’t get put under too much stress in the drying process. This is especially relevant for leather boots which have a tendency to crack if you don’t look after them properly.

If you have leather hiking boots use some kind of leather treatment after each use, and then let them dry in their own time in a cooler room. This will greatly help extend the life and length of use you get out of them

Put Newspaper Inside your Boots

This is a neat little tip that works pretty well. One of the problems you have when drying hiking boots is that they need to get dry on the inside as much as on the outside, in fact more-so on the inside.

This process can take a long time letting them dry from the outside in only. Part of the reason is that the moisture within the boots hasn’t got as many places to immediately escape to so it continues to circulate within the insides of the boots.

If you can, get your hands on some newspaper. Take a page and crumple it up into a loose enough ball, making a tear here or there is great too. Fill your boots up with news paper balls like this and leave them to dry.

This expedites the drying process as the paper takes in all the moisture from inside he hiking boots that had nowhere else to go. When done, just take the paper out and hopefully your boots are nice and dry inside as well as outside.

You may need to add several balls of newspaper, simply replace with dry newspaper when the bits inside your boots get damp and moist. Be careful not to scrunch the newspaper too tight though, it needs air flowing around it to work it’s magic 😉

I’ve used this several times and it’s a handy little thing to do that works a charm.

Conclusion

These are just a few quick tips to help you dry wet hiking boots when they inevitably get very wet on the trail. It’s never ideal than starting your day’s hiking in a pair of wet or damp hiking boots.

Putting a dry sock and foot into a wet or damp boot is not an ideal way to begin so anything you can do to expedite the drying process has to be a good thing!

If you’re just starting out hiking and you’re just at the point of buying boots, never mind cleaning and drying them, and you’re unsure what type of hiking boots you should get, check out the hiking boot buying guide. That should get you started on the road to finding the best hiking boots for you.

I find hiking to be a continual learning experience for me and I am certain there are other little tips and tricks that one can do to help speed up the boot drying process. Do you have any nuggets of wisdom to help dry your hiking boots quicker? Please do share them in the comments below 🙂

Never Wear Cotton Clothes Hiking!

I’m just back from a really nice hike, the weather wasn’t bad and visibility was pretty good. In saying that though, we did have a few heavy bursts of rain while we were out. This is never a problem if you have the right hiking gear.

A good hiking rain jacket and pair of hiking boots go a long way to keeping you dry but realistically, you need to have the full gambit of appropriate gear. I’m talking proper hiking trousers, waterproof trousers, base-layers, breathable tee’s etc.

However, today I saw again what I so regularly see when I’m out on the trail. That is, people wearing cotton clothes. Whatever you do, one simple tip you should always abide by is don’t wear cotton when you go hiking!

Hiking In Cotton Clothes

With that in mind, looking at the picture of our hiking couple above, can you guess what the problem is? That’s it indeed. While you have to admit our two hikers look pretty cool, they are wearing jeans and shirts which are of course made from cotton and are therefore a big no-no on the trail.

Now, this may seem like stating the obvious but I can’t count how many times I have seen people out hiking wearing jeans and normal clothes. This is a recipe for disaster. I assume that this is generally from people not realizing the hassle and even danger they may be causing themselves by not wearing the right gear.

So What’s So Bad About Cotton?

Well, in short cotton absorbs moisture. This moisture makes your clothes damp, or even worse, wet. So where does this moisture come from? Well look at it like this.

Sweating

When you’re hiking you’re of course expending effort and energy. That effort and energy generates heat which in turn releases sweat from your body in an effort to cool you down.

That sweat then turns into vapor and tries to evaporate off and away from your body. However, your cotton clothes don’t have the capability to let that vapor out and so they catch that moisture, and so get damp and wet.

What makes this so much worse is that when you are putting the effort in, your body temperature is of course higher as you are spending the energy, that in turn generates the heat which leads to the sweating.

Now, at some point you will stop exerting the same level of energy and so your body temperature will go back down. What does that mean in lay man terms? In short, you cool down. You are also now effectively wearing a wet towel i.e. your now damp cotton clothes.

Suitable hiking gear, made from appropriate material, would prevent this as they would have the ability to wick the moisture safely away from your skin.

Rain, Snow, etc.

When you’re out hiking, you’re of course out in the hills and so it is very likely that a rain shower or two will cross your path at some point. Therefore, if you’re wearing cotton clothes, you will get wet. The same problem as listed above, getting cold etc., ensues but this time from the outside in.

In all likelihood though, you will have to contend with both of these, moisture from the inside in the form of sweat and moisture from the outside in, in the form of rain, etc.

How to Avoid this?

Well, simply put, you need to wear the right gear for hiking. This will be gear made from suitable materials such as synthetic fabric or merino wool.

If you want to learn specifically what you need to wear, check out the complete day hiking checklist list. Among other things, this lists the essential gear items you need for hiking all year round.

Conclusion

Wearing cotton on the trail is simply not advisable. A big part of hiking is safety. A large part of hiking safely is ensuring you have the appropriate gear on and with you before you ever set foot out on the trail.

Accidents will always happen but you can go along way to prevent them from happening and / or protect yourself in the case that they do, by having the right gear.

Let’s end this post with a very possible scenario which has happened many times before …

You’re wearing cotton jeans, tee shirt and wearing a cotton jacket; you get into difficulty on the top of a mountain on a cold day, you twist your ankle, and you can’t walk out; it starts to pour with rain and you have no emergency shelter; well assuming you can at least get in touch with rescue services, you need to get ready for a long and cold wait until help can finally get to you and pray hypothermia doesn’t set in!

If you can’t contact outside help in this scenario, well you can imagine how quickly things will go from bad to much, much worse!

Prevention is always better than cure so prepare appropriately and wear the right kit!

The Top 10 Essential Gear Items You Need For Winter Hiking!

OK, it’s mid December and the Winter has set in. In many parts of the world that means colder temperatures, frost, snow and all sorts of other seasonal weather hazards to deal with.

With that in mind I wanted to get together a detailed list of the top ten essential gear items you need to have for Winter hiking.

Winter Hiking

Please note that in this list I am not referring to hiking over glaciers or deeply packed heavy snow. Hiking in more extreme winter conditions over that kind of terrain needs specialized guidance and or training.

For that, while you will still need all the gear items listed below, you also need very specialized kit like crampons, snow shoes, safety ropes, etc.

This post refers to hiking on trails mixed with a bit of hiking, where safe and appropriate, over open mountain. As always use common sense when choosing your hiking route, don’t go anywhere that will be too challenging for your skill and experience level.

Winter is a beautiful time to get out hiking on the trail but you need to prepare yourself appropriately. While I do also list some optional items at the end of this post, the first ten items listed below are not optional and are a must to keep you safe and warm.

1. Waterproof Hiking Boots

Top of the list is a proper of hiking boots suitable for winter conditions. You need to keep your feet as warm and dry as possible.

meindl-vakuum-gtx-hiking-boots-for-men-in-the-field-1

I recommend boots made from Goretex, suitable leather or a mix of the two. Check out my recommendations for hiking boots here.

If you are planing to hike over ice and deep snow, you may need crampon compatible boots, snow shoes, etc.

2. A Good Rain Jacket

It’s going to be cold in Winter with every chance of rain, snow and probably more! Your rain jacket is your first line of defense to keep the nasty stuff out. Anything made from Gore-tex or similar technologies should do the trick.

For a newbie hiker doing average day hiking, I recommend A good rain shell jacket, it should do the trick without breaking the bank.

Marmot Precip Jacket For Men

Check out my rain jacket recommendations here.

3. Rain Pants

Next on the list are rain pants. Again, pants made from Gore-tex or similar should do the trick. You need good waterproof capability but you want to look for good breathability too.

You can go for an all in one option but I recommend you have two pairs of hiking pants. The first pair are the normal hiking pants you have on for the duration of your hike. These will be water resistant as opposed to waterproof.

The second pair are hiking rain pants which need to be completely waterproof. You pull these on over your hiking pants when needed.

You may not need to have these on all the time on your hike but you will need to put them on in heavy rain, snow or if you’re finding things too cold.

Berghaus Mens Helvellyn Pant1
Berghaus Men’s Helvellyn Rain Pants

I have a pair of Berghaus helvellyn pants, pictured above, for this which I find great. They’re a bit more on the pricey side but they kept me dry up and back to the summit of Mont Blanc as well as on many a nasty weather day, day-hiking.

4. Sports Underwear

This one is simple enough, just avoid cotton ladies and Gentlemen. Any kind of synthetic (For example, nylon or polyester) sports underwear should do the trick.

Your underwear is touching your skin so you need some level of wicking capability to let moisture out but keep precious heat in.

5. Sports Tees

You need two tees, well one isn’t a tee as such.

Against your skin you need a long sleeved base layer. This will keep warmth in and even though it’s cold in winter, you will still sweat at times while hiking so you need to be able to let that vapor out and away from your skin. You can get a decent base layer for thirty / forty bucks.

On top of your base layer I recommend another layer, probably a tee of some kind. I usually use a short sleeved tee. Same rules apply as the base layer, you want it to be breathable with wicking capability. Again, avoid cotton!

6. Fleece Jacket or Similar

Ah, the trusty fleece jacket. A welcome addition on a cold day for any hiker. There are oodles to choose from and, as with all hiking gear,  you can spend a lot of money if you want to.

However, you don’t need to. If you’re not fussed on branding, you can get a reasonable one for forty / fifty bucks.

The North Face Men's Denali Jacket
The North Face Men’s Denali Jacket

Fashion on the trail is one thing but functionality comes first, always! As long as it can keep you warm, that’s what matters.

Pictured, The North Face Denali Fleece Jacket for Men.

7. A Good Pair of Hiking Socks

I have harped on about this many times here but to me, your hiking socks are nearly as important as your hiking boots.

You need good ones and I highly recommend you break them in too … yes, I am serious. Wearing socks a few times on lighter hikes is a good idea to be sure you have no niggles from wearing them.

8. Woolly hat

No need to explain this one. Everyone knows you lose a lot of heat from your noggin. A woolly hat does the trick for this problem. There are plenty of synthetic options available too.

Check out this post on hiking hats to learn more about some options for the winter.

9. Gloves (for warmth)

Gloves are a must. You need a pair that will keep your hands warm. Generally I use a pair of ski gloves for heat purposes. My hands do get very cold quickly so I find ski gloves work fast for me.

10. Waterproof Gloves (Goretex or similar)

I was in two minds about whether to put this into no.9 but I thought it better to make it separate to make a distinct point about it.

A pair of waterproof breathable gloves are a must. As with your head, your hands are at the cold face of the elements usually so you need to keep them dry as well as warm.

As mentioned above I use ski gloves for warmth which also provide a level of water resistance. However, I also carry a waterproof pair. These are what I normally wear and I switch to the ski gloves when I get really cold by either swapping them or slipping them on over the top.

The key difference is that these gloves still enable me to use my hands and fingers to about 70-80% of if I wasn’t wearing them. So I can still unscrew a water bottle and easily do relatively fiddly things with my hands.

Obviously, when you put the the ski gloves on, that mobility goes out the window. I go into my overall approach to hiking gloves here.

If you don’t have ALL of the above, please DO NOT consider heading out into the mountains in cold winter conditions. If you do, you are a risk to yourself and others.

Carry Spares

It’s also a good idea to carry spares of all these items where possible in a dry bag. If you fall into a river or something, you will be mighty grateful of a dry pair of clothes to change into. I should add, this can apply across all seasons, not just winter.

Highly Recommended

This next list is definitely good to have with you and I highly recommend that you do. However, they probably slide just out of the ESSENTIAL category.

Gaiters

Gaiters are great in deep snow. there’s a reason why most ski pants have built in gaiters and that’s because snow turns to ice cold water against your body heat very fast. gaiters will keep snow out of your hiking boots.

You definitely do not want cold wet feet hiking through snow. It’s not only horrible to experience but is also dangerous in case the water starts to freeze. Frostbite is something you should always be conscious of hiking cold winter weather.

Outdoor Research Cascadia Gore-Tex® PacLite® Gaiters - Waterproof

If you’re a newbie to hiking and you don’t know what gaiters are, check this post out.

Muff / Neck Gaiter (can double as a hat)

These are handy things to have and are versatile to be moved about to protect your neck, head and or face.

I have a neck gaiter which I find really great. Again, came with me to the summit of Mont Blanc and did the trick. You can learn more about neck gaiters here.

Walking Poles

I don’t always use walking poles but the few times I have, they have been very handy to have, especially on steep descents.

Having a pole or two handy for trying to negotiate tricky terrain in snow and ice can only be a good idea. Walking / Hiking poles are a very useful addition to your hiking kit!

Head Lamp (just in case you get stuck in the dark!)

A head lamp  can come in very handy in winter. As a safety precaution it is always a good idea to have one in your pack. If heaven forbid you get injured or get lost in bad conditions and you don’t make it out of the hills before dark, this will make your life all the more easier.

Black Diamond Spot Headlamp

Remember, winter days are short so it’s easy to just get caught out and misjudge your journey back to base. if it’s get dark and you can’t see, you exponentially increase your risk of falling, tripping or slipping and hurting yourself.

Conclusion

I hope you found this top ten essential gear items for winter hiking useful. If you’re new to hiking and you plan to do any venturing into the hills this winter, you need to have all of them.

This list doesn’t cover everything, be sure to check out the complete day hiking checklist in pictures, that covers just about everything you could need for any day hike at any time of year!

Where possible, carry as many spares as possible in case you get wet. At the very least have spare base layers and a warm fleece. In short, carry as much spare stuff as you can. I don’t mean to sound dramatic but it could save yours or someone else’s life.

As mentioned above, winter is a really beautiful time to go out hiking on the trail. Ensure you enjoy it as much as possible by taking sensible measures to keep yourself safe. In short, wear the right gear 😉

Happy hiking this winter and as always, stay safe!

Did you find this list useful? I’d love to hear your thoughts in the comments below.

Map Reading Basics

A key part of keeping all your hiking enjoyable is of course safety. A key part of safety is how you plan and set up your hiking route. Also, when you’re out on your hike, how you follow your planned route successfully and take any required alternative action, should your route need to change, is also a key element that go towards keeping you and your hiking party safe.

So, why the long contextual introduction? Well today I wanted to start looking at a key skill that all hikers should be familiar with as they get more and more hiking experience. That skill is navigation.

Map Pic

Now, if you’re a member of a hiking club and all your route planning etc. is already taken care of and you feel you don’t need to worry about all that technical navigation stuff, that’s fine.

However, there may come a time when you need to know a bit more, especially if you choose to go out hiking on your own or outside of your normal hiking club or group. This is bound to happen at some point so taking some time to learn some of the basics is a good idea. What’s more, it’s fun!

Navigation is a huge topic in and of it’s own right so I will try to go through it in such a way so as not to be too much at once.

I’m going to try and approach this in manageable chunks, as much for my own benefit 🙂 , so I will split it out into separate posts. With that in mind, I will try and keep each post at a reasonable size covering topics as the series progresses.

Today I want to look at our first topic in the series, map reading basics.

Map Layout and Scale

So, let’s start from the start. What is a map, or more precisely, what is a topographic map?

Basically a topographic map is a two dimensional representation of the land, features etc. in a three dimensional space or area. If you can, imagine you’re looking at some mountains and somehow, someone squished them down flat, that would more or less be what your topographic map looks like.

The map then uses a variations of lines and symbols to represent the physical attributes of the land e.g. height or altitude using contour lines and so on.

A map will normally be laid out in grid format (That may not always be the case though). Each line in the grid may have a letter and or number assigned to it. This letter or number helps define what part of country and or area the map is representing. These are also used to enable you to make grid references, we’ll look at all that in detail in another post though.

Maps will always be laid out in a scale. A couple of examples of common Scales are 1:25,000 and 1:50,000. So, taking the 1:50,00 scale as an example, this basically means that 2 centimeters on the map equals 1 kilometer on the ground (1cm = 50,000 centimeters, so 2 * 50,000 centimeters = 100,000 centimeters or 1km).

Nearly all maps I use are based on the metric system, (centimeters, meters, etc.) but there is usually some kind of accommodation for the imperial system (inches, miles, etc.) too. I’m sure there are imperial only based maps too. Every map will have a scale on it somewhere. Below is an example of a 1:25,000 scale on a map.

Map Scale

The scale will also be listed on the front of the map when you buy it. Basically, the lower the scale, the more detail you can expect on your map. It is good practice to get used to navigating off of different scaled maps though.

Codes and Symbols

All good maps will have a ‘Legend‘ of some kind which, as well as including things like scale above, will explain what all the various symbols on the map represent on the ground e.g. a dotted black line = a track, and so on.

Map Legend

There are also standard ways to represent similar things on all maps e.g. contour lines to represent height or altitude as mentioned above. Depending on the scale, the distance between each contour line will represent a level of rise in height. For example, the distance between two contour lines on an Ordnance Survey 1:50,000 scale map in the UK is 10 meters.

I’ll look at contour lines in more detail in a future post of this series but for now, see the wavy lines that run around in circle like patterns in the map picture below for an example of a contour line.

Grid  (or Map) North, True North and Magnetic North

Huh!? Surely there is only one North I hear you cry? Well, not quite … let’s break it down.

Grid North

The top of a map always points to what is referred to as Grid North sometimes also referred to Map North. Grid North is north depicted by following the directional lines of a map. That is, the grid lines running upwards to the top of your map follow grid north as illustrated by the green arrow in the map below. Similarly, Map North is the top of your Map should no grid be present.

True North

True North is the line you follow, aka longitudinal lines, along the earths surface to reach the North Pole. This is very close to Grid North and although there is a slight difference, for basic navigation purposes we can take them as the same.

Magnetic North

Finally, Magnetic North is the direction in which a compass needle points. See the Red arrow in the blue square on the compass in the picture below.

So, why do we have all these different ‘Norths’? What is one in relation to another? OK, this is where it can get a little confusing so bear with me. For the detailed scientific stuff behind each of these, the links above will take you to Wikipedia where all that is explained.

What I will try and do here is to show you the practical use of these i.e. what you need to think about in real life.

Using Grid North and Magnetic North

In short, you need to know about and understand Grid North and Magnetic North. Now, this post is not supposed to be on how to take a compass bearing (although that will be done in this series soon) but I will use a compass bearing to help illustrate the required point here.

When you are looking at your map and you want to get from position A (rocky mountain on the map below) to position B (cock mountain on the map below) on it, you will take your compass and line it up appropriately between these two points.

You then align the North 360 degrees arrow, highlighted in the red circle below, with the grid lines on your map i.e. your compass arrow in the compass housing points North in line with the grid lines.

Two Points

You now have a bearing from point A to point B using Grid North. However, to make that bearing something that you can actually use you need to account for the magnetic declination of the earth. You do that by adding the magnetic declination to the bearing you just took.

So for example, say my bearing from Point A to Point B was 60 degrees but I am in a location on the planet with a magnetic declination of 5 degrees. I now need to add those 5 degrees to my bearing before I can use it to accurately take me from point A to point B on the ground. My bearing now becomes 65 degrees and that is what I follow to get me from point A to Point B.

Your map will tell you the magnetic declination you need to account for in the legend information. However, it is important to point out here that Magnetic Declination changes from place to place and year on year as Magnetic North moves. So always keep that in mind, especially if you’re taking a declination number from an old map, it will likely be out of date.

As mentioned above, this post is not supposed to be on how to take a compass bearing, that will follow in this series in due course. However, I wanted to use this example to help explain the practical use of Magnetic North though.

Conclusion

OK, I think that’s enough for today! Hopefully it has helped you get a feel for some of the basic features on a map. This is only the first post in a series of many with regards to navigation so there’s plenty more to come.

It is worth noting that not all maps are made equal. In the UK and Ireland, one of the main map providers is the Ordnance Survey UK and Ordnance Survey Ireland. They tend to be pretty accurate and reliable. In the US, you can start with the US Geological Survey to find maps for your area.

Most countries have an official mapping body who take on the task of mapping their country but there are still places on the planet that haven’t been very well mapped out.

If you have any links to official mapping bodies in your country, please add a link to the comments below and I will add it to a list of resources here.

Next up, we’ll look at how to set a map.

  • « Previous Page
  • 1
  • …
  • 9
  • 10
  • 11
  • 12
  • 13
  • …
  • 16
  • Next Page »
  • Facebook
  • Pinterest

What are you looking for?

Copyright © 2025 · Cool Hiking Gear

Cool Hiking Gear is a participant in the Amazon Services LLC Associates Program, an affiliate advertising program designed to provide a means for us to earn fees by linking to Amazon.com and affiliated sites.

  • About This Site
  • Privacy Policy
  • Affiliate Disclosure Statement
  • Contact