coolhikinggear.com

  • Men’s
    • Best Hiking Rain Jackets for Men In 2024
    • Best Men’s Hardshell Jackets Of 2023
    • Best Hiking Pants For Men In 2023
    • Best Ultralight Rain Pants For Men
    • Best Men’s Daypacks For Hiking In 2023
    • Best Backpacking Backpacks For Men In 2023
    • Best Base Layers For Men In 2023
  • Women’s
    • The Best Hiking Rain Jackets For Women In 2023
    • Best Women’s Hardshell Jackets Of 2023
    • Best Hiking Pants For Women In 2023
    • Best Ultralight Rain Pants For Women
    • Best Daypacks For Women
    • Best Backpacking Backpacks For Women In 2023
    • Best Base Layers For Women In 2023
  • Hiking Accessories
    • Best Hiking Poles
    • Best Trekking Pole Monopod Camera Mount
    • Best Hiking Headlamps
    • The Best Hiking Watches In 2023
    • The Best Hiking Gloves In 2023
    • Best Hydration Bladders For Hiking In 2023
    • Best Compass For Hiking Our Top Picks
    • Cool Hiking Gadgets
  • Footwear
    • The Best Men’s Hiking Boots In 2024!
    • Best Hiking Shoes For Men In 2023
    • The Best Women’s Hiking Boots In 2023!
    • Best Hiking Shoes For Women In 2023
    • Best Hiking Sandals
    • Best Hiking Sandals For Women in 2023
  • Hiking Guides and Resources

What Is The Difference Between Hiking And Mountaineering?

As a regular hiker I often spend time hiking over, across, etc. mountains. With that in mind I was always curious what the difference was when I heard someone using the term mountaineering, when referring to their activities in the hills, rather than simply hiking.

Man Scrambling Through Rocks

OK, well first off I guess you can hike anywhere. I recall reviewing into the difference between hiking and walking in another post some time back. In it I made the distinction that hiking usually involved going over some kind of natural terrain, like mountains, while walking was just going out on your local roads for a stretch of the legs.

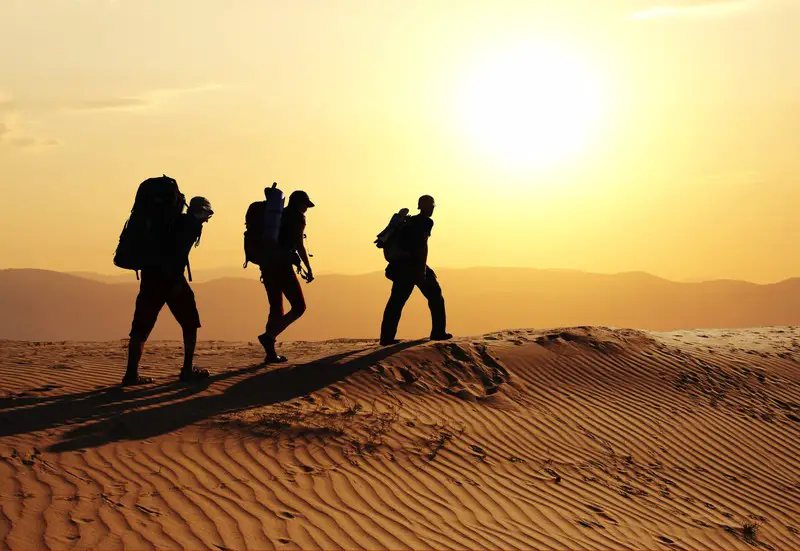
However, it is worth noting that the natural terrain to hike on doesn’t always need to be mountains. Hiking in a desert is a good example where you may not need to climb or cross any mountains but you’re not going out for an easy stroll! In contrast, mountaineering obviously implies that mountains are involved in some form.

So with that in mind,  I had an idea but wasn’t 100% sure how ‘mountaineering’ was defined, if at all. One thing I had noticed though was that it was only ever very experienced ‘hikers’ who would ever refer to any of their activities as mountaineering as opposed to just hiking.

So what is the Difference?

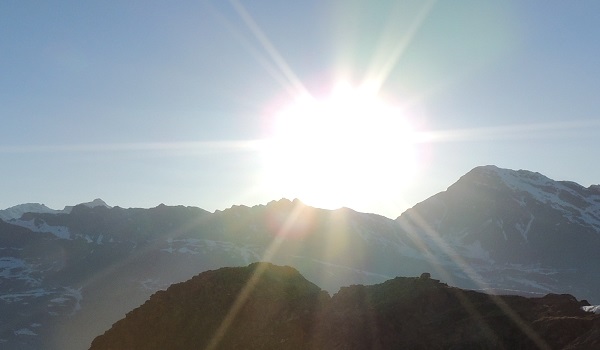
Yesterday I returned from my ‘mountaineering’ (I am using the word appropriately here I believe 🙂 ) trip to the Alps. I was away for a week and I am happy to say that I got to successfully summit both Gran Paradiso and Mont Blanc!

I will of course be doing some detailed posts on these in the very near future but as a background to this post, as part of the trip we had experienced guides to take us to the summit for both climbs. This is an absolute necessity as it is dangerous in the Alpine environment if you do not know what you are doing. Therefore, experienced guidance is not optional.

Anyway, the lead guide for the trip has over 25 years of experience in the Alpine environment and on the initial climb to a hut before the summit attempt for Mont Blanc, I overheard him using the term mountaineering when referring to our summit attempt in the days ahead. It immediately occurred to me, could there be a better man to ask this question of than him?

So, I asked him and his answer was beautifully simple and sweet. In  short, he said that in mountaineering you use your hands. When you’re just hiking, the use of your hands isn’t necessary. Beautiful!

What Does it Mean to use your Hands?

Now, I should add some points of clarification to this and perhaps risk stating the obvious. However, by ‘using your hands’ he was, as I am now, referring to needing to use your hands on or with natural obstacles or terrain to pass or overcome them as you hike and climb up a mountain.

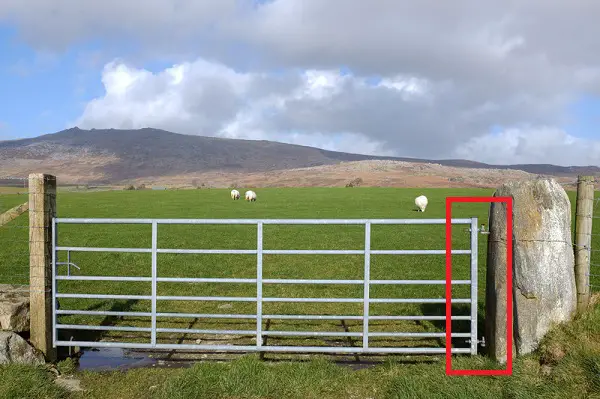
Therefore, it does not mean using your hands to hold walking poles or climb over a fence. Rather it refers to anything from continuous scrambling over rocks right the way up to full on rock climbing.

Note: there are a lot of levels in-between the levels of scrambling and rock climbing.

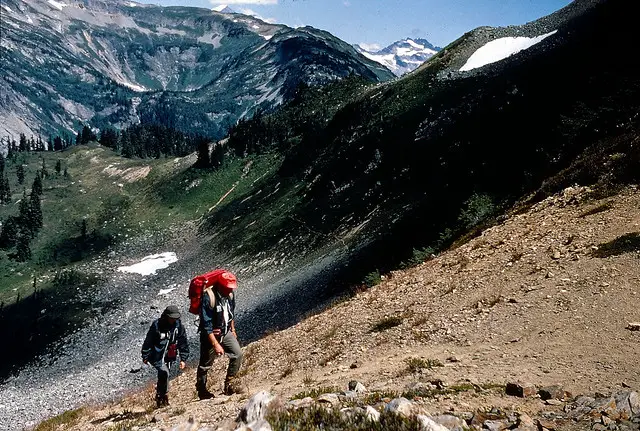
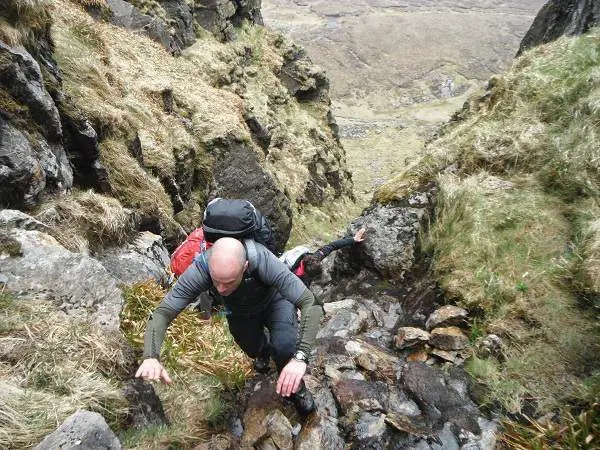
I am not a rock climber but scrambling is something I have done on many occasions, that’s me scrambling in the photo below, while out on the trail. It sits at the easier end of the climbing spectrum and refers to having to use your hands to negotiate rocks or other terrain in your way on the trail.

Scrambling

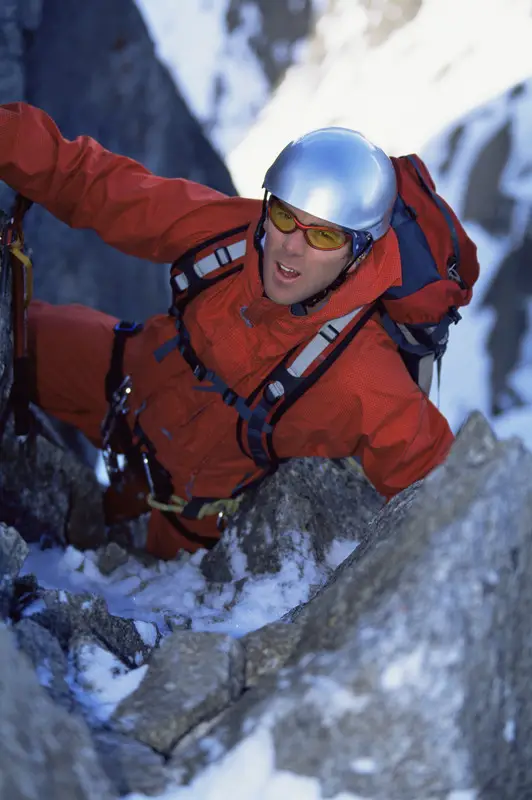
That is, your legs aren’t enough to get you by and it’s sometimes, although not always, tricky enough that you may also need to employ some basic climbing gear e.g. helmets, harnesses, roping using karabiner clips, and so on. We needed to wear that gear in the Alps last week as the scrambling was of a significantly dangerous enough level to warrant it. That may not always be the case though.

It’s also worth noting that using your hands can mean having to use them with various tools to help move you along the trail e.g. an ice ax.

Conclusion

So that’s it for today’s brief post. Hopefully this has been of interest. It was nice to get a perspective or two on the term ‘mountaineering’. I should add that there are also a whole host of other mountain skills involved in mountaineering that extend beyond simple hiking. However, I think for ease of use this was a nice, quick and easy way to note a considerable difference between the two activities.

I for one, quite enjoy a bit of scrambling while out on the trail but I don’t think that full on rock climbing would really be for me. You may hate the thought of ever having to use your hands to hoist your body over rocks or any obstacle while out on the trail. I guess that that’s the real beauty of the great outdoors though, there is something there for every level of skill and everyone to enjoy!

Do you like to scramble or climb while out on the trail? We’d love to hear about it in the comments below.

Respect The Sun When You’re Out On The Trail

In many parts of the world, it’s that time of year where the spring is drawing to a close and the call of a long hot summer beckons. Well, hopefully a hot one with plenty of nice sunshine to soak up and enjoy.

Hiker In The Sun

The longer days of summer and the nice weather of course provide the hiker with lots more opportunity to get out on the trail. I like hiking any time of year but it is hard to beat hiking on a beautiful summers day. Not only is the weather a lot more amiable but the views can often be much better as your chances of a clear blue summers day sky increase.

However, as with all good things in life, you can have too much of a good thing and you need to remember to respect the sun when you’re out on the trail.

Drink Plenty Of Water

The first thing to mention is that when you’re hiking in a hot sun, you’re going to dehydrate a lot faster than normal. As a rule you should drink water regularly on the trail anyway but on a hot summers day, you should have some extra water supplies with you.

Drinking Water In The Heat

If you’re really heading out into the wilderness, it’s a good idea to know where your next available water source will be just in case you run into any problems.

As a separate note, would you like to have ice cold water with you out on your day hike on a hot summers day? If so, check out this post for a neat tip!

Use Sun Screen

Whether you’re hiking on a trail or lying on a beach, this is a given. Bring lot’s of sun screen with you to protect your skin from burning. Be sure to cover all exposed areas. Many times prime areas that are just ripe for burning can be omitted by accident. Places like the tips of your ears, your nose, that type of thing. Be sure to top up regularly too.

Having after sun with you is also a very good idea!

Wear A Hat

There are lot’s of different hat options you can choose from to protect you from the sun. This is especially important if, like me, you have a bald head.Flap Hat 03 Khaki W15S46DIt will burn fast if you don’t cover it up properly with a hat as well as using sun screen. Hat’s also serve other useful functions too like keeping the sun out of your eyes or protecting your whole neck, depending on the hat you choose of course.

Wear Sunglasses

No, this isn’t to make a fashion statement but that can be a side benefit 😉

In bright sun, you can easily get blinded for a few seconds and that can lead you to lose your footing or make a bad call on a piece of terrain or the like. Also, if you’re hiking high up enough, you will possibly have snow to contend with and the sun reflecting from it can be too much for your eyes to handle.

This is wear sunglasses really play their part. You need the right kind of pair though so it is worth investigating to get the right ones. I might do a piece on this in the coming weeks to provide some more information on what to look for as I will be purchasing a pair for my Mont Blanc trip in the next week.

Cover Up Where Appropriate

Yes indeed, this can sound a little bit odd as surely when the sun is out you want to bask as much of your body in it as possible! Well, yes and no. If you’re out on the trail all day in the sun, you may be better off to cover up by wearing pants and a long sleeved shirt or tee.

I am of course referring to ones purpose built for wearing in the sun. These are loose fitting, moisture wicking, light colored, very breathable, lightweight and have some level of UPF (Ultraviolet Protection Factor) protection in the material. Convertible hiking pants are also great for hiking in the sun as they give you the option of wearing shorts for a time. as and when you need.

Zip Conversion of Hiking Pants Into Shorts

Getting purpose built gear for the sun is important as it takes lot’s of issues you normally take for granted into consideration. Chaffing is one example that springs to mind. When you’re sweating that bit more in the heat, chaffing can be a real problem if you’re not in the right kind of gear.

Somewhat ironically, the hotter the environment you’re hiking in, the more you may need to cover up as you really need to protect your skin as it’s just too hot. I am thinking here about deserts and some places where the sun is particularly strong ( New Zealand is one example of where you can be out in not excruciatingly hot sun but you burn quite easily and very quickly.

This is apparently due to the ozone layer being that bit thinner further south closer to Antarctica, therefore the same would apply in other southern regions on the same latitude e.g. places in South America ).

Finally, and this would really be for the more adventurous hiker, you may not always be in hot environments when you have to contend with the sun. As referred to above, if you’re high enough, you’ll likely be surrounded by snow and need to cover up appropriately. The power of the sun will still take it’s toll whether it’s cold or hot.

Heat Exhaustion

You need to watch out for this one among yourself and  fellow hikers. Often times people can just overdo it and not even realize before this starts to impact them, especially if they’ve been out in hot sun for several days. There are two things that can help cause this 1. water depletion and 2. salt depletion.

There are many symptoms to watch out for e.g. fatigue, excessive thirst, dizziness, nausea, headache, rapid heartbeat to name just some of them. To treat heat exhaustion, get out of the sun, drink plenty of fluids, remove any unnecessary clothing and try and cool down as much as possible.

If you don’t see signs of improvement within 30 minutes you should contact a doctor. If not treated it can lead to more dangerous problems like hyperthermia. I think this topic probably deserves a whole post of its own as there is a lot more to it.

In short, as mentioned above, drink water regularly and have some salty snacks to keep you ticking over to help avoid this.

Conclusion

Hiking in the sun especially in summer can be just stunning. You can enjoy some of the best views you’re likely to see all year round and it’s nice to be able to put the rain jacket into your pack for a while!

However, as with all good things, you can have too much! You need to respect the sun. It’s beautiful but very powerful, and it can cause you problems if you don’t prepare yourself properly. I hope these few simple tips will help you enjoy your hiking experiences in the sun all the more!

Remember, sometimes it can be just too hot and humid to hike in and it might just be better to leave your hiking trip for another day. As always, be sensible as while hiking in the sun can be beautiful, if it’s too hot, humid etc. you will get uncomfortable very quickly.

Have you any good tips for hiking in the sun? We’d love to hear about them in the comments below.

Be Sure To Eat And Drink Regularly On The Trail

It’s important to eat and drink regularly on the trail, even when you’re just out for shorter day hikes. As you move across different terrain you will be exerting your body to harder levels at varying times and so you will be consistently burning energy and dehydrating as you go.

Therefore you need to be sure you keep yourself well hydrated by drinking plenty of fluids and have regular energy top-ups from snacks to keep you going comfortably.

Hydration

This one really speaks for itself. We all know how important water is when you’re doing any activity, not just hiking. It is really important to take time to re-hydrate yourself at regular intervals out on the trail. As a general rule, you should aim to have a drink every time you stop for a break.

Man Drinking Water

Keep a special eye on this rule in colder climes though as you may stop less as you want to keep moving to stay warm. You still need to make a point of drinking regularly though. That’s where the hydration pack really comes into its own as it enables you to drink while you keep moving.

What to Drink?

With regards to what to drink, I usually take a mixture of drinks. Water for hydration purposes and sometimes tea if it’s cold on the trail, a hot drink will be welcome when I stop for a bit, especially after lunch.  A good flask keeps my tea warm.

Other options to take are some of the sports drinks that replace electrolytes and salts. I’m not a fan of these personally.

I would definitely not take fizzy drinks, not my cup of tea in general and not as good as water when it comes to re-hydration. Coffee should probably be left out and, if I’m honest, tea should probably be on the leave out list too as, like coffee, it’s a diuretic. So technically they may dehydrate you somewhat.

There’s nothing quite like a hot cup of tea or coffee on a cold mountain side while looking out across a stunning vista though and the morale boost is quite something else I find! So, one or two small cups won’t hurt 😉

Food

I did another post on what types of foods to take on the trail, especially for a day hike so I won’t go into too much detail again here. The main thing to say here is it’s good to snack regularly on the trail in small amounts to help replace energy as you use it.

As some quick pointers, salty snacks are great to nibble on as they will replace any salt you lose from sweating. Also, cereal bars can be handy to have. Normally I would not eat cereal bars regularly as part of my diet as I think they’re just bars of sugar. One or two on a hard hike I think are fine though, great for an energy boost when you need it.

Chocolate is also a favorite of mine, another winner for that short little burst of energy. You can take a chunk as and when you need it. Like hot tea I find chocolate can be a nice little morale booster too, especially on a cold and wet day.

Of course, if you’re out on a day hike, you will need a lunch. There are multiple options for this e.g. sandwiches, pasta, whatever takes your fancy really as long as it’s handy enough to eat and packs some carb energy. Nuts and fruit should get a special mention too as I take almonds, apples and bananas out most weeks.

Almonds

If you’re trekking for several days, you of course need to be a lot savvier with your food list as you need to cover multiple meals over several days. I think I’ll leave that for another post though 😉

Conclusion

This post was just a short one to highlight the importance of eating and drinking regularly on the trail. It’s also important that you eat and drink reasonably good stuff too, so leaving the Twinkies and soda pop behind is probably a good idea 😉

To have good snacks and so on with you can really add to your enjoyment on the trail! You want good food that will help keep your energy levels up and your spirit high! Remember to always take any rubbish, wrappers, fruit remains, etc. away with you.

Do you have a favorite food or drink you like to take with you out on the trail? I’d love to hear about it in the comments below!

How To Prevent And Treat Foot Blisters On The Trail

Ah the dreaded blister! The all too familiar nemesis of many a hiker 🙂

As I’m sure you know blisters are caused when too much friction is repeatedly placed between your clothes and your skin. Heat, dirt and moisture all play their part in a blister forming too.  The main area where this problem is experienced is of course on the feet. Nothing can spoil your hike faster than a nasty blister and turn a pleasant experience into a very annoying one indeed.

Foot Blister

Invariably they happen when you’re already half way up the mountain so you may have to wait till your hike is finished and you get the whole way back to your car to be able to to truly relieve it by taking your boots off!

OK, before looking at some tips on how to treat foot blisters on the trail, I wanted to to look at a few things you can do to not get blisters in the first place, prevention is always better than cure! Lets get started!

How Best Can I Avoid Blisters?

Listed below are a few simple pointers to help you avoid getting blisters in the first place:

  • A blister can start off as a simple annoyance that you feel on your foot that gradually builds more and more as you walk. The first tip is to not ignore it as soon as you notice it. If a quick adjustment of your socks or boots will do the trick to alleviate the problem, take the time to do so!
  • If the first step doesn’t work, you can put a plaster over the aggravated area. This is likely to look like a red spot in the early stages. The main point here is that you don’t need to wait for an actual blister to form before putting protective dressing over the affected area.
  • Always be sure to wear the right hiking socks! I can’t emphasize this enough and I always think it’s as important to wear proper hiking socks as it is to wear proper hiking boots! Your socks should be smooth and be able to wick moisture, which can expedite blister problems, away from your feet. This should be standard with any good pair of hiking socks.
  • As well as your socks, be sure you have good fitting boots that you have broken in adequately before you take them out on the trail. Better to take them out on shorter hikes first and build them up over time to give your feet time to adapt them.
  • If you find yourself feeling a blister twinge or if your feet are getting too wet from sweat and so on, if it’s practical to do so, take your boots off when you can and let some air in at your feet to let them cool down and dry. Can do your feet the world of good blister wise and also just feels very pleasant if you’ve been hiking hard for the last few hours 😉
  • I came across a neat little trick while hiking in the Alps in June this year. I did a full post on it but in short, if you’re hiking for many days in a row, smearing your feet in Vaseline can be very effective in preventing foot blisters.

How Do I Treat a Blister If I Get One?

It’s always a good idea to have a first aid kit in your day pack while out on the trail. You can make up your own kit or if you prefer, you can buy a ready made first aid kit. In that kit you should have things that can help treat a blister:

  • The first step is to clean the area with sterile water, try your best to clean your hands first. Anti bacterial gel or ointment will be great for that.
  • Now, the next step does go somewhat against advice you normally hear, or at least I have heard before. Assuming the blister is causing discomfort when walking, you want to pop your blister at its base with a sterile needle if you have one. Normally I believe the advice is to leave the blister alone and not to pop it if you can. However, as you’re hiking you will only continue to aggravate it and make it worse if you don’t pop it.
  • Drain the blister in full and don’t remove the loose skin over it, this will help protect against infection.
  • Clean the area again with antiseptic or a sterile pad and water. This really helps speed up the healing process. A sterile pad should be standard in any first aid kit. When finished dry it up, letting it air dry is great if possible, should only take a few minutes.
  • Next, you want to apply a protective dressing. Again any decent first aid kit should have something for this as standard. A plaster, gel pad, etc. will all be fine to do this with. There are plenty of purpose made blister pads which are a great addition to any first aid kit if you don’t have any. Whatever you use, ensure the dressing is secure. If necessary, secure it using dressing tape.
  • Finally, be sure to remove your dressing and let air at the blister when you can after your hike, it will help with the healing process. However, be careful with some types of blister pads, as they may need to stay on until they come off naturally i.e. they’re designed to help the healing process, so it might be better to leave them on.

Conclusion

As a hiker, blisters are definitely something you want to avoid on the trail as much as possible. The only time I have experienced minor issues with them myself has been on longer multi day hikes like when I did the Camino de Santiago. Nothing major and I knew what to do so it worked out fine.

Blisters have have never been an issue for me on day hikes but they do happen! Hopefully the tips provided above will help you avoid ever getting them in the first place or, if you’re unlucky enough to get a full on one, you will have some ideas on how best to treat it to enable you to continue on and enjoy your hike!

Have you any good tips for avoiding the dreaded blister on the trail? I’d love to hear them in the comments below!

How To Weight A Backpack For Training Purposes

Today I wanted to take a look at how best to weight a backpack for training for a bigger trek or hiking trip. As I have alluded to several times over the last month or two on here, I am planning to undertake my biggest hiking challenge, to date, this year in June. That challenge is to climb Mont Blanc in the Alps, the highest mountain in Western Europe.

Backpacker Packing A Pack

One of the key pieces of kit I will need for that trip is of course a good backpack and my search for a suitable backpack is ongoing. (I've pretty much picked the backpack I will use and will likely purchase it this week).

Anyway, once I have my backpack, it occurred to me that I can't just show up to the Alps with my new backpack filled up with gear and head for the summit! I will not be used to carrying gear for multiple days on my back while ascending a very large mountain like Mont Blanc. Therefore, I will need to 'pack' my pack, so to speak, in advance and get used to carrying a similar weight of gear on my back.

This was fine and I figured that once I got my backpack of choice, I would weight it up to take on my normal weekly hikes. That should get me up to some reasonable level of being used to hiking with the heavier weight of gear on my back when doing the real thing.

However, the next thing that occurred to me was, what should I pack it with to add weight!?​​​​​

Our Top Men's Backpack Pick: Osprey Atmos 65 AG 

Osprey Mens Atmos 65 AG Backpack

The Osprey Atmos 65 AG is a 65 liter is an excellent backpack that delivers outstanding ventilation and carrying comfort.

View More

Weights and Bricks?

Now, you may be thinking, don't be silly, just get some heavy bricks or a dumbbell or two and fire them in. Well, when you think about it, they probably wouldn't be very good things to put in a backpack. They are heavy but over quite a small surface area. If anything, this could very well damage a backpack as it would have too much pressure on one smaller part of it. It could very easily rip a hole open or warp the backpack in some way!

After some consideration, I thought I would consult one or two of my hiking friends who have been on many backpacking expeditions before to get some tips. Here's what they recommended to use when trying to weight your backpack for training purposes.

What to Use to 'Weight' Your Pack

Bottled Water

This was top of the list. A few big bottles of water can easily fit into pack and laid across the bottom. This should spread the weight relatively evenly across the pack. Another great advantage of water is that it's easy to offload if things get too hard to carry. Just open the bottles up and pour the water out!

Old Books

Another easy and convenient thing to use is to put a few big books into your backpack. This will add some significant weight to the pack but you probably need to add a fair few of them in.

Books

Be sure to use books you don't care for too much as they will likely get a bit rustled up in your backpack while out on the trail with you!

Magazines

Similar to books, although they do have the extra advantage of being more disposable. That is, you're probably less concerned with what happens to some old magazines of yours than part of your book collection 😉

OK, I was happy that I had several easy options for weighting my pack but then another question formed in my head!?

How Much Weight Should I Add to the Backpack?

The approach I have taken to this is very logical 🙂 and I hope sensible! In short, I am going to pack the backpack up when I get it with all the gear I think I will need to have in it for my trip.

Now, unfortunately some of the gear I don't actually own and I will have to hire it when I get to the Alps. For those pieces, I will need to do some research and make approximations. The company I am going with have provided a gear checklist so this should be relatively easy to do with a bit of research.

When I have all of that, I should be in a position to give a pretty good estimate of the weight of the backpack I will need to carry for the 6 days on my trip. Then I can weight up accordingly for my normal weekly hikes in preparation!

Conclusion

I was in two minds about whether this should be a post or not as, like most people, when you first think about weighting a pack for training purposes, you assume it's very straightforward i.e. just put heavy stuff in your backpack.

However, after consideration there were a few things I wasn't sure about and so thought it best to ask around to see what may be the best approach. I'm happy that I have found the best approach for this which is to use bottled water, large bottles, to an approximate weight of the actual gear I will carry in the backpack for the trip. A few of my regular hiking outings with that before June should get me in good shape for the real thing 😉

As an aside, It's worth noting that there is a whole method and science to how you 'pack a backpack' too. That is, what items you should put to the bottom first and so on. This makes a lot of sense and is something important to learn for any trip you will be undertaking with a backpack.

Check out this guide on what I take for a 2 to 3 day backpacking trip, that goes into the details. In short summary, pack what you will need soonest, say rain gear, at the top of your backpack and what you won't need soon, say a sleeping bag, at the bottom.

I think everyone needs to develop their own optimum solution or system to this but these basic guidelines help simplify the process. I'll be sure to add up a post on that at some point and link to it from here, it may be helpful to folks new to backpacking / wild camping.

Finally, if you're looking for a backpack or a day pack, you can start your search right here. Check out some nice day packs here, these are perfect for a day hike on the trail. If you need something more substantial and in the vein of this post, to carry kit for several days, check out our top pick backpack in the red box above.

Have you ever weighted a pack for training purposes? Any other suggestions on how best to do it? I'd love to hear about it in the comments below!

Hiking In The Desert

Recently I touched on hiking in deserts when looking at seasonal conditions to consider when planning a hiking trip. I thought it could be interesting to extend on that area some more and today I wanted to look at hiking in deserts in more detail.

Myself, I am a pasty white Western European from Ireland 🙂 . While I do tan, if I am careful and wise with my sun screen use, I am simply not genealogically built for the desert climate. I have experienced the desert a few times, once on a visit to Tunisia and more recently when in Death Valley.

While in Tunisia I got to see the Sahara in all it’s punishing majesty and beauty. It is a sight to behold but has ‘don’t mess with me’ written all over it! Death Valley too was quite the experience and again, truly beautiful and majestic place.

Hiker In The Desert

In my first experience in the Sahara, when I was there I really only went for a short walk, not really a hike. I also rode a camel (I had to give  a camel a go when I was there, when in Rome and all that) and a horse.

It was mid April. Even though I only went for a short walk in, what the locals would consider, a milder time of year, I could immediately feel the impact of the searing sun on my body.

It’s a tough place to be and how nomads eek a life out of the desert is just amazing. I saw some of them while there. They had very dark leathery skin which is no wonder if you spend all your days in that environment.

When in Death Valley, I did venture out onto the trail and did some short enough hikes, maybe 4 to 5 miles. Again, even though it was springtime, I found the heat tough as I hiked.

So, with the above in mind, let ‘s take a look at what you may need to consider if you’re planning on hiking in a desert anytime soon. Deserts aren’t typically places I seek out to hike in, however the experiences I have had, I have enjoyed so I will most likely be back in one at some point the future.

What is a desert?

I thought we could start off by taking a look at the definition of desert. There are several ways to classify a desert.

One way is that a desert is defined as a place that receives less water by precipitation (through rainfall, snow, etc.) per year, than it loses in evapotranspiration (the loss of water through evaporation and plant transpiration). In short, water evaporates at a greater rate than it falls.

To try and give you some kind of a yardstick to do a comparison with, I am from Ireland. Ireland, which granted is a very wet country, gets between 75 and 125 centimeters (29.5 and 49.2 inches) of annual rain, depending where you are in the country, per year.

Ireland’s climate also means that it has a low evapotranspiration rate so it keeps a lot of the water it gets through rain etc. for much longer periods.

A desert will get, approximately, less than 25 centimeters (10 inches) of rainfall per year and loses that water at a much quicker rate than it falls.

As a result deserts are naturally very arid and baron places where water is very hard to come by. There are also other classifications of deserts e.g. semi-deserts. However, in the context of hiking they are treated more or less in the same way.

Some very cold regions also meet the criteria for deserts, as even though there is water in the ice, there is no evapotranspiration going on. With that in mind let’s look at the first key challenge of hiking in the desert.

Water

As mentioned above, there is not a lot of water in a desert. Therefore, you need to carry lot’s of it with you. The problem here is compounded by heat of the sun during the day so you’re going to lose lot’s of water by sweating more than you normally would.

Add hiking on top of the heat and you’ve even more to contend with. You will dehydrate at a much faster rate.

Drinking Water In The Heat

Ideally you should carry as much drinking water with you as you think you will need, then double that estimate. Always better to have more than less. You can sometimes find water on the trail but you need to be careful with it as it will likely be filled with bacteria and viruses.

Filters and purification tablets, for example iodine, can help with that problem making water safe to drink, and it is good to have a back-up solution to the water supply you are carrying. We’ll look at filters in a bit more detail in the gear section below.

The Sun

The sun is of course the main thing you have to contend with. You need specialized gear which we will look at next but you also need other common sense stuff like plenty of sun screen and after sun.

Setting Sun In The Alps

Due to the hot sun, a real threat in desert heat is heat exhaustion. This is caused by any strenuous physical activity in high temperatures.

As you are constantly on the move while hiking, you could be a prime candidate for this. Heat exhaustion can lead to heat stroke and onward to hyperthermia, hypothermia’s lesser known cousin, which are life threatening.

Another thing to consider is that as you are sweating so much, not only are you losing water but you’re also losing much more salt than you usually would which could lead to low sodium levels.

As you drink more water to replenish your water levels you can also be flushing out more sodium in the process. To avoid this, bring salty snacks with you and eat them as you go.

If you can, avoid the hotter times of the year and travel when the temperatures are lower and as friendly as possible. If possible, also aim for places that have some known water spots as you pass through.

In summary, always respect the sun when you’re out on the trail, never mind being in a desert. Of course however, a desert in terms of the power of the sun, is usually always significantly more intense.

Navigation

Again, I think an experienced guide is a must for your initial hiking trips into the desert. A key reason for this is navigation. When navigating, a major part of it that you use in normal conditions is to identify land masses and marks you see on your map with what you see as you hike.

This helps you orientate by establishing your position. Crucial to have any chance of knowing where you’re going!

Compass

I have never tried to navigate in a desert and can only assume it is very difficult as identifiable land masses or marks will be few and far between.

In short, it’s a sea of sand so navigating will likely be very difficult.

Technology should be a big help here but for those emergency situations if something breaks, it’s good to be able to rely on a map and compass which I assume would be much trickier in the desert.

It is possible there could be trails in the desert but be very careful if you’re any way unsure. Getting lost in a desert is not something you want to do!

Weather

We already looked at the sun but the weather in the desert can present other unique challenges. Many deserts have a rainy season which although brief is the main provider of the yearly rainfall.

At this time there can be dangers of flash floods in places like canyons and dry river beds. Hiking just after the rainy season should mean there is more chance of finding more water spots on the trail. Yes, it is possible that in an emergency you may need to consider drinking water you find on the trail.

Some deserts will also have thunderstorms and lightening as part of their normal weather patterns due to low pressure build up because of the heat.

Try and get shelter if you get caught in one but be careful where you choose to take shelter i.e. any shelter in the desert will likely be made of rock so if there’s lightening be sure to insulate your feet from any rock or ground you may be standing on.

Standing on your pack or something else should keep you safe. In short avoid any direct connection with the ground as you are effectively a live and primed lightening rod!

Gear

If there was ever a place where you needed good gear, the desert is it. You will need lots of water bottles to carry water and you will need some filters and a water purification method for your bottles. As mentioned above, ideally you carry your water needs with you but it is possible that you may need to drink water on the trail.

Water in the desert will most likely be polluted with bacteria and viruses so you need to be very careful with it. A filter will help take care of dirt and such but you will also need some kind of purification chemical like iodine to kill off said bacteria, etc.

You can get filters that have purification means included. However, I am not an expert on water filters and purification methods best suited to the desert, so I suggest you do a lot of research to find the best way of purifying water in that environment in an emergency.

Water is critical so you need to use something that gives you the confidence to be comfortable drinking it.

If you’re camping you will of course need a suitable tent or shelter and carrying some kind of tarpaulin to provide shade when you stop for breaks is a good idea too.

For clothes, you will need full body protection so starting from the top, a wide brimmed hat that will protect your head and neck from the sun is a must. Next you will need a loose and breathable hiking tee.

Long sleeved could be a good option too to protect your arms from the sun. Be sure to check your tee is suitable for the desert and that the sun can’t get through. Light hiking pants with a high level of UPF protection are also a must.

You will need a rain jacket but not just to protect you from water! Most rain jackets are windproof which you’ll need to protect from high winds which can be common in the desert. Depending on when you travel to the desert, rain may be a factor you’ll need to protect yourself against too.

Next you’ll need a good pair of hiking boots that are suitable for hiking in the desert. I would suggest looking for breathable boots with functional specifications like a gusseted tongue to help keep sand out of your boots. 

Also, in general, you want to use light colored clothes that will reflect the heat of the sun. However, temperatures tank in the desert when the sun goes down so, ironically, you will need some clothes to keep you warm during the evening and night.

A fleece or two should do the trick and you may want to pack a warmer pair of pants for the evenings too.

Finally, and I always feel this deserves a special mention, you will need good hiking socks that you’ve already broken in. I always say that hiking socks are as important as your hiking boots when it comes to the trail.

The desert is no different. Feet sweat a lot in normal circumstances so you can imagine how much more they will sweat in a desert!

Finally, it is worth giving a mention to the sand storm. I have never been in one and I hope I never will be. In those kind of conditions I assume you just need to get down and completely cover up. An emergency shelter may be of use in that scenario should you be unlucky enough to get caught in one.

Guides

If you’re not experienced at hiking in a desert then you should have an experienced guide with you. There is no debating this one. The desert will eat you up very quickly if you don’t know what you’re doing so experience is key.

Guides will know when the best time to go is, where to camp out, if you’re camping out, and how to read the weather and so on.

Wildlife and Plants

Deserts are home to some of the most beautiful and unique plant and wildlife on the planet. However, you need to be wary of some of them. For example, scorpions are a desert resident and the last thing you want to do is get stung by one as a scorpion sting, will at best be unpleasant and at worst potentially lethal.

Emperor Scorpion

Some scorpions are known to be fond of dark cool places like the inside of an empty hiking boot so be careful when you take your boots off and put them back on.

Scorpions are not the only creature to consider, you will have others like snakes, lizards, etc. who can pack a nasty punch too.

Desert plants can also be tough characters. Many of them have barbed like parts, think of a nasty cactus plant, that can really cause difficulty if you’re unfortunate enough to get caught up in one. Some of these are like spears so keep clear.

The advice here is to again do significant research in advance of what you need to protect against and prepare for in the desert you will be hiking in.

Again, this is another instance where experienced, and ideally local, guidance is invaluable and something I would not be without in my first ventures out into the desert hiking.

Conclusion

When you first think about hiking in a desert, the immediate thought is generally, ‘OK you’re nuts! Why on earth would you want to go and hike in an environment as forbidding and potentially dangerous as that?‘

However, when I stood looking out across the Sahara the first time I ever encountered a desert, while on one side, as mentioned above, I was humbled by the punishing authority of the environment, I was also taken aback by the sheer majesty, beauty and feeling of limitlessness that it offered too.

There are many unique plants and animals to be, frankly, amazed at as well. How anything can survive there is a testament to the resilience of life.

It is hard to put it all into words but it was something that I know I will like to experience again so I personally will plan desert hiking trips again in the future.

Finally, I feel I need to put a disclaimer of sorts on this post. I am not an experienced desert hiker and as such need to be clear that the above is only offered as general guidance on points to consider.

If you’re planning to hike in the desert sometime in the near future be sure to get the right guidance from experienced desert hikers and ideally have a professional, local and experienced hiking guide with you on your trek.

As mentioned several times above, the desert is an unforgiving place and will show little mercy if you do not respect it appropriately. In short, use common sense, research your destination well and get experienced local guidance.

Have you ever hiked in the desert? What was your experience like? I’d love to hear about it in the comments below.

Hiking Trail Etiquette

Today’s post is about hiking trail etiquette. While out hiking recently with a group, we came across a small river that we had to cross to enable us to continue on to the top of the mountain.

As we approached the river, we could see there was another group of hikers approaching from the other side who would reach it at about the same time as we did. There was only the one place to cross, a series of stepping stone rocks sticking out of the river, which we were both walking towards.Hiking EtiquetteAs expected both groups reached the stepping stones at the same time and one of the other party went to start to cross but another man in their group told them to stop and let us pass first.

This is correct based on standard hiking etiquette as they were coming down the mountain and we were going up. It was interesting to witness while out on the trail and afterwards, when I queried some folks in my group on it, most didn’t seem to know that there were ‘rules’ as such. So, I thought a post on hiking etiquette might be useful!

Common Sense

First and foremost, common sense prevails. Even if the rules state that you should do one thing but the situation clearly indicates the opposite is a better course of action, then common sense wins every time.

However, there are some basic rules of etiquette out on the trail which provide general guidelines to follow to help ensure everyone can have as an enjoyable a time as possible.

Right of Way

As already mentioned, if two parties meet on a tight spot on a steep trail, as a general rule the group going uphill has the right of way. Also, when trying to pass someone out, follow the rules of the road in the country you are in. So if you’re in the US, pass on the left. If in the UK pass on the right. Again though, common sense applies, so if it isn’t wise to pass in a standard way, then use your best judgment to do it.

Hikers in Mountains

Another aspect to this I came across just now, which I honestly hadn’t considered before, is to do with other users of the trail. In places, it is possible that you could be sharing the trail with other non-hiking parties. For example, mountain runners, people on horseback and people on bikes.

For runners, they should follow the same etiquette as hikers but if they’re running at pace, it might be considerate to let them pass first even when you’re going uphill. Horses are one that I have not personally encountered on the trail but it is bound to be a regular enough occurrence in certain places. Horses have right of way over people so step back and if you can, step off the trail away from the direct line of the horse to avoid giving it a scare.

Finally, as mentioned above, another party who you might bump into on the trail are mountain bikers. When encountering bikers, bikers should give hikers the right of way. However, be careful with this.

I was hiking up near my hometown not long ago and they have recently opened mountain bike trails there. Some of these are clearly marked for bikers only so keep an eye out when you’re in places that have marked trails specific for mountain biking.

In summary, when meeting other parties on the trail, right of way normally goes to horses, hikers and then bikers in that order.

Close That Gate!

First off, my thanks to Mark for mentioning this one to me in the comments below. I am not quite sure how I missed it as it’s one I regularly come across!

When you’re out hiking, sometimes you may cross farm land or other types of private property. Always respect the fact that you’re on someone else’s land and close all gates or follow any other rules the landowner may ask of you. If they’re good enough to let you cross their land you should always show your respect in return by following any rules they have while you’re on their property.

Farmers Gate

Leaving a farm gate open can have serious consequences. For example, if a herd of cows gets out onto a public road, it could cause a lot of problems and possibly accidents! Many times when I’ve came across open gates or that, I like to think that people do it because they just don’t realize rather than with any malicious intent. However, it’s still something that needs to be taken seriously.

As per the final key point below, leave no trace you were there! If a gate was closed when you found it, be sure to close it again when you go through it! If you find a gate lying wide open, it’s no harm to take the time to close it over if it looks like it should be closed. Common sense again comes into play here too 😉

Speed

Sometimes, it can be good manners to let the slowest hiker set the pace if you’re in a group. This will ensure that a gap does not develop between the slower and faster hikers.

I know from personal experience however, that this can drive a lot of faster hikers crazy though. That is why in hiking clubs and associations, hikes are normally graded putting people of similar ability together.

Safety

As well as having someone leading a group hiking, following the chosen route etc., it is normal an experienced hiker takes up the rear of a party or group. They can help keep an eye on everyone and ensure that no-one falls behind, gets into difficulty, etc.

This is not always required e.g. in smaller groups. Either way, safety is paramount when out on the mountains and whomever is leading the group should always act in a safe and conscientious manner taking the safety of all the group into consideration.

Noise

Generally, avoid making lots of loud noise while out hiking. This would mainly be described as needless and loud shouting. However, I have read that making loud noises can in fact be a good thing though when hiking in certain places e.g. if you’re hiking in bear country.

I have hiked in bear country, only a couple of times, but I’ve never encountered a bear, thankfully! Apparently some noise gives the bears some warning of your approach which I assume is overall a good thing, as if you surprise a bear they are probably going to be more aggressive and freaked out into the bargain. Probably depends on the bear though, I doubt a grizzly will have too much concern about a few humans coming their way 🙂

Also, while you should always have your phone with you as your most important emergency device, don’t abuse it on the trail by playing music or having loud conversations on it, etc. The trail is the place to get away from the technological joys of life, not to indulge in them!

Leave No Trace

I did a detailed post on Leave No Trace which is worth checking out but in brief, when out hiking, leave the land and space exactly as you found it. Their mantra, which is pretty succinct and cool, is:

“Leave nothing but footprints. Take nothing but photos. Kill nothing but time. Keep nothing but memories”.

Conclusion

I hope you find this post on some of the basic rules of hiking trail etiquette useful. When out on the trail, as in life in general, it is good to give some consideration to others.. Overall, as said at the start, common sense should prevail and it would seem odd to me that there would be any reason to have disagreements or problems. I’ve never seen an argument on the trail and most times hikers will be well spread out so bottlenecks are unlikely, even with big groups.

However, good manners is always a good thing and costs nothing to offer. With that in mind always be mindful of your responsibilities, in the guidelines listed above, to your fellow hikers and other trail users while out enjoying the mountains.

Happy hiking 😉

Have you ever encountered bad manners on the trail? We’d love to hear about it in the comments below!

Hiking Boots – Finding The Perfect Fit!

Never let anyone tell you otherwise, choosing your Hiking Boots is a big deal! And part of that choice is finding the perfect fit for your feet. Hiking boots come in all shapes and sizes as do feet and you will likely be wearing them for long stretches at a time.Lowa Renegade Mid GTX Hiking Boots For Men Gallery One

Hiking boots are also a bit more expensive than your average boots or shoes. Therefore, it is worth spending a bit of time thinking about what you need to look for when looking for your ideal boots!

As an overall guide for choosing a pair of hiking boots, check out this guide on how to choose hiking boots. In this post, I want to expand on this topic a bit further and take a look at some common sense tips you can use to help you find the perfect fit boots for your feet.

Try Hiking Boots on in the Afternoon

A hiking friend told me about this, I thought he was a bit barmy. The reasoning behind this is that your feet will naturally be a bit swollen
in the afternoon from walking most of the day so you will have a more realistic version of your feet size when trying your boots on.

Having queried this in a few places, there is apparently truth in this and your feet will be a bit bigger in the afternoon. It was a new one to me too I have to admit 😉

Wear Your Hiking Socks

Good hiking socks are really important to the overall comfort and fit of your hiking boots or shoes.  I mention this a lot but it’s worth adding here again.

Choose Hiking Socks

When it comes to your hiking boots or shoes, always wear your hiking socks when trying hiking boots for size as your hiking socks are always that bit bigger than standard ones. This will impact the fitting and therefore the comfort of your boots when you try them on.

Orthotics

Similar to socks, if you always wear orthotics or use any kind of foot support on a day-to-day basis, be sure to incorporate them when trying on your hiking boots. They will have a significant impact on your fit and comfort.

This will be obvious I feel to people who actually wear them but it’s worth adding a note in on it all the same. If your orthotics don’t work with standard hiking boots, you can always look to get custom made ones.

Boot Fit

The boot should be snug but not tight on your foot. As a general rule, there should be enough space of about a finger width between the top of your toes and the top of your boot. When you push your foot forward in your boots, you should be able to slide a finger between the back of your boot and your foot.

The boots also needs to be wide enough to let your feet move. This is a common one I notice people having issues with if they have wider sized feet. A good way to account for this when buying online is to check out other customer reviews. For a popular boot, you’re bound to see some comments in there on that topic and many boot manufacturers these days offer wide feet options.

Measuring Your Feet

You likely already know your shoe size but it is worth getting your feet measured anyway. Both when you stand and when you sit just in case there are any minor deviations in size, due to more or less pressure on your feet, which could cause discomfort.

Shoe Measure

Be sure to request this from the sales person if you’re in a shop or do it yourself if buying online. You will also likely be aware of any other sizing nuance your feet may have so be sure to take that into account too.

Note: Keep in mind any common sore points you may have. For example, if you regularly get hot spots and blisters on a certain part of your foot, be sure to factor that in to your fitting and decision making process.

Stand on a Slope in your Hiking Boots

Firstly, face downward. This is of course to imitate standing and facing downwards on a hill or mountainside which you will likely be doing a lot of when you’re hiking. The general rule here is that you don’t want your toes hitting the front of your boots. This could potentially cause a lot of very uncomfortable problems, for your toes and toenails, very quickly and you won’t be able to walk long with pressure like that if it’s the case.

Next, face upwards on the slope. Push your heel up as far as you can. It shouldn’t come up more than 1 cm or 1/2 an inch.

Another useful thing to do, can be to walk up and down steps or stairs in the boots or shoes. This again will give you a feel for some different types and variations of foot movement. Again, the boots should remain comfortable and secure while moving.

Note: If you’re buying in a shop, they should have a slope tool which is made specifically to test this on. If you’re trying them on at home after buying online, standing on any kind of downward slope in your house at about a 45 degree angle should do the trick.

Wear the Boots Inside for a While Before Keeping Them

This is one of the main things I think you need to do regardless of whether you buy boots in a shop or online. Some folks think that you must try a boot on in a shop before you can decide what is best for you, so buying online may not be the best option.

However, if you get your hiking boots in a shop, granted you can do some of the above tests on the spot and you can also walk around the shop a bit to check for any issues like rubbing, tightness, etc., but you can’t walk around the shop all day!

The main thing you need to do is take them home and try them on in your house, with your hiking socks, etc. on and walk around in them for more prolonged periods of time. That’s the only real way you’ll start to get a good feel for them. If you bought in a shop or online, either way, you will be able to send them back for a full refund or credit within a certain period, usually at least 2 to 4 weeks, if you haven’t worn them outside.

This final point is the best gauge you can use to ensure you have the best chance of a winner of a hiking boot on your hands, or should I say feet 😉

Conclusion

I hope you found this short article useful. If you’re buying your first pair of hiking boots and so are completely new to this, these pointers should get you started. Also be sure to check out this article on how to buy a pair of hiking boots and shoes, there’s a wealth of information on what to look for in that.

Remember, that even when you get your new hiking boots home and have worn them comfortable for a while in the house, they still may well not be fully adapted to your feet. So if you get some initial sores when you finally take them out on the trail, you are quite possibly still just breaking the boots in and that can take a while, especially for tougher leather hiking boots.

If you’re a seasoned hiker, it’s always good to go over the basics before settling on a new pair of hiking boots. Also, like the trying the boots on in the afternoon point above, which I only learned recently, there’s always something new to pick up to help with your buying choice.

As mentioned at the start of this post, good hiking boots will cost a bit more money than standard shoes and boots but they are an investment in comfort for the trail and, frankly, you don’t have a choice if you want to hike regularly. Good hiking boots or shoes are simply a must in my opinion.

If you want to get the hunt started for a good pair of hiking boots, check this out to see some of the best boots available on the market today!

Do you have any other tips for finding the perfect fitting hiking boot? I’d love to hear them in the comments below 🙂

Always Take Seasonal Conditions Into Account When Planning Your Hiking Adventures

If you’re planning to take on a hiking adventure to a far flung location in the future one thing you will need to take into account is the seasonal conditions in the location you plan to visit. Some of the most beautiful hiking destinations in the world are in areas that can have extreme weather so it can be best to avoid them when they’re at their toughest.

View on the Kungsleden hiking trail in Sweden

This should be one of the many things that should influence your decision on where to go. This may seem like stating the obvious but unless you’re a very seasoned and experienced hiker looking for a challenge, there are some simple guidelines you should use to help ensure that when choosing a hiking destination you pick the right one.

You don’t want to get yourself into trouble or to be disappointed when you realize a hiking trip you’ve started out on can’t go ahead due to the weather conditions. In short, there are places that are good to go in every season and there are places to avoid. Let’s take a closer look at these below.

Winter

In the winter time some of the best exotic hiking destinations can be deserts, places in the opposite hemisphere, the tropics and sub tropics. Deserts are hot all year round (except at night time of course) but coolest in winter so it is a good time to experience this unforgiving environment.

Hikers In The Desert

Opposing hemispheres normally have opposite climates. So, for example, when it’s winter time in the UK it will be cold but hot in Australia.

Finally, the Tropics and Sub-tropics are best experienced in winter. The Tropics and Sub-tropics are, roughly speaking, geographic locations close to the earths equator and between the tropic of Cancer in the northern hemisphere and the tropic of Capricorn in the southern hemisphere. These regions are not necessarily tropical as such, for example deserts sit in this region. As a general rule, winter will be a drier season and summer would be the rainy season.

The places you want to avoid in winter are very high mountains and places with a very cold climate. The simple reason for this is that it will be significantly colder as you go higher up mountains. Therefore, if you think it’s cold down near sea level, it will be Baltic the further you go up the mountain.

Now, it is obviously colder at the top of mountains regardless of the time of year, but in winter time it can be a hell of a lot nastier! What’s tough and warrants caution in summer, can become potentially lethal and a no go in winter.

Spring

Similar to Winter, Springtime can be a time to visit a desert for hiking, more so earlier than later in the season when it’s closer to summer. I was in the Sahara in mid spring once and it was a sight to behold. I’ve never seen an environment like it that really emanates ‘no mercy’! Forests and lower mountains are also ideal for hiking in springtime.

Again, avoid high mountains and places with a cold climate. It can still  be very, very cold at high altitudes and not suitable for most hikers without special equipment, training, guidance, etc.

Summer

This is where the beauty of high mountains can be fully enjoyed. You can head out and enjoy all the beauty they have to offer but still be cautious and do your homework as high mountains can of course be very, very cold, even in Summer.

My trip to Mont Blanc was a good example of a very high mountain that should only be attempted to summit during summer. This is illustrated by the fact that there are normally only hiking trip holiday packages available over the summer months. I’m sure some extreme hardy folks may head up there in winter too, but it wouldn’t be the norm.

Forests in colder climate areas are great to hike in, in summer. They should be fresh, cool and pleasant. Finally if you ever want to visit Arctic and Sub-Arctic regions, summer is the best time to do it, although it still won’t be anywhere near warm!

Hikers In The Arctic

At the top of the list of places to avoid in summer are deserts. They are even more punishing and unforgiving and not for the fainthearted or inexperienced. The Tropics and Sub-tropics are also not pleasant in summertime. They will be very, very wet, humid and muggy. The possibility of getting things like malaria and other nastys also goes up in summer in tropical areas. Hot lowlands should also be avoided in summertime too as the heat can build up and be very tough to hike in.

Autumn

The best type of destination in autumn are temperate deciduous forests. Forests in Western Europe are a great example of this. They’ll be a reasonable temperature to hike in but you will still need to wrap up.

As with winter, it’s best to avoid high mountains in autumn with the winter creeping in day by day, the temperature can start to drop quite suddenly and winter like conditions can start to set in that bit earlier. However, some lower summits can of course still be enjoyed, just proceed with caution and always keep an eye on the weather forecast.

Conclusion

When planning a hiking trip away, checking the seasonal conditions in your chosen destination against your dates of travel is an absolute must It could save you a lot of time, pain, disappointment and money! Aside from that, it’s easy to do.

As with all hiking trips, you should always plan ahead sensibly and if you’re unsure ask around for advice. There’s oodles of stuff online or you could join a hiking forum to ask more experienced folks who’ve been where you want to go for advice. Whenever and wherever you decide to go hiking, always be sure to have the right hiking gear for the environment you’re hiking in, be that a good rain jacket or a sturdy pair of hiking boots.

Of course, there are places you should just have to avoid during certain times of the year as the weather is too tough! Happy hiking 🙂

  • « Previous Page
  • 1
  • …
  • 11
  • 12
  • 13
  • 14
  • 15
  • 16
  • Next Page »
  • Facebook
  • Pinterest

What are you looking for?

Copyright © 2025 · Cool Hiking Gear

Cool Hiking Gear is a participant in the Amazon Services LLC Associates Program, an affiliate advertising program designed to provide a means for us to earn fees by linking to Amazon.com and affiliated sites.

  • About This Site
  • Privacy Policy
  • Affiliate Disclosure Statement
  • Contact