coolhikinggear.com

  • Men’s
    • Best Hiking Rain Jackets for Men In 2024
    • Best Men’s Hardshell Jackets Of 2023
    • Best Hiking Pants For Men In 2023
    • Best Ultralight Rain Pants For Men
    • Best Men’s Daypacks For Hiking In 2023
    • Best Backpacking Backpacks For Men In 2023
    • Best Base Layers For Men In 2023
  • Women’s
    • The Best Hiking Rain Jackets For Women In 2023
    • Best Women’s Hardshell Jackets Of 2023
    • Best Hiking Pants For Women In 2023
    • Best Ultralight Rain Pants For Women
    • Best Daypacks For Women
    • Best Backpacking Backpacks For Women In 2023
    • Best Base Layers For Women In 2023
  • Hiking Accessories
    • Best Hiking Poles
    • Best Trekking Pole Monopod Camera Mount
    • Best Hiking Headlamps
    • The Best Hiking Watches In 2023
    • The Best Hiking Gloves In 2023
    • Best Hydration Bladders For Hiking In 2023
    • Best Compass For Hiking Our Top Picks
    • Cool Hiking Gadgets
  • Footwear
    • The Best Men’s Hiking Boots In 2024!
    • Best Hiking Shoes For Men In 2023
    • The Best Women’s Hiking Boots In 2023!
    • Best Hiking Shoes For Women In 2023
    • Best Hiking Sandals
    • Best Hiking Sandals For Women in 2023
  • Hiking Guides and Resources

El Camino De Santiago – Some Top Tips for the Pilgrims Trail

Just over a year ago, August 2013, I did one of the most popular and well known hikes in Europe. Calling it a hike would, to some, be incorrect as for many, it is first and foremost a pilgrimage.

Wooded Path On The Camino

The hike was on the ‘Camino de Santiago’ or ‘Way of St. James’. Recently I was chatting with a friend about the experience and he asked me what tips I had for it as he was thinking of putting it in on his travel plans for next year. After that conversation, I thought it might be useful to capture those tips in a post and share them here.

The Camino is a very popular hike. There was even a Hollywood movie called ‘The Way‘ made about it some years back starring Martin Sheen and Emilio Estevez to name just a couple of the actors. I watched it before I went actually, it wasn’t bad.

What Is The Camino de Santiago?

Before getting into things, some background information on the Camino de Santiago might be useful.

Historically, the way of St. James was one of the most important pilgrimage routes in medieval times. Legend has it that after St. James died, his remains were carried by boat from Jerusalem to northern Spain where he was buried on the site of what is now the city of Santiago de Compostela.

I actually did a post about a year back explaining more about the history of the Camino de Santiago so you can check that out here. Or if you would like to check out some more in depth information, you can follow my trip here.

The Camino attracts all types of hikers and travelers all of whom have their own unique reason for walking it. For many it is a spiritual journey that can be symbolic of leaving something behind on the Camino, for example after a major change or transition in life. For others it is simply a beautiful hike.

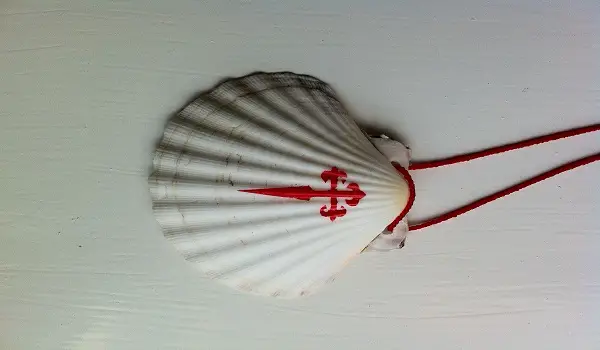
The symbol of the Camino is the scallop shell, pictured below. There are many thoughts as to why this shell is the symbol of the Camino. From being used as a drinking vessel to scoop out water from a trough in medieval times to representing the nice idea, if you follow the lines on the shell, that all roads lead to one. Every Pilgrim will have one though, usually attached to their pack. You can get them in any shop for a euro or so.

The Camino Shell

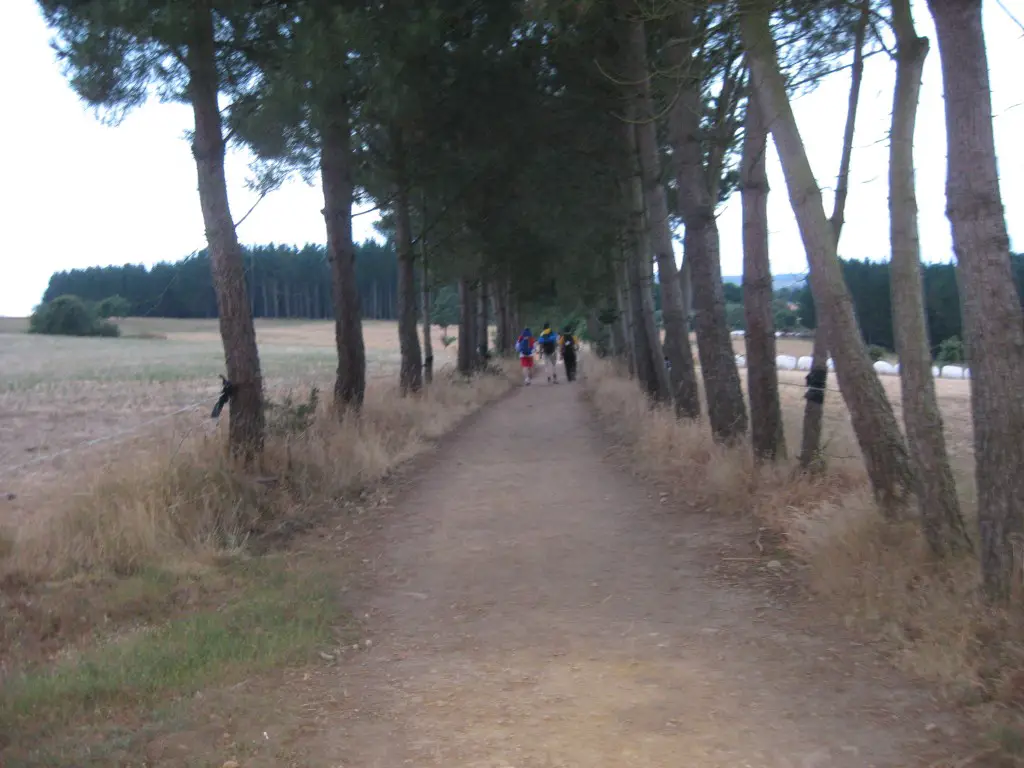
The pilgrimage can take a number of routes but the main one starts in St Jean Pied De Port in France and ends in Santiago in Spain. Most people travel to St Jean via Biarritz or Pamplona.

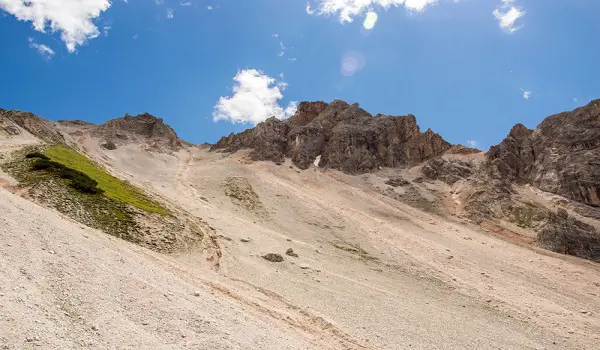
The main Camino route can also be split into three parts, the hills of the Basque country, the hot and flat section of the ‘meseta’ and the beautiful green hills of Galicia. It’s common for people to opt to do one section at a time on different trips, mainly due to the time it takes to hike the whole way.

The minimum distance you need to complete to officially complete the Camino de Santiago, defined as qualifying for a certificate of completion or Compostela, is sixty two miles on foot or one hundred and twenty four miles by bike, cyclists are just as common on the Camino. The closest big town to start from on foot, is Sarria.

Anyway, back to the main event so to speak. Below are some of the top tips I learned from my own and other peoples experience on the Camino. If you’re planning on travelling to hike the Camino anytime soon, I recommend taking a look through them as they will help maximize your experience there.

Travel Light & Smart

Whether you’re planning to do the whole five hundred plus miles of the Camino or just one or two of the stages, remember that you will need to carry all your gear with you on your back for the whole journey! Unless of course you plan to have porters 😉

You can arrange to have your gear moved on to your next location by taxi drivers and so you just have to do the walking. However, I think to really get the experience it’s better to carry it yourself. While it is advisable to book accommodation ahead it is nice to have the freedom to do as you choose as things present themselves. That is, you might take a notion to sleep by a stream out underneath the stars, and why not!

Five hundred miles is a lot of walking so first and foremost, you’ll need a good backpack to carry your stuff in. Also, you need to pack sensibly and pack light. If you bring any unnecessary stuff with you, be prepared to lose it as you will dump all unnecessary stuff as you travel. I can guarantee this as you just won’t be bothered carrying anything more than you need. You have been warned!

Bring Clothes Pegs

Following on from the traveling light point above and in line with it, you should bring some clothes pegs with you. Why clothes pegs? Well, it’s better to pack several pairs of socks and underwear that you wash every other day to reuse rather than gathering up lots of washing. Having a few clothes pegs handy means you can hang them up to dry either in your hostel or on your pack as you hike, the latter being a very common sight on the Camino.

Clothes Peg

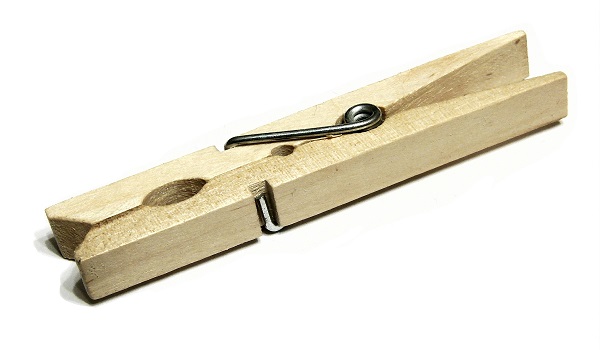
Trust me, as already mentioned, you just won’t carry any extra unnecessary clothing or materials with you when you get going and you will happily dump anything like this in the nearest bin rather than carry it needlessly for a hundred plus miles!

It’s worth noting as an aside here, the nice spiritual symbolism of this i.e. not carrying any extra baggage and dropping stuff as you go. I don’t think it’s intentionally connected but it’s a nice metaphor for what the Camino represents for many. Anyway, on to the next tip …

For Accommodation – ‘Albergue’ it!

If you want the full Camino experience, I recommend that you stay in the hostels (Known as an Albergue). In the Albergues (Not sure of the plural in Spanish!) you will be sharing dorm type rooms, see picture below, with many folks from all walks of life. The downside to the hostels is that the sharing of snores and odors is a given!

An Albergue In Santiago de Compostela

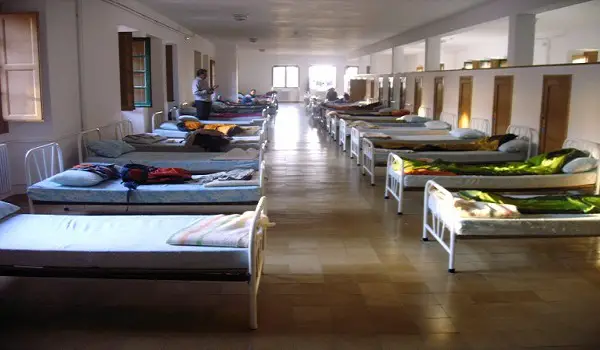
However, this is where you will meet your fellow Pellegrinos (Pilgrims) and make friends. You will also find that as you travel along the Camino you can repeatedly meet the same people from one place to the next and a sort of camaraderie and an attitude of helping one another out naturally develops which is kind of cool.

Some of the stories you’ll get to hear from the folk you’ll meet in the hostels will be well worth any snores you may have had to endure while crashing in them! Some will make you laugh but many will make you cry too.

Food – The Pilgrims Menu

You will see these offered in most restaurants as you travel through the various towns and hamlets on the Camino. The Pilgrims menu is a bargain three course meal for Pilgrims. The cost, when I was there last year, was anywhere from nine to twelve euro (eleven to fifteen US dollars exchange rate at time of posting). Standards will vary from place to place and you can of course opt for more expensive options. Generally speaking, the standard at these prices was pretty good. Look out for it on the menus!

On the trail, a standard sandwich (bocadillo), which is a hefty feast in itself, will cost you around three euro or five US dollars in a cafe along the Camino. The quality is generally very good so you can’t go far wrong at prices like that!

Bocadillo

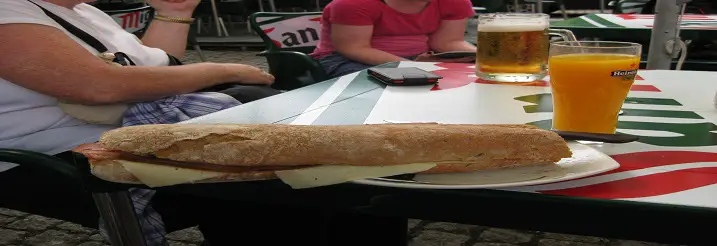
Pictured above is a typical bocadillo I ate on the Camino. It gives you a good idea of what you can expect for an average sandwich on the trail. As you can see by its size, at only five bucks, you won’t go hungry!

Bring Suitable Hiking Gear

It’s crucial you have the right hiking gear with you for walking the Camino. I walked it late July and the weather was very changeable. Some days it was hot and other’s it was very overcast and cloudy.  I was also caught in several downpours.

As part of your main gear, be sure you wear appropriate hiking boots or shoes that are well broken in, to avoid the dreaded blister, and definitely have a light hiking rain jacket with you for the inevitable rainy spells. As already mentioned, when it rains it can rain heavily so be prepared!

If you’re hiking at a cooler time of year you will need rain pants and more layers for warmth. Most people choose to walk the Camino over the Summer period and I recommend this, definitely a better time to go and I think many of the hostels and restaurants are closed at colder times of year.

Always Wear Good Hiking Socks

I could have put this under hiking gear but I feel so strongly about this one I think it deserves a special section all on its own! I can’t emphasize enough the importance of having good hiking socks with you.

I’ve said this many times before and will continue saying it. I think your hiking socks are as important as your boots or shoes. You need good quality ones that will not help lead to blisters, a very common complaint on the Camino, or other sores on your feet.

As well as the sock option above I recommend the two sock strategy as well as using Vaseline on your feet. You need to do your best to keep your feet in good shape as it’s the fastest way to a miserable hike on the Camino. There are some free medical clinics for Pilgrims all along the Camino that will treat minor ailments for free but Prevention is always better than cure!

Getting the Certificate of Completion or ‘Compostela’

To get the certificate of completion for the Camino or ‘Compostela’, as it is known, you need to acquire a ‘Pilgrim’s passport’ in advance, also known as the ‘credencial’. These can be acquired on arrival on the Camino.

Remember, you need to get the passport stamped in locations with the official St. James stamp in each town or village you pass through. Every bar, cafe, restaurant, church, etc. will have a stamp. Remember, to be sure you have no issues getting your ‘Compostela’ on arrival in Santiago, you should get at least two stamps from two separate establishments every day!

On arrival at the certificate office in Santiago they will inspect your passport to be sure you have the correct amount of stamps. They will then ask you to pick why you did the Camino from three options: 1. religious reasons 2. religious and spiritual reasons 3. recreational reasons. When they have that they will then prepare and give you your personalized ‘Compostela’, with your name on it, in Latin.

I did actually witness an Asian couple getting refused their Compostela’s as they hadn’t got it stamped correctly. They weren’t happy campers! It goes to show though that they do take it seriously enough so be sure you get your stamps as you go.

Don’t be Afraid to Travel SoloSolo Pilgrim On The Camino

The final note I will add here is don’t be afraid to walk the Camino on your own. Many people do it this way and if you are on your own, you will make even more of an effort to meet people and make new friends on the trail. Meeting people from all walks of life and from every corner of the globe is a majorly cool part of the whole Camino experience so don’t be afraid!

On the other hand, if you’ve some stuff you need to process or things you need to let go off, being on your own will give you the time and space you may need.

Conclusion

And thus concludes my main tips for walking the Camino. If you’re planning to do it in the future, you won’t be disappointed, it’s a wonderful and unique experience! If you follow some or all of the tips listed, I can assure you, it will only add to the whole experience.

If you’ve any questions about the Camino I am happy to answer them if I can. Leave a comment below or drop me a line via the contact page.

Have you hiked the Camino? What was your experience? Have any top tips for it? I’d love to hear about it in the comments below!

What Is A Sleeping Bag Liner?

Recently, I’ve done a couple of posts on how to kit yourself out with appropriate sleeping kit if you plan to camp out while out on the trail. So far we’ve looked at how best to choose a sleeping bag and the necessity of a camping roll mat.

You can get away with a good bag and a roll mat for a reasonably good nights sleep on the trail but one final accessory that I want to look at today is a sleeping bag liner.

So What is a Sleeping Bag Liner?

A sleeping bag liner is kind of like a bed sheet for a sleeping bag. It has the same shape as a sleeping and you use it in the same way and in conjunction with your sleeping bag.

Basically you put your sleeping bag liner inside your sleeping bag and get into it in exactly the same manner as you would your sleeping bag. This provides a liner or sheet between you and your sleeping bag?

As with Sleeping bag’s, sleeping bag liners can come in different shapes and sizes.

When referring to shapes, I am talking here of either Rectangular or Mummy. These are the two most common shapes of sleeping bags so it makes sense to get a sleeping bag liner in the same shape as your sleeping bag.

Cocoon Silk MummyLinerPictured above is the Cocoon Silk MummyLiner. Silk is an excellent although more expensive option for a liner.

ALPS Mountaineering Brushed Polyester Rectangle Sleeping Bag Liner

Pictured above is the ALPS Mountaineering MicroFiber Rectangle Sleeping Bag Liner. Another excellent liner choice if you don’t want to spend extra for the silk option.

Similarly, with regards to size, if you get one that fits the size of your bag, and assuming you’ve already checked that you into fit your bag of course 🙂 , it should be a comfortable fit for your body.

This may seem like stating the obvious but I have a friend who just picked up a cotton sleeping bag liner in a store without checking the size of it. I have no idea why! Long story short, it was way too small for him as he’s a big guy. It was more or less useless then.

What’s the Point of it?

Well, as far as camping goes, the main advantage is that it keeps your sleeping bag from getting dirty or sweaty from the inside. After a days hiking, chances are you’re not going to be the cleanest you’ve ever been. When you take off your gear and get into your sleeping bag, you don’t really want to have the dirt and sweat from the trail bonding with the inside of your sleeping bag.

Instead if you have a sleeping bag liner, it will do that for you and protect the inside of your bag. The main advantage of this is that a sleeping bag liner is pretty thin and lightweight. Therefore, it is a lot easier to wash a sleeping bag liner than having to wash a sleeping bag.

Using a liner will help cut down on the need to wash your bag as much as you would need to if you didn’t use one.

Finally, a liner will add a little extra bit of warmth to your nights sleep so it’s worth keeping that in mind too. It is no way enough on it’s own but it will add a marginal amount more to the performance of your sleeping bag.

Are they Heavy?

No, Sleeping bag liners are designed to be lightweight so they don’t add much weight to your pack. As already mentioned, they’re similar to a bed sheet in thickness and they usually come in a carry case which it rolls neatly up into (see bag in mummy picture above).

They are usually made from either cotton or silk. My understanding is that the silk one is lighter, a little less bulkier, stronger and probably a little more comfortable than the cotton ones available. The silk one also dries quicker than a cotton one and handles temperature changes a bit better.

The one I have is a cotton one and it worked just fine. I’ve used it in the huts in the Alps as well as camping and it worked perfectly.

How Much are They?

A sleeping bag liner should definitely not break the bank. For a cotton one, you are looking at anywhere from $20.00 to $40.00. As mentioned above, is you want a silk one, they are more expensive and you’re talking anywhere from $50.00 to $80.00.

Other Uses

A sleeping bag liner is not only advantageous while making camp. As I wrote about a few months back I climbed Mont Blanc in the Alps. As part of that I stayed in the ‘huts’. Huts are accommodation you can book to stay in while hiking in the Alps.

The huts are basic but comfortable and they provide beds which will have some form of bedding. However, we were advised to take a sleeping bag liner with us as recently the powers that be were saying that a sleeping bag liner was a requirement.

Now, it seems this latest requirement is not always enforced and no-one checked when I was there. However, regardless I was grateful to have one with me anyway as I imagine the beds in the huts get a lot of traffic through them. I have no doubt they’re washed regularly enough but having your own protective barrier in the form of a sleeping bag liner was definitely a good idea.

Extending on from this use, I really see that if you are planning to do some backpacking, or perhaps a longer trek like the Camino de Santiago on which you plan to stay in the Auberges (hostels), utilizing a sleeping bag liner would seem to make a lot of practical sense. Those beds will have a lot of traffic through them so I think it’s nice to have your own protective sleeping layer.

Conclusion

If you’re going to head out for a nights camping or if you’re planning to do a bit of backpacking and stay in hostels as you travel, a sleeping bag liner is a good addition to your kit. They’re practical and they don’t cost the earth so I recommend looking into getting one.

Now, for longer backpacking trips where you’re carrying all your kit on your back, in truth, a sleeping bag liner probably takes up too much valuable space which could be used to carry something much more functional. However, they are still worth a look when kitting your sleeping system out.

So, that’s pretty much all I wanted to cover with regards to sleeping kit for a nights camping on the trail. With a good sleeping bag, camping roll mat and a sleeping bag liner, you should have the guts of what you need for a reasonable nights sleep under the stars in your tent.

Do you use a sleeping bag liner? Cotton or Silk? I’d love to hear your thoughts in the comments below!

What Is A Camping Roll Mat?

In a recent post, I mentioned I did some mountain training, mainly navigation and group management stuff. Part of that involved learning about how to select and set up a camp site while out on the trail. For the training I needed to of course be get kitted out appropriately with, most, of the required camping gear.

When camping, one of the first key areas you need to address is having the right kit for sleeping. For example, one item that is a must is of course a sleeping bag. I purchased a pretty reasonably priced one from Vango, pictured below (click on the picture to learn more no how to select a sleeping bag), some time back and it has done the job reasonably well on numerous camping trips now, although it is a bit bulky.

Vango Nitestar 250 Sleeping BagI commented in that post that as well as a sleeping bag you of course need some accompanying sleeping kit accessories to help ensure you have a reasonable nights sleep. I also mentioned I’d review those in some separate posts, this one being the first of those.

So without further ado … what else do you need as part of your sleeping kit? First off, you absolutely need something to sleep on and this can come in the form of a camping roll mat.

(This post focuses on sleeping specifics and so works on the assumption that a tent is available and already in place. I will add some tent reviews and results from my research on that particular area up on Cool Hiking Gear soon though, as I will be purchasing one at some point in the future.)

What is a Camping Roll Mat?

This is a critical part of your standard camping kit that accompanies your sleeping bag. In short a roll mat protects your body from the cold and damp of the ground when you sleep. They usually come in one of two forms.

The first is the standard one made from some kind of waterproof foam. Pictured below is an ALPS Mountaineering Foam Camping Mat, click on the picture to learn more:

ALPS Mountaineering Foam Camping Mat (Regular 375)

The second, is a self-inflating mat you can inflate when you get to your camp. Pictured below, taken in my back garden, is the Therm-a-rest Prolite Plus mattress, my current sleeping mattress. Click on the picture to learn more:

Thermarest ProLite Mattress with Pillow

A roll mat can sit inside or, apparently, outside, underneath, your tent. I can’t see any advantage in having it outside but some people do do that. I always have my mattress inside the tent. Perhaps if it is wet it could make sense, and perhaps it is just down to personal preference.

I used to have the foam option listed first but I have since switched to the Therm-A-Rest mattress option as it is far more comfortable in my opinion and much easier to carry. Again, it depends on your personal preference, I have a hiking friend who actually prefers the foam mattress.

Price

Overall, I’m happy to say, they’re not that expensive. You can spend anywhere from $12.00 to $300.00 depending on what your needs are. $100.00 should be adequate to get you a pretty good air mattress though that should meet most of your camping needs. As with all things though, if you’re going into tougher conditions you may need a tougher mat.

I also would guess, but can’t say for sure, that in very dry places, you might get away with just a sleeping bag. However, the foam pad, while it is pretty thin, maybe 1-2 cm in depth, does also provide some level of comfort as it adjusts over bumps and little stones that may be sticking up from the ground.

I personally recommend spending a bit more in this area if you can. For about $80.00, you should get a really top notch Therm-A-Rest air mattress that will cover you well for most conditions. The extra bit of comfort you get for the extra cost I think is worth it.

Other Considerations

From my experience, one thing to consider is size. The foam roll mat rolls up and can be attached to your pack on the outside. They’re not that heavy so weight isn’t a major issue.

However, from the pure perspective of bulk, an inflatable air mattress again wins out. As long as it has the facility to be self inflated, it will take up much less room that a foam one.

To reiterate, I’m looking specifically at camping in a tent here so a Bivi Bag isn’t considered, although I will look into those in a separate post.

Conclusion

Remember, if you’re going camping in a tent, you need a few things to give yourself as comfortable a night in the wilds as possible. As well as a good tent and sleeping bag, a good camping roll mat or air mattress will go a long way to keeping you comfortable and protected from the elements. They won’t break the bank and there are plenty of options to choose from. As with your sleeping bag, be sure to get the appropriate mat for the conditions you will be camping and sleeping in.

Next up, in keeping with the camping sleeping accessories, we’ll look at another potentially useful accompaniment to your camping experience, the sleeping bag liner.

Do you think a foam or a blow up roll mat is better? I’d love to hear your opinion in the comments below.

How To Pace Yourself On The Trail

If you’re new to hiking, knowing how to pace yourself on the trail may not be something you’re familiar with. The temptation when you first start out is to give everything you’ve got when you go out on the hills. While it can be tempting, you need to be careful that you don’t burn yourself out too soon.

Remember, however far you go, you need to get yourself back to where you’re started. If you burn yourself out on the outward journey, you might have difficulty getting back to base, definitely something you don’t want to do.

Keep a Steady Continuous Pace

Keeping a consistent pace is desirable. What I mean by that is that even when you come to harder uphill terrain, ideally you don’t slow your pace too much from walking on easier flatter terrain. The goal should be to keep your pace as steady as you can, within reason, regardless of the terrain.

Pacing Yourself

The old classic rule, not sure where I picked this up, rings true here:

If you can keep a conversation going comfortably while you’re hiking uphill or over difficult terrain, you’re at a good pace.

Take Regular Breaks

Part of pacing yourself involves giving yourself adequate rest breaks. Generally speaking, on a day hike I recommend a 3 to 5 minute break every 1 or 2 hours and maybe a longer break for lunch, anywhere up to half an hour. This of course varies significantly depending on the skill, experience and fitness of the group hiking.

Now, this recommendation is heavily dependent on the weather. If it’s very wet or cold, stopping too often may not be advisable and it would be better to keep going to keep your body warm.

Remember, even if you feel very warm from exertion, you will cool down very quickly when you stop for a break on the trail in cold weather and you’re usually exposed to higher winds in the mountains. Always keep that in mind. Taking all that into consideration, stopping for a few minutes every 2 hours might serve you better.

Keep Your Muscles Moving

It’s obviously very important to keep your muscles moving when you’re hiking. If I stop for too long a stretch too often, I find my muscles can stiffen up a bit so when I stop I tend to stay standing on my feet and not stop for longer than the aforementioned 5 minutes. Any longer and I find my muscles start to tighten up a bit and it can be harder to get them moving again.

The exception to this is lunch. I usually like to pull up a pew on a stone or bush and sit down for that longer break. Again though, this is highly weather dependent. sitting down for lunch in torrential rain ain’t pleasant, soggy sandwiches and all that. So again, common sense prevails and where the situation requires it, I keep on moving. You can lunch on the trot 🙂

Deciding a Pace For a Group

As a general rule, you should aim to go at a steady pace that the slowest hiker in the group is comfortable with. Now, I think you can up the pace a little when you’re on reasonable terrain, after all, people want to get fitter so giving some opportunity for people to push themselves a little bit on a hike is fine in my book. However, this would only be for certain periods where it makes sense to do so.

Mountain Leader

This touches on another point that ideally, when hiking in a group, everyone on the hike should be of a relatively similar level of fitness so they’re not stretched too much. Similarly, the faster hikers in the group are not held back at too slow a pace for them.

This is why joining a hiking club can be such a good thing for a novice hiker. Normally, different grades of difficulty on hikes will be available. Therefore, you can start at a level that best suits your fitness level with a group of hikers at the same level.

Conclusion

Pacing yourself simply makes sense. It ensures you can enjoy your hike to the maximum while pushing yourself only to a comfortable level. Doing too much too soon can never be a good thing and at best will leave you with tired and aching bones for a few days after your hike and, at worst, a trip back to base courtesy of the local emergency rescue services! You definitely do not want the latter due to something as preventable as not pacing yourself 😉

When you start out, start small. Get a feel for what you are comfortable with. Try different terrains and see how you get on and slowly build it up. You will build your fitness up in no time. Also, it’s worth mentioning, I know plenty of hikers who never want to push themselves any further than a certain level. That is absolutely fine and makes good sense. When you find your level, you don’t need to push yourself any harder than that and you can choose to only take on hikes at that level in the future.

Have you any tips for pacing yourself or a group while out on the trail? I’d love to hear about it in the comments below.

How To Hike Over Scree

Recently I was out hiking with my regular hiking group in the West of Ireland, in the twelve Ben’s (or pins) as they are known. We did six of them known as the Connemara Horseshoe on a day hike. The six in question form a nice horseshoe shape and while it is a tough hike, it is a beautiful one and we were blessed with the weather too.

Connemara
View across some of the Ben’s in Connemara

I did the very same hike last year and this year we actually did it much faster. By the time we finished last year my knees were in pretty bad shape and I was so grateful to get back onto flat land lol 🙂 This year, my knees were actually pretty good at the end.

While some of that could be down to being more used to it than last year, I think another part was due to how I approached some of the terrain on the hike.

The terrain on the Ben’s is quite challenging. Very steep and rocky in general and there is a lot of scree in places. One of the six in particular has a lot of scree when going down it. Another one of them has a lot of scree when going up it but, as I found out this year, by going another route that bit can be avoided. Hiking up scree is definitely much harder than hiking down on it.

With all this in mind I thought doing a post on how best to approach the scree type of terrain, from my experience to date, might be useful. If you find scree terrain difficult to hike over then read on.

What is Scree?

In brief, scree is a lot of small stones and rock debris that piles up in large quantities on the slope or base of a mountain. I don’t know too much about the geological aspect of scree i.e. how it got there but I think it might be something to so with remnants left over after volcanic activity and periodic rock fall over time.

Scree On Mountain Side
Scree on A mountain side

Scree itself can be anything from very small stones to larger rocks and, more or less, any mix in between. When you stand on it, your hiking boots will naturally sink quite deeply into it.

Hiking On Scree

Of course as scree is a very unique and different terrain to hike on, there a few ways to approach how you traverse it, depending on which way you’re going. Below, I split it down into the main challenges you will face while hiking on scree.

Hiking Down Over Scree

The main way I can suggest as the best way to hike down over scree is to almost surf on it. What I mean by that, is that when you put your feet onto it you will, naturally enough slide into the scree and down the mountain.

As mentioned above, one of the reasons I think my knees were so sore last year on the same hike on the same scree was that when I went down it I fought against the naturally flowing motion of it and tried very hard to stabilize myself every time I took a step. This is very hard on the knees!

By the time I was approaching the bottom of that mountain last year, what I had figured out was that if I simply went with the flow of the scree, it was much easier on my knees and my body in general.

So, when you set off downwards on scree, put your foot out straight and as you put your down when you take a step, let your weight go into your heel. You will feel a bit like your sliding and might feel a bit out of control at first but if the weight is on your heel, it will naturally bring you a stop.

Do this slowly at first and gradually you will get the hang of it and will gain the confidence to pick up speed. When you get going you can actually move quite quickly with minimal effort downwards over scree.

Now, a key point to add here is that this approach only works if the scree is of the right depth and the stones are small enough to allow the movement. If the scree is not deep enough, do not take this approach as you could quite easily twist an ankle or trip over as the ground holds steady below your sliding foot.

If the depth and quality of the scree isn’t suitable for this approach, look to see if you can get to the edge of the scree where it might be more stable and so easier to hike down on. If that’s not an option, you just need to take your time going down and be very careful.

As with all things with hiking, especially with terrain, you need to exercise good judgment on the approach you take. Safety always comes first.

Hiking Up Over Scree

Not surprisingly, going up over scree is much harder than going down over it. It takes a lot of effort and can be very frustrating as you put a foot into the scree and start to slide downwards. It can feel like you’re not making any progress at all and even like you’re going backwards at times!

The best way I found to walk up it was to make your feet as wide as possible by turning them horizontally to the mountain and leaning in ever so slightly. This should give you a wider base area to spread weight over the scree and so prevent you from sliding down into it.

Then, when you’re going upwards, if possible a zig-zag path is probably the best option. By having your feet horizontal and ascending in a zig-zag fashion, you should be that bit more stable and not experience slides downward as much as if you took a direct approach with feet pointed directly at the mountain.

Hiking Across Scree

Similar to going up over scree, I would approach this with your feet in a horizontal position towards the mountain. As you’re not going upwards, you just leave he zig-zag path out and move directly across in a, more or less, straight line.

Other Tips

I highly recommend that if you are about to walk on scree, you put your gaiters on. If you don’t, as you slide in the scree your boots will get filled with little stones which is a pain. I can assure you than stopping on scree to take your boots off to empty them is not an easy thing to do 😉

Conclusion

I hope you found this brief guide useful. Scree is a very unique type of terrain which, as a hiker, you will probably come into contact with at some point.

If you’re lucky and you’re going down scree, it can actually be quite a lot of fun ‘surfing’ down through it. It can nearly be a welcome relief on the muscles on a hard hike as if done correctly, you should probably expend less energy that if you were walking normally. It takes a while to get confident on it though so if you’re feeling unstable and uneasy, always take your time to negotiate it as best required for you.

Do you have any tips for hiking on scree? I’d love to hear about them in the comments below.

What Is A Backpack Rain Cover?

In the last post I reviewed how you can utilize a bin liner to keep some of your gear dry on a very wet day. The main point I was getting at in the post was that, as a general rule, a bin liner can be handy thing to have with you in your pack while out on a day hike for multiple reasons.

On top of that, if you really want to keep gear inside your pack dry, it’s a really good idea to put it inside a bin liner or a dry bag. When you’re out on the trail, if the rain is heavy enough, no pack will stay dry so it’s a good idea to have some extra protection for the stuff inside your pack.

When it comes to keeping rain off your pack, another option that can help is to use a rain cover.


Camelbak Rain Cover M.U.L.E.

What is a Backpack Rain Cover?

Backpack Rain Covers are purpose built covers that fit over your pack. They come in varying sizes and and are waterproof, so the idea is for them to keep the rain from getting into your pack. They have an elastic type draw cord around the outside which can be adjusted using a cord lock fastener.

They also have a tie cord or two which can be used to tie the cover to your pack. This feature is very important as many times when there’s bad rain on the trail, heavy wind will accompany it. These tie cords help ensure that if your rain cover gets blown off your pack in the wind they stay attached to it, so at least you don’t have to chase after it!

Many backpacks will come with a rain cover built in as part of the make-up and features of the pack. However, you can also buy them separate to use for any pack.

How Much is a Good Rain Cover?

When you buy a rain cover for a day or back pack as s stand alone item, the price will vary a bit. Overall a good one should not be more than $10.00 / $15.00. They will come in differing sizes and so the price will vary upwards slightly as you increase the size.

Where Can I Get a Rain Cover?

Any Outdoor gear shop will have them but you can probably get the best deals online. Click on the picture above or here for some good rain cover options available from CamelBak.

What Size To Pick?

Obviously, the smaller rain covers are for day packs and the bigger you go up in size, the bigger the pack you can use the rain cover for. Rain Covers come in specific sizes so simply compare the size of the rain cover to the capacity of your pack.

Other Considerations

It  can be worth getting a pack that stands out color wise. While Fluorescent yellow may not be your normal color of choice, it can make sense to have something that stands out while out on the trail if, heaven forbid, you get into any difficulty. A search and rescue team might spot a bright yellow pack easier than a dark blue one for example.

Finally, to mention again, most good day packs and backpacks these days come with rain covers purpose built in as part of their make-up and design. So if you’re in the market for a new pack, it can be worth factoring this in. For more tips on buying a day pack check out the day pack buying guide.

Conclusion

If you’re just starting out hiking and already have a day pack of sorts, you should get along fine by utilizing a bin liner. Put your stuff in a bin liner or two inside your pack and it should keep it pretty dry in heavy rain.

Buying a separate rain cover can be an additional way to help keep your gear dry. They’re not too expensive so they won’t break the bank, they’re also very lightweight and so can be tucked away compactly in your pack until needed.

When I buy packs, I wouldn’t be too bothered if there was no built in rain cover. I think it’s a nice to have and they’re handy when you get caught in a shower but they’re not critical. I have used separate rain covers on packs that didn’t have them built in and while they can work to some degree, they can be a bit of pain in heavy winds as they tend to flap about a fair bit and if they’re not attached well, they can easily blow away.

Even though I have built in rain covers on my packs, they aren’t perfect and they won’t keep rain out indefinitely. I utilize dry bags and bin liners to be sure of keeping stuff in my pack dry. When it comes to bin liners, I like to use the tougher variety, ones that are used for gardening or building refuse. I like them as they’re much tougher and stronger than standard bin liners.

I hope you found this short post on a backpack rain cover useful. Please like, share and / or comment.

What Does SOS Stand For?

The first thing that probably came to your mind when you read the title, ‘What does SOS stand for?’ was of course ‘save our souls’. That was, to my knowledge, the standard literal meaning taken from the SOS distress signal. However, the interesting thing is that SOS does not actually stand for anything.

The other day I did a post on the international emergency distress signal when in the
mountains. I started to research the history of it a bit and, typically, I got sidetracked onto other things. SOS

When looking at distress signal’s, the classic distress call, which is of course SOS, came up.

I started to look into this a bit more and thought it would be interesting to do a bit of research to see how this whole distress signal thing came about.

Interestingly enough, I couldn’t find a whole lot of information on it.

What is it?

SOS was created as an easy way to send a signal using the Morse Code. It’s easy to remember, three dits and three dahs and then three dits done on a continuous basis with no spacing, ‘…—…’ .

The dits and dahs are used in Morse Code to help communicate a message by using various combinations and series’ of dits, dahs and spaces to represent letters. That’s a whole other area of knowledge in and of itself so I won’t go into that here.

Where did SOS come from?

The Morse Code was of course designed to send messages via the old telegraph system which reaches back to the 19th century so we are going back a bit.

However, from looking at what Wikipedia has to say on the origins of the SOS signal, it seems it was first formally introduced in 1905 as part of radio regulations in Germany and was then adopted as an international standard shortly thereafter in 1906.

My interest was piqued at this stage so I did a bit more research and found this very good article on the history of maritime distress signals.

This gave some very interesting information on the history of SOS. First off, that most people believe SOS stands for ‘Save Our Ship’ rather than ‘Save Our Souls’.

I found that interesting as I had always heard it was the latter however, ‘Save Our Ship’ probably makes more sense as an origin though, especially if it is based in maritime roots.

The next interesting thing was that ‘CQD’ preceded ‘SOS’ as a maritime distress signal. It seems ‘CQ’ was used to initiate all telegraph messages and ‘D’ originated to signify an urgent message. As these were accepted and known signals at the time, the major telegraph company of the day, Marconi, designated the combination of the two as a distress signal.

As a side note, the original American distress signal was ‘NC’ meaning ‘Call for help without delay’ but it was not taken up as the main distress signal.

Anyway, I fear I am quoting too much from the article above at this point so if you’re interested, check the link out. It has a lot more fascinating and interesting information on where SOS came from, what it means, etc..

Conclusion

So, in conclusion, what does SOS stand for? Officially, nothing. It is not an acronym and was not created with any meaning intended. It was chosen simply as it was an easy to use symbol that is easy to execute and hard to misinterpret in Morse Code.

Informally, people know SOS to stand for ‘Save Our Souls’, ‘Save Our Ship’ and ‘Save Our Succour’ (Never heard of that last one before either). While not directly related to hiking as such, I thought this was an interesting little diversion to investigate as I am sure there is probably some relation somewhere.

The international emergency distress signal is of course crucial to know while out on the trail so, if you don’t know it, remember to check out this post.

I hope you found this somewhat diversionary post interesting 😉

Do You Know The International Emergency Mountain Distress Signal?

Today’s post is a brief but important one. It’s about the international emergency mountain distress signal. The distress signal is an internationally recognized visual or audible signal that is used to draw attention to others that you or your party are in distress and need help.

What Is The Signal?

It is based on groups of three or six. For example, three fires or three mounds of stones in a triangle signals distress. Similarly, repeating three flashes from a light or three whistle bursts for a minute, followed by a minutes break and then repeating signifies the same.

Man Blowing Whistle

In the UK and the Alps, the signal is made up of six rather than three short repeated signals followed by a minutes silence before then repeating.

The rescue team responds using three signal blasts repeated in a minute to acknowledge receipt of the six blast signal.

The short signal bursts can really be created using anything you can use that will create an audible or visual signal that will draw people’s attention to your distress. This is why an emergency whistle and a head lamp are two critical pieces of kit you should always have in your pack.

When buying a day pack, getting one with a whistle already attached is a good feature to look for.

The Importance Of This Signal

The reason knowing this simple signal is important is that as a hiker, you really never know when you might need it to draw attention to your location if you get into difficulty.

Rescue teams or experienced hikers will automatically recognize what it is if they hear or see it. However, what makes it even more important is that even if people, who are not familiar with it, see or hear it, they are going to know that something is up.

To see a repeating pattern like that will draw attention to you and your plight should you be unfortunate enough to need it.

It can also be a very helpful way to signify to a rescue team your exact location as they approach you or, if they just know the general area you are in and can’t pinpoint your location, this will of course be a great aid to help them find you.

Conclusion

By now, this signal should be stored in your memory banks as it isn’t at all hard to remember. However, just to reiterate. In the UK and Europe it is six short bursts, followed by a minutes break and then repeat. Other locations in the world, you can use groupings of three for a minute, followed by a minutes silence and then repeat.

When you’re out hiking, safety always comes first and you should always take the appropriate preventative measures to not get into difficulty in the first place. However, sometimes no matter how much you prepare, accidents can and will still happen.

Finally, if you don’t have one already, an emergency whistle and a head lamp are good investments to make to add to your hiking kit.

I truly hope you never need to use this signal and all your hiking adventures will be happy and safe ones but just in case, it’s good to know!

Have you ever had to use the emergency distress signal? Let us know in the comments below.

How To Clean A Thermos Flask

Today I want to take a look at how best to clean a Thermos flask. Now, I don’t mean your standard clean after a normal weekly hike. What I’m referring to here is a deep clean. Let me explain.

Now I’m sure you’ve had this problem if you’re a regular hiker who likes to take a hot Thermos Stainless-Steel Vacuum Insulated Bottle drink with you out on the trail be it coffee, tea or whatever.

Week on week you add your tea, I’ll use tea here as that’s what I usually bring with me, to your flask. You do your hike, you come home and give the flask a good rinse, clean and you leave it to dry.

That’s it. All good and you’re flask is good to go the following week on your next hike.

However, over time your flask starts to gather deposits, that’s the only word I can think of to describe it, that don’t come off after a good rinse and wash with hot water and soap.

These deposits are visible to the eye. Over time, the flask can also get a bit of a musky smell about it too when you open it up. Not ideal when you want to drink from it.

A flask by it’s very design is not the easiest thing to clean at the best of times. It can be hard to get in to the bottom of it and get a good scrub around. Ideally using a cleaning brush will help with this but it can be hard to find one thin enough for some flasks.

However, even with a good cleaning brush that is slim enough to fit into the flask itself and long enough to reach the bottom, you still can’t man oeuvre it easily to clean everything. On top of that, you can’t see the bottom of the flask while you clean it as your hand is in the way. What a pain!

So, even with a good cleaning brush, which I do have and use, deposits still gather. I like a bit of sugar and milk in my tea too so over time you never know what little science project is developing in there 🙂

I’m joking of course, a good basic clean with soap and water does the trick most of the time but every once in a while you need to get in there and do a really deep clean.

I figured that it would be a good idea if I learned how to give the flask a deep clean that would remove the tea stains, sugar remnants, limescale deposits, etc. This all seemed very good but when I thought about it, I actually had no real idea how to deep clean inside a steel thermos flask!

And so, the quest began for a solution!

The Cleaning Options

Now, enough context … I won’t drag this out too much longer. I came across several ways online to get your thermos flask clean, shiny and new looking on the inside again:

  1. Using egg shells – Yes, you’re reading that right
  2. Using Tea – Interesting solution considering tea is part of what is causing the stains
  3. Using denture tablets – my preferred method by a long shot … highly recommended to get similar results as with the teabag below and I only use this method these days.

The Tea Bag Method

When I looked at the three methods above, I decided I would start with the easiest one to execute first which was  number 2. This is because I already have tea bags and boiling water aplenty!

To briefly explain, this method simply involves putting a tea bag in the thermos flask, putting in boiling water to the very top of the thermos flask and leaving it overnight. In the morning, simply empty the tea out and then rinse it in cold water. Easy peasy!

Now, as I mentioned above, I normally have tea in my flask when I am out hiking so it would seem odd to be using part of the problem as the solution so to speak. However, as already alluded to, I drink my tea with milk and sugar so that probably changes the dynamic of the final brew in some form I would imagine and so it isn’t plain old fashioned tea as such.

The Denture Tablet Method

Similar to the tea bag method, you simply pop a denture tablet into the flask, add warm water and leave to soak overnight. I can’t really elaborate on this more except to say that this is now my preferred method for cleaning any of my liquid carrying gear.

There are two reasons for this:

  1. It was even easier than the tea bag. Just give it a quick wipe the next day but most of the grime was already removed by the tablet.
  2. It leaves a nice fresh smell … they are denture tablets after all so it makes sense that they would!

As well as cleaning my thermos flask, I used denture tablets recently to clean my hydration pack and it was again a really great success. It even took away any discoloration on my hydration pack, really sweet!

The Results

Note that you will get great results using either the the tea bag method or the denture tablet method. Below I refer to the tea bag method but to use the denture method, just replace the tea bag with a denture tablet in the steps below and you’re good to go!

So …

I did as the steps suggested and put a tea bag into my stainless steel thermos and left it overnight. I decided I’d track the process to see how it panned out, very scientific I know lol 🙂 The pictures below show what happened:

1. The shot below is pre-experiment. As you can see I have some nasty looking grime rings on the rim rings at the top of the flask, not pretty I know!

Stainless Steel Thermos Flask Pre Cleaning

2. I put a tea bag into the flask and filled it up to the very top with boiling water. This was done just before midnight. If you’re using denture tablets, boiling water is not needed, slightly warm water will work fine.

Thermos Flask With Tea

3. Next up, I just closed the flask with the lid sealing it tight. Note, I didn’t put the stopper in, see the bottom right of the photo above, as I wanted the tea to reach the very top of the flask and submerge the rings.

Thermos Flask Closed

4. The next morning, at about 8am, I got up and emptied the tea out of the flask. The rings of residue build up were still there but a quick wipe with a wire dish brush and it completely came off!

Flask Post Clean

Hopefully you can see the difference in the shot above in comparison to the first one. Quite a difference. It’s also worth noting that any inkling of the musky smell from the flask was completely gone too!

Conclusion

If you take a stainless steel thermos flask out with you on your hikes, it’s a good idea to give it a deep clean every so often and this process could be just the ticket. I used to use the tea bag method but ever since I started using denture tablets, I haven’t looked back. I never looked into the egg shell method and that just seemed too complicated 🙂

To recap, pop a teabag into your thermos flask, leave a teabag filled to the top with hot boiling water in it over night, empty, scrub, rinse with cold water and voila, you have a nice and clean thermos flask! To use the denture method, do the same replacing the tea bag with a denture tablet and use warmish water instead of boiling water

If you need to remove tea stains or coffee stains and build up from your flask, give it a go!

Have you tried this or any of the other two methods mentioned above for cleaning a stainless steel thermos flask? I’d be curious to know how you got on so please do leave a note in the comments below.


  • « Previous Page
  • 1
  • …
  • 10
  • 11
  • 12
  • 13
  • 14
  • …
  • 16
  • Next Page »
  • Facebook
  • Pinterest

What are you looking for?

Copyright © 2025 · Cool Hiking Gear

Cool Hiking Gear is a participant in the Amazon Services LLC Associates Program, an affiliate advertising program designed to provide a means for us to earn fees by linking to Amazon.com and affiliated sites.

  • About This Site
  • Privacy Policy
  • Affiliate Disclosure Statement
  • Contact