coolhikinggear.com

  • Men’s
    • Best Hiking Rain Jackets for Men In 2024
    • Best Men’s Hardshell Jackets Of 2023
    • Best Hiking Pants For Men In 2023
    • Best Ultralight Rain Pants For Men
    • Best Men’s Daypacks For Hiking In 2023
    • Best Backpacking Backpacks For Men In 2023
    • Best Base Layers For Men In 2023
  • Women’s
    • The Best Hiking Rain Jackets For Women In 2023
    • Best Women’s Hardshell Jackets Of 2023
    • Best Hiking Pants For Women In 2023
    • Best Ultralight Rain Pants For Women
    • Best Daypacks For Women
    • Best Backpacking Backpacks For Women In 2023
    • Best Base Layers For Women In 2023
  • Hiking Accessories
    • Best Hiking Poles
    • Best Trekking Pole Monopod Camera Mount
    • Best Hiking Headlamps
    • The Best Hiking Watches In 2023
    • The Best Hiking Gloves In 2023
    • Best Hydration Bladders For Hiking In 2023
    • Best Compass For Hiking Our Top Picks
    • Cool Hiking Gadgets
  • Footwear
    • The Best Men’s Hiking Boots In 2024!
    • Best Hiking Shoes For Men In 2023
    • The Best Women’s Hiking Boots In 2023!
    • Best Hiking Shoes For Women In 2023
    • Best Hiking Sandals
    • Best Hiking Sandals For Women in 2023
  • Hiking Guides and Resources

How To Carry Water While Hiking

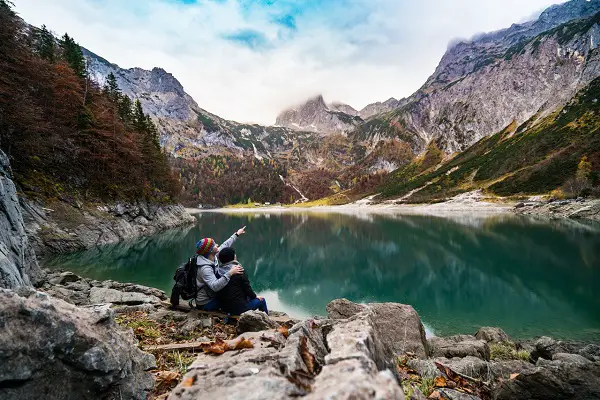
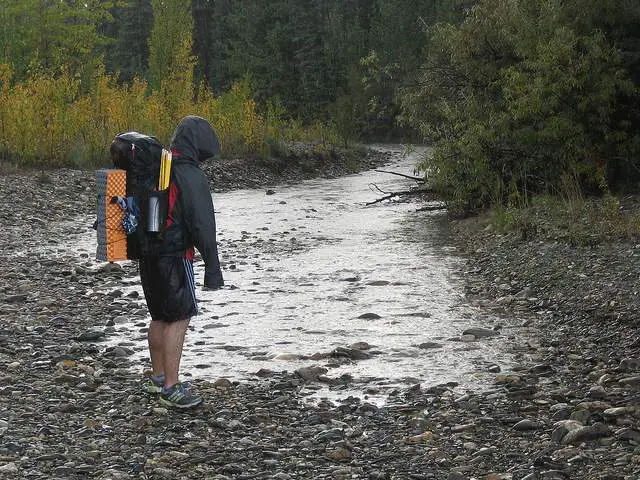
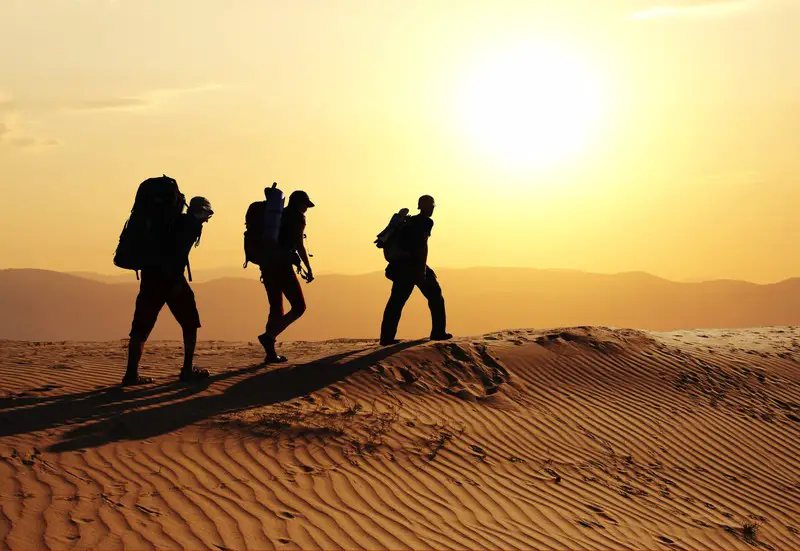
It goes without saying that’s it’s important to have an adequate supply of drinking water when you’re out on the trail.

However, it’s not quite immediately as evident how to carry water while hiking, once you’ve figured out how much you’ll need, especially to folks new to hiking.

How Much Water to Carry When Hiking

The amount of water you’ll need to carry with you varies according to several different factors, and how much you’ll need can influence your choice of how you carry water while you’re hiking.

Finding the right amount can be tricky for beginners, take too much and you’ll be weighed down unnecessarily, take too little and you’ll risk dehydration.

Here’s some factors you should take into account to help you to decide how to carry your water for your hike.

Once you’ve taken all of these variables into account, you should have a better idea of how much water you’ll need to take with you and consequently how to best carry it.
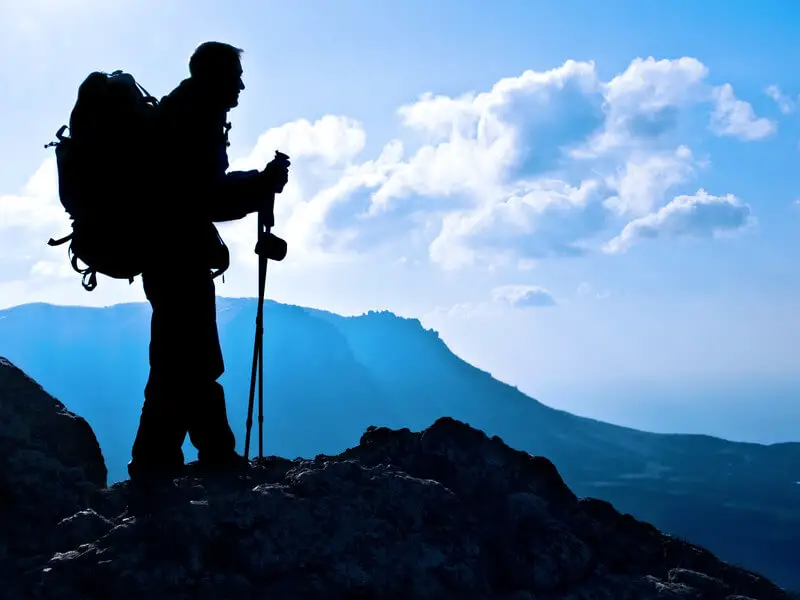
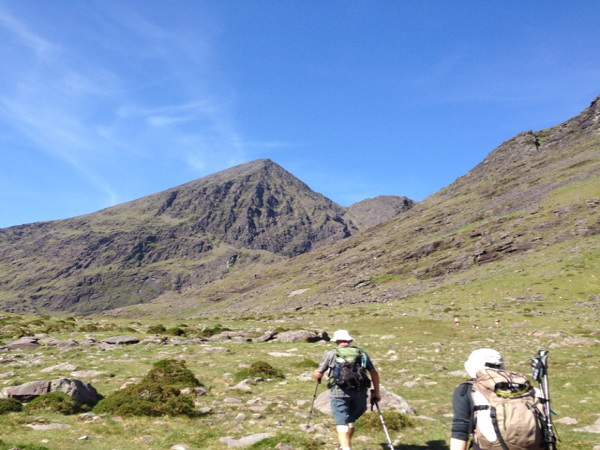
Length of Your Hike

The longer your hike, the more water you’ll need to factor in. Don’t forget when you make the change from a day hike to an extended backpacking trip, you’ll have to factor in the evening and morning time’s hiking refreshment.

It won’t suffice to simple double the amount you take with you on a day hike, and you may need to factor in water sources as you travel.

Temperature

It is kind of stating the obvious, but you’ll need to drink more water in hotter areas or during hotter periods of the year. to replace extra water lost through perspiration.

Hikers In The Desert

Pay attention to the weather and the atmosphere e.g. hot and humid vs. hot and dry, and so on. You will need plenty of water either way, but if you happen to head out on an extra hot day, you may need to take a little bit more.
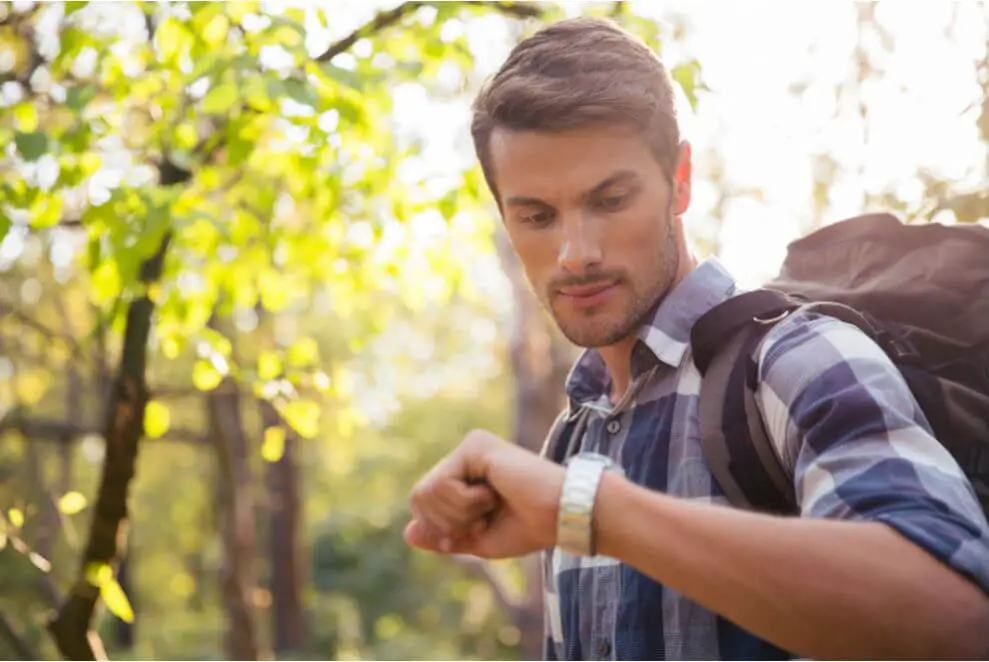
Physical Exertion

Again maybe obvious to some, but it is worth mentioning. A tough, physically-demanding hike will require you to drink more water to stay in top form.

If you’re on a tough day hike, you can also plan to drink a lot more water before and after your hike.
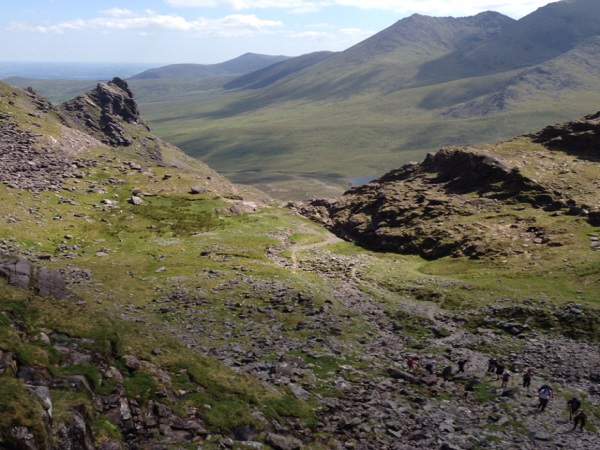
Location

Research your location through reputable, up-to-date sources. If you’re not heading out into the backcountry, there could well be sources of drinking water in the vicinity to your trail including nearby villages or towns.

River Water Bottle

State and national parks will often indicate water refill points. The location of any creeks or other water sources will feature on maps, so make sure you have appropriate water purifying equipment.
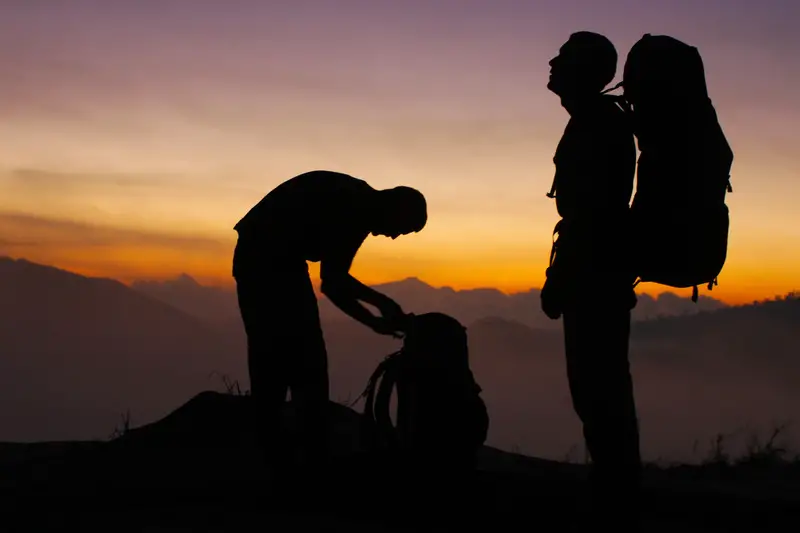
Food & Hygiene

Don’t forget to factor in any water you’re planning to use for cooking and washing purposes on extended hiking trips.

Using water you’ve boiled to cook food is a smart way to get more use out of the fuel, water, etc. I am obviously referring to food being heated up in packs, not water directly mixed with food … just saying 🙂

Equipment

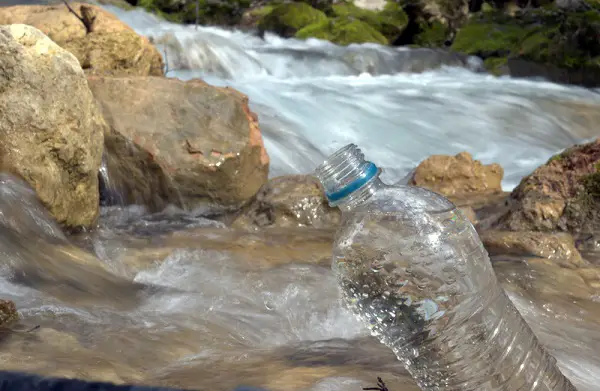
As touched on above, with the wealth of different equipment available nowadays to purify water from most natural sources, you could cut back the amount you need to carry by a significant amount.

Of course, you’ll need to be as certain as possible that the sources you’re planning on using are not dried up, as well as having a back-up plan just in case.

Personal Preference

Some people drink a lot of water when they’re out hiking, while others drink less.

If you tend to drink more after a long hike bear this in mind if you’re planning for your first extended trip over several nights.

I drink a ton of water when I hike! I have a good hiking friend who drinks maybe a quarter of what I drink! It really can be very different for different people, so getting to know how much your body needs is a really good idea.

This comes over time as you hike more and more, you naturally learn how much you need. When starting out, it’s of course better to have more than less!

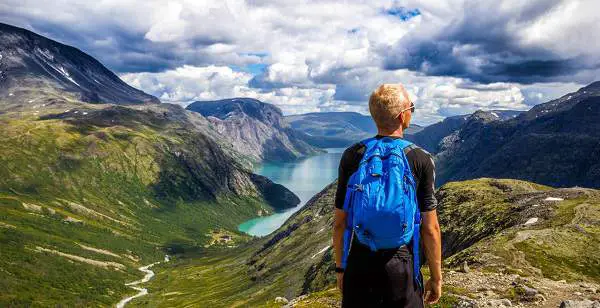
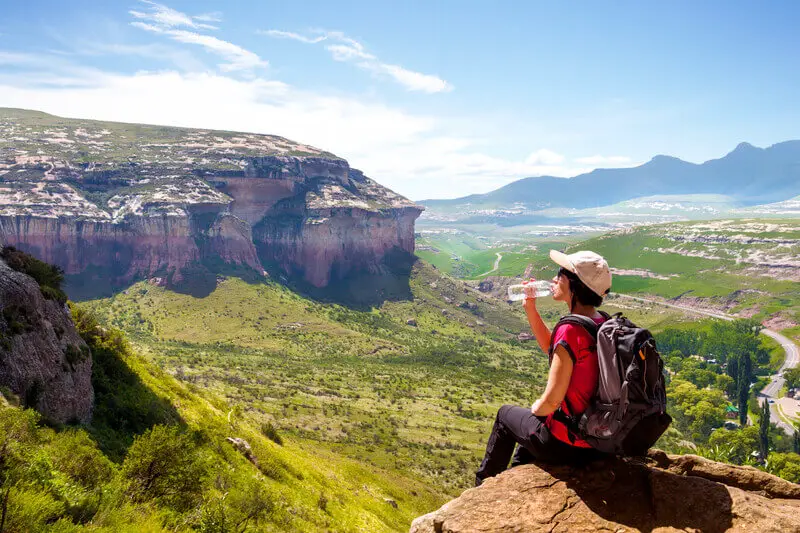
Hydration Bladder vs Bottles of Water

On the trail the two main ways to transport water are via a hydration bladder or traditional water bottles.

Both have their own advantages and disadvantages, with the main deciding factor coming down to personal preference.

Some people even prefer to use a hydration bladder with a spare bottle in their backpack for handy refills or for drinking when taking a break. I utilize this myself when I need to carry extra water.

Here’s some of the main pros and cons of using both hydration bladders and bottles while you’re hiking.

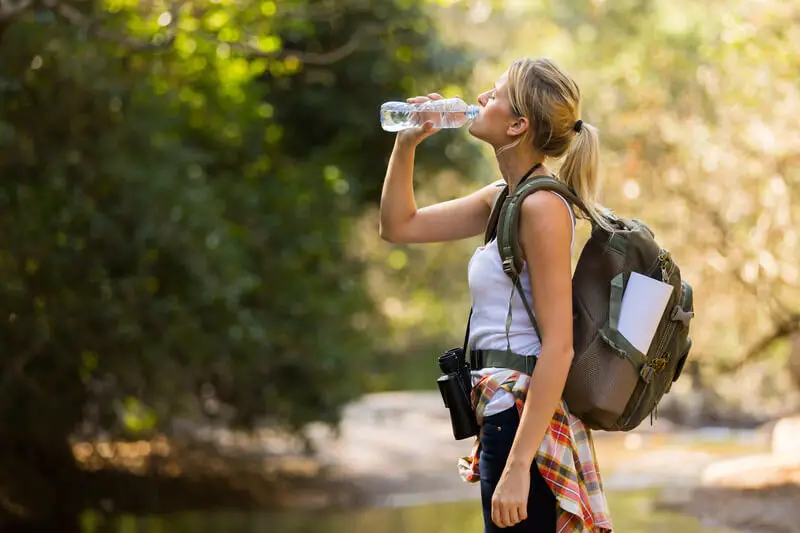
Water Bottles for Hiking

Plastic bottles are lightweight and handy to use. You can pick them up just about anywhere and reuse and refill with ease.

Water Bottle

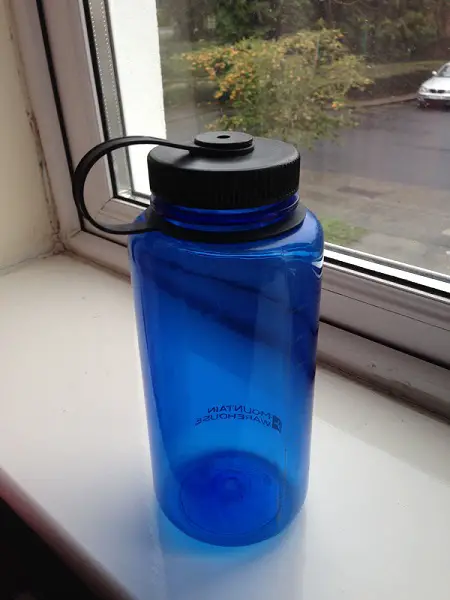
When you use them in your backpack side pockets you can usually reach them without having to take your pack off, although when the weather’s hot your water will heat up pretty rapidly.

Putting them inside your backpack will mean you’ll have to stop and remove your backpack for every sip. In any case you’ll probably at the very least need to pause to unscrew your bottle and drink if you want to avoid tripping up.

Aside from having to stop regularly and possibly risking drinking less if you don’t tend to take regular breaks, bottles also have a relatively small capacity compared to a hydration bladder.

This puts them at a distinct disadvantage for longer trips, however they are extremely useful for refilling and for this reason alone, we think it’s well worth taking some sort of bottle with you.

Collapsible bottles can be useful to carry when using a hydration bladder and they take up much less space when they’re not in use.

Hydration Bladder

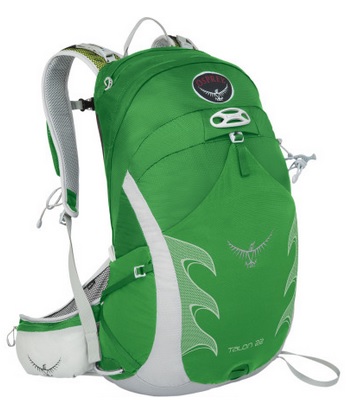
Hydration bladders allow you to carry a lot more water and to drink on the go. Most good modern backpacks have compartments specially designed for hydration bladders so the load is easy to carry and doesn’t move around.

Platypus Big Zip LP Reservoir

Although they’re also made of plastic, a good hydration bladder will last a long time, making them more ecologically responsible and environmentally friendly than disposable bottles which end up getting replaced much more frequently.

You can of course get a good refillable water bottle too, and we of course recommend that over plastic bottles from your local store.

As you can drink on the go, you’re also less likely to become dehydrated by drinking more frequently throughout the course of your hike.

Unfortunately hydration bladders are literally not to everybody’s taste. Although many people don’t experience any issues with their hydration bladders, others experience an unpleasant plastic taste.

When you’re preparing for a hot day’s hiking, you won’t be able to stick your hydration bladder in the freezer, to have cold water while hiking, like a bottle as you’ll risk splitting the pipes.

However, you can put some ice in it just before setting off. Bear in mind that the water in the tube is going to get warm in hot weather.

You’ll either have to spit out your first mouthful or gulp down extra to get to the cool water from further within. Once again, this doesn’t bother some people at all, while others find it more off putting.

Other Options

You may want to consider other types of bottles to use either alone or alongside standard bottles of water or your hydration bladder.

Using a bottle with a sports cap can make drinking on the go much easier. In hot weather you may want to consider using a insulated bottle designed to keep your drink cold for several hours.

Such bottles often also work well in winter for keeping drinks warm, if you like to take a hot coffee or chocolate for a mid-morning break on a winter day hike for example. 

If you’re looking for ways to cut back on carrying a lot of water, you can also carry specialized water filters or water treatment chemicals allowing you to refill your bottles or hydration bladder out on the trail.

Iodine Tincture

Note, if you’re using a water treatment process that takes several hours (as opposed to more instant on the go results like with a filter), you’re going to need a plastic bottle to store the water in while it’s being treated before putting it into your hydration bladder.

Always be super careful when filtering water and make sure you do it right, be sure to know how to use your filtering tool properly, and with an appropriate water source.

You could take a collapsible bottle with you for this and help save on space in your backpack.

Conclusion

If you’re still wondering how to carry water while hiking, the best way to carry water for longer hikes and extended trips is probably going to be using a hydration bladder.

However, keeping a bottle of water to hand too, can also be extremely useful for refills and can be more pleasant to drink from when you’re taking a break.

Whether you prefer an hydration bladder or a water bottle, whatever works best for you is ultimately the best choice.

Just be sure that you plan ahead and take enough water for the duration of your hike, or until you can reach a confirmed refill point with well thought-out contingency plans, especially in hot climates.

Hiking Time Per Mile

Knowing your average hiking time can be useful in a number of situations, especially when it comes down to figuring out how long a hike will actually take you to complete.

Hiking Time Per Mile

If you would like to find out what your personal average hiking speed is, read on to learn how you can calculate your hiking time per mile and how you might put this information to good use.

Why it’s Useful to Know Your Hiking Speed

If you enjoy hiking to destress and relax, you may not be that interested in knowing your hiking speed. However, at some point, you’re going to wonder what time you’ll need to leave by to make it back before nightfall, or where you should aim to stop over on an extended hiking trip.

As much as you might want to keep your hikes spontaneous and natural, at some point if you want try out new places and trails, you’re going to have to do some minor, organizational planning.

When you’re planning on hiking as part of a group, it can be useful to agree on a common hiking speed before committing.

If the group is newly formed or a one-off trip, it can be useful to know what range of speeds members generally hike at to reach a consensus before starting as well, so as to plan breaks as well as departure and arrival times.

Your hiking speed can also be good to know if you are looking to improve your physical condition and intend to use hiking as part of your training plan.

Knowing your current hiking speed and aiming for a faster one, can help you to get into better shape. Of course if you are aiming to step things up a gear and take on a thru-hike or start fastpacking, then you will naturally be interested in knowing your current hiking speed and how you can improve it.

How to Calculate Your Average Hiking Speed

To start with, you should bear in mind that the average walking pace is around three miles per hour (approx. five km/h). Of course, many people will walk faster and many others much slower.

However, when you’re hiking, it’s not quite the same as going for a walk around the block. There are plenty of other considerations to take into account which will ultimately affect your hiking speed.

Here’s some of the main factors you will need to consider when calculating your average hiking speed.

Terrain

Obviously, your pace will be faster on flat, easy-going terrain than it will be on steep inclines with uneven footing. If you’re planning on hill walking, you could use Naismith’s Rule as a guide to help you to account for uphill sections.

Basically you allow one hour for every three miles forward and add another hour for every 2,000 feet (600m) you ascend.

This improved figure can be useful, however, you need to remember that certain sections of trail can be more difficult and time consuming than others, regardless of the incline and that descents can often take longer than ascents.

So, by all means use Naismith’s Rule to help, but don’t forget to also factor in any other possible terrain-related factors, such as overgrown vegetation, rocky ground, or tricky descents.

It’s also worth noting that Naismith’s rule is generous, and any reasonably fit and regular group of hikers, will likely go faster then it.

Load

A short day hike in ideal conditions shouldn’t require you to carry a load that will slow you down too much. However, even long day hikes with average loads can slow you down a little, not to mention when you’re on a backpacking trip carrying a full 60L backpack.

Backpacker Packing A Pack

You’ll need to take your pack weight and bulk into consideration when you’re working out how long a particular trip is going to take you.

Weather

The weather can hugely influence your hiking speed. Unexpected winds, heat, storms, low visibility can all bring even the fastest of hikers down to a crawling speed.

Even once you’ve factored in slowing down for weather conditions, you will also have to possibly reconsider your pack weight again, and how that might slow you down further.

For example extra water for a heatwave, extra layers in a cold spell and various tools such as pick axes in extreme winter weather conditions.

Company

In general, unless you’re training together and challenging each other, hiking in company tends to be slower than hiking solo. Social interactions on the go will undoubtedly slow down your average hiking speed.

Nothing wrong with that, and chatting on the trail is part of the fun too, but it’s something to keep in mind when planning how long you will be out, especially if you are leading a group.

Physical Condition

If you’re in good shape and keep active regularly then your hiking speed is likely to be higher over some difficult parts than it would be for someone out of shape, even if your natural walking speed is on the slow side.

As your body will be more used to exercise, you’ll need less time to stop and recover after tricky sections, and you should get into your stride faster and be able to keep going at a comfortable pace for longer.

Experience

Unless you have plenty of hiking experience, you won’t be able to factor it in for it! Knowing your average speed and where your strengths and weaknesses are, how well you take ascents and descents, how to deal with any navigation issues or any other problems that may occur out on the trail.

All of your experience out hiking combined with knowledge of your own endurance, will give you the best estimate you can get for how long a certain trail will take you.

If you regularly work out your average speed, you will reach a certain point where you become aware of how fast or slow you’re traveling and can adapt your speed to suit your needs. Using a smartphone and an app to track your hikes will give you extremely accurate figures.

While your hiking speed will vary with the factors listed here, it can be useful to look at your speeds over the course of your hike and to gain valuable insight, enabling you to predict your speed over certain sections of future hikes based on past performance.

Conclusion – Putting it all together

If you would like to work out your average hiking time per mile, take the average figure of three miles per hour into consideration. If you know you walk particularly fast or slow, allow for this.

Then factor in the terrain using Naismith’s Rule for any ascents, bearing in mind the descents can sometimes be just as slow, or even slower when its steep, too. Allow for your load, weather and any difficult terrain and you should come up with an approximate figure that’s a useful guide.

With modern technology, you can easily use an app on your smartphone to figure out not only your average performance, but also where, when and why you were at your slowest. This can be invaluable to know and really provide a useful guide when you’re putting together an itinerary for a new hiking trip.

We hope you found this useful, please share it around your networks if you did 🙂

Happy hiking and stay safe on the trail!

How To Keep Drinks Cold In A Backpack

Nothing quite beats a refreshing ice cold drink after a few miles hiking in the summer heat!

If you’re wondering how to keep drinks cold in a backpack, or asking yourself if it’s even possible, read on for some top tips on how to keep your drinks cooler for longer while you’re out on the trail.

Staying Hydrated

It’s important to drink regularly when you’re out hiking in the heat. While you will naturally become thirsty as your body seeks to replace moisture lost through exertion and to cool down, it can be pretty unpleasant drinking warm water on the trail.

You will probably find that keeping your drinks cooler in your backpack will encourage you to drink more regularly and in consistent quantities, which in turn means you’re less likely to dehydrate.

The Science

To stand a chance at keeping your drinks cool, or at least not too unpleasantly warm, it helps to understand why hot drinks cool down and cold drinks warm up.

Basically, both drinks adjust to the ambient temperature. A cold drink will absorb energy from its environment, while a hot drink loses it to its environment.

In a closed system, the second law of thermodynamics ensures that a thermal equilibrium is reached between an object and its surroundings. Under normal conditions heat flows naturally from an object at a higher temperature to another at a lower temperature.

So, basically speaking if we want our cold drink to stay cold, we’re going to need to minimize the difference between its temperature and its surroundings. This will limit the amount of heat that will be transferred to our drinks. Science lesson over, let’s put this into practice!

Preparation

As with many things in life, preparation is key. Start by getting your drinks as cold as possible. If you’re setting off from home or somewhere with access to a freezer, then put your drinks in to freeze. Remember water expands as it freezes so don’t overfill!

If you’re in a hotel or hostel, your best bet is probably going to be to purchase your drinks from a nearby store as you set off. If possible select the coldest at the back of the cooler.

If possible grab an ice pack or two and stick them in to freeze. Stores may have disposable thin plastic ice packs ready to go in the chiller cabinet.

Insulation

Once you’ve got the coldest drinks you can get your hands on, the challenge is to keep them that way, for the next few hours at least. As you can’t take the fridge with you, you’re going to have to find a way to keep the drinks surroundings, i.e. your backpack, as cool or cooler than the drinks to prevent them heating up.

Insulation is the key here to minimize any difference in temperature. Put your cold drinks with an ice pack, if possible, in a plastic bag. Depending on your circumstances an insulated thermo bag would be ideal, however, if you don’t have one to hand, use any plastic bag to protect the rest of your gear from any water.

Wrap this inside your sleeping bag, spare layer or any other insulating gear you’re taking with you and place it at the bottom of your backpack. The more insulated they are, the longer your drinks should stay cooler. Just be sure to not get anything wet if you need to wear it or sleep in it at night!

Freeze Some Water

I personally prefer to freeze a plastic water bottle or two overnight, and then pack them away, wrapped to keep them as cool as possible for longer. I’ll ensure the water in my hydration bladder is cold, see below, when I start out so I have cold water for the first hour or two.

This gives me easy access to cold water early on my hike, while keeping the interior of my backpack a little cooler too. I then replenish my bladder with the water from the bottles when it melts. Remember they were frozen, so they will be colder for much longer.

When the day is at its hottest, your drinks should remain cool in your backpack. As you consume them and with the passage of time, they will inevitably heat up, however, they will be much more pleasant to consume than warm, tepid water.

What About my Hydration Bladder?

If you prefer to use your hydration bladder in hot weather, I would recommend putting some ice directly into the bladder and insulating it well in the center of your pack.

Bear in mind you won’t be able to freeze it as you’ll risk splitting the tubes. Also any water in the tube is going to warm up when you’re out, so either take large gulps or remember to drink more regularly to avoid it becoming too unpleasant.

Cold Drink Cheats

Make the most of your surroundings. If your hike passes any creeks plan to stop off to eat nearby. On arrival place any warm drinks in the cool waters and let them cool for at least 30 minutes.

By the time you’re good to go, they should be cool for later on. Wrap them in a wet item, then a plastic bag and insulate inside your backpack. If it’s really hot you’ll want to take a dip yourself or wet your clothing and headgear.

If you have a Lifestraw or similar, you could drink the cold water directly from the creek itself. If you know that there will definitely be water in the creek at that time of year, then this could allow you to reduce your pack weight by carrying less water. Note: Always be sure to check in advance if it’s OK to drink the water, even with a filter.

If your hike itinerary passes near any small towns or villages, check ahead to see if there are any nearby convenience stores that wouldn’t require much of a diversion.  This can also help to keep your pack weight down, as you won’t need to pack as much water at the start. Carrying less weight, you’ll exert yourself less and perspire less.

Recommended product

One product I’ve used non-stop over summer is my Aquatix stainless steel sports water bottle, pictured below. If you’re looking for a hassle free way to grab a cold drink and head out the door, this takes some beating.

I use it for the first few hours of my day hikes and it’s really handy for keeping a cool drink to hand, without opening and warming up the rest of my drinks.

It has a lock feature and a flip top so you don’t have to worry about soaking the rest of your gear. It’s also excellent for keeping your drinks warm in winter, so you can use it year round. Check it out here.

Conclusion

How to keep drinks cold in a backpack – start with ice cold water and use plenty of insulation. If possible make use of any possible resupply points on the go and invest in a specialist insulated sports water bottle, you can also use it in winter to keep your drinks warm.

Remember too that freezing good old fashioned plastic bottles overnight before your hike, can help to keep your water colder for longer, but on a really hot day, this will have limited use.

If you’re heading out far in the heat, don’t forget to keep drinking water regularly. Even if you don’t succeed in keeping your water as cool as you’d like for one reason or another, remember,  drinking warm water will still keep you hydrated.

So, whether it’s refreshingly cold or bordering on unpleasantly warm, keep drinking and stay hydrated!

Hiking in Summer

Broadly stated, there is usually no better time of the year to head out on the trail than in Summer. I like hiking all year round, but I thought it would be interesting to assess what I see as some of the benefits of hiking in Summer as opposed to other times of the year.

A Sunny Day For Hiking

The Weather

First up, the obvious place to start is with the weather. The weather tends to be nicer, in many parts of the world, with more sunshine and less cloud in Summer. Of course, even if it is sunnier and hotter, you still need to be careful when it comes to the sun.

It can cause as many problems as cold weather when you’re out hiking in the heat for a long period of time. Dehydration is not uncommon for example and although this can happen at any time of the year, a beating sun certainly increases the likelihood.

The potential to encounter this problem is of course exacerbated in more extreme parts of the world, say hiking in a desert for example.

However, generally speaking, the warmer weather and nicer temperatures make for a much more pleasant hiking experience. I should conclude this section by saying that even in Summer, in temperate parts of the world, you can still get drenched in a downpour and caught out by the weather at any time.

The advantage can be that you may get as cold as you might in Winter, however, I have hiked in the Summer and got drenched in various parts of the world and with a cool breeze and heavy cloud cover, it didn’t feel like summer at all, at times!

People are more Likely to Hike

Summer is the perfect time for a beginner hiker to get started as the better conditions mean one less thing for them to factor in when preparing and getting used to what’s involved.

Similarly, there are plenty of fair weather hikers who only poke their heads out onto the trail in the Summer time. The thought of dragging themselves across mountains in cold and wet conditions is simply a no no for them.

That isn’t an issue in my world as I know plenty of all year round hikers. However, I know a couple of friends who would like to get out on the trail more, but they need to bring their wives out with them too as they only get to spend a day together here and there, what with kids and so on.

Their wives would not even consider setting foot onto any trail if there was a threat of rain!

However, in Summer, it’s a much more viable option for many people and you of course tend to see many more people out on the trail in summer that at any other time of year.

Beautiful Views

This one ties in with the weather but it does merit a special point all of its own. Summer is really great when it comes to getting those panoramic views that every hiker hopes to get rewarded with after a long trek up a mountainside!

A Beautiful View

There is much more chance of catching amazing views, and that great photograph to show off to your friends, when the sun is out! Now, of course some places experience sun most of the year round, but for many, summer is the best chance of a blue sky photo opportunity.

I hasten to add that there are plenty of beautiful views to be had on cloudy days too, they can have their own mystique and qualities which are always worth experiencing, but much harder to catch on camera by an untrained photographer like myself!

More Options

In Summer, generally speaking, when you visit a national park or the like, all the various trails on offer tend to be open.

Although it’s likely to be a busier time of year so there will be more people too, it does mean there are usually plenty more options to experience on the trail. If you plan ahead, you should get to do the hike you prefer.

At other times of year, due to the weather for example, many trails are closed as they are deemed to be too dangerous. Think of heavy snowfall threatening avalanche, or perhaps the Narrows in Zion National Park, where the river is too dangerous to hike in for periods of the year due to run-off from rainfall and melting snow.

There are plenty of examples of this and overall, it’s more likely that in Summer, you have plenty more options to choose from when you hit the trail.

Less Gear to Carry

Again, broadly speaking, your gear bag will be a bit lighter in the Summer. While you always should have extra layers for warmth and suitable rain jacket and rain gear, in summer time, the necessary performance requirements are likely to be less.

For example, as I move through the year, I go from wearing a very thick and heavy fleece in Winter, to a much lighter one in spring and Autumn, to an even lighter one in Summer. In fact in summer, many times, it just stays in my day pack.

Similarly, in winter, I will carry extra pairs of thick gloves and mitts but in Summer, when the temperatures are much better, I don’t need this kind of heavy artillery gear in my bag. I of course always have suitable spares for emergencies but there is definitely more leeway when the sun is shining and the temperatures are up.

Conclusion

So, there you have it, some of what I see as advantages to hiking in Summer, as opposed to any other time of the year. Now, as I said at the start, I hike all year round and love what every season brings in terms of experience and enjoyment.

However, Summer is a fine time to experience the mountains and it can be really sweet to hike when nature is in full bloom, and you can really see off into the distant horizon. Summer time certainly brings it’s own majesty to an experience on the trail, that is for sure!

What about you? Is Summer your favorite time of year to hike? I’d love to hear your thoughts in the comments below.

How to Choose the Right Hiking Trail

For someone new to hiking, it can be a bit daunting when you are trying to get out on the trail for the first time. There is a fair bit to think about before you set out.

On the Trail

What clothes should I wear? Have I got the right hiking boots? What food is good for a hike and how much water should I take with me? Where should I go for a hike?

The day hiking checklist is extensive when you’re new to it all. In this post I want to look one of the many items on that list that a new hiker needs to take into consideration. That is, how to you choose the right trail for a hike.

This of course gets easier and easier with experience but it always plays a part in your planning, even for the most experienced hikers, you always need to be aware and check on many things to confirm that a particular trail or route is right for you.

OK, although we’re going to assume that the hiker who is the subject of this article is new to hiking and so needs to start from the basics when picking a route, the same things apply to experienced hikers too. Let’s kick on!

Fitness

The trail you take on, will need to match up to your level of fitness and capability. If you never hike more than 3 miles in your normal run of things, setting out on a 10 mile hike is of course not a smart idea. Your body will not be able to jump to that kind of exertion.

Next up, in terms of fitness, take the activity itself into consideration. What I mean by that can be illustrated by a personal example.

My ex girlfriend was a Pilates and Yoga teacher, so obviously pretty fit with good core strength. However, when she came out on hikes with me, she could often struggle at times and found the going, even on short hikes, tough.

Why would that be, she is very fit after all? Well, you need to factor in the activity. Being very fit from doing Pilates and Yoga, may not necessarily transfer over to hiking 10 miles.

It’s a different kind of fitness. Another area I have seen this a lot in is people who are into strength training and weight lifting, as I am myself a bit. If you have good conditioning, it should be a good help to your hiking, but strength from doing weights does not necessarily transfer across.

Weightlifter

We’re of course always looking at aerobic or anaerobic exercises which can deliver different things in terms of fitness. You’d be surprised how many people automatically assume their normal training transfers across to hiking.

If you’re not used to hiking, your body needs to adjust, just like for any new activity. Some will do it faster than others of course, but most people have to go through some period of adaptation.

Bottom Line

When you’re choosing your first trail for your initial hikes, choose something that is well within your comfort zone. It will give you a good feel for what you are capable of.

It can be OK to push it a little bit, for example, say if you run 3 miles regularly, maybe try a 5 mile hike and see how you get on. That should be within your reach, but be sensible, only you know what works best for you 🙂

Location

Ideally, on your first time out, when deciding where to go for a hike, pick an area you know or at least near to you. Why does that matter? Well, you already know the climate, the temperature at the time of year (Although bear in mind it will get cooler as you gain altitude), what wildlife you may have to consider and so on.

Now, in saying that, you will likely be going into a more wilderness type area and with that in mind, you should still check up these same items as you may well encounter a whole range of different things in a more wilderness area.

For example, as already mentioned, the weather can change significantly as you hike up a mountain, there may be wildlife that you don’t normally encounter that you need to think about, etc..

When thinking about location when starting out hiking, it’s a good idea to pick a place that is popular i.e. so you will encounter other folks on the trail. As you’re just starting out, you never know what may happen and so you want to be as safe as possible in the location you choose.

If, heaven forbid, something was to happen to you and you couldn’t get help, if there are people around, there is more chance of being found and getting help if you need it.

Trail Difficulty

This kind of ties in with fitness, but assuming you go to a well established area for your initial hikes, there is a good chance there will be well established trails that are split out into levels of difficulty. An example is listed below:

Difficulty LevelDescription
EasyHiking on obvious trails that are easy to follow and are well maintained, minimal height gain and less distance
ModerateLonger distance with more ascent and potential off trail segments i.e. over tougher terrain
HardLonger trails with much more up and down with more height gain, potentially more off trail and challenging terrain to negotiate e.g. scree, rocky areas, etc.

Basic trail maps are also often available to buy in information stations so you can find your way around.

Of course, you may want a challenge but again, be sensible! Pick something that is well within your capability. It’s fine to push the boat out a bit and challenge yourself but just do it in a sensible manner.

If you’re unsure, start of on an easy level of difficulty and you can work up as you get used to the different challenges available. In fact, you may do a basic trail and find that you’re happy to stay at that level, no more difficulty required! That’s totally cool too.

Again, at the start, the best advice it to stick to well marked, even signposted, trails to be sure you don’t get lost. I do not recommend going off trail when you are only starting with hiking, you need to get some proper experience under your belt before even considering that.

By the way, just because trails are popular and well sign posted, it doesn’t mean they aren’t challenging. There are plenty of well marked popular trails all over the world that are challenging, even to experienced hikers!

Going Alone?

I am not against this is you have followed all the items listed above. If you’re in a well established area with decent foot traffic, you are probably safe to go out alone as long as you take sensible precautions e.g. tell people where you are going and when you should be back, etc.

Hiker on Trail

Ideally, going out with a few people is better. If something happens to one or more of you, there are others there ready to act to get help.

I don’t mean to flog a dead horse but it can’t be emphasized enough … be sensible about what you decide to do always keeping your safety in mind and you will most likely be fine.

Hiking Gear

This is a HUGE topic and one you need to spend time learning more about as you get more and more into hiking. If you’re just starting out, and getting a flavor for the trail and sticking to well known trails, you don’t need to spend a fortune on gear at the start.

Some things, like hiking boots and a decent rain jacket are non negotiable though. Again though, if the sun is splitting the trees where you plan to hike, you might be fine in a pair of shorts.

Hiker Eating On The Trail

The overall point here is that if you’re choosing a hiking trail you should be sure you have appropriate gear with you for that trail.

If you expect rain, have a good rain jacket and suitable hiking pants, if the sun will be strong, you need a good sun hat, sunglasses, sunscreen, etc. you get the idea, bring gear appropriate to the challenge of the trail and its location.

You will nearly always need some kind of good day pack too, to carry any spare gear as well as your food, water, a basic first aid kit, etc. so keep that in mind!

Safety

This should probably be first on the agenda but it really encompasses everything else that has already been listed, as at the end of the day, it’s all about staying safe! Whatever you do, don’t put yourself at risk and be sure you have a plan and know how to get help in an emergency.

Don’t take on more than you can chew and be sure to check out the basics like:

  • Weather on the day
  • The nature of the trail you are taking i.e. terrain, altitude gain, etc.
  • What gear you should have
  • You have a fully charged phone (There is hopefully reception)
  • You let people know where you are going, what route you will take and when they should expect you back, etc.
  • You have adequate food and water with you
  • Any other safety concerns you should think about e.g. wildlife, access restrictions, etc.

There is a lot to consider when it comes to staying safe on the trail for sure, but a little thinking and planning in advance becomes second nature in no time!

Conclusion

I hope you found this short article on how to choose the right hiking trail useful. While it is aimed more at the beginner hiker, as mentioned at the start, it is always relevant to all hikers, on all trails!

Always think safety first and how you can maximize the enjoyment of your day without taking any unnecessary risks. I think it is fine to push the boat out a little but only within your capabilities, in a safe and sensible (there’s that word again) manner.

I lead groups in the mountains and one of the biggest causes of people getting into difficulty in the mountains that I have come across, is bad preparation and lack of knowledge.

I would guess that 95% of this is easily preventable, and there is plenty of information to keep you safe, that is freely available before you ever set out.

Get online and do some research about all you need to prepare for, or even better speak with someone who has hiked the trail you want to hike, hiking clubs and associations are an excellent resource for this.

To conclude, whatever you do, choose your initial trails to hike on wisely and be sure to always stay safe. I hope you found this useful, please like and share it if you did!

Stuck for Folks to Hike With? Try These Suggestions!

This is a kind of funny topic to think about as I have never really had any issues with finding people to hike with. However, it can be pretty common for some.

I remember it a little myself when I first started out hiking, I just didn’t know any hikers so I had to have a think about the best ways to get some folks out hiking with me.

Lone Hiker

So, in this article I want to make some suggestions to help get you out to meet like minded folks to get started on the trail and save you having to hike on your own.

Join a Hiking Club / Group / Association

Far and above the best way to get started on the trail and to meet like minded folks, is to join a hiking club or association. They are built for beginners and will have all the necessary things in place to help a new hiker get started.

For example, typically they will have graded levels of difficulty hikes, transport (possibly), experienced hike leaders and so on. Getting started this was is my number one recommendation and you will quickly make lots of new friends.

But What if a Club Doesn’t Suit?

When you’re just getting started hiking, maybe you feel it’s too early to go hell for leather and join a club or association. That may be too much of a commitment for you at the start and you just want to give it a try to see if you will like hiking as a pastime.

It could also be that there just aren’t any hiking clubs or associations in your local area so you have to work it out yourself. Having never been to the mountains before, you should always do plenty of research on what to expect, how to prepare etc. Check out the hiking for beginners guide for more information on that.

However, assuming, you have done your research and you are ready to safely hit a trail near you off of your own bat, you could find yourself stuck with no-one to go along with you on your adventure.

If that is the case, fear not, as with anything in life, you can always get creative to try and recruit people to head out on the trail with you!

Your Buddies

Yes indeed, some of your friends may look at you like you have ten heads when you suggest to head to the mountains for a hike … for fun!

However, mixed in among them you may well be able to find some willing resources who just need a little bit of cajoling. You most likely already have fit and healthy friends who maybe get their kicks from lifting weights in the gym or running miles on a treadmill.

These are a good bunch to target. Already fit and healthy, they are probably not averse to a challenge. If you get rebuttals at the start some simple reverse psychology could easily do the trick.

For example, cajole your weight lifting friends that they probably wouldn’t be able to hike up a mountain as it’s a different kind of fitness than they’re used to … that can get a very swift ‘Yes I can’ reaction as no-one likes to be told they can’t do something.

Another example, you have a friend who is big into yoga. Tell them that there’s nowhere more peaceful and spiritual than the mountains with nature all around. This is of course actually very true and it may just appeal to their mindful nature!

For friends in general, always start with highlighting the benefits of hiking. Match up what they think they would like with their personality and what they already enjoy.

Work Colleagues

If you have no joy with your friends, you could always look to your work colleagues. This may not be a runner for some, I totally understand that. But for others it could be a winner.

Just think about it, a common pastime among work folks is heading for a few beers after a hard week at the office. What better time to put forward a suggestion to head for the hills over a weekend than when everyone is winding down after a relaxing beer or five 🙂 You could get a lot of takers!

Think about taking a wider initiative too. Does your workplace have a sports and social or some kind of extracurricular activities club? Why not put a hike in the mountains forward as a suggestion for them for their next big trip away?

You can easily hire a guide to take you on a tour of a mountain or two in a range close to home. There are all manner of tour companies available too

If that’s not an option, just start to talk about a hike to help with team bonding and you could start to get people interested. What better way to get to know some of your work mates than to head out into a totally new and challenging environment for some team bonding!

Family

Are you not keeping in touch with your extended, or connecting with your immediate family as much as you should? Not enough family time going on? What better way to sort that out than to get a bunch of the relatives out on the mountains for a day out!

It could be novel … it could be hell … who knows until you try! Of course, similar to the work colleagues option above, this is possibly just a very bad idea for some.

However, if you and your extended / immediate family get along (at least a bit) and you fancy a hike in the hills, it could be a great source of folks to get to head out with you.

Don’t be limited by age barriers either! My uncle still hikes in the mountains in his 80’s and at the other end of the age spectrum, what better kind of adventure can a kid have than heading into the wilderness and the mountains. A break from video games and the internet could be a winner!

Also, if you haven’t taken some time out with that special someone in a while, a romantic trip into the wilderness could be just the ticket!

Couple Hiking

Most couples and families like the idea of spending time together so this could be a great option to suggest to do just that!

Conclusion

As I stated at the start, if you’re stuck for people to hike with, it can be best to seek out a hiking club or association. Meetup is also another really good way to see if there are hiking meetups in your local area and a great way to meet folks.

If that isn’t an option, why not try and use one of these options to see how you get on. When you head out on your first hike into the mountains, I recommend that you don’t go out on your own if possible.

It’s nearly always better to head out with other folks when it’s your first few times out. Just to get comfortable before you get more adventurous. Heaven forbid that anything should go wrong but if you happened to get unlucky and take a tumble, there is safety in numbers, to get emergency help, for sure!

I hope you found this article lighthearted and useful! What do you think? Is there anyone else you could call if you’re stuck for a hiking buddy? Please let me know in the comments below!

New To Hiking – Gear Accessories

This is the final post in the area of gear for folks new to hiking. We’ve pretty much looked at most of the core essentials you need when getting started. Everything from hiking pants to hiking boots, from rain gear to day packs which we looked at last time out.

Today I want to take a look at some hiking accessories you may need for your first hiking trips out on the trail. Now, I want to reiterate this again lest there be any confusion as to the message of this series of posts for beginners on the area of hiking gear.

Hiking Accessories

Photo Credit: Perfect Zero

The main thing I want to do with these posts is to point out the pieces of gear that you should have when you first head out on the trail. Now, hiking gear can be very expensive so when you’re just getting started, I think it’s fine to improvise with some kit you probably already have to save you having to have a big splurge in the shops from day one.

However, the main background context for all this is that your first hikes are:

  • Short hikes on very clearly marked trails
  • Made on a day and time of the year when the weather is good
  • When the temperature is favorable, warm and pleasant
  • You use these workarounds only for a few hikes at most before getting the proper gear

So with that in mind, lets move into the wonderful world of hiking accessories.

Hiking Accessories

Wow, where do I start! There are so many accessories and hiking gadgets that you can have for the trail that it’s difficult to know where to begin. From a hydration bladder to a good knife, from a GPS to trekking poles, there is a lot of great kit you can get to enhance your hiking experience.

However, in keeping with the thread of this series of posts I want to point out a few key ones for when you’re just getting started.

Hiking Hat

The background context to these posts is, as you know, starting out hiking at a favorable time of year when the weather is good. However, even in good weather, it’s a good idea to have a hat.

A hiking hat serves all manner of purposes. From protecting you from the heat and UV rays of the sun, to keeping your head warm when it gets chillier. There are all sorts of hiking hats available which you can take advantage of. Personally I use a sun hat or a baseball cap in Summer and a hiking beanie, see two of my beanies below, for colder weather.

Two New Beanie Hats

There are other options too, like buffs and so on but generally speaking I stick with those hats most of the year round. In all likelihood, you already have a suitable hat to protect your head while out on your first few hikes so you shouldn’t need to get a hiking specific one right from the get go.

For Summer, a sun hat or baseball cap is how I roll 😉 so I recommend those if they suit the climate you’re hiking in. If you do want to get a hiking specific hat, check out the post on how to buy a hiking hat. It goes through a lot of different hat options and will give you some ideas if you are ready to purchase one.

Gloves

Now, if it’s a warmer time of the year, as I suggest for your first hikes, you may not need these. However, if it is a bit cooler or just a colder day, gloves are a good idea if not a necessity. For Winter I wear ski gloves and the rest of the year I have slim hiking gloves that enable me to use my fingers and operate my mobile phone. They are also purpose made functionally to help keep more heat in.

Again, you probably have something lying about the house that you can use when you first start out so again, you should be good to go with a workaround pair until you’re ready to purchase a hiking specific pair.

Sunglasses

I will do a post soon on the best sun glasses for the trail but when looking at them they fall into 4 categories, 1 to 4. Each level provides more protection than the lower one so 4 provides the most and 1 provides the least. Note I am saying protection in terms of that when you’re out on the trail you’re usually much more exposed and so in direct sunlight much more than you normally would be.

Sunglasses

Photo Credit: Jen Durfey

Category 1 would be more for normal use whereas category 4 are for very high altitude snowy mountains where snow blindness from UV rays reflecting off the snow is a real hazard and very dangerous for your eyes. I needed category 4 sunglasses for my Mont Blanc climb for that very reason.

However, when you’re just starting out, any pair of decent sunglasses should do the trick. If you have sport / outdoor ones all the better but normal day-to-day ones will be fine for your first hikes out. I should add that sunglasses aren’t a necessity but can be nice to have a on a really bright and sunny day.

Trekking Poles

Now, you probably won’t have these when you first start hiking but trekking poles are a great investment if you choose to pursue hiking on an ongoing basis.

In the interim, you could opt to use a walking staff or stick if you normally use one. Not ideal for open mountain walking but should be fine on a well marked trail or path.

Water Bottles / Hydration Pack

It is very unlikely that if you’re new to hiking you will have a hydration bladder lying about unless you have one from other outdoor activities. It is even more unlikely that you will have a hydration pack compatible day pack to put said bladder in. However, I want to mention this as the way to go if you get more into hiking. It’s by far the best way to carry your drinking water in my opinion.

Platypus Big Zip LP Reservoir

Pictured is the Platypus Big Lip Hydration Reservoir, the one I use. Click on the picture to learn more.

When you start, any water bottle will do, one from the store is just fine. You can get reusable hiking water bottles in any outdoor shop or online too. They’re cheap enough and I have several which I use in conjunction with my hydration bladder.

Hiking Socks

I think it’s a really good idea to get a good pair of hiking socks when you start out hiking, they’re not that expensive and they really make your feet that bit more comfortable and will keep your feet that bit warmer.

Three Season Hiking Socks

You can read the hiking sock buying guide here. If you don’t want to purchase just yet, choose a thick, warm and comfortable pair. Look for socks made from wool or synthetic material. They’re the best materials for wicking moisture away from your feet, and your feet will of course be more sweaty as you’re going to sweat more as you hike.

Sunscreen

Technically, not really a gear item but I am adding sunscreen in as it is one that is so easily overlooked and where you can easily pay the price for neglecting if you don’t respect the sun.

I have done so myself many times 🙂 As I am recommending you do your first hikes in fairer weather and ideally in Summer, I wanted to add this one in at the end!

Summary

So, that’s it on the hiking gear front for this hiking for beginners series. As you can see, if you’ve read every post, there is a fair bit of kit you need to get and we’ve only really touched on the basics in this series.

I think it’s fine to use some normal day-to-day kit for your first few hikes as long as they’re in a relatively benign environment with clearly marked trails and paths. However, you need to use your judgement in that regard. Some things, you just won’t get away with.

If you’re planning to head out to a National Park and walk some of the marked trails close to where you park up, you just might get away with wearing your sneakers on a good summers day. If however, you think heading up into open mountain in them is a good idea, you’re way off the mark.

Common sense is always critical when you’re in the great outdoors. If you’re unsure, ask an experienced hiker or someone who knows the area well. There will be a wealth of information on your chosen hiking area available online too no doubt.

Keep yourself close enough to your base camp or car so should something happen and you get drenched in a downpour, you won’t have too far to travel to get back to the safety of your car. It’s a good idea to keep some dry clothes in your car too, just in case.

Conclusion

I stress again, that this is only for when you’re getting started. If you find you like hiking, I recommend you start buying all the appropriate gear as soon as possible starting with a good pair of hiking boots and a decent rain jacket. For an extensive list of all the gear you will need, check out the complete day hiking checklist.

If you’re just starting out hiking, I hope you’re finding these posts informative and useful. Please share them around on your networks and if you’ve any questions on anything please leave a comment below.

Next up, we’ll look at some key hiking supplies you should take with you on your initial hikes when you’re just getting started.

If you’re coming straight to this post, you can go right back to start of this whole series for beginners by clicking here.

Getting Started With Hiking – All About Daypacks!

Well, we are drawing closer to the end of our short sojourn in the wonderful world of hiking gear for beginners. I think we’ve pretty much covered most of the clothes that you need to wear, we started with hiking pants and last time out we looked at rain gear with a few other bits and pieces in between.

Now, when you head out on any hike, you need to be able to carry some stuff with you. Even for short hikes when you’re getting started, you need to carry some essentials like water, some food, any extra gear, etc.

Daypack On The Trail

Photo Credit: Stig Nygaard

The simplest way to do this, is to use a day pack. Now, if you’ve been following this series of posts for beginners you know that the general gist, in the context of hiking gear, is to try and offer alternatives, where possible, to full on branded hiking gear when you’re just getting started.

Cost

Good hiking gear isn’t cheap so it may take you a while to acquire all the various bits and pieces as buying it all out right could easily move into the latter end of $1000+! That is not as big a problem over time. Good gear will last the course and so it is worth investing in it when you’re sure you want to commit to hiking as a regular pastime.

However, it usually takes time to get all the pieces together so having some other options when you’re just getting started, can only help. Now, I know I sound like a broken record at this point but in the context of gear, I want to list out the main assumptions I am making about your first hike or two. These are that your initial hikes will be:

  • Short hikes on very clearly marked trails
  • Made on a day and time of year when the weather is good
  • When the temperature is favorable, warm and pleasant
  • Only for a few hikes at most

With those things as the background and setting, it’s easier to bend a few rules here and there 🙂

OK, so on to daypacks!

If you’re coming straight to this post, you can go right back to start of this whole series for beginners by clicking here.

Day packs

Now, I guess I can pretty much take it for granted that anyone reading this knows what a day pack is. However, in case not, a day pack is a backpack that has enough space in it to accommodate all you need for a day. Simple enough 🙂

You can have any number of types of day packs. For example a small gym pack could be a day pack of sorts. A college book bag could also be a reasonable day pack and are very commonly used. However, in hiking terms, while a day pack fulfills the same essential function as these other day packs, it is of course specifically built for the trail.

Osprey Talon 22 Backpack

What does that mean?

Well, I don’t want to go into the full list of functional specifications and capabilities in this post, you can read all that in the daypack buying guide. However, I will give a couple of examples below for illustration. If you’re ready to purchase a daypack you can go straight to our top recommendations for men’s daypacks here and our top recommendations for women’s daypacks here.

Examples

Example number one! A hiking day pack will have very hiking specific features such as a hydration sleeve. This is a sleeve at the back of the pack into which a hydration pack can slide neatly into. A hiking day pack will also have all the required ports and so on to enable the drinking tube to feed through from the bladder to your mouth easily and securely.

Another example would be a built in rain cover. While you’re out on the trail, you are of course more open to the elements. With that in mind, rain will most definitely be on the cards at some point. A rain cover built into your day pack enables you to cover your pack with a rain protective outer layer which helps keep the contents of your pack dry.

The Good News

So, as most people have an old day pack for the gym or for their college books lying around, the question becomes this. Can I use any old day pack for hiking? In general terms, as with most hiking gear, I would advise you no and to get the proper day pack with all the functional specs and trimmings for the trail.

However, you’re just getting started here so I think it that scenario, it is totally fine to use an old day pack. Remember the assumptions above, at the start, you should be out in reasonable weather at a good time of year, so hopefully rain won’t be an issue and you can carry a bottle of water in your pack rather that use a hydration sleeve.

You will miss out on some of the extra trimmings like good ventilation to your back and trekking pole loops, but that’s fine when you’re just getting started.

Upgrade When Ready

When the time comes and you know you want to pursue hiking, I strongly advise you get a good hiking day pack that does the job. If you’re planning longer treks you will of course be moving into larger backpack territory but that’s a whole other world of things to consider and we are just getting started here so I’ll leave that for another time 🙂

Think of it in these terms though. As mentioned above, when you first get started with hiking and decide you want to do it regularly, you will probably have a long list of things you need to get. It won’t be cheap to get decent gear and kit so you will likely need to space it out over time.

Therefore, At the top of that list you need to put things like hiking boots, a rain jacket and good hiking pants. A proper hiking day pack can sit much further down the list and be substituted with a basic alternative until you’re ready to purchase.

Conclusion

In conclusion, you need some kind of daypack when you’re heading out on your first starter hikes but I think you will be OK using something you already have when you’re just getting started.

As you progress, I highly recommend you purchase a purpose built hiking day pack as well as all the add-ons like a rain cover, hydration pack, etc. All in good time though.

So with that, I think we are drawing close to the end of the gear element on this series on hiking for beginners. We’ve covered most of the stuff you need to wear and something to carry some necessities in. Next up, I think we’ll conclude by looking at some of the key gear accessories you need to think about when you’re just getting started.

I hope you found this introduction to day packs useful. It’s another key part of your hiking gear that you need to take into consideration.

What do you think? Will any old day pack do for a few hikes? I’d love to hear what you think in the comments below.

Getting Started With Hiking – Rain Gear

Continuing in the series on getting started with hiking, the last time we looked at hiking footwear where we reviewed hiking boots and trail shoes. We’ve covered many of the key aspects of gear like hiking pants, shirts, baselayers and fleeces as well as boots. Today I want to move on to another key element of your hiking kit which is your hiking rain gear.

Raingear

Photo Credit: Paxson Woelber

Broadly speaking you need a good rain jacket and rain pants. A rain jacket is a jacket that is both waterproof and breathable. Rain pants are similar and are not the same as your hiking pants. Rain pants are put on over your hiking pants as a full outer protection layer for your legs against the elements.

The thrust of this series, with regards to gear, for beginners is about getting the chance to get out and try hiking without having to buy a load of gear from the start. So where possible, trying to come up with workarounds or cheaper temporary alternatives to brand name hiking gear while you figure out if hiking is something you want to pursue.

Some of the main assumptions I am making  for your initial hikes are that they will be:

  • Short hikes on very clearly marked trails
  • Made on a day and time of year when the weather is good
  • When the temperature is favorable, warm and pleasant
  • Only for a few hikes at most

With that in mind, let’s take a closer look at what you need to think about with regards to hiking rain gear.

Rain Jacket

OK, ideally you want a proper rain jacket suitable for the outdoors. You want something that is both waterproof and breathable. If you don’t have something suitable but you’re ready to commit to a purchase check out the rain jacket buying guide and visit our top rain jacket recommendations for men and our top rain jacket recommendations for women. You can find some excellent examples of very functional and popular rain jackets.

The North Face Men's Venture Jacket

If you’re new to hiking you probably don’t have hiking specific gear lying around. So, what alternatives could you use? Well, a basic rain jacket of some kind should do the trick for some initial hikes.

Most people have something of this nature. It probably won’t be breathable though but for a quick rain blast in fair weather, it will do the trick. try and pick something lightweight as you need to carry it when you’re not using it.

If you don’t have anything suitable in the rain jacket category you could invest in some cheap rain protection before buying a full on rain jacket.

A rain suit or poncho are some examples. Now, the cheaper versions of these aren’t ideal for the long term, although a poncho could be great for really heavy downpours in Jungles and that type of thing, but they can be sourced cheap and cheerful to get you started on the trail.

Rain Pants

Berghaus Mens Helvellyn Pant1

Starting with the ideal, you want to get proper rain pants for hiking. I currently use the Berghaus Hellvellyn Pants (see image below) as I use them and they have served me very well. From the summit of Mont Blanc to local hikes, they’ve really held their own.

If you don’t like them, you can also opt for something similar but look for the same technical make-up and functionality. If you’re ready to buy rain pants, check out the rain pants buying guide to give you some tips on what to look for. You can also find our favorite rain pants for men here and our favorite rain pants for women here.

Rain Pants differ from a rain jacket I think in that they aren’t something that everyone has lying about. Therefore you may need to get purchase these if you need them.

However, remember the assumptions I made above. I am advising that for someone new to hiking, you pick days in a time of year when the weather will be fair to get you started. Therefore, you should probably be able to get away without rain pants for a hike or two. In summertime with a good forecast, I generally don’t carry them in my day pack.

Another option to consider is waterproof gear from other sports. Think rain gear for golfers and that type of thing. They will use rain pants although they may not be as breathable so you can expect it to be warm in them. Not a big deal if you just want to stay dry for a quick downpour.

Similarly, as with the poncho above, you can opt to get a cheap and cheerful pair of rain pants that will do the job at the start. I really think that, as long as the climate and weather is decent, you can probably get away without rain pants for a few hikes at the start. If you’re on well-marked trails and can easily get back to your car, the worst case is that you will get very wet, not a total disaster 🙂

Conclusion

Rain gear is a critical part of your hiking gear and if you choose to really get into hiking, you need to buy the proper gear that is suitable for the trail. If however, you’re just dipping your toes in the water on a couple of short hikes, I think you can utilize some of the alternatives suggested above until you confirm hiking is the thing for you.

If you’re sure hiking is the thing for you from the get go, take time to find a good jacket. Read the rain jacket buying guide and check out the recommended hiking jackets linked to above for some very functional and popular jackets. Similarly educate yourself about rain pants before buying them too.

Finally, I think you should always have a rain jacket with you but in warmer times of year, in good conditions on very safe hiking trails, you are probably fine to leave the rain pants at home. As always, use your common sense to make a judgement call.

I hope you found this post on rain gear useful. It is not meant to be a detailed trip into the world of rain gear, that is a much broader topic. Rather, it’s meant as an introduction for a newbie who may not know what gear they need to think about. Next up, we’ll take a look at day packs.

Please leave a comment below and share this post.

  • 1
  • 2
  • 3
  • 4
  • Next Page »
  • Facebook
  • Pinterest

What are you looking for?

Copyright © 2025 · Cool Hiking Gear

Cool Hiking Gear is a participant in the Amazon Services LLC Associates Program, an affiliate advertising program designed to provide a means for us to earn fees by linking to Amazon.com and affiliated sites.

  • About This Site
  • Privacy Policy
  • Affiliate Disclosure Statement
  • Contact