coolhikinggear.com

  • Men’s
    • Best Hiking Rain Jackets for Men In 2024
    • Best Men’s Hardshell Jackets Of 2023
    • Best Hiking Pants For Men In 2023
    • Best Ultralight Rain Pants For Men
    • Best Men’s Daypacks For Hiking In 2023
    • Best Backpacking Backpacks For Men In 2023
    • Best Base Layers For Men In 2023
  • Women’s
    • The Best Hiking Rain Jackets For Women In 2023
    • Best Women’s Hardshell Jackets Of 2023
    • Best Hiking Pants For Women In 2023
    • Best Ultralight Rain Pants For Women
    • Best Daypacks For Women
    • Best Backpacking Backpacks For Women In 2023
    • Best Base Layers For Women In 2023
  • Hiking Accessories
    • Best Hiking Poles
    • Best Trekking Pole Monopod Camera Mount
    • Best Hiking Headlamps
    • The Best Hiking Watches In 2023
    • The Best Hiking Gloves In 2023
    • Best Hydration Bladders For Hiking In 2023
    • Best Compass For Hiking Our Top Picks
    • Cool Hiking Gadgets
  • Footwear
    • The Best Men’s Hiking Boots In 2024!
    • Best Hiking Shoes For Men In 2023
    • The Best Women’s Hiking Boots In 2023!
    • Best Hiking Shoes For Women In 2023
    • Best Hiking Sandals
    • Best Hiking Sandals For Women in 2023
  • Hiking Guides and Resources

What Should I Pack for a 2 to 3 Day Backpacking Trip?

Typically most backpacking trips I do, are over the span of a weekend, so usually 1 to 2 nights, sometimes 3. Having done many of them over the years at this stage, I thought it would be useful to lay out some information with regards to what I typically pack for a 2 to 3 day backpacking trip of this kind.

Backpacking Gear

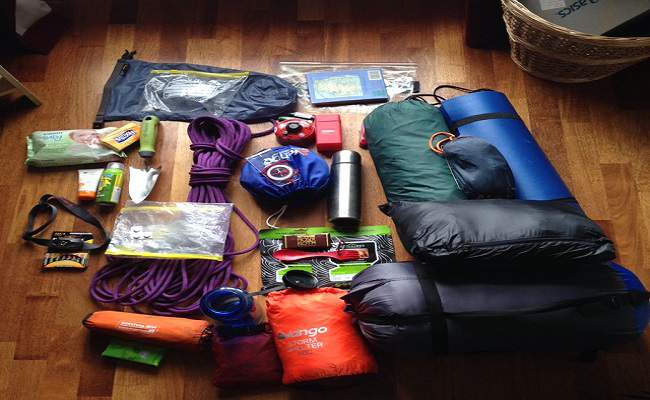
I will try and split the various bits and pieces out into logical groupings to help make it clearer to follow. So if you’re unsure of a particular area, say food, you can just skip to that area to read up on it.

I’m going to preface this article by stating that when you start backpacking you need to develop a system. The system obviously needs to be adapted for varying locations, conditions, seasons, etc.

We’ll explore that more below but ultimately, while most ‘systems’ will be similar, there will be nuance based on personal preferences.

Your overall backpacking system comprises of several smaller systems. So, you have a system for shelter, for sleeping, cooking, and so on. Breaking it down that way makes it easier to manage and map out what you think you need.

Shelter

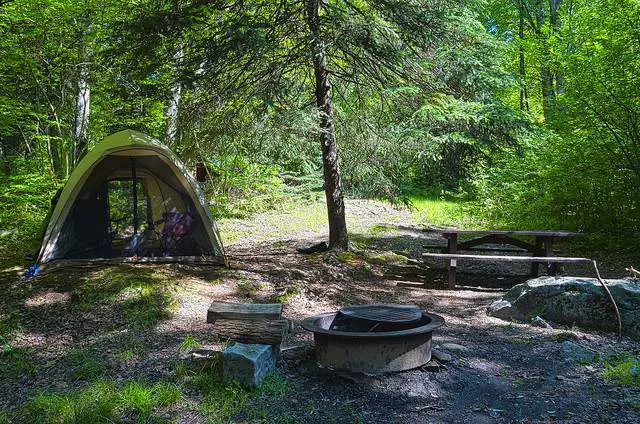
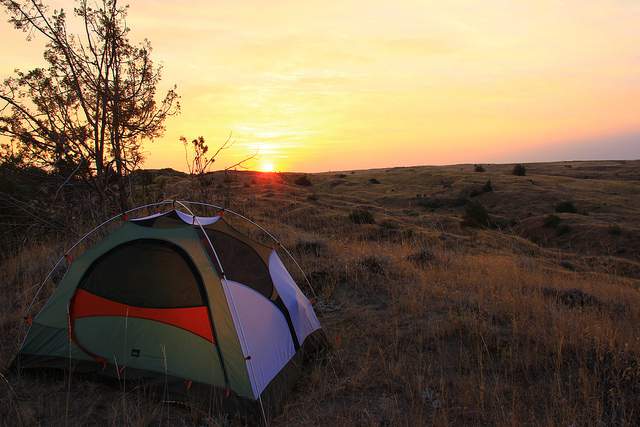
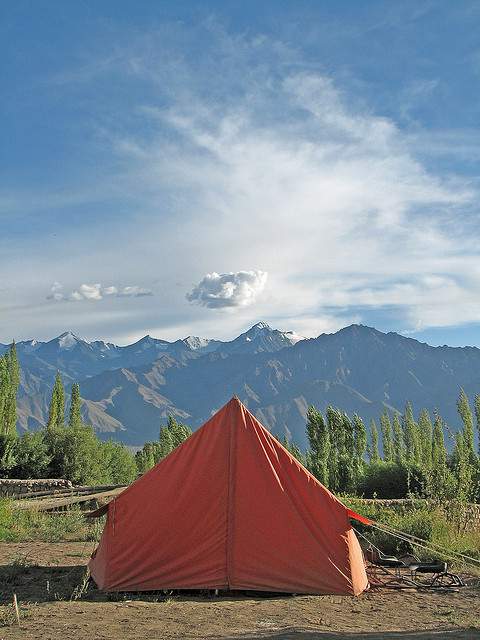
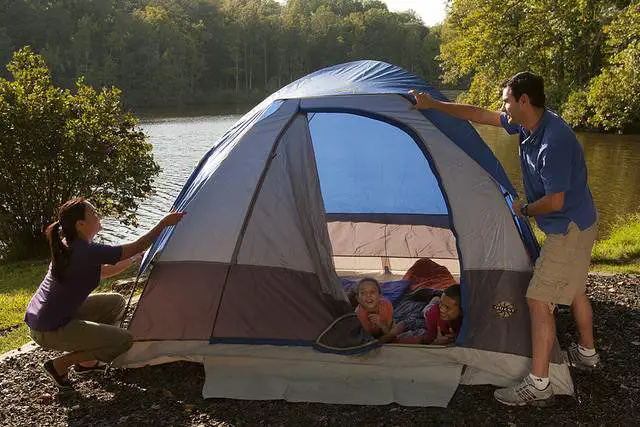
Let’s start with the obvious one for backpacking, shelter. You of course must have shelter with you if you plan to stay out overnight in the wilderness. With that in mind I recommend a one or two person tent. 

A two person tent is a bit too much in my opinion but it is doable to carry for one person if it’s a sleek enough package. If you’re with a friend, you can always share the load by splitting it up between two people.

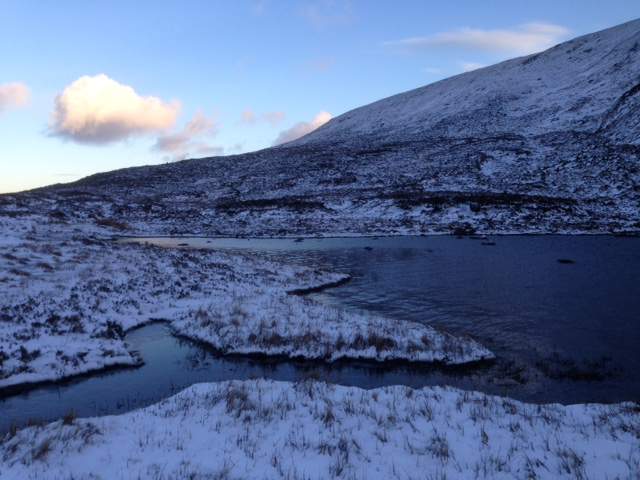
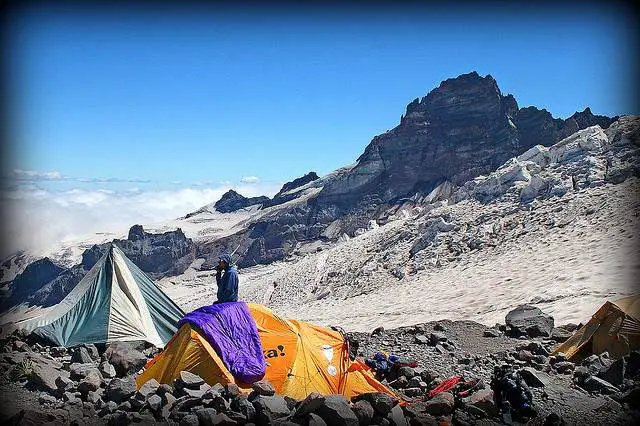
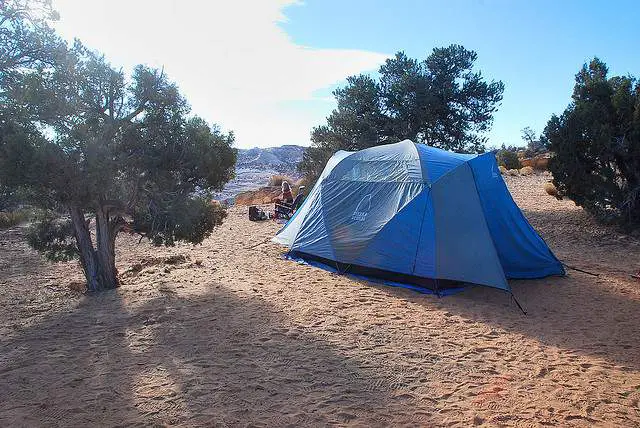
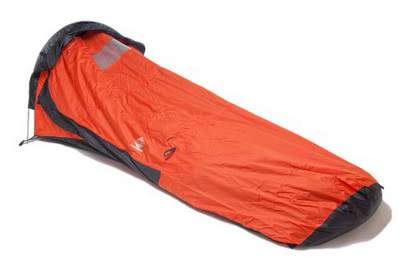
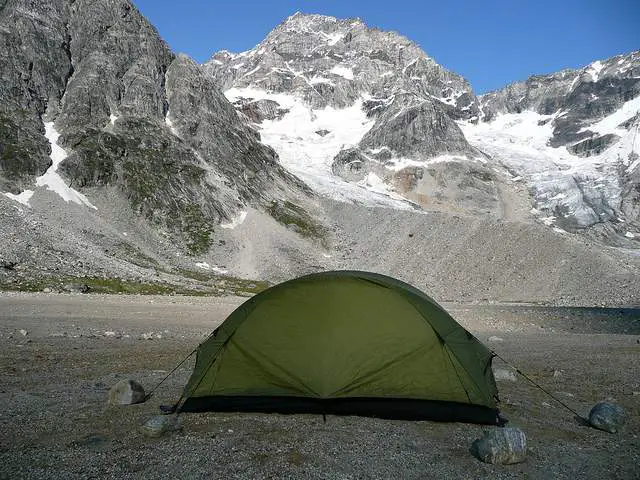
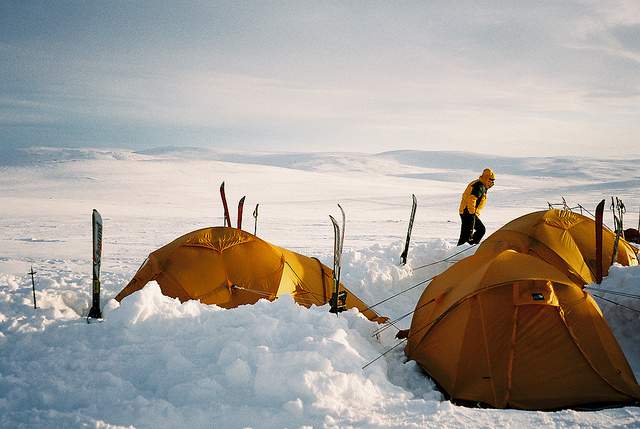
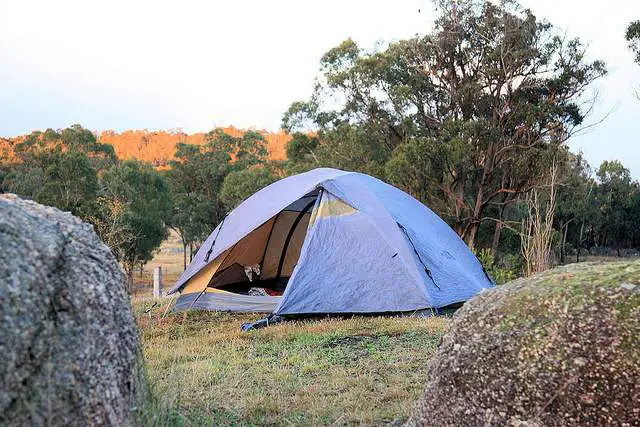
Now, you can of course choose an ultralight backpacking option, like a tarp and some kind of bivvy bag, if the conditions allow that. Personally, I always go with a one person tent, the one I am currently using is the Terra Nova Zephyros 1 Person Tent, you can see a picture of it in the field during my winter experiment below.

Terra Nova Zephyros 1 Person Tent

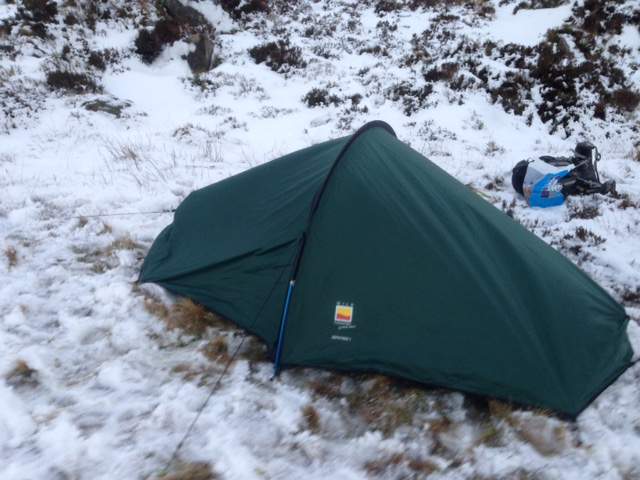
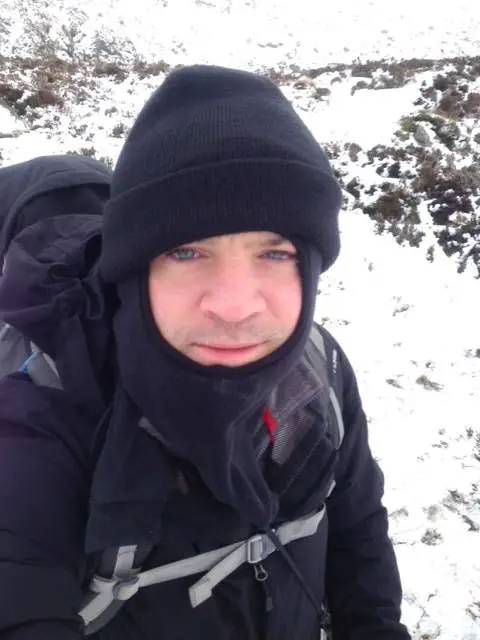
I like this as it is compact and lightweight (plus it didn’t break the bank). It’s a 3 season tent but I have used it in winter. I tried an experiment to see if a 3 season tent could be used in winter and it went fine. Of course, it all depends what type of winter weather you’re talking about! Our old friend common sense plays a part here as always!

As a tip, I pack my tent by removing all the packing and take only the tent pieces I need with me. I also stuff the tent down into the bottom of my backpack. This saves on space and makes it easier to carry.

As a final note, if you are new to buying a tent, check out the tent buying guide as well, it covers all the various shelter options that are available. Remember to get clear on the conditions of where you plan to camp, as that will have a big impact on what kind of tent you need.

Sleep System

Crucial to a successful night out under the stars, or clouds 🙂 , is of course, a good night’s sleep. As part of your overall backpacking system, you need a sleep system.

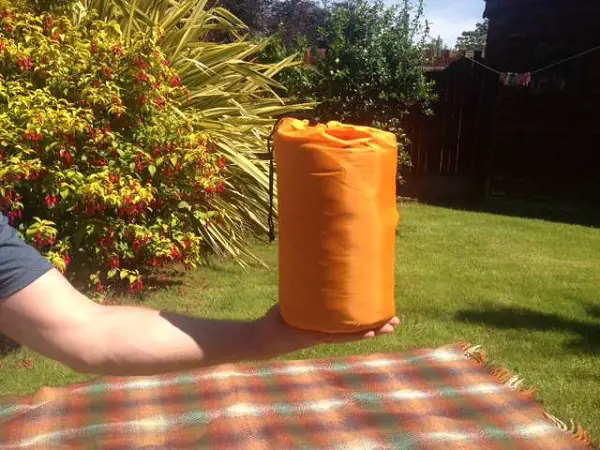
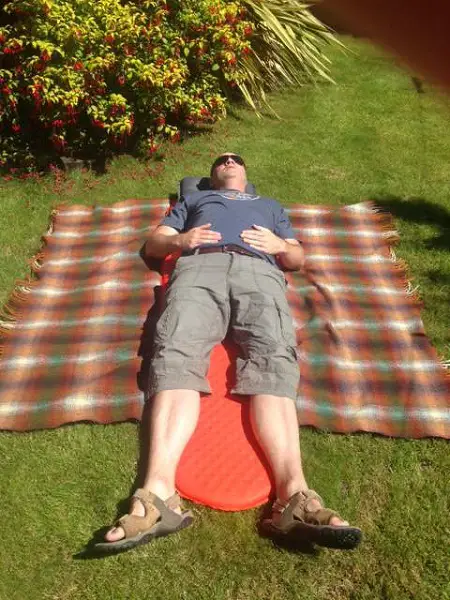
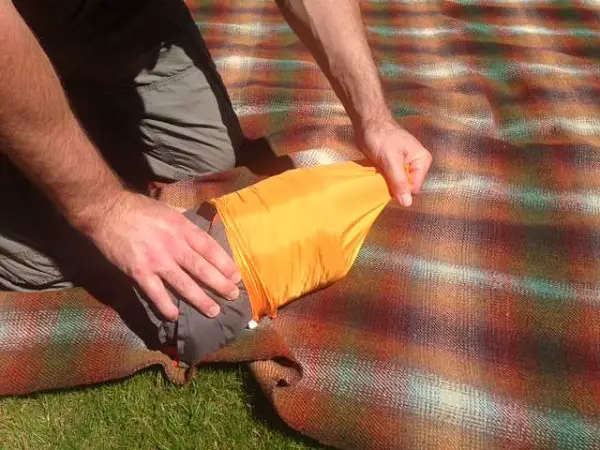
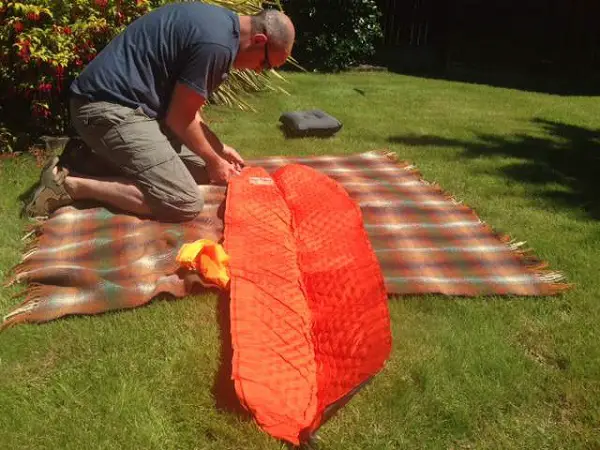
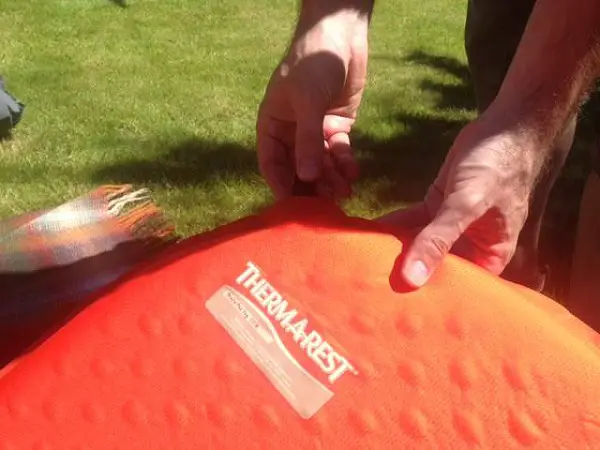
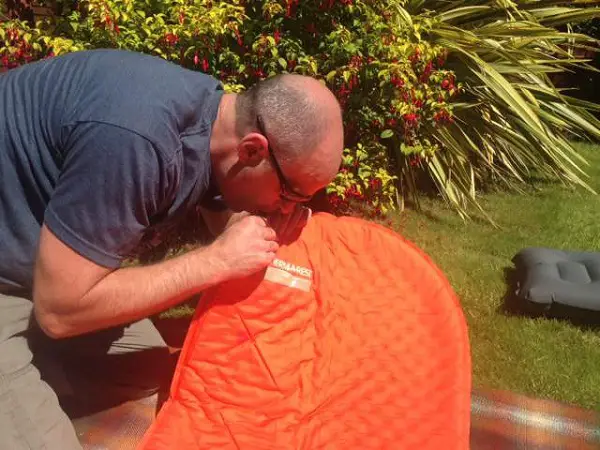
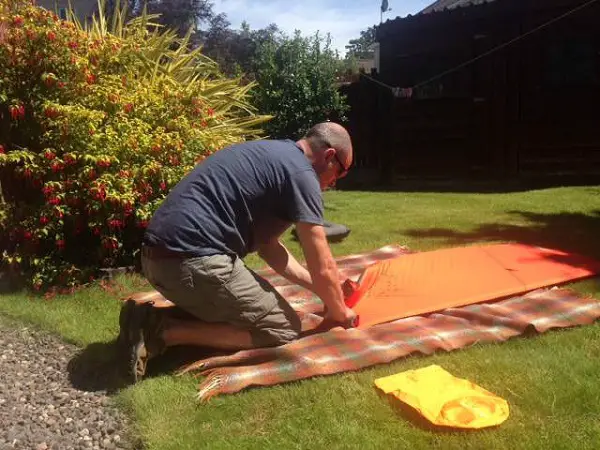
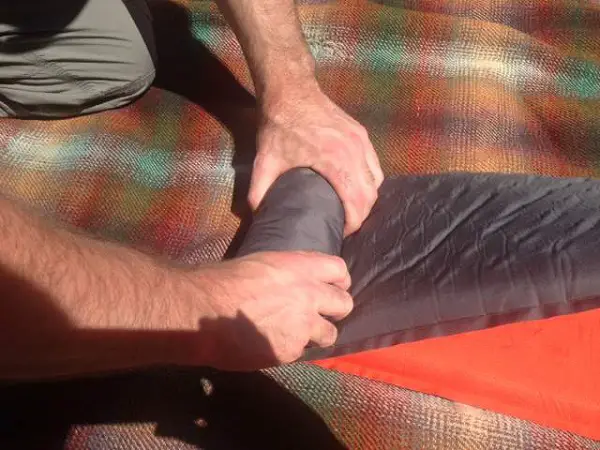
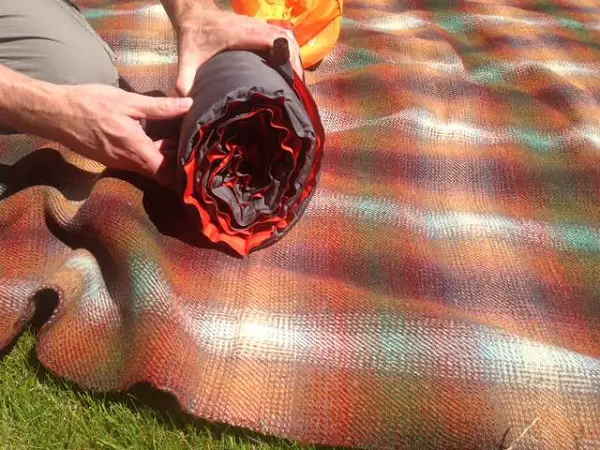
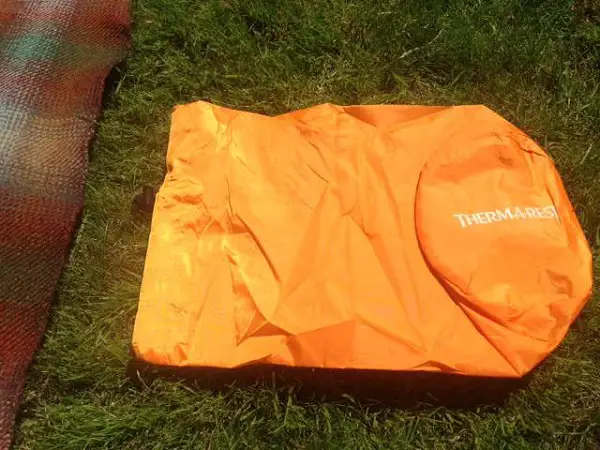
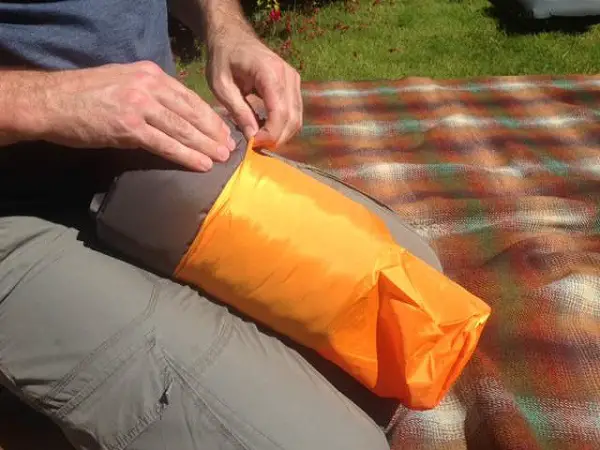
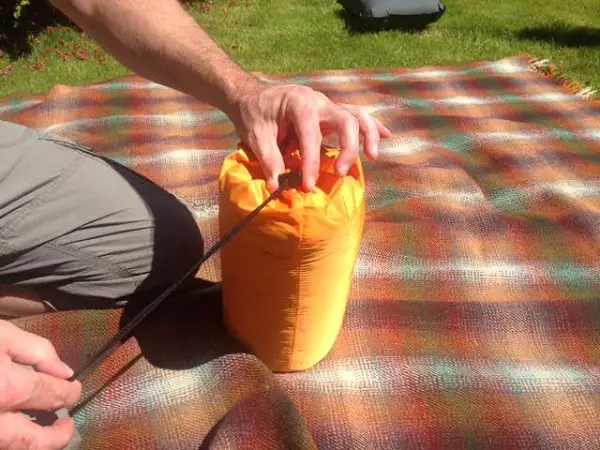
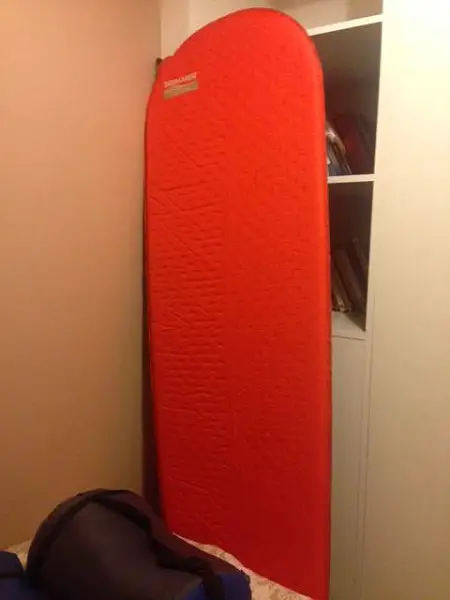
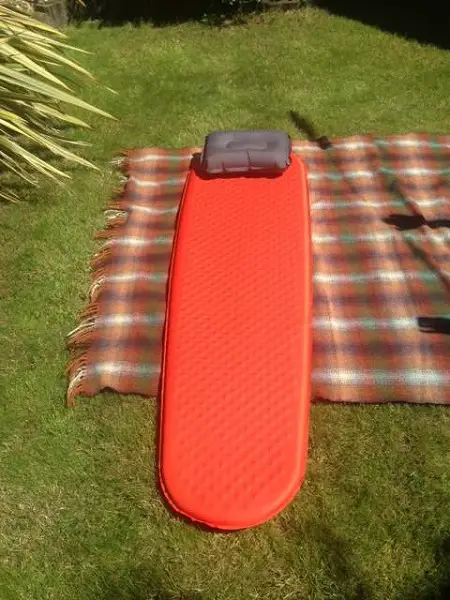
In brief, you need a suitable air mattress and pillow (a pillow is not necessary but I like to have one). I used to use a foam roll mat but my air mattress, pictured in it’s packed form below, is head and shoulders above it in terms of comfort.

Thermarest ProLite Plus Size

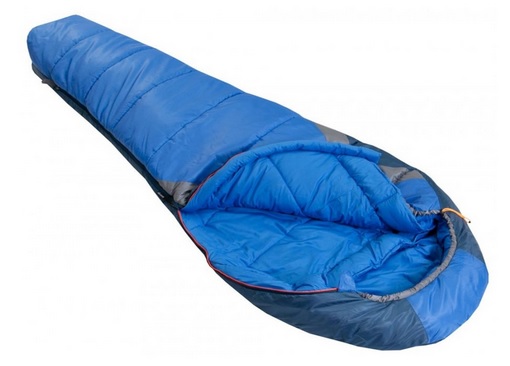
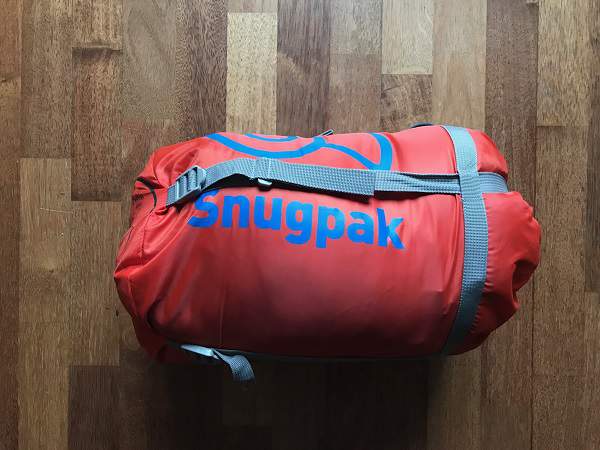
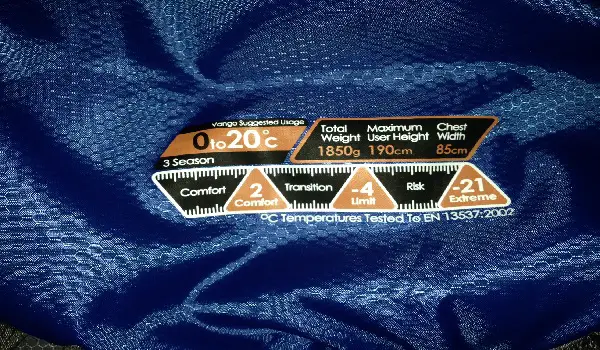
Next up, a critical piece of your comfort and safety is your sleeping bag. You must have a suitable sleeping bag for the temperatures and conditions you are planning to camp in. This is critical, as finding out your bag isn’t going to work in the middle of the night in the wilderness, is not a recipe for a happy experience!

Check out the sleeping bag buying guide to learn more about how to choose an appropriate sleeping bag. The process is pretty straightforward when you know how.

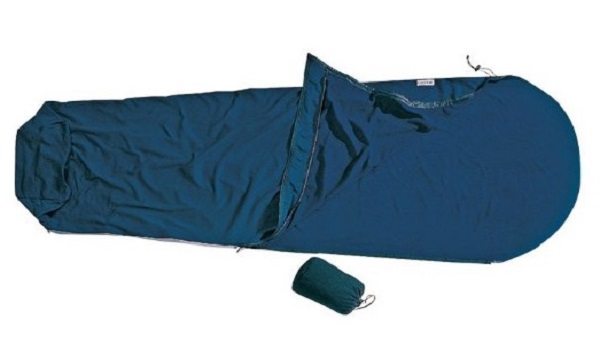
You may also want to consider a sleeping bag liner but I tend not to bother with that for a backpacking weekend. I use those for trips into the huts in places like the Alps.

Cooking

Cooking is of course the next thing you need to consider. I will look at food and water next but to help qualify this, I only ever heat food for main meals up while backpacking.

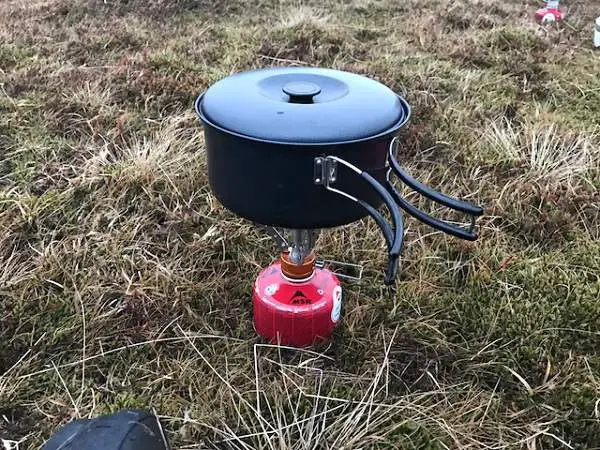
I use food in a bag that I just have to heat up. Very easy and efficient with minimal hassle. Anyway, I digress … in terms of cooking I bring a simple butane gas stove with me. I always bring an extra gas canister as well, just in case I run out.

Gas Stove

It’s a good idea to check how full your existing gas canister is. This is usually very easily done by putting it into water to see how much it floats / sinks. The canister will usually have instructions on it, on how to do this.

I bring one basic but functional stainless steel pot with me and I use that for all my cooking. As I said I only ever heat things up in water so I have zero mess and no cleaning at the end.

I also tend to use the water I heat stuff up in e.g. for coffee, tea, etc. I also try to pack the cooker and whatever else I can squeeze into it, inside my cooking pot. This saves on packing space when getting your kit together.

Lighter and Utensils

As well as this, you need to bring a way to light the gas. Typically I pack a few lighters, I always bring spares just in case. Pack these in dry bags so they are functional in bad conditions when you need them. In fact as a rule, I typically put all my cooking gear into a dry bag, easier to keep it all together.

Finally, you need utensils to eat and drink with. Again, I aim for zero fuss and minimal packing weight so I bring only a suitable mug, a flask (can double as a mug) and a spork to eat with.

I eat straight from the bag so I don’t need a container of any kind. If you do, I suggest eating straight from the pot as a plate is a needless extra in my opinion.

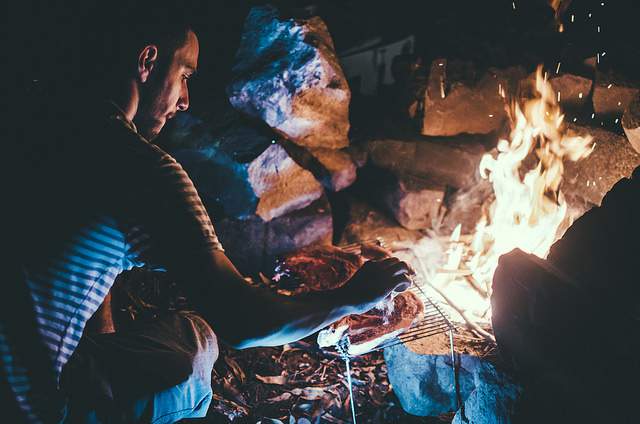
Ideally, cook away from your tent to avoid any major mishaps as tents can go up in an instant if they get an errant spark on them! If the weather is too bad, utilize the porch in your tent (Look for a functional porch when buying your tent) and be very careful if you cook while still in the tent!

Food and Hydration

Food Packet and Spork

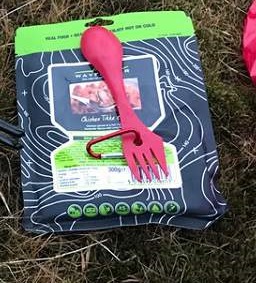
Next up, you have to bring food and source water. As already alluded to, in terms of food, I only ever bring pre-cooked food that can be heated up in water. It’s easy to manage with zero fuss. The food available in these bags is actually really pretty tasty and I have been happy to eat it for a few days on the trot.

I don’t entertain any cooking that means I have to wash up for two reasons. First, I am lazy when it comes to this 🙂 and two, more importantly, it’s all about leave no trace and washing a dirty pot out will invariably leave bits of food lying about.

As well as this I bring easy carry food in wrappers for backpacking. Things like energy bars, chocolate bars, boiled sweets. Anything that is dry and in a wrapper. When I day hike I will take fruit with me but I don’t bother when I backpack on a weekend as it means there will be decomposing waste to carry out.

One of the things I like about backpacking is that your pack should be lighter on the way out, than on the way in. After you’ve ate your food and used some of your gas, you knock some weight down.

Waste

Be sure to pack your food and waste / empty bags away in a seal-able bag of some kind as the waft from them can attract animals and that is not ideal. In some cases, say if you have bears to consider, you may need a proper canister that will really stop any waft from getting out.

Also, I always carry my waste with me. So, if I camp up for a night but then head out for a day hike the following day, I take all waste and all my food with me.

If you leave it behind and a smell gets out, it could easily to be too much of an attraction to animals, especially if you’re not around to dissuade them.

You can easily come back to a ruined tent as animals try to get at the food inside. This is not good as not only will you possibly go hungry but you may not have a roof over your head for the night!

Water

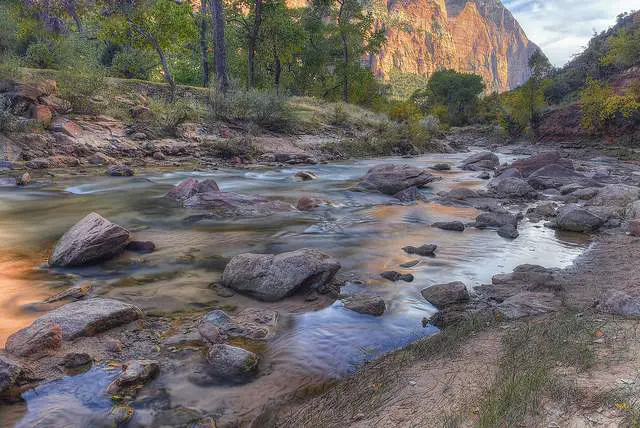
Water is of course critical. I source all my water in the mountains. I plan my camping location in advance so I am relatively close to a good water source.

I also do my research, and if it is OK to drink the water straight from the river (common in the UK and Ireland), I have no issue drinking it straight if the source is high up enough. You need to decide what is right for you though, as I have friends who would never do this and they always use a filtration method.

If the water is not safe to drink, you need a way to purify it. There are many ways to purify river water these days. I recommend a bit of experimentation to see what you prefer as there are many ways to do it.

Of course you then need a way to carry water. When I day hike, I prefer to use a hydration bladder to carry my drinking water. However, I don’t do this when I backpack for several reasons.

Firstly, if a bag full of water bursts inside your backpack, that is not going to be cool. You should utilize dry bags as much as you can but even with your stuff packed into them, something inside still could get soaked.

If a bladder burst or water seeped out through a hole, it would probably be a while before you realized as it is on your back and not directly in your view.

The first time you notice it is probably when you feel it on your back or legs and by that time, it is very possible that some of your stuff could be wet.

Think about if you had a down sleeping bag and it got drenched … D’oh! No warm and comfy nights sleep for you 🙂 Again, employing dry bags will help prevent this but it is still something to try and avoid. On top of this, you have probably just lost all your drinking water.

When I backpack, I always use water bottles. I tend to bring two, one 1 liter bottle and one 0.5 liter bottle. I place the 0.5 liter in a side pocket so I can access on the move without taking my pack off my back.

Water Bottle

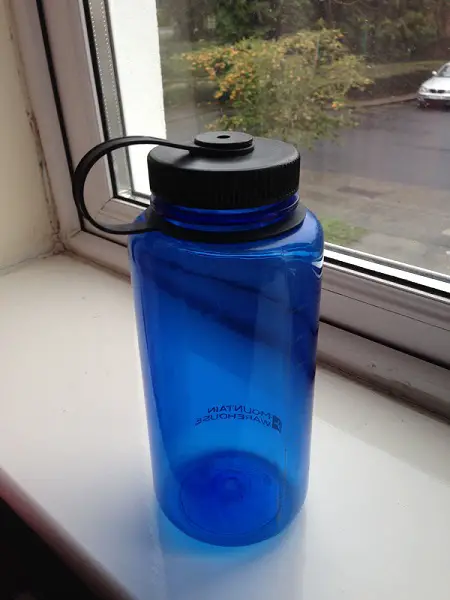
The 1 liter bottle is kept in my pack. I use it to refill my drinking water bottle should I need to, or to carry water to cook with. You should always try to camp close to a water source if possible so you can replenish your reserves as you need to.

Another good option which I use from time to time, is a water bag. These are just bags that you can fill up with water and leave near your tent, can be very handy to have to save multiple trips back and forth to the river. A hydration bladder can do this job fine as well.

Safety

By default, you should always have some safety gear with you. This should comprise of:

  • a first aid kit
  • an emergency blanket
  • your mobile phone and some extra charging capability
  • a bothy bag
  • map and compass (Carry a spare)
  • a headlamp (with spare batteries and ideally a spare headlamp)
  • and possibly a suitable hiking rope (only include a rope if you know how to use it and think there may be a viable need for it)

These are the main items to think about in terms of safety. Follow the links above to learn more about each specific item. Now, depending on where you camp, your safety equipment may need to be more extensive. For example, are there animals you need to potentially protect yourself from in the area you plan to camp in?

As well as this, before you ever set out on a backpacking trip, make sure you do proper research. For example:

  • Do you need a permit to go where you want to go?
  • Is camping even allowed?
  • What time of year is it and is it safe to camp in the conditions?
  • What’s the weather forecast?
  • Where are you going to camp?
  • What’s your route to get there?
  • Can you get in touch with emergency services from where you will be?
  • Do you have the correct contact number?
  • Is there mobile reception?

You should be very well versed in all of this and more in advance. In truth most of your safety work is done long before you ever set out.

Anyone can be unfortunate and take a tumble, but good planning nearly always prevents problems long before they can get a chance to manifest and helps ensure you can deal with them if they do.

Clothing

It could be argued that clothing is part of your safety as the gear you wear and carry will have a major impact on the level of enjoyment you experience. Again, you need to be looking at the location, conditions, etc.to see what you need but as a general rule I take the items below.

Hiking Boots

It goes without saying, you should have good hiking boots or, if conditions allow, hiking shoes with you. I always go with sturdy backpacking boots, even in warm weather. Pictured below are my awesome Meindl Vacuum hiking boots!

my-meindl-vakuum-gtx-hiking-boots-after-some-good-use

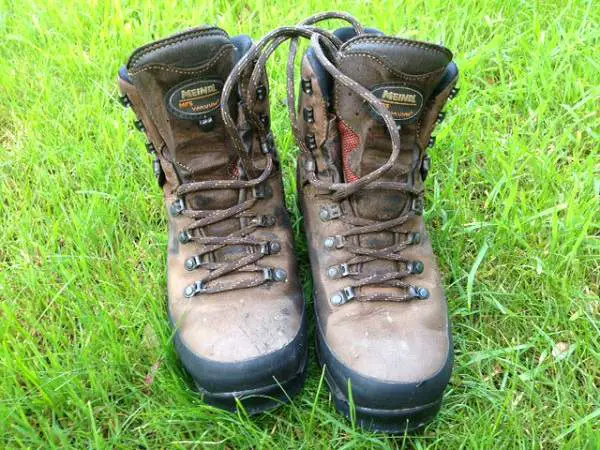
The extra weight on my back means for me, that I want more stability in my feet and ankles, so  I go with boots every time. Some people do hike in trail shoes but that isn’t for me. I prefer the traditional leather Alpine style boot but the more technical looking backpacking boots are an equally viable option and can sometimes be lighter.

Ensure your boots are well broken in and you have suitable insoles should you need them, again break them in before heading out on extended backpacking trip.

Underwear

I will wear one pair of hiking socks which generally will do me the whole weekend. If the weather is to be very wet, I will carry a spare pair of socks. It can be a good idea to always have a spare pair, even in good weather but sometimes I’ll skimp on this if the conditions are good.

I tend to just wear normal boxers when I backpack and like socks, if it’s going to be wet, I carry a spare pair for a weekend trip. However, these boxers are made of cotton which for me, in any other aspect of hiking gear, is a no-no.

For some reason I let it slide when it comes to my boxers. I have tried using Nike running boxers instead of the cotton but, oddly enough, they didn’t work well for backpacking and led to a bit of chaffing.

This is something I need to look at some more but I haven’t had any major issues wearing cotton boxers in bad weather so that is most likely why I haven’t tried to change it too much.

My other gear and rain gear does the job well and so broadly speaking, my boxers stay dry enough. I also find if they’re a bit damp, if I sleep in them in my sleeping bag, they will dry up in no time from the heat inside the bag.

Base layers

You need a good base layer, even when the conditions are good, you should have one packed away. At colder times of year I wear one and carry a spare. Merino wool or synthetic is the order of the day here as you need good wicking capability for your base layers.

I prefer Merino when it’s cooler as it’s more snug and cosy on the skin. I think synthetic fiber base layers are maybe a better option in warmer weather as I tend to feel cooler in them. Whatever works best for you though.

I don’t bother with wearing baselayer leggings. I have them but even when I used them in Winter in the Alps, I found they were just far too warm for me.

If your legs get chilly though, they are an option. In saying that though, I pack them in as a spare at colder times of year as it’s handy way to add more heat while sleeping in a bag at night should you need it.

Mid layer

I will always wear a suitable hiking tee over my base layer top. Any synthetic running tee should do the job.

Although normally an outer layer I will add my pants into the mid layer section as I often wear rain gear over them. I wear hiking pants that are very breathable and ideally with venting options.

I like the more recent materials being utilized in hiking pants such as elastane mix. I find them very comfortable as they are stretchy and fit easily.

They also dry very quickly which is also something I look for. Hiking pants are a whole area in and of themselves, check out the hiking pants buying guide to learn more on what to look for.

Next up, over my tee, I will wear a fleece. If it’s a colder time of year I wear a heavier warmer one. If it’s warmer, I might wear a thinner one or none at all.

At all times I carry a micro fleece in my spare clothes bag for extra warmth as required. Again, you can use this as required e.g. over your base layer in your sleeping bag for extra warmth if that works.

Sometimes I carry an insulated jacket as well. They wrap up very small and they can be great for colder conditions. When you’re sitting about in your campsite, that extra warmth on top of a heavy fleece, tee and base layer can be just the ticket.

Outer layers

This is basically my rain gear. I carry rain pants and use them as I need to. Good rain pants are a very good investment indeed and I believe in paying a bit extra for good ones.

You will more than get it back in terms of use as, depending where you are backpacking of course, you will get rained on! I also use them as an extra layer for warmth over my hiking pants and they can be an excellent wind stopper i.e. keeping windchill at bay.

The next critical piece of my outer gear set up, is a good rain jacket. I opt for the rain shell jacket option as they are lighter and easier to pack and carry. Your jacket needs to provide rain protection and breathability.

Think Gore-tex or or other well known waterproof and breathable technologies. You can opt to carry a wind jacket but I don’t. I rely on my rain jacket to do that and keep the wind chill away.

Hats, gloves, etc.

I always carry a minimum of two hiking hats, one I have access to and one in my spares bag. These are usually beanies but in hotter times I wear and carry sunhats too.

I carry three pairs of gloves:

  1. One lightweight acrylic with touch screen capability
  2. One waterproof pair  (debatable if they are actually waterproof but they retain heat when wet and that’s what I want)
  3. A pair of ski gloves or mittens for warmth

Sometimes, if the weather might be chilly, I will take my neck gaiter with me. This is great for keeping the chill of my neck. Sometimes, I will pack a balaclava too as they are also excellent when you need to keep the head warm.

Hygiene

Not the most pleasant of things to talk about, but when you gotta go, you gotta go … and if you’re spending two to three days in the wilderness, you can rest assured that at some point, you will need to go 🙂

I won’t go into the details about what to do when nature calls in the wilderness but I will list out what I bring with me in for that purpose. I pack a trowel to dig a cat hole, tissues and baby wipes. You can use a lighter too to burn any used paper.

I don’t bother with a tooth brush, normally I just bring some chewing gum and that does me fine for a couple of days. For cleaning my hands and face, I use the baby wipes (any kind of hygienic skin wipe will do the job but baby wipes are easy to get).
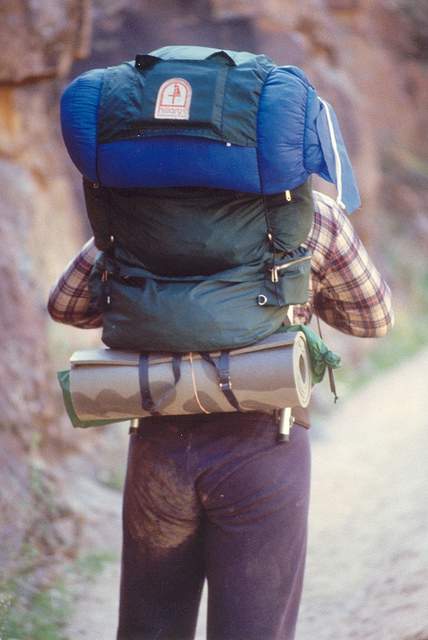
Backpack

Last but most definitely not least, you can’t get very far on a backpacking trip without something to carry all this stuff in 🙂 With that in mind, you need a good backpack.

For a weekend trip I generally get away with a 53 liter bag (48+5) but aiming for a 60L to 65L bag is probably a good idea. It’s funny as although I prefer a bit more space, as I do more and more backpacking, I consistently try and carry less.

However, when starting out, you should probably aim for more space to get a chance to work your backpacking system first. After that, you can work out what needs to stay and what can go.

Miscellaneous

The core of what I carry is covered above but there can be miscellaneous items that I take with me from time to time. For example, if it’s sunny weather, I might pack some hiking sunglasses along.

I will often take gaiters with me too. They are great for wetter areas or if you’re hiking through shale and scree. Also, sometimes I will take walking poles, they can be really useful, especially when carrying a heavy load on your back over steep terrain. I don’t always take them though.

Conclusion

When I first started writing this article, I thought it would be a straightforward enough piece. However, it turned out to be a tad longer than I first thought lol 🙂

I hope you found the information here on what to pack for a 2 to 3 day backpacking trip useful. What I list here is how I go about my backpacking weekend trips so if you’re planning something similar, this should give you some good pointers if it is your first time.

I am sure I have may have missed one or two minor things but hopefully I have covered most of them.

While this is what I do at the minute, it is always an evolving process. As I get more gear, as gear gets better, as I learn more tricks, etc. I will continue to change and adapt how I go about this.

It’s a never ending work in progress but the one common goal for me will always stay the same, namely less weight and more efficiency 🙂

Please feel free to ask me any questions in the comments below and if I can help clarify anything for you, I will be only too happy to do my best to do that.

Finally, if you found value in this, please share it around your networks!

Therm-a-Rest ProLite Plus Mattress Review

The Therm-a-Rest ProLite Plus mattress is an excellent mattress for camping and backpacking. In this review I explain my experience with the Therm-a-Rest ProLite Plus mattress and what I think is good about it.

I’ve been upping my camping activity over the last few months, it being summer it’s been good to get out. As a camper (I mean more like a backpacker carrying all your gear) I generally go out for 1 to 2 nights camping, adding in some nice hiking too of course.

There are of course numerous aspects you need to get right to have a comfortable nights camping. From getting your cooking equipment and food right, to having a good tent to keep the elements at bay and protect you during the night.

Another one of those key things is of course, your sleep system. In brief summary, what you take with you to ensure you have a good nights sleep. So your sleeping bag to keep you warm, your sleeping bag liner, etc. Another key component of your sleep system is what you sleep on.

Thermarest ProLite Plus Mattress with Pillow

Traditionally, I have went with the trusty camping roll mat. It’s basic, but it does the job. However, as I have camped more and more I have come to accept the fact that a foam roll mat, while certainly cheap, is not always cheerful 🙂

The last time I went out camping, I specifically went out hiking at night to practice night navigation. Although it was summer, the weather was not good in terms of ‘good weather’. It was wet and misty which although not good for lazing around in, it was perfect to add to a night navigation session.

Finally!

Anyway, after trudging about in the dark for 3 hours, I finished up at 1:30am. It’s summer of course so I had to stay out late to get the full night in.

When I got back to my tent I was tired and very wet. I got into my sleeping bag and thought I’d be out like a light. I was, for about 5 hours but I woke up early enough and every part of my body ached lol 🙂

It was not only the contortions of the previous nights activity, I also realized that I just had not had a comfortable nights sleep, as I have noted before, due to the foam roll mat. It’s basic and does a job, but I would not call it comfortable.

So, with that in mind, I decided it was time to look into the wonderful world of Thermarest sleeping pads / mattresses. These are a different beast to the basic foam mat. They usually inflate with air and can be mixed with a combination of internal foam which expands.

After looking around, I came across the Thermarest Pro Lite Plus and I liked the look of it. Let’s run through the features to give you a better idea.

Summary

The Thermarest Pro Lite Plus is a self inflating sleeping pad. It’s a well put together piece of kit and so far I have been impressed with it, certainly a world away from a roll mat!

It features a non-slip surface to help keep you in position on it during your slumber. It is a neat bit of kit that fits in my backpack and so is a welcome addition to my gear.

Size and Weight

As mentioned, there are several sizes available, from small to xtra-large. Depending on the size, you will of course have more or less weight and a larger or smaller size when in use and when packed into it’s carry case.

My one is the large and it comes in at 183 x 51 x 3.8 (cm’s). It’s a good size for me, I’m 6 feet tall and to give you an idea of size when rolled out, you can see me lying on it below.

Lying on Thermarest ProLite

In terms of carrying it, it’s fits down into a nice little 10 x 28 cm / 2.2 L package as pictured below.

Thermarest ProLite Plus Size

This is definitely one of the main attractions for me. My foam Roll Mat, is bulky. Using this, I would estimate it takes up 40 to 50% less area / space.

As it’s so compact when packed away, I can just pop it into a dry bag and store inside my backpack, or attach it to the outside of my pack. It’s much easier to move about, not as bulky and clunky as my foam mat … Happy days!

In terms of weight, it comes in at 670 grams. I think this is a good weight. Now, I did find options that are even lighter and more compact than this, but for my budget, this one fitted the bill well.

Comfort, Warmth and Durability

The outer of the Therm-a-Rest ProLite Plus Mattress is made from 70D nylon with an inner constructed using polyester which is a tough construction and by all accounts this pad is durable and so you should get good use out of it for the longer term.

The filling within the pad, the secret behind it’s self inflation, is urethane foam. As best as I understand the science behind how this works, the combination of air with the urethane foam enables a cushion of air to form between your body and the ground.

Not only is this very comfortable to lie and sleep on, but very practical in terms of heat retention i.e. keeping the cold of the ground away from your body. Thermarest pads are exceptionally effective at this and the Prolite Plus no different and is an excellent insulator from the ground.

Ease of Use

The Therm-a-Rest ProLite Plus is self inflating. This is very easy to utilize. Basically, you just take the pad out of it’s carry bag …

Unpacking the Mattress

And then roll it out.

Setting the Mattress Up 2

As you open the mattress up and roll it out flat, the foam within the mattress expands as air gets into it.

Setting the Mattress Up 3

So, basically, you roll the mat out, open the screw valve at the top of the pad and leave it for a bit!

Valve

It inflates itself, more or less, and you can top it up with a couple of puffs of air should you need to before closing the valve shut.

Blowing Air Into the Mattress

Easy peasy and I have to say very effective. It really is comfortable to lie on!

Packing Down and Carrying

To pack it down, you just open the valve at the top of the pad and roll the mat up squeezing the air out of it. you can use your body weight to help with this. I recommend doing this a couple of times to get all the air out of it.

Rolling the Mattress Up 1

When you have that done, simply roll it up snug …

Rolling the Mattress Up 2

and when you get it into a circular size and shape as in the picture below …

Rolling the Mattress Up 3

… put it back it it’s carry case which comes with the pad.

Thermarest ProLite Plus Carry Bag

Again, I have found the dismantling process pretty easy. Be sure to get all the air out of the mattress or it could be a bit of a squeeze to stow it into it’s carry bag.

Stowing the Mattress In the Carry Bag

It’s compact when you do though and you can seal it nice and tight with the closure fitting at the top of the bag.

Tightening the Carry Bag

Storage

It’s worth adding a quick note on storage. This is clearly listed with the instructions that accompany the ProLite Plus but just for completeness I’ll mention it here.

To store the Thermarest ProLite Plus Mattress, you leave the mattress fully folded out leaving the valve open. You then store it in an upright position as shown in the photo below.

Storing-Your-Thermarest-Mattress

If you leave it in your carry case for extended periods of time, the urethane foam can get damaged and the mattress may not then inflate correctly. So, with that in mind, it is important to store it correctly.

Also, when you first get it, you need to inflate it fully and leave it overnight with the valve shut. I think this is like the initiation of the matress before use as such. Again, just check the instructions when you get the ProLite Plus or any other Thermarest mattress and follow them accordingly.

Customer Reviews

From about 40+ customer reviews from various retailers, the Therm-a-Rest ProLite Plus scored a very decent 4.5 stars out of 5. Of those reviews 92% gave 4 stars or more. Overall, a pretty  good score by anyone’s standards.

From the qualitative experience and comments perspective, the general sentiment from users was positive so this did sway me to lean towards picking it and I am glad I did! I am pleased with the ProLite Plus and the positive comments I read about it before I got my hands on it has borne out.

Our Rating: 4.5

Price

It comes in at a reasonable price, depending on size. I was pretty happy with the price for the quality I was getting so no complaints on that front from me.

Mine also came with a 2 year warranty which is nice to have. You may need to check on that if you choose to purchase one just to confirm as it may vary it different parts of the world.

Check out any of the product links on this page for an up to date price on Amazon for the Thermarest Pro Lite Plus as well as some other good Thermarest mattress options.

Conclusion

If, like I was not too long ago, you’re still using a roll mat for your backpacking trips and hikes, I highly recommend the switch over to a sleeping pad like the Thermarest Prolite Plus.

They are significantly more comfortable in my opinion and much easier to carry than a basic foam mat. Granted, it is probably 10 times plus more expensive but I think it is a worthwhile investment in comfort that you are unlikely to regret.

I do have a hiking friend who just loves his old foam roll mat. He’s a hardened backpacker though so I am pretty sure he could sleep on the ground and still be pretty comfortable lol 🙂 Me on the other hand, I definitely lean towards that bit more comfort that the sleeping pad provides.

I think the Thermarest Prolite Plus Mattress is a good a year round sleeping pad that will perform well in Winter and in cooler locations in the world year round.

It is probably best suited for short camping trips (1 to 3 nights) as opposed to long backpacking trips. For that, I think you probably want something that packs even smaller and probably even that bit lighter in terms of weight.

I am a big fan of the Thermarest Prolite Plus but there are many other sleeping pad options available. Be sure to get clear on where you plan to use your pad before buying. That is, if you’re planning to camp in Winter you probably need something that provides that bit more insulation.

I hope you found this review useful, please share and leave a comment if you did 🙂

Can You Use a 3 Season Tent In Winter?

Last week I wanted to head into the hills for a nights camping. I recently ordered a 3 season tent as I plan to do most of my camping from Spring to Autumn. However, although it was early March, the weather was bad with a particularly cold snap over the weekend when I wanted to go camping.

Cold Snap

The Plan

I was to head out on Friday afternoon and get to the campsite for 5:30pm enabling me to pitch and get organized before dark, see the selfie below as I was setting out … needed to wrap up warm lol 🙂

Wrapped Up Well

I had to hike about 6 km to get to the site. However, as mentioned, due to the cold snap there was a significant drop in temperatures the days running up to the camp and there was snow on the ground Friday morning.

I checked the weather forecast for the day and the temperatures were to drop to minus 5 degrees Celsius (23 degrees Fahrenheit) but with wind chill it would feel more like minus 8.

Now, although it is March and Spring time, that to me is as cold as we’d normally get in Winter. So, with all this in mind I wasn’t sure if heading into minus 5 degree temperatures in snow and ice with a 3 season tent was a good idea or not.

So, as always, I got onto Google to try and do a bit of research on the subject. I couldn’t find too much on it but from what I did find it did seem like, unless going into seriously hard-core winter weather, a 3 season tent should be fine given some other things were in place, namely a very good sleeping bag.

So, after my research, I decided I would go ahead and continue with my planned camp with my 3 season tent even though the weather was very cold.

How I Got on

Well, overall, it went totally fine. It was very cold with snow and high winds but my tent, the Terra Nova Zephyros 1 Person Tent, pictured below, held up no problem. There were however a few other key things to mention.

Terra Nova Zephyros 1 Person Tent

As mentioned, before I went out I did some research on using a 3 season tent in winter conditions and overall it seemed fine to do this once in a while as long as the conditions weren’t really intense, and you had a very good sleeping bag.

My Sleeping Bag

Now, my current sleeping bag is the Vango Nitestar 250, pictured below. It’s a 3 season bag so I was a little bit concerned that given the conditions, it wouldn’t be appropriate to use with a 3 season tent. The minimum temperature listed is 0 degrees Celsius with minus 4 as the outer limit. With minus 5 on the agenda, I wasn’t sure this was a good idea.

Vango Nitestar 250 Sleeping Bag

I got in touch with a friend of mine who does a lot of winter camping and he told me I would be fine if I used a bivi bag in conjunction with the sleeping bag in the tent. I was happier with this potential set-up and figured it would be enough to keep me comfortable.

So, to summarize, my shelter and sleeping kit was:

  • 3 season tent
  • Bivi Bag (Emergency)
  • 3 season sleeping Bag
  • Cotton sleeping bag liner
  • Roll mat
  • Pillow (An insulated jacket rolled into its own pocket)

This worked great and I was warm and comfortable throughout the night, although having a hot flask of tea was very much needed when I got settled into the tent!

Important note: This was effectively an experiment. Please always ensure that the comfort rating temperature of your sleeping bag falls well within your requirements i.e. establish the temperature you will be camping out in and ensure that it falls well within the comfort rating.

The Result

So, I guess with that experience, I have answered the question for myself and that answer is, yes, you can use a 3 season tent in winter in certain conditions as long as you take other measures as listed above.

Fundamentally, I think if you are using a 3 season tent in winter, you should have a 4 season sleeping bag. I didn’t and used my 3 season bag but I compensated for that with the emergency bivi bag on the outside. However, even if I had the 4 season sleeping bag I would still utilize the bivi on the outside of it in that type of cold weather.

I feel it worked really well and would only provide more warmth and protection. The only slight downside was that the sleeping bag can get damp inside a basic emergency bivi. This could probably be helped with a few holes in the bivi but that may defeat the purpose of it’s proper use. All in all, it worked well though and I was warm.

In terms of shelter and protection, the best I can ascertain, the main difference between a 3 season tent and a 4 season tent is that 3 season has more ventilation and doesn’t line snug to the ground. This means that more air from outside can get into the tent environment and so, in winter, means it is colder in the tent.

Drafty

I did notice a draft coming in along the bottom of the tent in places. In terms of protection, I think the tent is primarily there to protect you from the wind, rain, snow, etc. and it’s the sleeping system you have that does the rest e.g. keep you warm and as comfortable as possible.

The other thing that is worth noting is that I think using a 3 season in winter, every so often is probably fine. However, I think that if you were to use it regularly in winter, it would probably not hold up as well in terms of length of use.

That is fair enough though, as it is a 3 season my hunch is just that it isn’t meant for those type of tough winter conditions all the time.

So There You Have It

So, the main question for this post was, can you use a 3 season tent in winter? I can confirm that the answer to that question is, yes, you can indeed! However, I say that with a few caveats.

First and foremost, if you’re going into hard-core winter weather for any length of time, you should have a 4 season tent that is able for the conditions you are hiking and camping in.

So, while a 3 season work’s fine, you of course need to take account of the camping conditions. If the conditions are too severe, you’re taking a risk using only a 3 season tent.

Secondly, what was definitely critical to all this working was the camping sleep system. If you plan to use a 3 season tent in winter conditions, you should use a 4 season sleeping bag that will keep you warmer in very cold conditions.

A good addition to that is to put your sleeping bag into a bivi bag for an added bit of protection. Finally, a sleeping bag liner will be good to have too.

Conclusion

I hope you found this article useful. If you plan to use a 3 season tent in the winter or in colder conditions, I highly recommend testing it out first.

For example, camp in winter in the type of bad conditions you are considering but keep close enough to your car first time out. Worst case, if something doesn’t work out, you can make a dash for the vehicle and stay protected in it for the evening.

My general feeling on all of this is as with any camping or backpacking trip, you need to develop a system, and trial and error in relative safety will go a long way to keeping you good in more remote regions.

Any thoughts or comments please leave them in the comments below!

How To Choose A Campsite

There is nothing quite as special as getting to spend the night out in the wilderness. There’s a beautiful sense of freedom that comes with it, that’s hard to describe and it’s a great way, as part of a backpacking trip, to enable you to go deeper into trails and mountains to see areas you just can’t reach on a day hike.

Camping Site

Photo Credit: Andrew E. Larsen

In the last few posts I’ve been taking a closer look at camping and all that it entails. We started by looking at what gear you need. You can’t go too far without choosing a suitable tent to protect you from the elements or without having a decent sleep system to enable you to get as comfortable a nights sleep as possible.

So, you’ve got your camping gear together, you’re ready to hit the trail to see some amazingly beautiful landscapes and wilderness stopping to camp along the way. All good!

However, there is one thing you need to seriously think about when you’re heading out on the trail on your trip. What is that? Well, where are you going to camp?

In this post I’ll take a look at some top tips for helping to find a suitable camping spot and choose a good campsite. Even if you have all the right gear, you won’t have a pleasant experience if you plonk your tent down in the middle of a spot prone to flash flooding or in a valley that attracts gales when the winds get up!

As well as picking a spot that is suitable, you as always want to leave as minimum an impact as possible on the area you camp in.

Choosing a Camp Site

Picture this, you’ve been out hiking all day and you decided to hike on into the night to enjoy the beautiful  stars in the sky. At midnight you are tired and you decide it’s time to pitch tent. Just one problem, it’s dark!

The first thing you need to do when you’re out backpacking and camping in the wilderness is to aim to get to the area you plan to camp before it’s get’s dark, ideally leaving yourself two hours is a good idea.

When you are planning your trip and your hike for the day, you should be able to find a relatively good location for camping by using the detail on a map.

Now, this will only give you a general area so when you get there, you will need to spend a bit of time looking for the best place in that area to actually pitch your tent. It’s worth noting as well that while it’s very possible that an area looks good on the map, it may not be as suitable when you actually get there.

So, if you have two hours or so before sunset, you have time to find a good spot and / or make moves to an alternative location further on if the need arises. You will also have time to get an evening meal together too before the sun goes down.

Location

When choosing a location to pitch your tent, your first concern should be weather protection. You need a site that will offer protection from the rain and wind, and the combination of the two which can be much harder to deal with when they get heavy and hard.

Camping Trees Shelter

Photo Credit: Iris

You should look for some kind of natural shelter if you can and pitch your tent on the sheltered side of it. For example, if you can use the shelter of a large cluster of boulders or a patch of trees, you will have a natural barrier to the oncoming weather. When you have your spot, pitch your tent with it’s back the wind.

Look for Level Ground

The next thing you need to think about is level ground. This is kind of stating the obvious but it’s worth pointing out as you can get caught on this if you’re new to camping and pick something that isn’t level enough to sleep on.

In many ways with camping, as with anything on the trail, you always learn more with experience.

Flat Ground

Photo Credit: Rob Lee

Now, you want ground that is level but not hard compacted ground that is dipped into a depression as this can collect water in heavy rain and you could have a very wet bed in no time!

A good choice is if there is some kind of natural mattress, as I like to call it. If you think of grassland areas on softer ground.

When you put your camping roll mat down in your tent and snuggle up in your sleeping bag, the ground will actually add a bit more comfort to your nights sleep. That is the ideal, although not always possible. If you can use the ground to aid your comfort, excellent!

Try and Avoid a Gradient

As much as possible, you want the flat ground to be level. Any gradient can add to difficulties depending on it’s size. If you must have a gradient, try and keep it small and always place the head of the tent at the higher end of it.

If you’re in anyway unsure about the gradient, lie down on it, obviously with your head at the high end, and see how it feels.

Water

It is a really good idea to try and camp as near to water as possible for obvious reasons. You need water to drink and cook so if you have a flowing source close by, that makes your life and nights camping a whole lot better!

River

Photo Credit: Diana Robinson

Now, you of course need to be wary of the water too. If it’s a river, be sure you’re far enough away from it so it won’t cause you any difficulties. Also, be sure to check the water line on the river bed to see how high the river can rise in heavy rains.

As mentioned above, look out for any signs of flowing water having been there and if you see signs relocate. Choose a camping site at least 100 feet (30 meters) away from the water source and above any visible water line.

Camping 100 feet away from your water source will also help prevent you from inadvertently polluting the water if you’re too close to it. It’s important you know how to look after sanitation in your campsite as you want to have minimum impact on the local environment.

NEVER camp on a dry river bed! That’s just asking for trouble in terms of flash flooding which is seriously destructive in very quick time!

Local Ecology

Now, although it’s good to camp close to water, be sure to keep in mind the local ecology and the animals that depend on it. If you’re camping in more arid areas and there are clear signs of animal trails on your site, from the animals accessing the water source, it’s best to look for another site.

Firstly, because you ideally don’t want to upset the normal routines of local wildlife and prevent them from accessing their normal water source out of fear.

Secondly, depending on the local animals, I’m thinking bears or the like here, you most probably don’t want to be in the middle of their water highway as you never know, they just might drop in to say hello! Not good!

Cooking

When you get the stove out and start getting your well earned meal together, it can be a very good idea to cook well away from your tent, again at least 100 feet (30 meters) is a good benchmark to use.

There are a couple of reasons for this. First off, the smell of food can attract wildlife so better to keep them looking further away from your actual camp site should they show up to see what the unfamiliar cuisine that their nose has caught a whiff of is!

Secondly, cooking close to your tent could lead to unfortunate accidents. An errant spark from your stove or if your stove get’s blown over in the wind while you’re looking elsewhere could set your tent alight which is really not cool!

Your exciting trip into the wilderness has just taken on a whole new dynamic and can easily move from a relaxing hiking trip into a night practicing your survival skills in the wilderness! I’ve only built a shelter from branches and such once on a survival course I did, trust me, it isn’t fun 🙁 So best avoided 😉

Simple precautions like this are always just sensible!

Campfires

Campfires can be more trouble than they’re worth and, contrary to popular belief, they are very bad for the ground. I won’t go into the best way’s to light a campfire if you must have one but generally, I think they’re best to leave alone and in many cases, they’re illegal anyway.

However, in some camping spots on the trail, there may well be permanent camp fire rings in place. If so, if you can get a fire together and you need one, then maybe go ahead and utilize it.

Campfire Cooking

Photo Credit: Gonzalo Díaz Fornaro

The same rules as above apply, so camp far enough away from it as burning wood when damp can have lot’s of sparks shooting out from it, and you really don’t want that landing on your tent or have animals stopping by to see what you’re cooking. Again though, personally I’d try and leave it and get by without a campfire.

Areas Not to Camp in

It’s worth taking a few moments to list out some areas that are just best avoided as a camp site. I’ve touched on some of these already but for completeness I’ll mention those ones again here.

Exposed Areas

Anywhere that is openly exposed to the elements, heavy win and rain etc., isn’t ideal to camp in. Sometimes you may have no choice but try your best to get leeward, or out of the wind, at least.

Camping Beside Trees

OK, I did reference these above as a good place to camp as they can offer protection from the weather. That is true, but be sure to use your common sense.

If you have a massive tree beside you that looks dead and like it could topple in high winds, it obviously is a bad idea to camp under it. Keep lightening in mind too if you’re unfortunate enough to get caught in some of that action!

Rocky Areas

When you look at a camp site at the foot of a rock hill and you see rocks all over it, the likelihood is that these stones are falling regularly. You don’t want to have one of those land on your head while you’re dreaming 🙂

Meadows

On first glance, they can seem really good but they can be very damp and act like a sponge in heavy rain so be careful with them.

Dry Riverbeds

We mentioned this in red above. Avoid, avoid, avoid!

Valley Floors

Valley floors tend to have cold air in them as it’s heavier than warm air and so tends to sink in valleys. Now, this is only a concern at certain times of year in certain conditions but it is something to keep in mind.

Mountain Ridges

Stating the obvious here but on a ridge, you’re very exposed. Really a bad idea as you will be exposed to high winds and potentially lightening if it is on the weather menu for the evening. I’d treat summits in the same manner.

Mountain Passes

The classic wind tunnel! Again, in certain weather, you might get away with it but mountain weather is unpredictable as the best of times. If the wind get’s up at 3am, you could be in a pickle if you have to up sticks and move camp as it’s getting lifted from the ground!

Conclusion

I hope you found this post on how to choose a campsite useful. These are the main points I think about when I am looking for somewhere suitable to pitch camp for the night. Remember, you really want to get this right as you don’t want to have to try and relocate in the middle of the night in darkness. Just will not be fun!

There are plenty of special environments and locations that require you to camp in a certain way so as a final note, always be sure to educate yourself on any local regulations or legal requirements to pitch camp. Always respect the environment in the way laid out in the rules by the local folks who either run the place or live there.

Also, always be respectful of wildlife, follow proper sanitation at your site and Leave No Trace!

What do you think? Have I missed anything? I’d love to hear your thoughts in the comments below!

Please share this post around your networks!

How To Buy A Tent

Today I want to continue further into the world of camping. In some previous posts into this very broad and exciting area, we started from the ground up, so to speak, and looked at what you need to have for a good camping sleep system.

Camping

Photo Credit: Bureau of Land Management Oregon

Prior to that we had deep dived further into the elements of your sleep system by reviewing how to choose a sleeping bag and some accessories you can utilize to have to enable you to have a good night’s sleep in the Great Outdoors, namely a camping roll mat (foam or air mattress) and a sleeping bag liner.

With those things in mind I wanted to continue moving upward and outward, as such, as we look at the next key element of your camping kit. A great sleep system isn’t much use to you unless you have a decent roof over your head so today I want to look at your tent. A brief look at what they are and how best to go about choosing one.

What is a Tent?

OK, yes, that is a dumb question 🙂 everyone knows what a tent is, surely? Well, yes I would certainly think that most people do know what a tent is. However it’s worth writing a couple of short lines on it just for completeness.

A tent is a portable shelter. It is made from fabric and cloth and is supported by a combination of poles, cords and pegs to keep it upright.  A tent has an outer layer which is waterproof and an inner flysheet section. That’s basically it.

Types of Tent

There are basically two main Types of tent 1. The Cabin Tent and 2. The Dome Tent.

A Cabin Tent, pictured below, will have normally have more space than a dome tent as it is usually bigger than a dome tent as they have, more or less, vertical walls.

Coleman Tenaya Lake Fast Pitch 8-Person Cabin Tent with Closet

A dome tent, pictured below, is usually the smaller option of the two with curved walls and less space than a cabin tent but has an advantage in being very quick and easy to assemble.

Wenzel Alpine Tent - 3 Person

Both the Cabin and Dome tents have their place and each can be the better option depending on what your needs are. In addition to tents you, it’s worth noting that you have the option to go with a more basic shelter.

Other Types of Shelter

We have already looked at the two main tents above but as this site is all about hiking, it’s worth adding in a note on some other notable shelter options than can be used on the trail in place of a tent.

First up, we have a bivi Bag. To me, typically a bivi bag refers to an emergency blanket which is used as an emergency shelter / protection if you or someone else gets hurt and needs to stay protected till help arrives.

However, you can get more elaborate variations of them which are designed to be used as a lightweight and basic shelter / tent (kind of) for an avid backpacker. They have the advantage of being lightweight and easy to pack and carry.

Aqua Quest Single Pole Waterproof And Breathable Ultra Light Bivy Bivouac

Next up, shelters and tarps are a really lightweight option which can be employed on the trail. Now, you need to be sure the conditions are right if you’re going to use one of these as your main protection from the elements but they are a viable option and super lightweight to carry.

As with the bivi bag tent above, the shelter is more for what I would term an ultra hiker. someone who needs to move very fast and light

ENO Eagles Nest Outfitters - ProFly Rain Tarp

What to Look for When Choosing a Tent?

OK, so now we get into the meaty stuff 🙂 There are a lot of things you need to consider when starting out on the purchase process of picking a tent. I’ll list out each one in the order that I approach it and based on that you can then decide on whether a cabin or dome tent is your best option.

What Kind of Camping Trip are You Going on?

This site is of course all about hiking so logically, when it comes to tents, we would most likely be looking at smaller tents that can be carried for trekking and backpacking purposes. That more or less puts us firmly into the dome camp, no pun intended 🙂

Hiker with Pack

Photo Credit: True New Zealand Adventures

However, this point still applies. What do you need your tent for? Are you going backpacking on a solo trip? If so, A dome will probably be the ticket. Or, are you trekking with a larger group and need to set up a base-camp kind of deal? If you can drive to it, a larger cabin tent may be the better option.

You get the idea, confirm what you need your tent for. I know it sounds like stating the obvious but that will also have an impact on our next point.

Where and when are you Planning to Camp?

Similar to knowing the type of camping trip you’re going on, you obviously need to be very clear on where you plan to do most of your camping. Will you be camping in temperate zones in North America? Do you plan to go camping in mid-winter in much harsher conditions? Depending on where you are camping, the climate and time of year will play a big part in your choice.

Camping1

Photo Credit: Zach Dischner

As with when you choose sleeping bags, tents are rated along the lines of seasons. Below is a brief summary of the main ratings:

3 Season Tent

As per the name, this tent is suitable for 3 season use, meaning from mid Spring to early Fall in temperate conditions. A 3 season tent will protect you from a downpour but it is not designed to take on heavy storms.

These tents are used to protect you from bugs, via the flysheet, protect you from a downpour or two and of course, provide you with some privacy.

3+ Season Tents

These tents are really an extension of the 3 season tent. That is, their usage would extend out to early Spring and late Fall in cooler temperatures. They do this by having less air ventilation and so are a bit warmer than a 3 season tent. They also have more support in the form of poles to ensure a sturdier structure if tougher weather is encountered e.g. heavy blasts of wind.

Dome Tent

Photo Credit: Kitty Terwolbeck

As well as these tents being for people who want to camp at these times of year, they may be a better option if you are planning to camp at a high elevation in Summer. The higher up, the colder it gets so you may well need more protection that a standard 3 season can give you.

4 Season Tents

OK, so now you’re moving into tough territory with a 4 season tent. As the name implies, it is good to use all year round including the depths of winter or at very high elevations where it’s really cold. Therefore its makeup and build has to be tough enough and strong enough to withstand heavy snowfall and much heavier winds.

Camping in Snow

Photo Credit: Kitty Terwolbeck

A 4 Season tent will always be a domed tent as that design withstands the weather much better than a cabin style. If you’re in conditions where you need to utilize a 4 season tent, the practicalities of survival of course take priority, so things like luxurious space options are just not practical.

While a 4 season tent is technically usable in summer, in reality it isn’t really practical. At lower altitudes in any kind of summer temperatures, you’ll cook in one of these and it will be stuffy inside. Not a pleasant environment to try and sleep in. These bad boys are for tough conditions not a summer stroll in the hills.

Where you will be camping coupled with the time of year should have a large bearing on confirming this part of the decision process but, unless you’re planning going very high above the treeline or heading out into hard Winter conditions, broadly speaking a 3 or 3+ season tent should meet most people’s needs.

How much Space do you need?

As with the example listed out above, if you’re going on a solo backpacking / hiking trip, carrying a tent for two people obviously isn’t necessary and will only add extra weight to your pack.

If however you are setting up a camp at a spot you can drive to and then take day hikes from, you have the option to have a much larger tent either for space for yourself or for more people.

Added into the mix of the points we’ve already covered, you need to get clear on how many people will be camping. In terms of space, tents are listed based on how many people can fit into it. So they are ‘one person’, ‘two person’, ‘three person’ etc. Person is also sometimes interchanged with the word ‘man’ i.e. ‘one man tent’ etc.

Yes, it does sound pretty simple to understand but it can be a little misleading. There are no specific standards per se as everyone is different. The same two man tent to sleep two average sized women vs. two large men will probably be much more comfortable for the two women in terms of space.

Dog in Tent

Photo Credit: Jon Hurd

Even if you’re a one man show you may still need extra room in your tent e.g. say you brought your dog along with you for the trip or maybe you’re claustrophobic and need a bit more space. You get the idea, everyone’s spacing needs can be very different for a whole host of reasons.

Overall, I have found the ‘<number> person’ system to work pretty good, which means it was easy enough for me to zone in on my available options when purchasing.

Personal Requirements

However, if there are more people or extra requirements you need to take all that into account. If you’re still not sure, you can always check out a video on the tent you are thinking of getting to see if you can get some perspective on it’s size from that. Or, if you can, go to the outdoor store. Many times, the tent will be set up in the store so you can see exactly how much space is available.

As a hiker, my needs are for limited personal use and backpacking so I run with a one man tent as I carry it on my back. Being lightweight is high on my list of requirements of course so the smaller to pack and the lighter it is, all the better. I had no extra requirements in terms of extra space though.

It’s worth noting that you can also opt to carry a two or three person tent between two or three people. That can sometimes be even more efficient in terms of weight but you need to get the scales and the calculator out to work all that out but it is a reasonable option for longer backpacking trips and short camping trips that I have used once or twice.

There is an argument that you should carry your own tent and sleeping kit in case of an emergency i.e. if two people are backpacking together and one lost their pack, you still have the kit in the other persons pack to keep you both dry. It will be snug with two people in a one man tent but hey, in an emergency it’s a whole lot better than getting hypothermia 🙂

Weight

OK, so I’ve kind already touched on this one in the last section but it is something you need to consider depending on what your needs are so it should be singled out.

As a hiker, normally I drive to a parking area and hike up into the mountains carrying all that I need with me. That’s the norm for me. Therefore, I need something sensible in terms of weight.

Backpacker

Photo Credit: Kevin Dooley

If we go back to the base-camp type idea, weight shouldn’t be an issue as you’re driving to your camp to set it up or you may not have too far to carry it, so it is reasonable that a larger tent could be carried by splitting the parts up among a group till you reach your campsite.

Work out what you need and pay attention to the weight accordingly.

Features to Look out for

Height

In terms of hiking, assuming we’re carrying all our gear on our back, I don’t personally think this is a big one. Height comes into play more with Cabin style tents. As there are near vertical walls, this means that in a tent for multiple people, you can more or less stand up and walk about inside it.

Cabin Tent

Photo Credit: Karunakar Rayker

Handy if you are holidaying with the family or you can drive your tent to your campsite to set it up. However, in terms of hiking, I think the dome is the better option. You can get small cabin tents but the shape of the dome style tent is better suited to stand against tougher conditions so in my opinion, it’s the better choice for the hiker / backpacker.

Family Camping

Photo Credit: Vastateparkstaff

The Dome style tent is tallest in the center but slopes away from that point down. Remember the primary aim of the Dome is greater protection and shelter. To check the height on your tent when purchasing, look for something called ‘Peak Height’ in the specs. This is the highest height of the tent.

Length

The length of the base of your tent is of course important, especially if you’re above average height. Similarly if for some reason you need more space in your tent you will likely need more length. Tent length, as with height, will vary e.g. 86”, 88”, 90″ etc.

Again, if this is something you need to think about, be sure to get the measuring tape out and do what you need to do to work it out.

Doors

Every tent of course has a door or doors to get in and out. These will be more pronounced in cabin style tents where more space and, potentially, walking internally is required. In short, the bigger the tent, the more doors there should be.

Tent Door

Photo Credit: DanLoaTmba

If there are more than two people in a tent, it is good to have at the very least two doors, it would be very unusual if there wasn’t. The reason for this is that if you need to get up in the middle of the night for a nature call, you can exit from one side, the most convenient one, disturbing as few people as possible in the process.

It’s worth looking for good zippers for doors too and preferably ones that aren’t overly noisy.

Tent Poles

This is one area that has really came along in leaps and bounds over the years I think. Most modern tents are first and foremost freestanding. What does that mean?

Well, I can pop my tent up and then once it is in the desired shape, I can simply lift it up and move it about to my preferred spot before I pitch it in the final location with pegs. This is really handy and although this is the norm these days, it wasn’t always so 🙂 I can remember struggling with tents as a kid when I was out camping with my older brother.

Another cool thing that has really came on leaps and bounds is the option to clip-in poles in as opposed to slide them through lots of slots. A mix of the two is quite common to provide the best level of stability. In short this makes the whole setting up and pitching process that much easier and faster. Finally, as a last general rule, the fewer the poles the better.

It’s worth taking a look at how the poles work with the tent you’re purchasing. Try and imagine this, you’ve been out hiking all day, planning to camp for a few days. You’ve just got to your camp later than you planned, it’s really windy, it’s pouring rain and you just want to get a hot drink and get wrapped up in bed. The last thing you need is to have to wrestle and fiddle with a complicated pole set-up in your tent, trust me 🙂

The Rainfly

Next up we have the Rainfly. This is a separate cover that basically keeps all the nasty stuff out. It fits over your tent to provide extra protection from rain or other damp conditions.

There are two main types, roof only and full coverage. The latter of course provides the most protection so again, based on all the previous factors, have a think on what you need it for. For me, the full coverage is the better option but whatever suits you best.

Material and Fabric

When looking at this area there are two things to think about 1. Denier fabric and 2. Seam taping. The higher Denier the fabric, the tougher the weather the tent can withstand. Seam taping is probably the strongest way that seams on your tent can be sealed again ensuring you’re protected inside.

You want your tent to be tough and strong even in good weather so check out the fabric and materials on all the areas of your tent in particular the base of your tent and rain flies.

Vestibules

A vestibule is exactly what it says on the tin. A small porch type area in your tent. In bigger cabin tents these are very substantial and you can comfortably walk about them before entering the main tent proper.

In smaller domes tents, these are usually to the side of the tent beside the door and are small with only enough space to store your stuff e.g. leave your dirty hiking boots in to be protected from the rain but not to be taken inside to muddy the inside of the tent.

The vestibule in a dome tent can also be a nice little thing to have shelter to cook up a hot drink. Now, as a general rule, you should always cook well away from your tent as if a naked flame catches it, the tent will be eradicated very quickly. I kid you not, I have seen one being set alight as a test and it was obliterated in seconds once the flame caught hold.

However, I have been camping in conditions where the rain was so bad that it would have been highly unpleasant to get a hot drink together in it. The benefit of the hot drink would have been wiped out by the soaking. In those cases I have used the edge of the vestibule as a cooking spot.

Far enough away from the tent, on a two person tent, but close enough so my whole body doesn’t have to sit in the rain. In fairness, that’s where something like Barocook flameless cooking can really come in handy so you don’t have to use any naked flames to cook.

Air Vents

These will normally be in the roof of the tent and the door. In bigger tents they can also be added in as part of the windows.

Tent Ventilation

The general rule here, the hotter the conditions you will be camping in, the more air vents you will want.

Storage Space and Hooks

Most tents will have some kind of storage space built into the tent. For example, pockets along the side of the inside of the tent are common as are nifty little lofts at the top for putting stuff onto or hanging something on.

These are very handy, especially in smaller tents where you can put a few critical items where they are easily accessible, for example a headlamp. These are definitely worth looking out for.

Guy Out Loops

These are important for very bad weather as they enable you to tie the tent down effectively and stop any part of it from flapping in the wind. In terms of hiking and backpacking, look out for good ones.

Accessories

There are all sorts of tent accessories you can opt for. Again it really depends on what kind of camping you’re planning on doing. If you’re in a big cabin tent on a leisurely trekking holiday in a big campsite, having things like a ventilation unit, table and chairs, etc. are surely a fine thing to have.

In terms of hiking / backpacking, most of these types of things aren’t necessary and are not practical to carry. The one thing that is worth considering is getting a tent repair kit.

Coghlan's Nylon Tent Repair Kit

If you’re going out into the wilderness for a week and your tent gets damaged three days into it, it is of course a good option to be able to fix it.

Conclusion

Wow, I started writing this and it just seemed to go on and on lol. Buying a tent is something that it is worth taking time on. You’re probably not planning to head away camping tomorrow morning do you likely have time to do some proper research and I strongly recommend that.

I will be adding up some good tent options onto the site in the coming weeks and months in the form of reviews. They will give a very specific set of product recommendations but in the meantime, I hope this guide gets you started on the process of picking a good tent to ensure you have many happy and comfortable nights out underneath the stars.

What do you think, have I missed anything in this post? Are there other key functionality you like a tent to have? I’d love to hear about it in the comments below and please feel free to share this post.

What’s In A Camping Sleep System?

With the Summer well and truly upon us in many parts of the world, camping may be entering the mind of many hikers. It’s hard to beat a longer trek where you get to stay out in the wilderness for a night or two or even longer!

Camping By Moonlight

Photo Credit: Arup Malakar

With that in mind, I wanted to start a series of posts on camping. There are of course many things you need to have and many things you need to consider to have a successful camping trip while out on the trail.

I have camped many times but I wouldn’t consider myself a seasoned backpacker so I still have plenty to learn in this area myself. Today I want to start by  reviewing what key elements you need in a camping sleep system.

What is a Camping Sleep System?

Well, basically, a camping sleep system is what enables you to sleep comfortably and warm while you’re out in the wilderness. Broadly speaking there are two key components to a sleep system, a sleeping platform and a sleeping bag.

A sleeping platform is basically the equivalent to the mattress in your bed. There are various options to choose from and, as with many things related to camping, it will come down to personal choice. A sleeping bag is well, a bag you sleep in 🙂 I think pretty much everyone knows what a sleeping bag is but there is a lot to think about when choosing one.

Sleeping Platform

Looking at the a sleeping platform first, the main one I use is  a roll mat or air mattress. These are simply soft mats you roll out on the ground to sleep on. While they do provide a certain level of comfort through cushioning, their main function is to act as a layer of insulation between your body and the cold of the ground.

There are various options you can choose. From a range of simple foam pads to air pads which can be inflated to provide a bit more comfort. Most air pads are self inflatable and easy to pack away and in my opinion probably the best option to use.

Price wise, the basic roll mat will be cheaper than an air pad but we’re talking 20 bucks or so difference so not a major price variation I feel. A typical foam roll mat is pictured below. As you can see it’s pretty straightforward, nothing too fancy but it does the job for a night in the mountains.

My Foam Roll Mat

As mentioned, my preference is the air mattress, pictured below is the Therm-A-Rest Pro Lite,  my current air mattress. They’re way more comfortable and much easier to pack away.

Thermarest ProLite Mattress with Pillow

Check out this post to learn more about camping roll mats.

Getting Creative

Now, there is no such thing as a concise rule book in camping to the best of my knowledge, except for common sense of course, so there’s no reason you can’t get creative with your sleeping platform if the climate and weather allows it.

For example, you could consider a hammock. Not something I have ever used but it could be an option. On the plus side, it has the additional advantage of being very lightweight and packable with minimal fuss. As long as you have a couple of trees close by you are probably good to set it up anywhere you choose. It also keeps you raised from the ground which is really important, both in terms of insulation but also in terms of bugs and so on.

Hammock

Photo Credit: Richard Lewis

The main downside I feel is that you of course have no outside insulation so suitable weather is a must. You could perhaps formulate a shelter of some kind but it just wouldn’t offer the same level of protection from the environment than a tent in my opinion.

Another possible downside is that I guess you would probably also be sleeping in a funny position. Probably fine for a snooze but not so sure how comfortable in would be for a whole nights sleep. That may suit some folks just fine though.

Bivi Tent

Another possibility is a bivi bag or tent. Not loads of space but there’s no reason you couldn’t climb into one in fairer weather and sleep for a night. I have a friend who did just that on a short hiking trek. I also met a mountain guide in The Alps who told me that he slept in one while hanging from a cliff face while climbing a cliff face, now that’s really pushing it, but it worked fine for his needs although given the climb he was doing he didn’t have much of a choice.

On the plus side, a bivi tent is again lightweight and easy to carry. On the downside, it would probably be a bit cramped in one and you really would need reasonable weather I think to have any kind of a comfortable nights sleep in it. You’ll also probably still need your roll mat to work in tandem with this.

These suggestions are just some ideas really. Overall, you can’t beat a good old fashioned tent 🙂

Sleeping Bag

The second main part of a camping sleep system is your sleeping bag. It’s primary purpose is to keep you insulated and warm. There are various different options you can consider, for example a rectangular sleeping bag, a mummy sleeping bag (Pictured below the Vango Nitestar 250) and so on. Click on the image below to learn more about the various different types available.

Vango Nitestar 250 Sleeping Bag

There are many other factors to consider as well. Things like what time of year you will be camping, the colder it is the more insulated a bag you will need. There are also factors like material to consider i.e. to go synthetic or to go with down material. There are pay-offs in weight and warmth in one versus the other but other trade-offs in terms of if your bag gets wet e.g. a synthetic back will still keep you warm when wet, a bag made from down material won’t.

I won’t go into loads more detail on sleeping bags here as I wrote a post on how to select a sleeping bag and it lists all the various different kinds of bag you can get as well as all the things you need to consider when buying one.

Sleep System Accessories

These aren’t really a core part of your sleeping system per se. You can get away without them but they can be worth considering.

The first on the list is a sleeping bag liner. You can learn more about what a sleeping bag liner is by clicking here. Pictured below is the Tough Outdoors Sleeping Bag Liner. Basically this is a bag that kind of acts like a bed sheet that you use within the sleeping bag. It helps protect your bag from your sweat and so on. The liner is the same shape as a sleeping bag and you slip it inside your sleeping bag. When you go to sleep, you just climb in the bag and liner as normal.

The handiest thing about a sleeping bag liner is that it is much easier to take a liner out and wash it after a camping trip. On the downside, it’s more weight to carry. There are two material options, cotton and silk. Silk is more comfortable and lightweight but also significantly more expensive that the cotton counterpart. I have a cotton one and it does the job fine. To be honest, I don’t always take it with me camping though. Really up to you.

A Pillow is Always Nice!

Next up, you can also look to get a camping pillow. Again, these are usually self inflatable or only take a bit of effort from your lungs. Again this is something I don’t personally use, not that I wouldn’t be grateful or one I hasten to add. To me, it seems like more extra weight to carry. I usually fashion a pillow out of clothes and a bag or my jacket rolled up into the hood, rolled into a tee or bag. Has done me fine on many occasions.

However, everyone has their own special little comfort they like to bring out on the trail or on a camping trip and this could be a grand one to have in your backpack! That little bit of extra comfort giving a good nights sleep could be just the ticket for you so definitely worth considering 🙂

Summary

So, there you have it. I hope enjoyed this quick look at what a camping sleep system is. Nothing too complex overall as you can see but there is a fair bit to consider when you’re going to buy the gear.

If you’re ready to purchase some gear I recommend you click out through to the how to buy a sleeping bag post, the post explaining more about what a camping roll mat is and finally the post explaining more about what a sleeping bag liner is. That should give you a lot to chew on as you review your options.

Conclusion

Personally, I go with a roll mat and 3 season sleeping bag. I also have a cotton sleeping bag liner which I utilize from time to time. That system has worked great for me but I’m sure there are lot’s of other options I would enjoy too. Take time to find whats right for you and of course, take what you need it all for into account too.

For example, if you’re planning a long trek thru hiking the Appalachian trail over the next 6 months, weight is probably top of your list. If you’re going for a long hiking weekend with a night or two camping out on the hills, you probably have a bit more space for an extra bit of comfort that just wouldn’t be practical on a longer trip so a pillow and that type of thing might be great to take along with you if you like to have one.

Wasn’t that little exploration into a camping sleep system fun 🙂 I hope you found this all useful. What do you think? What’s your favorite camping sleep system? Do you take a pillow with you? I’d love to hear your thoughts in the comments below.

Please also share this post around your networks and like it, it would be very much appreciated 😉

What Is A Sleeping Bag Liner?

Recently, I’ve done a couple of posts on how to kit yourself out with appropriate sleeping kit if you plan to camp out while out on the trail. So far we’ve looked at how best to choose a sleeping bag and the necessity of a camping roll mat.

You can get away with a good bag and a roll mat for a reasonably good nights sleep on the trail but one final accessory that I want to look at today is a sleeping bag liner.

So What is a Sleeping Bag Liner?

A sleeping bag liner is kind of like a bed sheet for a sleeping bag. It has the same shape as a sleeping and you use it in the same way and in conjunction with your sleeping bag.

Basically you put your sleeping bag liner inside your sleeping bag and get into it in exactly the same manner as you would your sleeping bag. This provides a liner or sheet between you and your sleeping bag?

As with Sleeping bag’s, sleeping bag liners can come in different shapes and sizes.

When referring to shapes, I am talking here of either Rectangular or Mummy. These are the two most common shapes of sleeping bags so it makes sense to get a sleeping bag liner in the same shape as your sleeping bag.

Cocoon Silk MummyLinerPictured above is the Cocoon Silk MummyLiner. Silk is an excellent although more expensive option for a liner.

ALPS Mountaineering Brushed Polyester Rectangle Sleeping Bag Liner

Pictured above is the ALPS Mountaineering MicroFiber Rectangle Sleeping Bag Liner. Another excellent liner choice if you don’t want to spend extra for the silk option.

Similarly, with regards to size, if you get one that fits the size of your bag, and assuming you’ve already checked that you into fit your bag of course 🙂 , it should be a comfortable fit for your body.

This may seem like stating the obvious but I have a friend who just picked up a cotton sleeping bag liner in a store without checking the size of it. I have no idea why! Long story short, it was way too small for him as he’s a big guy. It was more or less useless then.

What’s the Point of it?

Well, as far as camping goes, the main advantage is that it keeps your sleeping bag from getting dirty or sweaty from the inside. After a days hiking, chances are you’re not going to be the cleanest you’ve ever been. When you take off your gear and get into your sleeping bag, you don’t really want to have the dirt and sweat from the trail bonding with the inside of your sleeping bag.

Instead if you have a sleeping bag liner, it will do that for you and protect the inside of your bag. The main advantage of this is that a sleeping bag liner is pretty thin and lightweight. Therefore, it is a lot easier to wash a sleeping bag liner than having to wash a sleeping bag.

Using a liner will help cut down on the need to wash your bag as much as you would need to if you didn’t use one.

Finally, a liner will add a little extra bit of warmth to your nights sleep so it’s worth keeping that in mind too. It is no way enough on it’s own but it will add a marginal amount more to the performance of your sleeping bag.

Are they Heavy?

No, Sleeping bag liners are designed to be lightweight so they don’t add much weight to your pack. As already mentioned, they’re similar to a bed sheet in thickness and they usually come in a carry case which it rolls neatly up into (see bag in mummy picture above).

They are usually made from either cotton or silk. My understanding is that the silk one is lighter, a little less bulkier, stronger and probably a little more comfortable than the cotton ones available. The silk one also dries quicker than a cotton one and handles temperature changes a bit better.

The one I have is a cotton one and it worked just fine. I’ve used it in the huts in the Alps as well as camping and it worked perfectly.

How Much are They?

A sleeping bag liner should definitely not break the bank. For a cotton one, you are looking at anywhere from $20.00 to $40.00. As mentioned above, is you want a silk one, they are more expensive and you’re talking anywhere from $50.00 to $80.00.

Other Uses

A sleeping bag liner is not only advantageous while making camp. As I wrote about a few months back I climbed Mont Blanc in the Alps. As part of that I stayed in the ‘huts’. Huts are accommodation you can book to stay in while hiking in the Alps.

The huts are basic but comfortable and they provide beds which will have some form of bedding. However, we were advised to take a sleeping bag liner with us as recently the powers that be were saying that a sleeping bag liner was a requirement.

Now, it seems this latest requirement is not always enforced and no-one checked when I was there. However, regardless I was grateful to have one with me anyway as I imagine the beds in the huts get a lot of traffic through them. I have no doubt they’re washed regularly enough but having your own protective barrier in the form of a sleeping bag liner was definitely a good idea.

Extending on from this use, I really see that if you are planning to do some backpacking, or perhaps a longer trek like the Camino de Santiago on which you plan to stay in the Auberges (hostels), utilizing a sleeping bag liner would seem to make a lot of practical sense. Those beds will have a lot of traffic through them so I think it’s nice to have your own protective sleeping layer.

Conclusion

If you’re going to head out for a nights camping or if you’re planning to do a bit of backpacking and stay in hostels as you travel, a sleeping bag liner is a good addition to your kit. They’re practical and they don’t cost the earth so I recommend looking into getting one.

Now, for longer backpacking trips where you’re carrying all your kit on your back, in truth, a sleeping bag liner probably takes up too much valuable space which could be used to carry something much more functional. However, they are still worth a look when kitting your sleeping system out.

So, that’s pretty much all I wanted to cover with regards to sleeping kit for a nights camping on the trail. With a good sleeping bag, camping roll mat and a sleeping bag liner, you should have the guts of what you need for a reasonable nights sleep under the stars in your tent.

Do you use a sleeping bag liner? Cotton or Silk? I’d love to hear your thoughts in the comments below!

What Is A Camping Roll Mat?

In a recent post, I mentioned I did some mountain training, mainly navigation and group management stuff. Part of that involved learning about how to select and set up a camp site while out on the trail. For the training I needed to of course be get kitted out appropriately with, most, of the required camping gear.

When camping, one of the first key areas you need to address is having the right kit for sleeping. For example, one item that is a must is of course a sleeping bag. I purchased a pretty reasonably priced one from Vango, pictured below (click on the picture to learn more no how to select a sleeping bag), some time back and it has done the job reasonably well on numerous camping trips now, although it is a bit bulky.

Vango Nitestar 250 Sleeping BagI commented in that post that as well as a sleeping bag you of course need some accompanying sleeping kit accessories to help ensure you have a reasonable nights sleep. I also mentioned I’d review those in some separate posts, this one being the first of those.

So without further ado … what else do you need as part of your sleeping kit? First off, you absolutely need something to sleep on and this can come in the form of a camping roll mat.

(This post focuses on sleeping specifics and so works on the assumption that a tent is available and already in place. I will add some tent reviews and results from my research on that particular area up on Cool Hiking Gear soon though, as I will be purchasing one at some point in the future.)

What is a Camping Roll Mat?

This is a critical part of your standard camping kit that accompanies your sleeping bag. In short a roll mat protects your body from the cold and damp of the ground when you sleep. They usually come in one of two forms.

The first is the standard one made from some kind of waterproof foam. Pictured below is an ALPS Mountaineering Foam Camping Mat, click on the picture to learn more:

ALPS Mountaineering Foam Camping Mat (Regular 375)

The second, is a self-inflating mat you can inflate when you get to your camp. Pictured below, taken in my back garden, is the Therm-a-rest Prolite Plus mattress, my current sleeping mattress. Click on the picture to learn more:

Thermarest ProLite Mattress with Pillow

A roll mat can sit inside or, apparently, outside, underneath, your tent. I can’t see any advantage in having it outside but some people do do that. I always have my mattress inside the tent. Perhaps if it is wet it could make sense, and perhaps it is just down to personal preference.

I used to have the foam option listed first but I have since switched to the Therm-A-Rest mattress option as it is far more comfortable in my opinion and much easier to carry. Again, it depends on your personal preference, I have a hiking friend who actually prefers the foam mattress.

Price

Overall, I’m happy to say, they’re not that expensive. You can spend anywhere from $12.00 to $300.00 depending on what your needs are. $100.00 should be adequate to get you a pretty good air mattress though that should meet most of your camping needs. As with all things though, if you’re going into tougher conditions you may need a tougher mat.

I also would guess, but can’t say for sure, that in very dry places, you might get away with just a sleeping bag. However, the foam pad, while it is pretty thin, maybe 1-2 cm in depth, does also provide some level of comfort as it adjusts over bumps and little stones that may be sticking up from the ground.

I personally recommend spending a bit more in this area if you can. For about $80.00, you should get a really top notch Therm-A-Rest air mattress that will cover you well for most conditions. The extra bit of comfort you get for the extra cost I think is worth it.

Other Considerations

From my experience, one thing to consider is size. The foam roll mat rolls up and can be attached to your pack on the outside. They’re not that heavy so weight isn’t a major issue.

However, from the pure perspective of bulk, an inflatable air mattress again wins out. As long as it has the facility to be self inflated, it will take up much less room that a foam one.

To reiterate, I’m looking specifically at camping in a tent here so a Bivi Bag isn’t considered, although I will look into those in a separate post.

Conclusion

Remember, if you’re going camping in a tent, you need a few things to give yourself as comfortable a night in the wilds as possible. As well as a good tent and sleeping bag, a good camping roll mat or air mattress will go a long way to keeping you comfortable and protected from the elements. They won’t break the bank and there are plenty of options to choose from. As with your sleeping bag, be sure to get the appropriate mat for the conditions you will be camping and sleeping in.

Next up, in keeping with the camping sleeping accessories, we’ll look at another potentially useful accompaniment to your camping experience, the sleeping bag liner.

Do you think a foam or a blow up roll mat is better? I’d love to hear your opinion in the comments below.

How To Select A Sleeping Bag

Last week I heading off on some mountain training, which, as I publish this, I am now currently be in the middle of. As part of the preparation for the training I had to get a few extra bits of gear which I didn’t currently have.

A few of these are in the world of camping. As part of the training I needed to get a sleeping mattress, cooking stove, sleeping bag, etc.

Snugpak Chrysalis 3 in Pack 2

Now this is very interesting for me as my knowledge of camping is pretty good but I am always keen to learn more if I can. I of course camped many times before but normally only ever for one night here and there over the years, and never in the context of a true full on backpacking experience over a few days.

This is something I really think I would like to do more of but I guess I need to see how I get on this week and learn some more about what’s involved for longer trips first.

Anyway, as I was recently trying to sort some different bits of gear I thought a guide on how I got on while buying a sleeping bag could be useful for you.

I’ll do a few posts on the various bits I had to get and the research I did on them, but with the above in mind, today I wanted to start by looking at how to select a sleeping bag.

What to Look for When Buying a Sleeping Bag?

Overall, there is a pretty easy guide to follow and, to the best of my knowledge, most quality sleeping bags should be rated in the same or in a similar way.

Season Ratings

Basically there are 5 sleeping bag season ratings to consider:

  • 1 season – This is a one season bag. Ideal for Summer camping in warm weather
  • 2 season – This is a two season bag. Ideal for Summer, Late Spring and Early Autumn
  • 3 season – This is a three season bag. Can be used in summer (might be too warm in hotter climates), spring, Autumn and a warmer winters night
  • 4 season – As you probably guessed 😉 this is a 4 season bag and so can be used all year round
  • 5 season – This is a bag for extremely cold conditions so extra warm. This is expedition type stuff so may not be suitable for standard use in Spring and Summer

As with all things, these are only guidelines but they definitely serve as a reasonable way to get an idea of where to start when deciding on what you should get to meet your needs.

Moving on …

Comfort Rating

Again this is another rating which looks at ‘Comfort’, ‘Limit’ and ‘Risk’. These three are shown in the picture below from my bag and are explained below.

Sleeping Bag Label

Comfort

The higher the rating, in theory the more comfortable the bag. If you tend to feel the cold more, choose a higher rating.

Limit

This is the comfortable temperature limit the bag can be used in.

Extreme

This is the absolute outside extremity of temperature that the bag can be used in.

The three things above are again, only guidelines but combined with the season rating, you should be able to pick a pretty good bag for your needs relatively easily.My recommendation is to stay comfortably, pun intended, within the comfort temperature rating.

Weight, User Height, Width and Bulk

On a hiking trip you will quite possibly be carrying your sleeping bag in your back pack so it is a good idea to take the weight of it into consideration.

Also, if you’re particularly tall, you may also want to pay extra attention to the user height. Finally, if you’re quite broad, special attention should be paid to the width of the bag. All of these should also be available on a further tag on the bag itself.

If you have to carry a tent, cooking gear, etc. bulk is a really important factor to add to your list for consideration. as a bigger bag, takes up more room in your pack. A good sleeping bag will have straps on the side of it that can be used to squeeze all the air out of the bag and so provide a much more compact bag to carry. Another option is to unravel the sleeping bag and wrap it inside a dry bag inside your pack.

Anyway, I digress … you get the idea, bulk is important.

Material

There are more or less a couple of choices here. You can go Synthetic or you can choose the road of Down type material i.e. goose feathers and that sort of thing.

Synthetic holds warmth better if it gets damp and a Down bag is really used for colder Winter type conditions. Other than that, I think it’s really down to your own personal choice. Functionally, the ratings above still apply.

I think this is something that is a factor if you will be camping for longer periods in tougher conditions. That is, if your hiking trek or expedition is into the extreme cold of Winter, Down might be the best way to go and so this may play more of an important role in your decision making.

However, if you do choose Down material for your sleeping bag, you will need to store it in a dry bag as you cannot afford to get it wet. If you do, it will be damp and cold to sleep in and so most likely not fit for purpose. You should store all your gear in dry bags anyway, whether made of Down material or not.

Shape

Broadly speaking there are three main shapes 1. Rectangular 2. Mummy and 3. Sleeping Pod.

Rectangular

These are, of course, shaped in a rectangle. I guess the main benefit of this type is you probably have more room to move your legs and feet around so if you move more in your sleep, this could be a better option for you.

Coleman Brazos Cold-Weather Sleeping BagMummy

This shape funnels down from a wider space at the top to a narrower bottom end. The main advantage is that it’s closer to your body and so that should help retain warmth (see featured bag above for what a mummy shaped bag looks like).

Sleeping Pod

These bags are normally as half as wide as they are long. The main advantage I see in these is that you have even more room to move around in that in a rectangular bag. Not practical for backpacking though.

Finally, there are options for getting some bags for more than one person e.g. if you want to sleep with your partner. The shapes still apply but they’ll just bigger in weight and width.

Overall, I think it is really down to your personal choice as to which you prefer the look of, how you sleep, the conditions, etc.

Zips

In my research before buying my bag, I read somewhere that a handy tip to look for is that if you’re left handed, ideally the zip should be on the right hand side and if Double Zipyou’re right handed, it should be on the left hand side. I assume this is for ease of opening.

Also, with regards to zips, it can also be good to look for a double zip i.e. the zip is accessible from both the inside and outside of the sleeping bag.

Price

This will of course vary based on what options you choose and what you need it for, but for a good sleeping bag for average use I think you will be looking somewhere between $60.00 to $80.00. I paid approximately $60.00 for my 3 season bag.

Now, if you need something for more extreme conditions, you can easily be moving up into the hundreds of dollars for a high performing bag. If you’re going to sleep out in extreme environments, this isn’t optional and you need to have the top level of performance both functionally and quality wise.

Sleeping Bag Extras

While you are well on your way to a good night’s sleep with a good sleeping bag that’s not really the whole story. It is a good idea to have a few other accessories like some kind of sleeping pad / mat, sleeping bag liner and a pillow.

A sleeping pad or mat acts as a layer of insulation between you and the ground and is very important for a good night’s sleep in a tent. While you can fashion a pillow out of a rolled bunch of clothes, there are camping specific pillow options available.

For today though I just wanted to look at sleeping bags. I’ll add up separate guides on sleeping pads / mats, liners and pillows in the coming weeks and link to them from here.

Conclusion

I found the process of buying a sleeping bag, pretty easy to get my head around. The categorization and labeling is very well set up and pretty easy to follow once you understand how it works.

Overall, I think you could probably just read the categories and labels alone and have a pretty good idea of what bag you should go for. I hope you found this guide on how to select a sleeping bag useful.

Do you use a sleeping bag for your treks and hiking trips? Do you have any tips to look out for when buying one? I’d love to hear about them in the comments below.

  • « Previous Page
  • 1
  • 2
  • 3
  • Facebook
  • Pinterest

What are you looking for?

Copyright © 2025 · Cool Hiking Gear

Cool Hiking Gear is a participant in the Amazon Services LLC Associates Program, an affiliate advertising program designed to provide a means for us to earn fees by linking to Amazon.com and affiliated sites.

  • About This Site
  • Privacy Policy
  • Affiliate Disclosure Statement
  • Contact