coolhikinggear.com

  • Men’s
    • Best Hiking Rain Jackets for Men In 2024
    • Best Men’s Hardshell Jackets Of 2023
    • Best Hiking Pants For Men In 2023
    • Best Ultralight Rain Pants For Men
    • Best Men’s Daypacks For Hiking In 2023
    • Best Backpacking Backpacks For Men In 2023
    • Best Base Layers For Men In 2023
  • Women’s
    • The Best Hiking Rain Jackets For Women In 2023
    • Best Women’s Hardshell Jackets Of 2023
    • Best Hiking Pants For Women In 2023
    • Best Ultralight Rain Pants For Women
    • Best Daypacks For Women
    • Best Backpacking Backpacks For Women In 2023
    • Best Base Layers For Women In 2023
  • Hiking Accessories
    • Best Hiking Poles
    • Best Trekking Pole Monopod Camera Mount
    • Best Hiking Headlamps
    • The Best Hiking Watches In 2023
    • The Best Hiking Gloves In 2023
    • Best Hydration Bladders For Hiking In 2023
    • Best Compass For Hiking Our Top Picks
    • Cool Hiking Gadgets
  • Footwear
    • The Best Men’s Hiking Boots In 2024!
    • Best Hiking Shoes For Men In 2023
    • The Best Women’s Hiking Boots In 2023!
    • Best Hiking Shoes For Women In 2023
    • Best Hiking Sandals
    • Best Hiking Sandals For Women in 2023
  • Hiking Guides and Resources

How To Boil Water While Camping

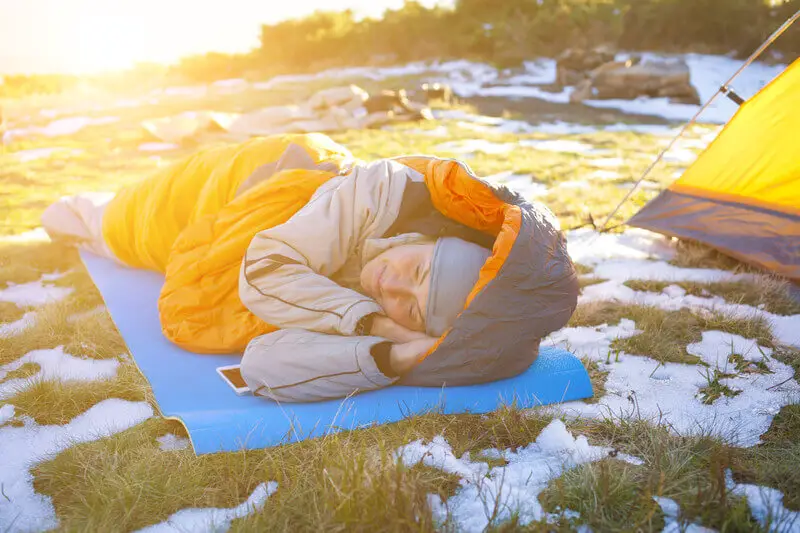
Learning how to boil water while camping can make your trip a much more enjoyable experience, and is of course a critical component or safety.

Gas Stove Outside a Tent

In this article, we’ll take a look at why you may need to boil water while you’re camping, as well as checking out some of the best ways to do so.

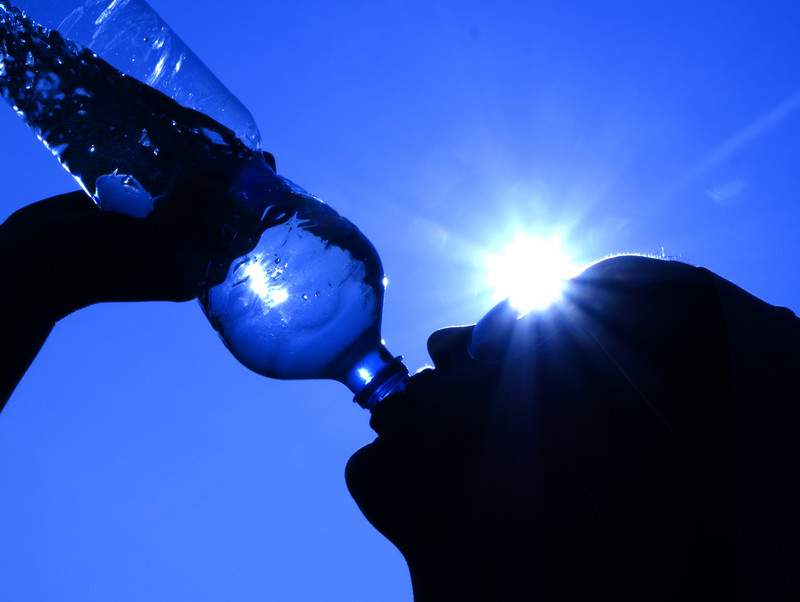
Boiling water while camping is an essential, often overlooked skill that can provide you with safe drinking water when you run out, or if your regular water treatment method breaks. So it’s good to have a back up plan in the back of your mind, just in case.

Why you need to Boil Water

Being able to boil water when camping is not only essential for your morning tea or coffee. Boiling water can also be an important way to provide you with safe drinking water, as well as a backup method for when you forget your other water purification methods or if they get lost or break.

Boiling water is also a quick and easy way to re-hydrate ready made freeze-dried meals for quick nutrition, however, having the means to boil water often also means you can actually cook a half decent meal too.

Let’s take a look at some of the most popular ways you can boil water while you’re camping.

Popular Ways and Devices to Boil Water when Camping

From the simple, traditional campfire to heatsticks, there’s a wide variety of devices available to boil water when you’re camping.

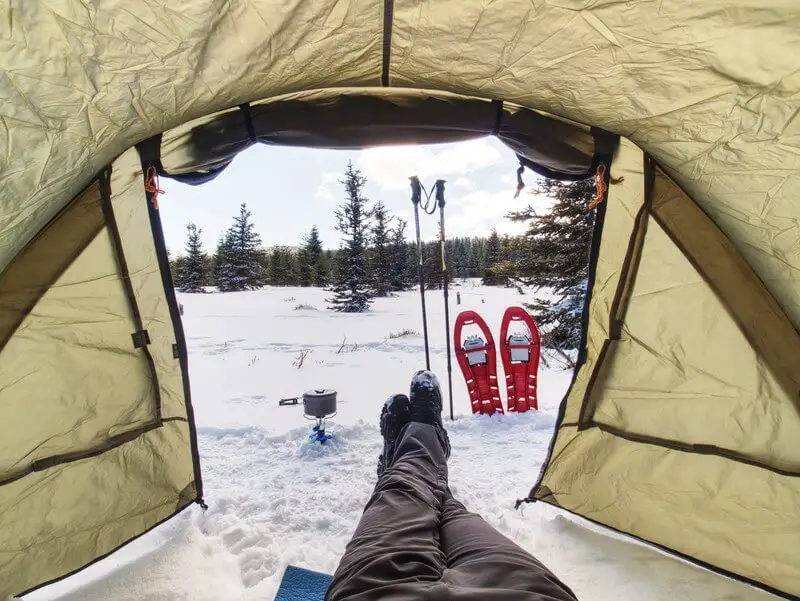
Traditional Canister Stoves

Canister stoves are generally speaking easy to light and bring water to a boil faster and mush easier than your average campfire. However, you will need to carry fuel with you which will add to your pack weight and take up space.

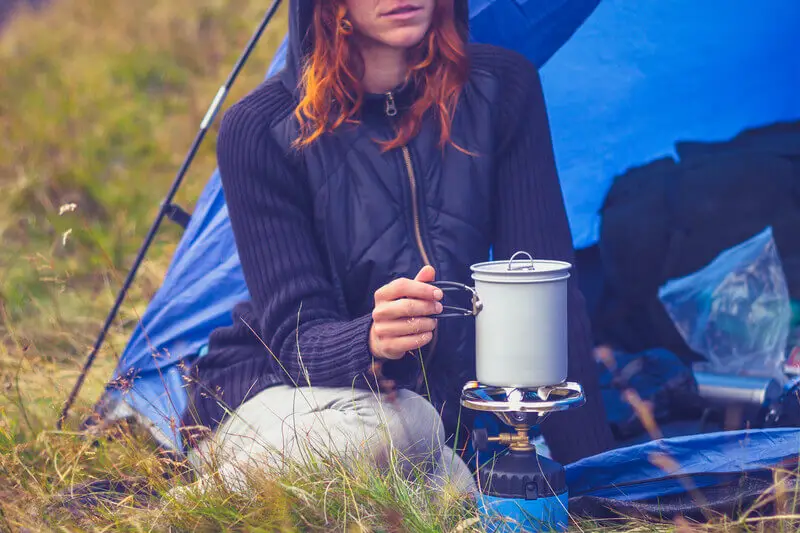
Traditional canister stoves are also good for cooking as well as simply boiling water. Some canister stoves feature easy ignition systems making them simple to light.

Available at a wide range of prices and weights, even basic canister stoves will boil water quickly and easily, making them a popular choice. Be careful with them in windy weather in and around your tent, it’s not unheard of for them to set the odd tent on fire.

Internal Flame Kettles

Try out a Ghillie or Kelly kettle for fast boiled water. Thanks to their internal chamber your fire stays lit even in windy conditions and as you don’t need any batteries or fuel you can use what you find around your campsite to burn in it.

Your water boils faster and more efficiently as there is less heat lost between the flames and the water than with a traditional stove. The handy pouring spout also makes the kettle ideal for your cup of morning coffee, or for transferring your purified water to another container to cool down.

As the flames are contained it also makes it safer to use in trying areas and conditions, like heavy wind as referenced in the last paragraph. Made from lightweight aluminum, these kettles are light to pack and can be attached to the outside of your pack to reduce bulk.

Campfire

Light a campfire using nearby sticks and leaves for a traditional campfire. You’ll have to pay extra attention to its location and make sure that you can keep your fire under control.

They can be quite difficult to light for newbies and might take a while to bring your pot or pan of water to a boil.

We are not fans of campfires, as we believe in leave no trace, but many folks do like to use campfires. Here’s a video of the most basic way that you could boil water with next to no equipment, basically a fire and a can.

Other Methods

You could also use newer mini canister stoves such as the Jetboil Flash to reach boiling point in a short amount of time or an integrated canister stove such as the Jetboil MiniMo.

These modern types of stove cut down on bulk and weight. They are also designed to be rapid, although they often can only heat small quantities which makes them unsuitable for groups or cooking.

If you are just looking for an alternative to the usual water purifying systems frequently used on the trail, then you might be interested in trying out the Jetboil.

It is expensive but it can boil water without a flame or light within several minutes. The small cylindrical tool weighs approximately 0.82 pounds and is unaffected by the elements. In fact it is so compact and easy to use that you can even use it on the go.  

Safety Considerations

If you are boiling untreated water from a natural source then there are some important safety aspects to bear in mind.

As boiling water won’t filter out or remove any toxic chemicals, if you don’t have a specialized filter or you have left it at home with your regular water purification method, then you will need to be extra careful where you draw your water from.

As a rule prefer fast flowing rather than still waters and always go upstream from any farmed land, roads, buildings and any other signs of human activity.

Your stream water will likely contain small bits of dirt and sediment. You can use a t-shirt or other item of clothing to filter your water and remove any large bits. Place your pan, canister or other receptacle full of water over your fire, stove or pour it into your Ghillie kettle.

Bring your water to a rolling boil for one minute to kill off any potentially harmful bacteria and pathogens. If your water is not quite at a rolling boil, then you would be better off leaving it to boil for several minutes longer to guarantee that it kills off any harmful microorganisms.

Also if you’re at an elevation over 6,500 feet, you will need to boil it at a rolling boil for at least three minutes as water boils at lower temperatures the higher up you go.

Keep in Mind

If water is in short supply, be sure to minimize evaporation by using a lid or self contained unit. This will also speed up the time it takes to reach boiling point. Some canister stoves come with insulated lidded containers that make boiling water faster and more efficient.

As referenced above, when you have any kind of naked flames, you need to be extremely careful that you don’t cause a fire that could quickly spread out of control. Check any warnings and pay heed to any fire bans especially during hotter times of the year when rainfall is scarce.

You’ll also need to pay attention to the wind direction, if you’re boiling your water near to your tent and equipment a sudden gust could potentially set your tent on fire leaving you without shelter.

Naturally, it’s also important to pay attention that you don’t burn yourself, either from the flames themselves, or the hot stove, pot or water.

Whereas at home in a standard kitchen we’ll automatically reach for a kitchen cloth or an oven mitt, if you’re new to camping you may just naturally reach out for that burning hot pot full of water without a second thought.

You may want to play it safe and make sure that your first aid kit has burn cream and appropriate dressings, especially if you’re the clumsy type.

Conclusion

From cooking to coffee, being able to boil water on the trail makes life much more comfortable on camping and backpacking trips.

Once you know how to boil water while camping not only can you prepare yourself hot drinks and meals, you also have an effective water treatment system for in case your main water purification method breaks.

While it won’t remove any toxic chemicals, if you’re stuck for drinking water, boiling stream water found upstream of any human activity is one of the safest ways to treat water and kill off any potentially harmful bacteria and pathogens.  

How To Pack An External Frame Backpack

Although external frame backpacks are much less common these days, and arguably less useful than internal frame backpacks, they still have plenty of advantages and can even be considered preferable to using an internal frame backpack in certain scenarios.

External Frame Back Pack Inside

However, before you consider dusting off your old external frame pack for your next hike, let’s take a look at how to pack an external frame backpack and why it’s important to get it right.

We’ll also consider the merits and the shortfalls of external frame backpacks, as well as where and when they can be preferable to use.

Differences Between Internal and External Frame Backpacks

Most obviously, external frame packs have a visible outer frame. External frames tend to be longer and bulkier than internal ones and the pack sits farther away from your torso, with the load positioned higher.

Most internal frame packs are more compact, and they usually have one or more aluminum stays. These rods support the pack load close to your back and can be bent to fit your spine curvature, for extra comfort. Internal frame backpacks carry weight lower than external ones.

As for the pack itself, internal backpacks tend to have a large internal capacity with one or two main compartments. There may also be a couple of attachment points for equipment.

External frame packs generally offer more sections, compartments and pockets, and equipment can be attached directly to the frame itself. They tend to have large load capacities which can be a positive.

Another noticeable difference is their price. External frame backpacks are less common today and they usually come at a cheaper price than their internal frame counterparts.

In fact, there are a great many more internal framed backpacks available for purchase, whereas finding a decent external frame backpack takes a certain amount of tracking down.

Advantages of External Frame Backpacks

In the vast majority of cases, in our opinion, an internal frame backpack, like the one in the image below, is going to be the most preferable choice.

Best Backpacking Packs for Women

They’re streamlined, weigh less, move with your body and maintain your natural center of gravity. Without a doubt, internal frame backpacks are much better when it comes down to balance. 

However, we’re all different and sometimes it simply comes down to a matter of personal preference. Preference aside though, external backpacks do have some notable advantages over internal frame backpacks. Here’s some of the main advantages of external frame backpacks.

Ventilation

As external frame backpacks hold the weight higher, with the pack further away from your torso, the frame area provides an excellent ventilation corridor.

This can help to keep you cool on hot days and prevent a build-up of perspiration between your back and your pack.

Heavy Loads

External backpacks are better for very heavy loads, thanks to their solid frame and large capacity.

They make heavier loads easier to carry, thanks to their better weight distribution, see below.

Better Weight Distribution

As your pack load sits higher on your back with an external frame pack, this allows for a better transfer of weight to your lower body.

This in turn, makes it easier for you to walk with a straighter back, unlike internal frame backpacks where the lower load encourages you to lean forward slightly, in order to better transfer weight to your lower body.

Carrying Bulky Items

If you’re looking to carry excessively bulky items, then an external frame backpack can make doing so much easier.

You can strap items to the frame directly, without hindering your access to the rest of your gear inside your pack. The larger pack capacity can also be useful for larger items too.

When, Where and Why you Might Use an External Backpack

Consider the main advantages of external frame backpacks and it becomes apparent that they do still have their uses.

In certain scenarios external frame backpacks can provide an equally good or even better choice than an internal frame backpack.

So, when do external frame backpacks make a better choice than internal ones? External backpacks can be the better choice year-round, your choice will mainly depend upon other factors.

They can be great in winter for carrying extra equipment and bulky layers. They can also be a good summer choice for transporting heavy extra water on trails that don’t have any refill points.

Plus, don’t forget their excellent ventilation that will prevent perspiration from building up and down your back.

Location will narrow down your choice of backpack significantly. You don’t want to be covering any tricky terrain with an external frame backpack.

They are best for flatlands and actual trails as the frame can get caught in any undergrowth, you may get through just fine with your internal frame backpack.

Any other type of terrain will probably be better suited to an internal frame backpack, which will help you to maintain your balance by keeping your natural center of gravity, with your load held close to your body.

In general, you’ll probably prefer to use an external frame backpack over an internal frame one, when you’re looking at taking a long flatland trail with a considerable load.

You might also want to consider using one for any special equipment you may wish to take on certain trips such as fishing or hunting gear, camera accessories or if you’re attempting family camping off grid.

Basically, any trip where you will need a large capacity and the ability to strap on larger items.

How to Pack an External Backpack

So, now you may have a trip in mind where an external frame backpack would be ideal. But just how do you go about packing an external frame backpack?

Well, the truth is, pretty much like an internal frame one, albeit with a few small differences. Thanks to their external frame, external frame backpacks can appear more forgiving of your packing technique.

The video below highlights some important differences between packing an internal and external frame backpack, worth a look!

The weight isn’t right up against your back, it’s distributed better to your lower back and you’re not going to risk having any items digging into you through the back panel.

However, as external backpacks do not hug your body like internal frame ones, if you don’t pack it correctly, its top heavy design will cause you to become uncomfortably unbalanced.

For this reason, it is recommended that you pack your heaviest items near the top and close to your back, when packing an external frame backpack.

This will help to ensure that the load is correctly distributed to your hips through the frame, allowing you to support the heavy load with a straight, upward stance.

Packing an External Backpack

  1. Place any lightweight items that you won’t need access to throughout the day, such as your sleeping bag, at the very bottom of your external frame backpack.
  2. Medium weight items should then be placed in the middle and furthest from your back.
  3. Place the heaviest items at the top of the pack, next to your back.
  4. Use the side pockets for go-to items you’ll need throughout the day such as drinks, snacks, waterproofs and maps.
  5. Strap any awkwardly shaped, long or bulky items to the frame itself, making sure that they are correctly balanced and securely attached as not to impede your gait by swinging.

Water, pans, and your stove are likely to be among your heavyweight items. By packing them near to your upper back, the external frame will be able to transfer the load more effectively to your hips.

If you pack them elsewhere, you risk the load pulling back on your shoulders. Not only will this cause discomfort, it’s also going to put you off balance.

In any case, don’t forget to keep any emergency items close to hand, in an easily accessible place and remember to pack in layers, securing heavier, harder items with softer ones to prevent them from moving around within your pack.

Any movement from the interior of your backpack could also set you off balance, causing discomfort and possibly even a fall. 

Further Resources

Why I still pack an external frame backpack – A good article on one person who likes the external frame backpack.

How to pack and hoist a backpack – An interesting article on packing and loading a pack on your back from the folks in REI.

Conclusion

If you’re looking to carry a lot of equipment over flatland trails, then an external frame backpack is going to be a good choice for carrying the extra bulk.

Think western desert flatlands and trail hiking in general. With their superior weight capacity and ventilation, external frame backpacks also make easier work of carrying extra water in the heat.

Just be sure you know how to pack an external frame backpack correctly to ensure optimal weight redistribution and balance.

However, for other terrain with your average hiking gear, you’re probably going to be better served by your regular internal frame backpack for better balance and ease of movement.

Although if you get the chance, try out an external frame backpack on your next appropriate trekking trip, it may change your mind about the old external frame style backpacks, or it could just reconfirm your faith in today’s internal frame lightweight and compact backpacks.

Best Tent For Hot Weather

Summer, with its long days and sunny skies, can be one of the best times to go backpacking. But when things start to heat up a little too much, you might feel uncomfortable in your regular tent.

So, what is the best tent for hot weather you may well ask? Read on and find out what makes for the best way to spend a night’s backpacking when the mercury rises. 

Season Specific Tents

Tents, like your sleeping bags and jackets are also designed to take into account the seasons.

When you’re purchasing a tent, be sure to check out its season rating to make sure that it’s appropriate for the time of year during which you intend to be using it most.

When you’re choosing a tent, your main choice will be between a two season, a three season or a four season tent. There is also a sort of halfway tent rated as a three to four or a three plus that comes somewhere between the two.

For very hot weather, you’re going to be better off selecting a two season tent.

Two season tents are generally mainly constructed of mesh fabric for improved air circulation during the hotter months, but they are only designed for fair weather camping.

If you’re likely to be dealing with a lot of rain as well as the heat, you may be better opting for a three season tent with functional mesh panels and a good rainfly for improved protection.

Three season tents can withstand downpours and most weather scenarios, however, they are not quite as sturdy as four season tents. Three season tents can be tough enough though, I once used one in winter and it worked pretty well.

Four season tents tend to have less mesh panels and can get rather stuffy during summer or on warm days. They are designed to withstand colder, harsh weather conditions including strong winds and snow.

Best Type of Tent for Hot Weather

Aside from a tent’s seasonality, you’re going to need to focus on a range of features depending upon the sort of hot climate you will be camping in.

Dry heat, such as you’ll experience in desert-like conditions, is very different from humid, tropical heat as you might encounter in a rainforest.

The features that your tent will need will ultimately depend upon which kind of heat you’re faced with on your backpacking trip.

Tent Features for Hot & Humid Climates

When you’re looking for the best tent to spend the night backpacking in hot, humid conditions you’ll need to ensure that your tent is predominantly mesh with a rainfly cover to hand when needed.

Tent-Door

You’ll need to have continued airflow even when you’ve got your rainfly on to prevent moisture build-up within your tent.

A fan can help improve air circulation and angled tent windows or ones with extended awnings over the windows, will allow you to leave them open in rainy conditions, thus improving air flow.

Bear in mind that hot humid climates are home to various insects, including mosquitoes, so mesh tent walls, are really are going to be the best option here, allowing air to enter while keeping the insects out.

You may wish to go for a tent with enough space to sit comfortably in, as if there are a lot of mosquitoes about in the evening, you’re going to need to spend more time inside your tent to avoid being bitten.

Even with excellent insect repellent, it can just be unpleasant to be surrounded by mosquitoes and bugs. 

Wet and humid conditions also mean that you’re going to need a tent that has a ground sheet or ideally a footprint, to ensure that moisture stays out of your tent from the ground below.

Make sure that you have a good fitting rainfly and that all seams are weatherproofed. 

Tent Features for Hot & Dry Climates

When you’re backpacking in hot, dry conditions, you’re going to need to try to shade your tent as much as possible from the sun.

Although not as big a deal at night, it is relevant during the day, some place can heat up very quickly as soon as the sun is up.

Your rainfly can be used to do this although a tarp stretched above will better protect your tent from the sun, while leaving the mesh sides free to allow air to circulate.

If possible, make use of any shade provided by any structures such as walls, or vegetation.

Advantages of Purchasing a Tent for Hot Weather

You may think that purchasing a tent especially for summer use may be an unnecessary extra expense.

However, doing so will make your summer backpacking trips much more agreeable, and will help to improve your quality of sleep on the trail.

It is not uncommon for many backpackers to only camp out in fairer weather anyway, not too many people want to head out into heavy rain and wind to camp.

In addition, you will find that tents designed primarily for summer use are lighter than your average tent, meaning a lighter load to carry.

The vast majority are also cheaper than tents designed for colder weather conditions.

Hot Weather Tent Price Range

Prices for small, basic mesh tents vary, however you’re probably looking at prices ranging from around $80 for simple models, of questionable quality, to much higher-priced ultralight models designed for fastpacking and ultralight hiking at several hundred dollars.

Don’t forget if you’re going for the most basic, cheapest option, you may need to add on a ground sheet or tarp, and it could be a good idea to pick up a bug net just in case you experience any quality control issues.  

Other Options for Hot Weather Camping

When the weather’s warm and the nights are long, you could spend the night under the open skies with just your sleeping pad and liner or a light sleeping bag.

Some people can’t sleep well in the open without the security of a tent or other type of structure, while others have no difficulty with sleeping in the open air.

If insects are going to be an issue, then again remember that you will also need a bug net.

Other great hot weather sleeping options include pitching your tent with only the rainfly and footprint. This way you’ll have a the familiar tent feel, but with plenty of space for air to circulate between the fly and the ground sheet.

Ideal for those who like the sensation of sleeping surrounded by a structure, but with plenty of air circulating. The rainfly will also provide shade from the early morning rays as things start to heat up.

Another main advantage is you don’t need to purchase another tent, just use what you already have for the structure, rainfly and footprint.

You could also make yourself a simple tarp shelter to lie under. Bear in mind this will not protect you from any damp, although it will keep the sun off you, and you can angle it to protect you from the first warming rays.

While the last two options can be rather uncomfortable and don’t provide any bug protection, possibly the best alternative solution for a lightweight way to sleep on a hot summer night is to invest in a hammock tent with bug netting.

As you’ll be sleeping suspended off the ground you will be more comfortable and protected by the netting from any bugs. Just make sure that your planned stopover point has plenty of sturdy trees to attach it to.

You could also sleep on the ground in either a bivy sack, a breathable barrier sack, in your sleeping bag, or in a bug shelter, made from bug netting held up with trekking poles.

Conclusion

The best tent for hot weather really depends on the kind of heat that you’re experiencing. In areas of high humidity you’ll want to keep yourself and your possessions as dry as possible, with extra protection against mosquitoes and other insects.

In drier heat, you’ll need to try to keep your sleeping quarters shaded and aerated. Purchasing a summer tent makes good sense as they are lighter and often fairly inexpensive.

However, there are plenty of other great options available, such as hammock tents or making use of your rainfly with your footprint. A good bug net can be added to any set up plus a ground sheet if you’re in a humid area.

So, in fact the best tent for hot weather may not actually be a real tent at all, but a combination of various tent elements set up to your liking, tailor-made to deal with the challenges brought on by the climate where you’re hiking.

And most importantly a set up that you feel comfortable and secure enough to sleep in.

How To Make Your Backpack Lighter

If you’re wondering how to make your backpack lighter, packing smarter and focusing only on appropriate gear can shave pounds off your base weight.

How To Make Your Backpack Lighter

Read on for some simple, effective ways to get your backpack weight down without compromising on the essentials.

Correct Backpack Size

When you’re planning a hike, be it a short day hike or an extended backpacking trip, be sure to use the correct sized backpack for the trip.

Taking a backpack that has a much greater capacity than you need will encourage to you pack more than you actually need, resulting in a heavier load.

A half-packed, larger backpack is also more difficult to carry than a fully-loaded, smaller backpack, even if the two weigh in at around the same. So be sure to use the correct capacity backpack for the trip

Plan Thoroughly

Before setting off on any hiking trip, preparation is the key. By planning your trip thoroughly, you can not only cut down on unnecessary items but also make sure that you have the essentials that you will need for that particular area, time of year and terrain.

For example, if you plan where and when you can refill your water supply on the trail, then you can plan how much you’ll need to take with you to get you between stops.

Knowing as much as you can in advance about the area, the terrain, any wildlife and insects will allow you to be able to plan more efficiently for exactly what you need.

This means you can then cut out what you don’t need and see if there’s any room for any non-essentials that you’d like to take. This is much more practical than packing everything you think you’ll need, then sticking in a lot of extra last-minute, might-come-in-use items.

Only Pack The Essentials

It may be hard at first, but try packing just the very bare essentials for your trip.

Backpacking Gear

Remove any unnecessary packaging from any items before packing and with your detailed plans pack only what you will need. Remember food and water will substantially add to your pack weight.

Don’t forget that especially on extended trips into the backcountry, your life may well depend upon what you’ve packed, so although you’ll have a more enjoyable trip with a lighter load, don’t take it to the extreme where it becomes unsafe.

Remember to always ensure you have the “Essentials” when heading off into the backcountry, even just for the day.

Reducing Your Base Weight

With some careful thought and meticulous planning you can get your base weight down without compromising on the essentials.

Reducing your base weight can be done gradually mainly by cutting out non essentials and replacing heavy items with lighter ones.

Here are some tips …

Invest in New Gear & Multipurpose Items

When you replace items or have the opportunity to purchase new ones, you can potentially save a lot of weight, although often at a greater price.

By paying attention to the weight of any replacement items and choosing new lightweight ones, you can gradually reduce your load without having to cut back.

Quality gear, that is lighter does tend to be more expensive, however, good gear usually has a longer life and so you get more use from it.

Purchasing multi-use items can also allow you to save weight and space in your backpack. Here’s some ideas on how you can choose new essential gear items that will help you to lower your backpack base weight.

Backpack

Choosing a lighter weight backpack can make a big difference, just be careful that you’re not compromising on comfort or durability.

Best Backpacking Packs for Women

Having a slightly heavier backpack that is more comfortable is well worth the extra weight.

However if your backpack weighs a lot more than necessary, especially for shorter trips, then you may be better changing it for a lighter weight model.

Tent

Ultralight tents for one person often weigh in at around two pounds, making use of one of your trekking poles.

If you’re camping during the summer months and you’re not anticipating any storms or mosquitoes on your trip, swapping your tent for a tarp tent or bivy sack could save you extra weight.

Alternatively if you’re not hiking solo, then you could share the weight of your tent by offloading some of the rest of your items to a partner or other group members, in return for carrying the sleeping arrangements.

Sleeping Pad

You could consider going with an inflatable sleeping pad or a torso-length one. Remember to take durability and your personal comfort levels into account.

Stowing the Mattress In the Carry Bag

If you’re uncertain about any new sleeping arrangements, be sure to test them out before heading off into the wilderness.

If you’re too uncomfortable to sleep well after a hard day’s hiking, then the next day your light weight load will feel much heavier regardless, which kind of defeats the objective.

Sleeping Bag

If you can, go for a water-resistant treated down sleeping bag. Down is lightweight and highly compressible, saving you weight and space. It’s also very warm.

Best Sleeping Bag Liner For Warmth

Stove & Utensils

Alcohol stoves are light weight and a popular choice for cutting back on the pounds. If you’re hiking in a group, you could bring a heavier stove and split the weight between you.

Special lightweight systems, such as the Jetboil, will provide you with boiling water for dehydrated meals and instant coffee within minutes.

As far as utensils go, if you want to really cut back on weight you could use an all-purpose spork.

Clothing

Cut back on clothing and only take the essentials depending upon the weather and climate, as well as your personal preferences.

Down jackets are lightweight and compressible for colder seasons or destinations, while multipurpose items such as a Buff can serve as a scarf, protection from the sun or a water filter when using purification tablets.

Reducing the Weight of Consumables – Water, Food & Fuel

Water

Plan where you can refill carefully and avoid carrying more water than you have to. Drink a large amount before setting off and at all refill points.

Drinking Water In The Heat

You could also use a mini water filter to cut down on the amount of water you need to carry. A LifeStraw or similar will allow you to stop off and drink quickly at any water sources you may pass.

You should also pay attention to the weight of any bottles you’re carrying, soft, collapsible bottles can weigh much less than rigid ones.

Food

While you’ll need to carry a lot of calories to keep you going, your food rations don’t have to weigh an awful lot provided you choose calorie-rich, instant items.

Dehydrated meals can save on weight and preparation, requiring only boiling water. Ready-to-eat items such as protein bars, nuts and dried fruit are lightweight and easy to snack on to help keep your energy levels up.

Fuel

This will depend upon your choice of stove or other equipment. Whatever you have decided upon, don’t take more fuel than you’ll need.

Remember by eating instant items at lunch, you should only need to use your stove once in the evening and again in the morning at the very most.

Hygiene

Don’t pack full-sized items for a few days hiking. Wet wipes can be used for general cleaning and travel sized hand gels (aim for biodegradable if using in the wilderness) for washing your hands.

Other mini travel size items such as toothbrushes and toothpaste will also come in handy and you can portion up tissues or toilet paper as required.

Conclusion

With a little planning and imagination, you can reduce your backpack weight and enjoy hiking with a lighter load.

So now you know how to make your backpack lighter, you can put these ideas into action and see where you can make changes until you find your ideal comfort vs weight balance.

Remember to stay safe and always pack the ‘10 essentials‘ to ensure that you’re prepared for any eventuality.

Best Family Tent For Under $200

Spending time in the great outdoors with your loved ones or a group of good friends can be a great way to spend a weekend or longer. While camping is generally pretty inexpensive, it can be a struggle finding a good budget tent.

So here’s a quick guide to what you should look for when choosing your budget family tent, along with a couple of recommendations that will help you to make the right choice.

We get straight into things and list the best options available and afterward, we go into some detail on what you need to think about before you buy a family tent.

If you’re in a rush and don’t have time to red through the full article, we recommend the Kelty Discovery 6, as the best family tent for under $200.

Best Family Tents Under for $200

While there is a wide choice of low priced family tents to choose from, they are of varying standards. While a $200 or less family tent is not going to be as good as one costing several times that amount, you can nonetheless find fully functional and spacious family tents within this price bracket.

Here’s our top picks for budget family tents.

1. Kelty Discovery 6

Check Availability at REI.

Pros:

  • Generous size for four adults with equipment or a small family of five / six
  • Oversize D-door for ease of access
  • Rainfly and tent stakes are included
  • Relatively easy to set up

Cons:

  • Some reports of durability issues

Kelty Discovery 6 Features Summary

  • Spacious design with oversize D-door makes for easy entry/exit
  • Stay dry with full-coverage, seam-taped rainfly
  • Kelty Quick-Corner technology makes setting up fast
  • Color-coded fly and tent connections make them easy to locate
  • Attached guylines with storage pockets and quality stakes included
  • Night-light pocket turns headlamp or flashlight into a tent lantern
  • Includes shark mouth duffle carry bag
  • 6 person, 3 season
  • Canopy: 68-denier polyester/mesh; Floor fabric: 68-denier polyester with 1,800mm coating; Rainfly fabric: 68-denier polyester

Product Summary

The Discovery 6 is a great value for money family tent that is a good size for four to six people. If you have a lot of gear with you, it would be better to stick to a capacity of four and put a queen mattress at each end with space in the middle for your equipment.

The tent has fairly generous dimensions and average height adults will have no problem with the ceiling height in the central part.

The door is oversized for easy access which works well. There are no windows, but air flows well through the tent.

The tent helps to keep rain out along with the included rainfly, although in spite of the inverted seams there may be some waterproofing issues in more challenging inclement weather.

There are internal storage pockets to keep your small, frequent use items to hand. The whole tent fits into an expandable carry bag complete with rip strip, making it easy to transport and to store.

Set up is relatively easy, thanks to the color-coded fly and tent connections which makes them easy to locate. The Kelty Quick-Corner technology also helps to make setting up of the tent fast. 

All in all this tent offers excellent value for the money and it’s our top pick family tent under $200.

2. Cedar Ridge Rimrock

Check Availability at Sierra.

Pros:

  • Comfortable 3 season tent
  • Comfortably fits four persons with room for equipment, six without equipment
  • Good ventilation
  • Easy to set up

Cons:

  • Prop 65 notice for materials used

Cedar Ridge Rimrock Features Summary

  • Free-standing, two-pole design with shock corded fiberglass poles
  • 185T polyester fly resists UV damage and stays taut
  • Factory-sealed rain fly gives great weather protection
  • Tub-style floor
  • Extra-large zippers on door for durability
  • Weatherproof fly with awning over door
  • Dual zip mesh windows for ventilation
  • Interior mesh storage pockets
  • Gear loft
  • 8″ steel stakes
  • Guy lines included
  • 6 person, 3 season
  • Canopy: polyester; Floor fabric: polyethylene; Rainfly fabric: polyester

Product Summary

This dome tent is a good choice for small families or groups of three to four persons with space for equipment. The tent allows for excellent ventilation, whilst keeping insects out of the tent.

This tent is very functional area is a great addition and can be used to sit in and chat if you have small children asleep during the evening in the main part of the tent.

At 72 inches at its peak, the Cedar Ridge Rimrock has sufficient head room for average-height adults in the central part. 

There are dual zip mesh windows which provide good ventilation. These work well and allow the tent to breathe.

The tent is easy to set up with its free-standing, two-pole design with shock corded fiberglass poles. There is a weatherproof fly with awning which sits over the door to keep the bad stuff out.

The factory-sealed rain fly gives excellent protection as soon as it starts to rain. The door zippers are extra large for extra durability.

There are also internal mesh storage pockets to store frequent use items. These are functional and easy to use. Overall, a good tent for summer family camping at a very good price! 

3. Columbus Outdoor Inari

Check Availability at Sierra.

Pros:

  • Three rooms for privacy and space
  • 74.8 inch peak center height for plenty of head room
  • Door also serves as canopy for larger living area
  • Good storage pockets

Cons:

  • Need to treat the tent with care as it isn’t as durable as others

Columbus Outdoor Inari Features Summary

  • Three rooms for ample interior space
  • Large inner tent doors with top mesh window
  • Main living area with detachable floor and PVC windows with inner curtain
  • Door also serves as canopy for larger living area
  • Storage pockets in inner tents
  • 2000mm polyurethane-coated fly with taped seams for waterproof protection
  • Carry bag
  • 6 person, 3 season
  • Canopy: polyester; Floor fabric: polyethylene; Rainfly fabric: polyester

The Columbus Inari tent will comfortably provide you with plenty of space for up to 6 adults or 2 adults and two or three children with equipment.

It also includes three rooms for ample interior space, which can be handy if you have young children with an early bedtime. Also useful if you need some privacy too.

This tent has excellent head room with 74.8 inches peak height in its central part, making it extremely spacious and great for those who are taller than average and often tend to have to hunch over in regular tents.

Ventilation is provided through the material and main entrance, the PVC windows allow light in as well. This is a large, rather heavy tent, it is however surprising easy to set up.

It comes complete with a handy carry bag and 2000mm polyurethane-coated fly with taped seams for waterproof protection.

In short, this tent is a great choice for tall families and the roll up front door with separate rooms is a nice feature.  

Family Tent Buying Guide

If you’re thinking about purchasing a family tent, even if you’re pretty familiar with smaller tents, you should still read on and find out more.

Family tents have their own distinct differences and peculiarities when compared to your standard one or two person tents.

The summary below goes through the main items to consider, and you can also check out our tent buying guide for more information.

What is a Family Tent?

A family tent is a tent that is large enough to sleep several persons. They can range enormously in size, from 4 to over 12 persons. They generally include a living space or storage area and separate sleeping compartments, depending upon their size.

Multi-room tents with separate entrances to each compartment can be useful for groups of friends or families with older children, allowing later sleepers to bed down later, without having to step over everyone.

Due to their size and weight, you’ll normally set up your family tent at a campsite or in close proximity to your vehicle if you’re camping off the grid.

They are not suitable for backpacking, although a group camping out could conceivably carry one a short distance between them.

Setting up a family tent is also a much more complex affair than setting up your average small backpacking tent. Family tents can also be a good choice for groups of people looking to camp out at festivals.

Family Tent Sizes

When you’re choosing your family tent, the main factor to bear in mind is size. Manufacturer’s recommendations for the number of persons should not be taken literally, and you may even have to consider halving their figure to end up with comfortable enough conditions in which you can sleep.

In the majority of cases you’ll be best looking for at least two persons extra. To be sure that you’ll have enough space, don’t forget to take into account any pets or equipment too.

While your kids may be small now, they’re only going to get bigger and you’ll be surprised just how much space a small child can take up, wriggling around in a small tent.

As a general guide a six person tent is normally a comfortable fit for two adults with two or three children, including cooking equipment, toys and clothing.

If you’re camping as a group of friends or extended family, you’ll probably want a bit more space for extra privacy. You may also want to consider splitting up into smaller groups rather than having one extremely large tent to set up.

Family Tent Shapes

Family tents come in a variety of compositions and modules, however, there are two main shapes that you should be aware of: cabin-style and dome-style shapes.

Cabin shaped tents tend to provide more interior space and greater head height thanks to their flat roofs. They can be better at accommodating groups with more adults or teenagers, and will allow you to make use of the entire floor space right up to the edges.

Coleman 8 Person Tenaya Lake Fast Pitch Cabin Tent

However, on the downside, cabin-style tents are at a distinct disadvantage in windy conditions, and you’ll need to ensure they are securely attached with extra-long stakes.

Dome-shaped tents deflect the wind much better thanks to their curves. They also tend to be lighter and therefore easier to transport as they’re made from less material.

Wenzel Alpine 3 Person Tent

However, their sloped sides mean that you may struggle for headroom and if the weather’s bad and you end up spending a lot of time inside, you may feel more cramped.

Vestibules

Some family tents have vestibule areas, they can be a useful option to store equipment or to provide protection from the sun or rain when sitting out.

Having a vestibule can help keep the interior of your family tent cleaner, as the family can eat under its protective canopy or take off dirty or wet outer garments like shoes and coats and store them there.

Setup

If possible try to find out how easy your family tent will be to set up before purchasing. Some can be more of a challenge than others and if you’re a couple with several small children, one of you may have to set it up alone.

Construction

If you’re planning on using your family tent for warm summer vacations, then you’ll want a model with plenty of mesh panels for improved air circulation.

Three season tents are designed primarily for this type of weather, although be aware that summer storms can be unexpected and you’ll still need suitable protection against the rain.

Three plus season tents are designed to provide more protection from the elements for camping in early spring and autumn as well summer, while four season tents provide enhanced protection for cold and more extreme weather conditions. They can, however, be a little stuffy at warmer times of the year.

When you’re purchasing a family tent, remember to check what is included. A ground sheet or footprint will be necessary even during the warmer months to protect your tent floor from any damp and the increased foot traffic that family tents endure.

Make sure that there’s a rainfly included to protect you from any rain. You may also want to purchase any tools to assist with setting up your tent.

Price Range for Family Tents

Like many things in life, you do tend to get what you pay for and there are plenty of exceptional family tents out there, with exceptionally high price tags to match.

These tents are not within everyone’s price range, although if used regularly for holidays over several years their price can be more than justified.

These high-end family tents will typically cost in excess of $1,000 and can reach prices around $1,800 depending upon options and size.

Mid-range family tents, offer decent quality but less higher specification features than the top-end models, they tend to cost between $500 and $1,000 for a good quality model that offers plenty of communal space as well as separate sleeping areas.

Inflatable models can make set up easy, although large, heavy models are probably best suited to longer camping trips rather than just a quick weekend away.

Spending less than $500 on a family tent can still get you a good enough tent for the money. While some may lack space or certain features, there is certainly a decent enough selection to choose from.

If you’re not a regular camper and have a family, it makes sense to purchase a less expensive model, particularly if you’re not sure when or if you’ll be using it again, say if you’re just dipping your toes into the whole family camping experience thing.

Groups looking to purchase a family tent for festivals will also probably be best off looking in this price bracket, as tents tend to get damaged at festivals more easily, especially if each person only wants to put in a small amount.

Overall, we suggest you keep your expectations at a reasonable level, $200 will get you a basic and functional tent, but there are much better options out there but for a higher price tag.

Further Reading

How to choose tents for camping – a nice article on the subject from outdoor specialists REI.

Conclusion

While there are many expensive family tents about, it often makes more sense to purchase a cheaper family tent if you’re camping for the first time as a family or group, or if you’re not intending to make it a regular occurrence.

Finding the best family tent for under $200 can be a bit of a challenge, however, the tents reviewed here represent excellent value for money and a good range of useful features.

So much so that they could make your family camping trip a greater success, and encourage the whole family to spend more time together in the great outdoors, something which you cannot put a price on.

Best Tent Zipper Lubricant

Tent zipper lubricant is one of those things that you might only think about when it’s too late, and you’re already battling with your stuck zipper as the approaching storm clouds start to unleash their torrential downpour.

If you like to be prepared, which is recommended when you’re out backpacking, then you might want to check out what is the best tent zipper lubricant to make sure that your extended hiking trips go smoothly.

If you’re in a rush, and just want to know what lubricant is best, we recommend the Gear Aid McNett Zip Care Cleaner and Lubricant,
it’s an excellent product that the does the job really well!

Why Use Tent Zipper Lubricant?

Tent zippers are often the most problematic part of your tent. They can be costly to repair and replace, so it makes sense to take good care of them.

When you’re out camping in your tent, you’re relying upon your zipper to keep the cold and wet out (and possibly insects too), while allowing you get out and in quickly.

Using tent zipper lubricant can help to reduce wear and tear on your zipper. This in turn can increase the lifespan of your tent. It also helps to prevent wear and tear on the fabric surrounding the zipper from over exerting force at a particular sticking point over time.

Tent zipper lubricant can also save you time and hassle, who wants to spend minutes struggling with their zipper to get out of their tent in the morning. It can also prevent the accompanying frustration which can be a bit of a downer on trips.  

Purchasing  and using tent zipper lubricant could save you time, hassle and money. In extreme cases it could even save your tent, preventing scenarios where the zipper seizes completely and you have to resort to cutting yourself out, not fun!

Terra Nova Zephyros 1 Person Tent

When to Use Tent Zipper Lubricant

Convinced? So, when should you use tent zipper lubricant and how often? I’d recommend scheduling it with any other regular tent maintenance so you don’t forget.

If you’ve not been experiencing any particular problems with your tent zipper getting stuck, you should probably aim to use it every few months. If you use your tent a lot, you may need to use it more regularly.

I find it’s best to store my zipper lubricant with all my hiking equipment. Before heading off on a long trip, I inspect all my gear and check everything’s in working order.

After checking over my tent I use the lubricant to ensure that I won’t have any problems when I’m out on the trail. You can also lubricate your tent zipper when you get home from a trip too after cleaning your equipment.

Inspect your equipment before storing it and note any repairs that will be needed before planning your next trip.

As I often go on day hikes, I regularly use my tent zipper lubricant on my day pack to help prevent wear and tear. I also treat my other backpacks before and after trips.

Your hiking jacket can also benefit from a quick application when you’re treating the rest of your zippered gear.

How to Use Tent Zipper Lubricant

Tent zipper lubricant is easy to use and generally comes in handy-sized bottles. Some may have a brush attached to the nozzle cap. Whether yours does or not, be sure to thoroughly clean your zipper before applying the lubricant.

Trapped grit and dirt are one of the main causes of a malfunctioning zipper and they can cause serious damage. So begin by opening the zipper full length and brushing out any dirt.

Next, apply the lubricant. You want to apply an even amount to the entire length of your zipper on both sides. On tents with a large zippered area you may prefer to enlist the help of a friend. Once you’ve done this pay particular attention to the zipper foot, making sure it is adequately lubricated.

Finally, close your zipper fully, making sure its slides, or rather glides, with ease. Repeat to ensure the product is adequately dispersed over the entire length and within the individual teeth. And voila, a clean, lubricated tent zipper ready for your next camping trip.  

How to Choose a Tent Zipper Lubricant

It’s pretty simple, however, there are a few considerations to bear in mind, namely your zipper material and your preference of application format.

When you’re choosing your tent zipper lubricant be sure to check that it is suitable for your tent zipper material. Some are made especially for plastic zippers, metal or nylon. Others are multipurpose, so just check before you purchase.

If you’re planning on using it for your backpacks and jackets too, you’ll also need to bear those zipper materials in mind.

Application formats can vary widely. For the most part it comes down to personal preference and what you find easiest to use. You may also like to purchase an additional mini format to take with you just in case of any malfunction, especially if your hiking buddies are less conscientious types.

If you camp often in sandy, gritty places, you may prefer to purchase a lubricant with a brush top, to take with you to remove dirt and debris from the zipper. Other formats includes sticks, sprays and fine application nozzles.

Recommendation

We recommend using Gear Aid McNett Zipper Cleaner and Lubricant. This is my favorite for several reasons, mainly because I find the non-stick formula to be the best I’ve tried so far.


Get the Gear Aid McNett Zipper Cleaner and Lubricant on Amazon now!

I mean what is the point of cleaning and lubricating if you’re just going to attract extra dirt? Aside from its non-stick formula, I like the handy brush head.

You could even stick it in your backpack and give your tent zipper a quick brush over before packing up. Lastly it’s non-toxic and also provides protection against salt, rust and corrosion. Use it on plastic, nylon or metal zippers, it’s a great product that does what it says!

Conclusion

Zippers are often an integral part of most essential hiking equipment, and they do the job so well that we tend to forget about them until they begin to malfunction.

Using a zipper lubricant can extend the lifespan of your hiking equipment and help to reduce wear and tear. Using the best tent zipper lubricant will prolong the life of your tent, potentially saving you money and making your trip a more enjoyable experience.

If you don’t already own one, we sincerely recommend purchasing a bottle today. We hope you found this article useful, please share it round your networks if you did 🙂

Best Sleeping Bag For Hiking The Appalachian Trail

Hiking the Appalachian Trail is the experience of a lifetime for those lucky enough to have the opportunity and the time to complete one of the nation’s most popular thru-hikes.

But how do you set yourself up for success with such a physically and mentally challenging experience? Finding the best sleeping bag for hiking the Appalachian Trail, is one of the more important aspects to help ensure your success.

The importance of a good night’s sleep on a such a long thru-hike cannot be overstated for both your physical and mental recuperation.

Hiking the AT

The Appalachian Trail is one of the most famous long-distance hiking trails. Passing through 14 states over approximately 2,185 miles between Georgia and Maine.

The average thru-hiker takes around 165 days to complete the Appalachian Trail from start to end, on average anywhere between five to seven months.

As you can imagine, over this huge distance, weather conditions and terrain vary enormously. The vast majority of hikers attempt the Appalachian Trail northbound in springtime and aim to finish before winter hits in Maine, potentially closing the Mount Katahdin finish point.

Leave early and you’ll be faced with low starting temperatures or leave later and risk missing the finish due to winter weather. Late March through early April is the optimal period for departure, although this is peak season on the trail.

If that bothers you, you may want to try to depart earlier or later depending upon your hiking style, level of fitness and weather conditions.

What to Expect

The AT varies in elevation from 124 feet at its lowest point in Bear Mountain State Park, New York, up to 6,643 feet at Clingmans Dome in the Great Smoky Mountains National Park and you can expect subfreezing temperatures.

Daypack On The Trail

Completing the AT in the recommended spring, summer and early fall window, should, however, rule out some of the more harsh weather conditions.

In spite of its length and reputation, the AT is not a wilderness trail, with the exception of the 100-mile Wilderness Section, you will cross a lot of roads and are able to stop at local towns usually just a short distance away.

These nearby towns are essential for food stops but also enable you to simply take a day’s break, pick up mail, replace any broken or unsuitable equipment and to mail unwanted stuff home.

Although it is recommended you take a suitable tent, there are also around 260 shelters spaced along the trail. Available on a first come, first served basis, you cannot rely on shelters alone.

Your choice of sleeping bag for the AT should take all of these points into account. If you do not already have a suitable sleeping bag, or are thinking of upgrading here’s a breakdown of some of the essential qualities you need to look for in a sleeping bag for hiking the Appalachian Trail.

Choosing the Right Sleeping Bag for Hiking the AT

The main choices you’ll need to make when choosing your sleeping bag for the Appalachian Trail thru-hike, are what type of material and how warm.

Before you decide, it may be best to consider whether or not you wish to change your sleeping bag for summer, by mailing one home and having a lighter one sent out. Or you could also consider using a substantial liner to increase warmth and using it alone at the height of summer.

Down or Synthetic?

In general, down sleeping bags are preferable to synthetic bags for several reasons, there are, however, circumstances where synthetic bags can prove preferable. Down bags are lighter, keep you warmer and are more compressible, meaning they take up less space in your pack.

On the other hand, down bags are more expensive than their synthetic counterparts and are not suitable if you’re planning on sleeping in environments which may be damp, such as a tent without a ground sheet.

Wet down bags can lead to hypothermia as all heat produced is absorbed by the damp down, unlike quicker drying synthetic. There is, however, a range of damp-resistant down sleeping bags.

In these bags, the down is treated with a hydrophobic coating, meaning it repels water on a molecular level rather than absorbing it. Naturally, this comes at a price.

Whether an adventure of a lifetime, such as an AT thru-hike, merits the extra cost is a personal decision. Sleeping well and waking feeling refreshed is extremely important to completing a long thru-hike.

Temperature Rating

A spring to early fall thru-hike on the AT encompasses a wide range of temperatures. If you’re just planning on sticking with the one bag throughout your hike then a 20 degree F (about minus 6 C) rating is probably going to be your best bet.

The rating will be listed on the outside of the sleeping bag and also on the bag itself. It’s easy to follow and pretty much self explanatory, see the example below.

Sleeping Bag Label

If you tend to feel the cold, go for a warmer one. In either case, if you can, taking a liner will add a little warmth and if the summer does get pretty hot, you can always use the liner alone for the hottest nights.

If you’re planning on mailing home your winter sleeping bag and getting a lighter one sent, then you can choose two bags with a greater temperature difference. Just remember, depending on your altitude, it can still get pretty cold even in summer.

In general, it is important to ensure that you will be warm enough and feel comfortable enough to sleep well and to complete your thru-hike. Try out your sleeping bag before leaving, sleeping well is essential to maintaining the positive mental energy needed to succeed.

Weight

Ideally the lighter the better, but do not sacrifice comfort and warmth for weight alone or you’ll soon be struggling to carry your lightweight pack due to lack of sleep.

Around 3 pounds is a decent weight to aim for, although ultralighters will probably aim more around the 2 pound mark.

Shape and Style

There are lots of different styles of sleeping bags. For the AT you’re going to be best looking at maximum heat retention and mummy-style bags with their built-in hoods are possibly the best option.

Snugpak Chrysalis 3 Sleeping Bag

However, you need to be comfortable and choose what works for you depending upon your sleeping style. Some people move around a lot in their sleep and prefer roomier bags, others less so.

There are advantages to using hiking sleeping quilts and some people use them on thru-hikes.

If you don’t want to go with a traditional mummy-style choice then try out several different designs, but remember if you opt for a quilt style you may have to bring along extra layers and headwear to increase heat retention.

If possible try sleeping in a few different types of bag before committing to a purchase.

Price

It’s definitely worth spending a maximum on quality. Not everyone has the option of spending half a year on the trail and for most it is the opportunity of a lifetime.

A good sleeping bag will last and will serve you well for future trips, so it really is worth making the investment. When the going gets tough you’ll be glad you spent the extra.

As with anything you can spend a lot, or a little, or somewhere inbetween. As always, the general rule is that, broadly speaking, the more you spend on a bag from a good outdoor brand name, the better quality bag you are going to get.

Recommendations

We like the Western Mountaineering UltraLite 20 Degree Sleeping Bag. A 20 degree down sleeping bag for colder temperatures.

Check out the Western Mountaineering Ultralite 20 Degree Sleeping Bag on Amazon

This ultralight, highly compressible, down sleeping bag from Western Mountaineering is a top pick with thru-hikers. Special features include a heat retention collar and a special coating to keep the down filling dry, whatever conditions you may find yourself in. Find out more on Amazon

For warmer temperatures, we recommend the Marmot Never Winter Sleeping Bag.

Check out the Marmot Never Winter Sleeping Bag on Amazon

Marmot have created the Never Winter summer, down sleeping bag to ensure that you stay warm even on those unexpected colder summer nights.

Highly compressible and lightweight, this bag also has a fold down second zipper for added ventilation, while the treated down ensures maximum water resistance. Check out all of this bag’s extra features here.

Additional Resources

Check out the official national park website as an excellent starting point for researching your At trip!

Conclusion

The best sleeping bag for hiking the Appalachian Trail depends upon a lot of factors. However, where possible look for warmth, light weight and packbility.

Whether you change part way or stick with the same one will influence your temperature rating, as will how warm you like to sleep. If you’re unsure try several models, this is the hike of a lifetime so make sure you’re as prepared as possible to succeed!

Best Sleeping Bag Liner for Warmth

Sleeping bag liners are often underrated, however they are extremely useful and can help keep your expensive sleeping bag in good shape.

If you’re looking for the best sleeping bag liner for warmth, here’s a round up of the most popular sleeping bag liner types, with some other considerations you will need to bear in mind to find the right sleeping bag liner for your needs.

What is a Sleeping Bag Liner?

Using a sleeping bag liner is a little like using a bed sheet. It is basically a fabric lining that matches the shape of your sleeping bag and fits snugly inside.

ALPS Mountaineering MicroFiber Rectangle Sleeping Bag Liner

When you use a sleeping bag liner inside your sleeping bag, it becomes the innermost layer between yourself and the sleeping bag. It forms a really useful part of your camping sleep system.

Why Use a Sleeping Bag Liner?

There are many reasons you may want to use a sleeping bag liner, some more obvious than others. The two main reasons are warmth and hygiene, although you may find that your sleeping bag liner comes in handy for a range of other uses.

Warmth

A good sleeping bag liner can add around 10°F extra to your sleeping temperature. In trapping extra layers of air between yourself and the liner, and between the liner and your sleeping bag, a good insulating liner will help keep you a lot warmer even in very cold temperatures.

If you have a good sleeping bag that you want to use in a colder season or for a one-off colder trip, you could try it with an insulated liner and save buying a new warmer-rated sleeping bag.

Hygiene

Much like a sheet, your sleeping bag liner serves as a barrier between your body and your sleeping bag. Any dirt, perspiration or body oils will be trapped by the liner which you can easily wash after your trip.

Using a clean liner for each trip is much more hygienic and easier than washing a sleeping bag.

Comfort

A comfortable sleeping bag liner provides an extra soft layer against your face and any other exposed areas of skin.

As they are designed to be regularly washed, you’re going to feel much more comfortable snuggling into a fresh liner than an unwashed sleeping bag, especially if it has been previously used without a liner.

Extends your Sleeping Bag’s Lifespan

By washing your sleeping bag liner instead of having to wash your whole down sleeping bag, you’re going to extend its life and not have to wait for days on end for it to dry out.

Standalone Uses

A sleeping bag liner is a handy item to have. It can even be used alone in warm weather without a sleeping bag. This can help you to sleep on warm nights when even light sleeping bags are too warm.

If you stop over in a hostel or budget hotel sleeping bag liners can help you have a better night’s sleep, by providing extra comfort and hygiene. Sleeping bag liners can also provide added protection from bugs and there are even some available that are designed to keep insects at bay.

Choosing your Sleeping Bag Liner

When you’re choosing your sleeping bag liner, there’s plenty to keep in mind, starting with the style that you need to match your sleeping bag e.g. mummy, rectangle, etc.

Then you’ll need to consider the material. Which liner is best for you depends upon where you intend to be using it most, whether you need an ultralight, packable one or if you need extra insulation.

Styles

In general, sleeping bag liners are designed to suit most popular sleeping bag dimensions. There are standard rectangular pocket style ones that you could conceivably use with just about any sleeping bag.

If you have a mummy-style sleeping bag with a hood-style top, you would be better purchasing a mummy-shaped style liner, that will stay better in place throughout the night. Some may also have their own hood drawcord for extra heat retention.

Bear in mind that body oils are going to be more concentrated around your head from your exposed skin and hair, so this is an important area from which you will want to protect your sleeping bag. Most sleeping bag liners will have a longer side for your head and shoulders if you are not using a hooded style bag.

Materials

The choice of material is highly important when choosing your sleeping bag liner. Aside from warmth, you’ll also want to consider how bulky the fabric is, its weight and how easy it is to launder. 

A breathable, soft liner can also feel better against your skin, allowing it to breathe.

Silk

Silk is possibly the ideal choice for a sleeping bag liner. It is warm in winter, yet remains breathable in summer. Light and compact, it takes up a minimum of space in your backpack, making it a highly popular option.

The only downsides are its price and it needs more careful washing than other options. In spite of this, silk will make your sleeping bag feel much more luxurious, keep you warmer and feel good against your face and any other exposed areas.

Synthetic

Synthetic sleeping bag liners are also a popular choice, for many of the same reasons that most sportswear is synthetic. Quick drying and with a stretch to it, great for those who toss and turn, synthetic sleeping bag liners are also breathable and warm.

Cheaper than silk and easier to wash they’re a good choice for busy, on-the-go backpackers and hikers.

Cotton

Cotton sleeping bag liners are absorbent, strong and durable. For added hygiene, like cotton bed sheets you can wash them on hot cycles or even bleach them, which will kill any germs if you’ve ever caught anything out on the trail.

However, cotton is fairly heavy and is not as easy to pack. For its convenience and low price it still proves a fairly popular choice. Some people also prefer the feel of cotton against their skin to synthetic fabrics.

Insulated

Some sleeping bag liners are designed to provide even extra warmth with added internal insulation. Rather like a mini-sleeping bag in themselves they can be used to boost the heat rating of your existing sleeping bag.

However, their bulk makes them only really worth considering in a handful of situations.

Microfibre

Microfibre sleeping liners are soft, warm and quick drying. Their spongy texture makes them comfortable but a little on the bulky side. They will keep you warm and are generally relatively inexpensive and easy to wash.

If you’re still undecided, check out this silk sleeping bag liner from Sea to Summit available on Amazon.

It’s an excellent liner which adds 10-15°F extra warmth and is available in a range of sizes and styles. It has the added bonus of several Lycra stretch panels making it easy to get in and out of.

Whether you need a liner for a long thru-hike or a camping trip, this luxury, breathable liner will keep you warm and help you to rest in comfort.

Conclusion

Silk is undeniably one of the best sleeping bag liners for warmth and our choice for the best option available. It has the added and important benefit of being lightweight and very easy to pack, whether you’re backpacking through hostels or hills.

However, if silk is a bit pricey and you have spare room in your pack or don’t mind a little extra weight, as you can see, there are plenty of other great options out there, that will not only keep you warm, but also extend your sleeping bag’s durability and keep it clean.

Fastpacking Gear List

Fastpacking is an increasingly popular type of backpacking that involves covering long distances at speed. A day’s fastpacking will usually comprise of sections of running, hiking and rest stops as necessary.

Fastpacking Gear List

Although certain trails might not lend themselves to actual running, especially at the start when your pack is fully loaded, fastpacking generally involves progressing at a faster than backpacking walk, with stretches of faster progression as and when you can.

In order to keep going at a brisk pace over several days your pack of course has to be light. However, heading out into the backcountry with just the bare essentials is dangerous and you’ll need to thoroughly plan where and how you can cut back weight.

Aside from meticulous route planning, you need to come up with a tried and tested fastpacking gear list. This will enable you to ensure that you have everything you need to stay safe and enjoy your time out on the trail.

Gear List

When you’re trying to cut back your normal backpacking gear list to go fastpacking, you may find you need to invest in more than just a new pack. It is essential that your pack for fastpacking is also durable as well as lightweight.

Presuming you have your pack already sorted, let’s take a look at what should be on your fastpacking gear list, to help you to lighten your load without compromising on your comfort and safety.

Note where possible, pack items that are dual or even multiple-use. If there are two of you or more, you will be able to split the weight of some of the heavier essentials between you, and may be able to take an extra luxury item or two.

As always, stay safe and test any new gear extensively before relying upon it out in the backcountry.

Weight

As a rule of thumb, 6-17 pounds (approximately 3 to 8 kg) is the general range of base weights for a three-day trip. Depending upon your location and time of year, you may need to add on a couple of extra pounds.

Typically on a backpacking trip, your pack is more like 24 to 35 pounds ( approximately 11 to 16 kg), so you can see the difference.

If you’re just starting out fastpacking we recommend doing a couple of local overnighters to see how you find the pace with the weight, which items you can live without and those you can’t.

Remember it’s important to be able to sleep comfortably to fully recharge for the next day, so if you think you’ll be fine without a sleeping pad, you would be best trying it out first, before committing to an extended trip.

Certain other items may also be season and location dependent, such as groundsheets, waterproofs and bear canisters.

Tarp or Tent

If the weather and terrain allow it, then you may be comfortable sleeping under the starry skies. However, in most cases you’re going to want to take some sort of lightweight, easy to set up tent or tarp.

ENO Pro Fly Rain Tarp

These can also be essential for areas prone to mosquitoes. Choose the most lightweight and least bulky. A tarp with trekking poles is a great space saver and allows a lot of flexibility in terms of set up. Tarptents are also excellent options reducing time needed to set up and providing greater protection.

Small two-person tents, at around 3 to 4 pounds (1.5/ 1.8 kg) in weight, can be great if you’re traveling with someone else and can split the weight. Get one complete with mosquito protection and groundsheet for an all-in-one sleeping solution. 

Sleeping Bag

Down is a popular choice as it is lightweight and easily compressed. Investing in an ultralight down sleeping bag will ensure your comfort, while keeping both volume and weight to a minimum.

While not good if it gets wet, you are unlikely to be going minimalist in poor conditions, better to keep your fastpacking for when the weather is favorable, at least when you first start out to get a feel for whats involved.

Check out our sleeping bag buying guide to learn more about the ins and outs of sleeping bags.

Sleeping Pad

If you’re planning on going ultralight, you may want to try sleeping without a pad. However, if you sleep much better with one you should get a lightweight, mini one designed specifically for fastpacking.

If you’re expecting cold weather, you will need a sleeping mattress for extra insulation from the ground, it’s the primary job of a mattress or pad.

Water & Purification

This depends on your location and resupply points. Fastpacking relies heavily upon planning to take the minimum amount necessary, without risking going short.

Drinking Water In The Heat

Start out with a full one-liter plastic water bottle and smaller drinking bottle and refill along the way. If you’re heading off into the backcountry, pack water purification tablets, a filter if needed and a collapsible water reservoir.

Always be sure to suss out in advance what the dos and don’ts are with regards to drinking water from rivers, etc. in the area you fastpack in. Be sure you follow guidance from knowledgeable local resources on how to treat water appropriately. Nothing will end your trip faster than drinking bad water!

Food

You’ll need a lot of calories fastpacking. Dehydrated meals offer high calories at a low weight and are easy to prepare. You’ll also need snacks to keep you going.

High energy bars and dried fruit are popular choices. Once again, know your route, if you’re passing near civilization for part of your journey you can stop to grab some quick food, meaning less packing and a lower weight to start with. 

Stove or Other Food Heating Equipment

If you’re in a group and can share the weight, then a small stove is an option. However, if you’re going solo, you may want to give it a miss, or try a water heater like the Jetboil for rapid hot water to heat and rehydrate ready meals.

You will have to pack fuel canisters too, however, its ease of use and speed is great when you’re tired after a long day’s fastpacking. Useful for boiling water too of course.

Clothes

Pack a change of clothes for the trail as well as another set for around camp with a warm layer. Clothes should wick well as you’re going to be sweating a lot.

Depending upon where you’re going and the time of year, you’ll probably want to pack a lightweight waterproof too. This can also double up as on-the-go mosquito protection.

Basic Essentials

Now that we’ve covered some of the key main items, below is a list of other basic essentials you should consider taking with you:

  • A map and compass are essential, even with today’s technology
  • You’ll also need a knife
  • Basic first aid kit
  • Bug spray
  • A headlamp plus spare batteries
  • Trekking poles if using a tarp or tarptent
  • Lighter or matches
  • Cell phone (depending on network coverage)
  • Eating utensils
  • Gaffer tape for emergency repairs
  • Cash
  • Basic toiletries.

Seasonal and Location Extras

If you’re heading out into bear country, you’ll need to pack a bear canister. Check area regulations about safe sleeping distances. Some trail camping areas provide bear lockers.

Rain wear, warm layers, a hat and mosquito netting may be advisable depending upon location and season.

Conclusion

Fastpacking requires a lot of planning and you’ll need to tailor your fastpacking gear list to your individual needs, and what’s available at your location.

Planning ahead is essential and can save you from carrying additional weight, whilst helping you to stay safe. Fastpacking is an excellent way to cover long trails in a shorter time, although it can be dangerous heading into the backcountry with only the bare minimum for survival.

As tempting as it can be to cut right back your load, pack responsibly and plan your fast packing gear list with care.

  • 1
  • 2
  • 3
  • Next Page »
  • Facebook
  • Pinterest

What are you looking for?

Copyright © 2025 · Cool Hiking Gear

Cool Hiking Gear is a participant in the Amazon Services LLC Associates Program, an affiliate advertising program designed to provide a means for us to earn fees by linking to Amazon.com and affiliated sites.

  • About This Site
  • Privacy Policy
  • Affiliate Disclosure Statement
  • Contact