coolhikinggear.com

  • Men’s
    • Best Hiking Rain Jackets for Men In 2024
    • Best Men’s Hardshell Jackets Of 2023
    • Best Hiking Pants For Men In 2023
    • Best Ultralight Rain Pants For Men
    • Best Men’s Daypacks For Hiking In 2023
    • Best Backpacking Backpacks For Men In 2023
    • Best Base Layers For Men In 2023
  • Women’s
    • The Best Hiking Rain Jackets For Women In 2023
    • Best Women’s Hardshell Jackets Of 2023
    • Best Hiking Pants For Women In 2023
    • Best Ultralight Rain Pants For Women
    • Best Daypacks For Women
    • Best Backpacking Backpacks For Women In 2023
    • Best Base Layers For Women In 2023
  • Hiking Accessories
    • Best Hiking Poles
    • Best Trekking Pole Monopod Camera Mount
    • Best Hiking Headlamps
    • The Best Hiking Watches In 2023
    • The Best Hiking Gloves In 2023
    • Best Hydration Bladders For Hiking In 2023
    • Best Compass For Hiking Our Top Picks
    • Cool Hiking Gadgets
  • Footwear
    • The Best Men’s Hiking Boots In 2024!
    • Best Hiking Shoes For Men In 2023
    • The Best Women’s Hiking Boots In 2023!
    • Best Hiking Shoes For Women In 2023
    • Best Hiking Sandals
    • Best Hiking Sandals For Women in 2023
  • Hiking Guides and Resources

Hiking In The Grand Canyon, A Beautiful Way To End The Trip!

So, as we drew closer to the end of our trip, we had one more major national park on our list to visit. We had to go hiking in the Grand Canyon! How could we travel all the way over there and not pay a visit to that amazing wonder. For sure, it had to be on the to do list.

Grand Canyon 3

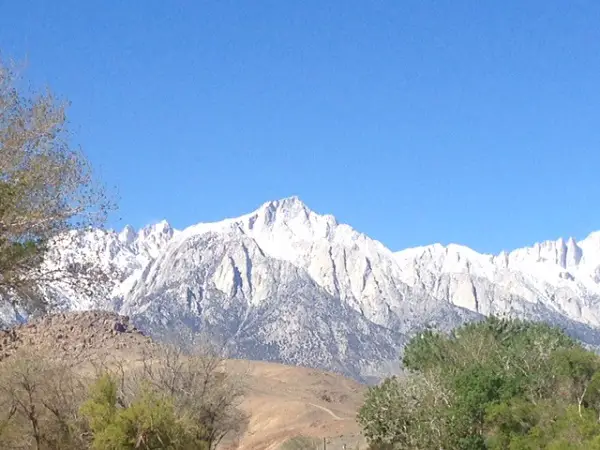
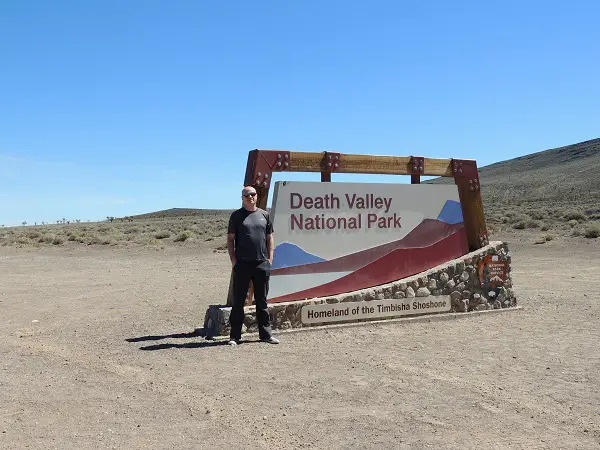
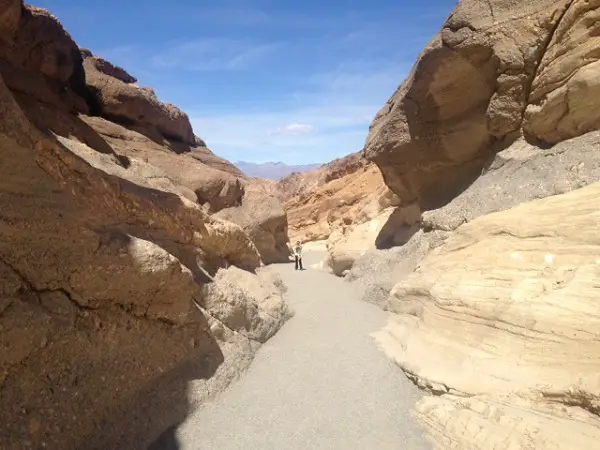
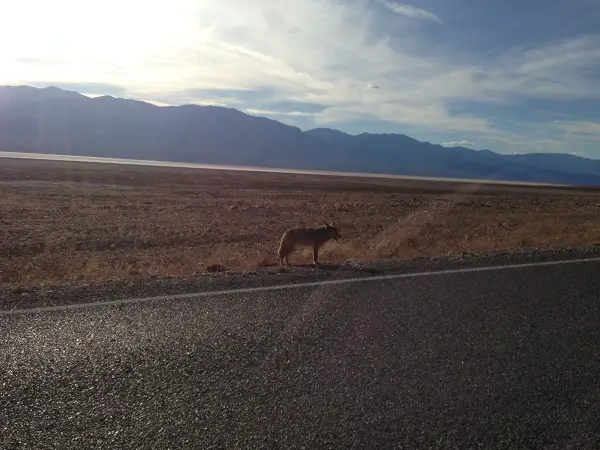
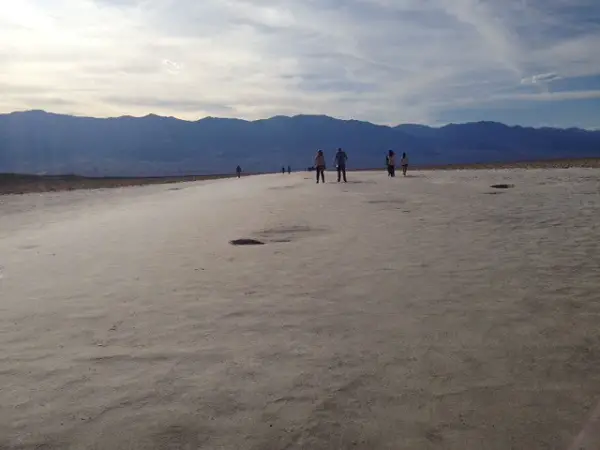
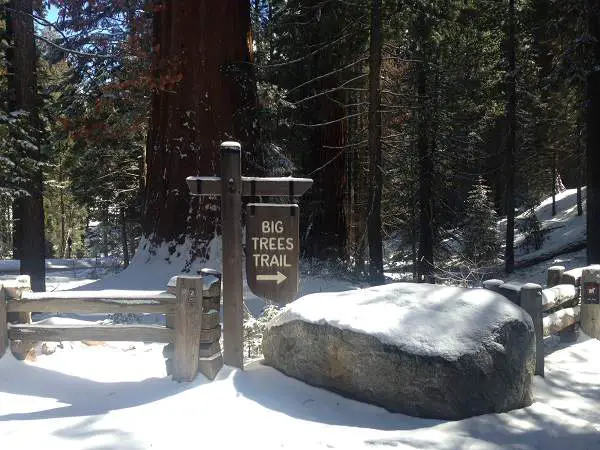
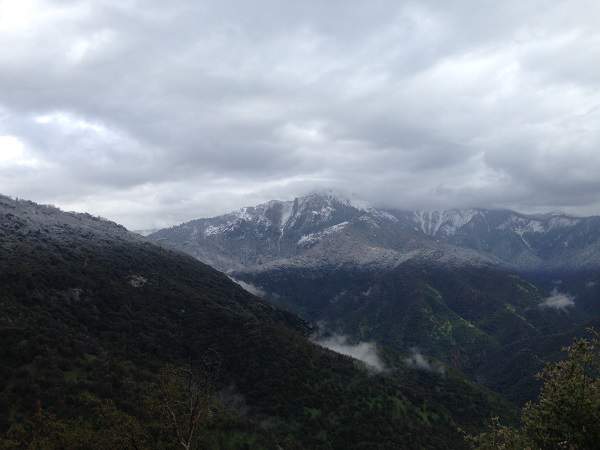
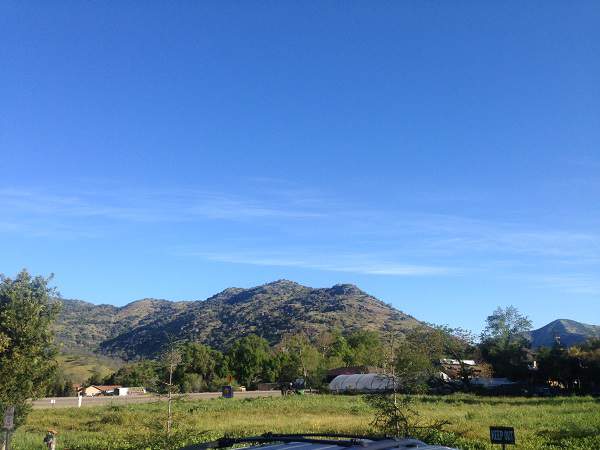
With our base being Las Vegas, it was about a four hour drive each way to get from there to the Grand Canyon National park. With the trips to Sequoia, Death Valley and Zion National Park, I had already put in a lot of miles driving over a few days so I wasn’t keen on spending another 8 hours driving to and from Las Vegas to the Grand Canyon.

As Las Vegas is so close, luckily, there are plenty of tour bus options you can take to get to see the Grand Canyon. Just do a Google search and you’ll get a load of options. From helicopter rides to day trips and longer excursions staying in Grand Canyon Village.

I did a Google search and found a company called Grand Adventures … they had a lot of good reviews. One of their options was the South Rim Express Tour, $125 per person at time of writing, which left at 6am and took in a hike of the the South Rim of the Canyon.

As the tour purposely beelined for the Canyon at that early hour, they were able to spend that little bit longer at the Canyon that most of the other tours on offer and still get you back to Vegas early enough. I liked the sound of that as it would give us more time at the Canyon itself.

An Early Start

We booked the tickets and the day after our Zion trip got up at 5am to get ready to make our way to Bally’s casino in Vegas to the pick-up point. An early start indeed after our hiking trip the previous day in Zion National Park!

As it turned out, there was only four of us on the day trip which was great from our perspective. The two of us and two other ladies who were on the trip got to have the whole mini bus to ourselves for the journey there and back. That meant we had a long seat each. Nice to have for sure having gotten up at 5am! Could stretch out a bit and have a snooze on the journey.

Our guide for the day was a Guy called Kevin. Very nice Guy who knew a lot about the Canyon itself and places on the way. He had lot’s of interesting and funny stories for us and kept us entertained and informed throughout the trip. From all the movie and music stars living in and around Lake Mead to interesting stories on sheep crossing bridges on the highway that he’s never actually seen sheep on. It was all very interesting.

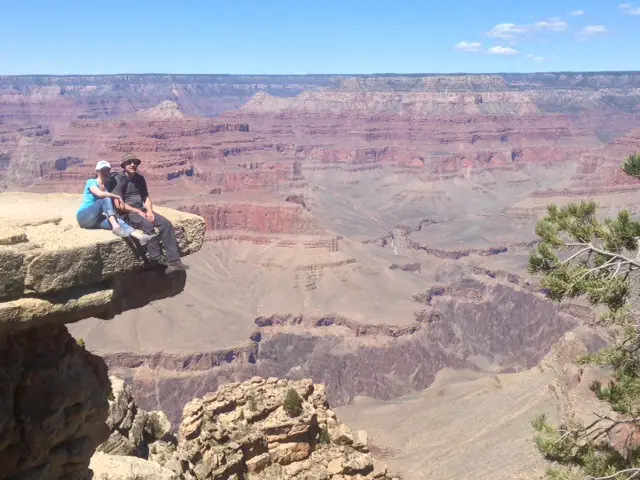
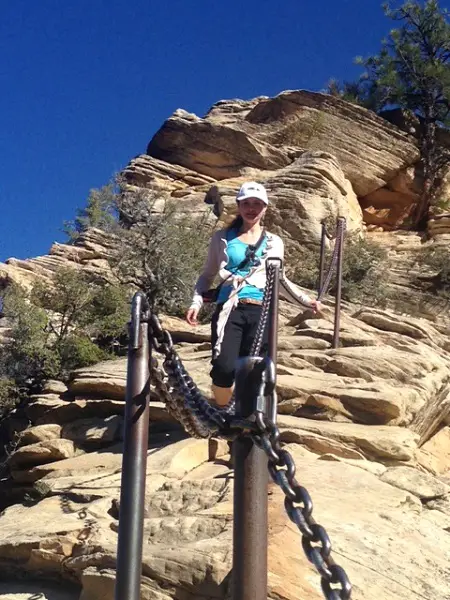
He also really knew his stuff in terms of history about the Canyon and so on. Any question I asked he knew the answer to. Kevin knew some excellent spots to get good photo shots, see below. Of course, it’s the Grand Canyon, so there are numerous opportunities for getting some good photos in.

At The South Rim of the Grand Canyon

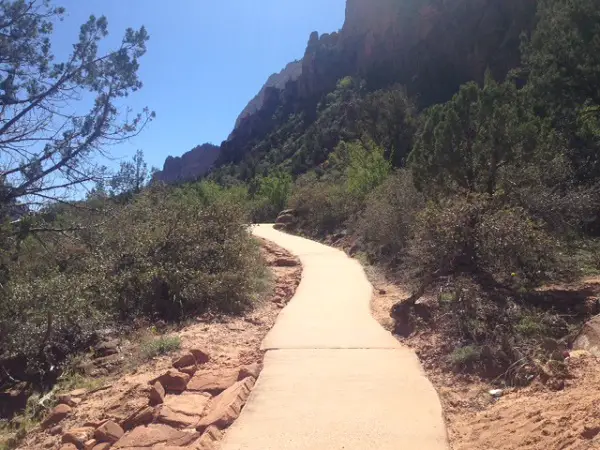
Hiking the South Rim of the Grand Canyon

When we got to Grand Canyon park, thankfully the traffic queues weren’t too bad, another benefit of the early start. After a rest break in the visitors center we made our way to start our hike.

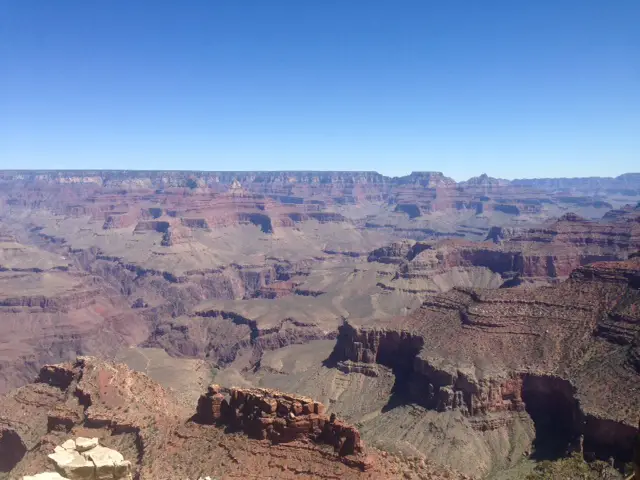
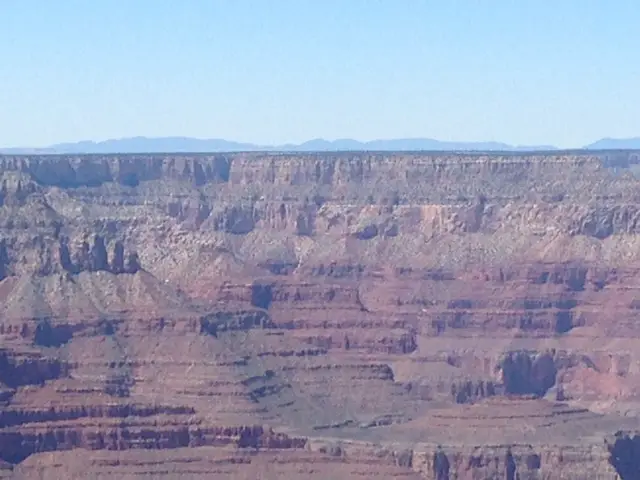
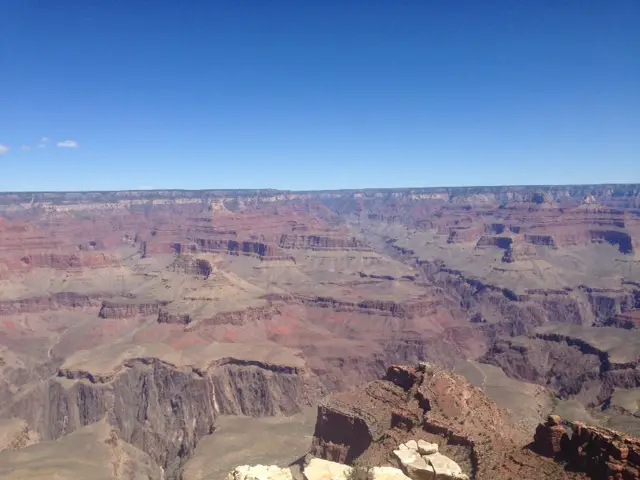
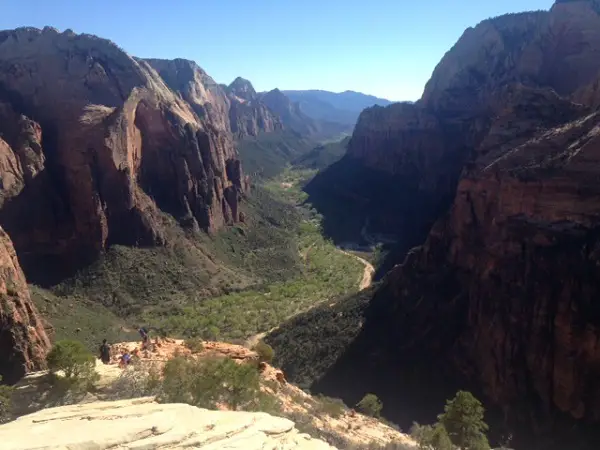
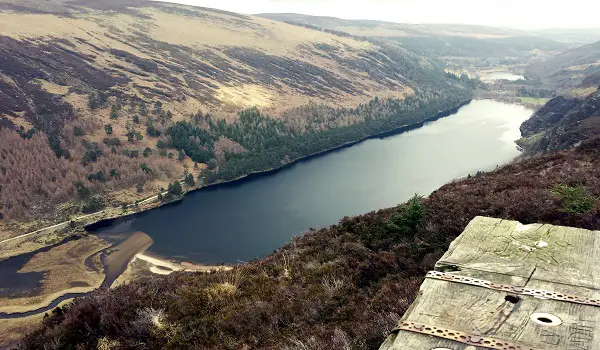
We hiked for about 3 hours around the South Rim of the Canyon. We were totally blessed with the weather and we had a perfect day for it. Clear blue skies as far as the eye could see. It really lent itself to seeing the majesty of the Grand Canyon. Notice the mountains in the distance in the shot below, we really could see for miles!

Grand Canyon 6

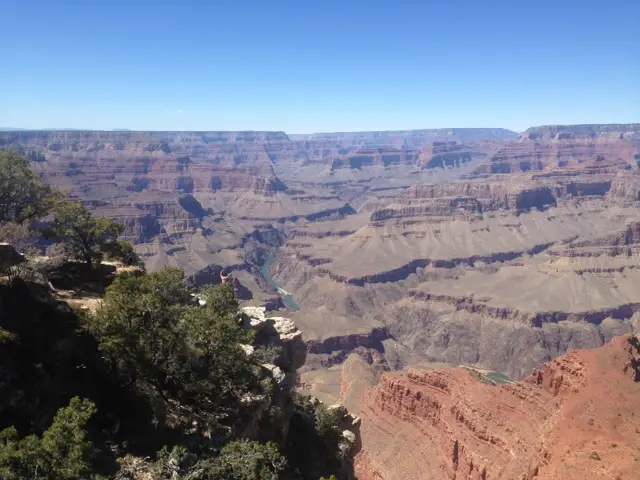
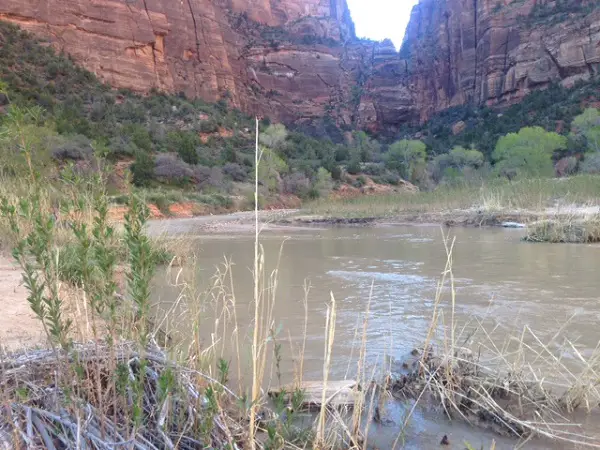
The Colorado, Spanish for red, River flows through the Grand Canyon and has been shaping it, cutting through the stone over time, for years. We could only see it in the distance, you can just about see it in the center of the photo below, as we were staying at the rim of the canyon but you can hike down to it. With the sheer size of the Grand Canyon, you could easily spend weeks, months and possibly years exploring it.

Grand Canyon 8

The Grand Canyon is definitely a tourist mecca and so it has a lot of facilities within it, including a shuttle bus to help get you trail heads and so on through out the park.

There are numerous places to stay, lodging, camping and so on. It is busy all year round and of course much busier at peak times in Summer. I think, from chatting with Kevin, it can be pricey enough to stay within the park itself though and you need to book well in advance.

Taking In The View At The Grand Canyon

I was considering writing more about the short trip to the Grand Canyon but I think the photo’s really speak for themselves so why bother 🙂

Grand Canyon 4

This was the last hiking trip of our trip to the West Coast. Two more days and we’d be heading back to LA to get our flight out. It was quite a way to end it with such spectacular views and scenery. The sheer size of the Grand Canyon is amazing, let alone the endless opportunities to hike and experience the natural beauty of the area.

Conclusion

As with all the other parks I visited on this trip, I can’t really do the Grand Canyon justice with a short fly in day trip. Like Sequoia, Death Valley and Zion, you could easily spend a couple of weeks / months in the area enjoying the many hiking opportunities that are available.

In terms of preparation, as with Death Valley and Zion, bring plenty of water and snacks as well as sun protection in the form of sun screen, hat, sun glasses, appropriate hiking gear etc. check out the complete day hiking checklist in pictures for a reminder of stuff you may need to bring.

There are lot’s of easy trails to hike on so if you’re new to hiking you can enjoy lot’s of hiking in basic trail shoes or running shoes. I prefer hiking boots for all my hiking though and they would likely come in more useful if you went further afield into the less frequented areas within the Grand Canyon National Park. However, if it’s a hotter time of year, lighter trail shoes might be a better option for sure.

So, that was it. The last hike on our trip. We got back in the van and headed back for Las Vegas. It was a great day out and it was a marvelous way to finish things up, in terms of hiking, after the rest of our trip! I highly recommend a visit to go Hiking in the Grand Canyon, and ideally spend a few days if you can to get a chance to really explore the place a bit. I know I certainly will the next time I visit 🙂

I hope you enjoyed this short post, please like and share.

Angels Landing In Zion National Park, My Favorite Hike Of The Trip!

After we finished in Death Valley, we made our way to Las Vegas which was to be our base for the remainder of our trip. While you immediately associate Vegas with several obvious things, casinos and partying to name just two of them, there is actually quite a lot of nice places to go hiking in and around Las Vegas.

Now, I only discovered this from speaking with a tour guide at the Grand Canyon so it didn’t form part of our hiking plans but I thought it is worth mentioning here before getting into things further.

We of course wanted to check out Vegas itself, take a show in, hit the tables for a little bit and all that kind of stuff, but Vegas was a good spot to pick as a base for the last 6 days of our trip for a couple of reasons. First and foremost, there are several awesome national parks not too far away and secondly, you can get really good accommodation at a good price. Winner!

Las Vegas Strip

One of the main areas I was really looking forward to hiking in was Zion National Park in Utah. Roughly a two hour drive from Vegas, it’s very accessible for a day trip.

I had two hikes that I really wanted to do in Zion, Angels landing and the Narrows, two of the most famous on offer there I would say. Angels Landing in Zion National Park is a strenuous enough hike up onto a beautiful ridge that offers marvelous vistas.

The Narrows refers to hiking through a canyon which the Virgin River flows through. For much of the hike, there is no trail so you basically hike up or down the river itself. The full hike runs quite a distance, up to 16 miles I believe, but you can of course choose how much you do or don’t want to do.

Now, with the time available to us, I was going to have to make a call on which one to do as it was unlikely I’d get both in. The river water would probably be pretty cold in March to do the Narrows and there was something about Angel’s Landing that really appealed, so we decided to go with the 5 to 6 miles hike, round trip, up to Angels Landing. If we had enough time, we’d try get up to the Narrows afterwards.

Now, for some reason, Zion was one of the National Parks I was really looking forward to hiking in. From photo’s I had seen, it just looked really beautiful so I was very excited to go there. What can I say, except it didn’t disappoint!

Getting to and Around Zion National Park

As mentioned already, Zion was very accessible from Las Vegas where we were staying and I am sure it is very easy to get to from various other locations as the roads are excellent getting in there.

Town Beside Zion

When you arrive, the little town just beside the park is really pretty and has lots of nice shops, restaurants, etc. There is lots of parking available in that area. You can park up and there is a free shuttle bus that takes you up to the gates of Zion ( That sounds like a religious text lol 🙂 ) When you get there, you pay in, same rates as other parks from what I could see. 15 bucks per person and you have a week long pass to get access into the park. They also provide you with a map and information newsletter.

When you’re in the park itself, they have another shuttle that drives around numerous stops throughout the park which you can stop at and explore. These stops are the starting points for many of the hikes available in the park. This bus shuttle system is common in the National Parks and I have to say, I was very impressed with it. Made getting to where you needed to be, much easier as the parks are so big.

So, between the shuttle bus to the gates and the shuttle bus within the park, it’s very easy to get to and around Zion National Park.

First Impressions

It’s hard to get across the real beauty of Zion. The red and copper hues mix effortlessly with the blue skies providing endless panoramic vista’s any direction you look.

Zion National Park 1

I got a real sense of earthy space in Zion as well, not sure why exactly, probably the wide openness of the surrounding area. I could tell that Zion was quietly stacking up to be my favorite hiking spot of the trip so far. I was really enjoying it and I hadn’t really even started hiking in it!

When we got on the internal park shuttle to make our way to the Grotto to start our Angels Landing hike, the bus driver started to provide some history of the park which was very interesting. The park has been prone to floods and landslides in recent times some of which actually took out the main road in the park leaving some people already in the park stranded for several days.

He also pointed out, and I hope I am recalling this more or less accurately, that when the park started back in the day, it had less than one hundred visitors in its first year of operation. The Visitors Center was also a small cabin and one of the shuttle stops on the existing route.

Today, the park gets millions of visitors every year and the new Visitors Center at the gate is a series of large buildings with information, gear, gift shops, etc. I had noticed that there was a lot of advertising on the TV for the 5 parks in Utah, Zion being one of them. Whatever, they’re doing to promote the place, it certainly seems to be working!

Preparation

The weather was hot but pleasant with the sun shining. I covered myself up pretty good with light hiking pants, a tee and hiking hat as well as sun glasses. Sun screen is a must as well as the hat and glasses but you could opt for shorts if you preferred.

I recommend wearing hiking boots, just my preference, but trail shoes will also work well. There are plenty of people hiking it in jeans and running shoes as well, so you can go down that route too if you wish but I always think suitable hiking gear is the best option.

As mentioned above, you’ll get your map when you pay in and the internal park shuttle will take you to the Grotto to start the hike. The hike is well marked with signs, like the one below, so it’s easy to follow and as it’s such a popular hike, there will most likely be plenty of people on it. I would say you pretty much have zero chance of getting lost or going the wrong way.

Angels Landing Sign

As it’s hot, it’s wise to pack a bit of extra water as well as some snacks to keep you going on the way up over the steeper parts of the trail. A small day pack should do the trick nicely to carry your stuff.

Angels Landing

To do the Angels Landing hike, you jump off at the Grotto stop and follow the signs. There are amenities at the Grotto stop. This is another thing I like about the parks. For these well-known hikes, there are a lot of visitors, so of course, It’s a good idea to cater for their ‘needs’, shall we say.

This also comes in to the area of trails too. Many, especially the very popular ones, are very well marked and you are strongly encouraged to stick to the trails to protect the local environment. As with all the National parks though, wilderness permits are available in Zion.

As already mentioned, the Angels Landing trail is very well marked out. There are signs and clear paths to follow to get up to the ridge. It starts on the flat before starting to veer upward on a steeper and steeper gradient.

Path in Zion

This first part of the hike is very pleasant, a bit strenuous but nothing of any major difficulty for an average regular hiker. As with all the hike, there are lots of excellent photo opportunities as you make your way up. We had a beautiful clear day so I was very trigger happy on my iPhone lol 🙂

Colm In Zion

This first phase of the hike ends when you reach a plateau and you walk for a bit on the flat again through, what I think is, a canyon. You move inward into the rocky mountain before you again start to head back upward again on steep enough paths. You follow that up the whole way to the first top, or flat level on the ridge.

Now, this is where the hike starts to get really excellent. As you follow this first plateau along you see for the first time the metal chain attached to posts which will be your companion, which you will be grateful of, as you move further up a long on the ridge towards Angels Landing itself.

Start of Ridge Up To Angels Landing

This is certainly where the hike does start to get a bit trickier and if you have any fear of heights, you may wish to consider if continuing on is a good idea. As you go further up, there is a drop on either side most of the way to angels Landing and it can be a bit hairy in places. People do die on the hike every year apparently. Someone gave me a figure of an average of 5 people a year falling of it and dying but I don’t know if that statistic is accurate.

At the early stages of our hike, we had Asian couple in front of us. The lady was having a really difficult time getting up over the first part of the hike with the chain on it. She was very nervous and taking a very long time. It definitely didn’t bode well and I really hoped she wouldn’t continue. They found a spot and let us and a few others pass by them.

This part of the hike was just beautiful. As mentioned, you need to keep your wits about you in certain places and use the chain to support you to prevent you from falling off. Anyone can have a slip so you just need to take care. You also need to be wary of the biggest danger on the hike to Angels Landing, namely, other people.

Ridge View

As Angels Landing is of course very popular, there is a fair bit of traffic up to it. On more than one occasion, I saw people barge past other people on the chain, or they would continue upwards while other people were trying to come down in places where only one should pass at a time. The terrain was such, that at some point, one of the parties would have to let go of the chain while the other passed leaving them helpless if they slipped.

One man in particular sticks in my head, on two occasions I saw him pushing upwards while people were trying to come down. The first was more rude than anything, the second was just dangerous. This second time, people who obviously weren’t hikers and were somewhat shaky to say the least, where trying to negotiate a tricky bit on the same way down. Regardless, he just pushed upwards hogging the chain forcing them to stop and let go. Just plain stupid of him.

It’s worth taking your time and being courteous to others is always a good idea, it is just safer in places like Angels Landing. It’s OK to stop for a few minutes and let people get down past you, you’ll get there in a much more safer way and you get a few moments to stop and enjoy the views in the process.

Ridge View 1

The terrain is more or less rocky and you make your way up through the rocks at various points as well as over them. You need to use your hands a lot, so a bit of scrambling is required. I personally love scrambling but it’s too much for some, be prepared for a bit of it on the way up to Angel’s Landing.

The Summit

When you get to Angels Landing, you definitely feel like you earned it. It isn’t an easy hike and the last section over the ridge adds a challenging and exciting dynamic to it.

What awaits you, is stunning views. The weather stayed perfect for our whole time on the hike so it was just beautiful at the top. We spent about 15 minutes on the top, took some photos and sat down for a bit just to take it all in. There are a few outcrops from the top that you can walk out onto if you’re feeling adventurous but we were happy sitting back taking in the view.

View From Angels Landing

As it’s so popular, it can get busy on Angel’s Landing itself so we didn’t want to stay too long, let others get to spend a bit of time on the top.

The Way Back Down

The way back down, over the ridge, is probably a bit trickier than on the way up. It usually is, gravity being what it is. Again, be patient and don’t rush needlessly. A bad slip in the wrong place likely won’t end well so take your time. The chain is even more useful on the way down I can assure you 🙂

Chain On Ridge Up To Angels Landing

On the way back, when we got to the first plateau we had reached on the way up where we passed the Asian couple, I was happy to see the Asian lady sitting there. She had obviously decided to sit it out and let her partner, and I think they had a kid with them too, proceed. Always good to see some common sense, I just hope she got back down over that first bit OK as it is actually one of the trickier parts of the ridge part of the hike.

When we got back down, we headed over towards the Virgin river to take a closer look. It’s brown so the water must have a lot of silt in it. It is beautiful though and the brown water fits right along with the red and copper hues of the landscape against the backdrop of an almost bright Azure blue sky just perfectly.

Virgin River In Zion

The hike had taken us about 3 hours in total. When we looked at the time, we decided that we would have to leave the Narrows for another time as we needed to hit the road back to Las Vegas a bit earlier as we were getting up at 5 am the following morning to head off to the Grand Canyon, the last national park on our visit list for this trip.

So, reluctantly, we got back on the shuttle and started to make our way back to the car and grabbed a bite to eat before hitting the road. The Narrows would have to wait till another time but that’s cool … more reason to head back soon!

Conclusion

I’m going to make a big statement for me here. I visited four national parks on this trip (Sequoia, Death Valley, Zion and The Grand Canyon) and I have to say that Zion was my favorite. I of course loved all the others too but there was something very special about Zion, something I really liked about it.

I can easily see myself going back there and spending a week chilling out in the cool little places beside the park and taking in the stunning scenery on the many hikes available. I will be back for sure and I look forward to hiking the Narrows the next time as that is probably at the top of my list when I return.

The landscape and scenery is just special in Zion and there are lots of great photo opportunities along the way. I definitely made some memories that will stay with me for a life time. Angels Landing in Zion National Park has definitely hit my top ten hike list for sure, a great hike in a beautiful park!

I hope you found this article useful. If you did, please like, share and / or comment.

Hiking In Death Valley National Park, A Unique And Beautiful Place

After finishing up in the Giant Forest in Sequoia, we hit the road for Lone Pine. We had planned this as a stop off point on the way to Las Vegas as we were hoping to maybe have a look in and around the Whitney Portal area. Lone Pine is the gateway town to the Whitney Portal i.e. the route to climb Mount Whitney but as we had to stay longer in Three Rivers and use the morning of our second day to see the Giant Forest, this probably wasn’t going to be as likely.

Lone Pine

As it turned out, one of the Rangers in Sequoia told us that there was a lot of snow in the Whitney Portal, with that in mind so we probably would not have got to do too much there although I had a hike in the Alabama Hills in the back of my mind too.

It’s about a 4 to 5 hour drive from Three Rivers to Lone Pine, so leaving Three Rivers around 2 pm meant that we didn’t get into Lone Pine until about 7 pm. We checked into our hotel on arrival, a neat little spot called the Dow Villa Motel/Hotel that a friend recommended.

Movie History

It has a lot of history as back in the day, a lot of the old western movies were filmed in the Alabama Hills. So the movie stars, people like John Wayne and so on, stayed in hotels in Lone Pine, in particular the Dow Villa Hotel. that’s my understanding anyway. Modern movies still regularly use the Alabama Hills for filming in. The hotel itself has a lot of classic movie pictures of all the old actors, it’s pretty cool.

The staff are very friendly and they’ll be happy to walk you through the history of the hotel. There’s a museum further up the town in Lone Pine as well so if you’re a movie buff, for old Western movies, you would enjoy taking a look. The decor inside the hotel is also from back in the day so it is kind of fun and different, not your average hotel for sure. A good spot and a nice place to stay.

Back to Hiking!

The other idea we had on our agenda was to do some hiking in Death Valley National Park. We would be driving through it on our way from Lone Pine to Las Vegas so we planned to stop off on the way to get a hike or two in. As we’d arrived so late to Lone Pine, following our later than planned exit from Sequoia, on Wednesday 30th March, we decided we’d rest up that evening and plan our hiking in Death Valley for the following day.

That meant we’d skip the Alabama Hills and the Whitney Portal but we figured there may not be much easily accessible there anyway due to the snow. There are some excellent views of Mount Whitney from Lone Pine which we got to enjoy the following morning, Whitney looked truly beautiful and majestic from the main street in Lone Pine.

Mount Whitney

I will definitely be back to Lone Pine as I want to hike Mount Whitney but I would need to do it in Summer time when all the snow is gone. It can be done at other times of the year too of course but, as snow and so on will be involved it adds more complexity to it for sure e.g. crampons, etc.

Mosaic Canyon in Death Valley

So, before we left Lone Pine we spent time reviewing the map of Death Valley to see where might be good to check out for a bit of hiking as we passed through. Technically, I guess you could hike in many places in Death Valley that aren’t official trails but we wanted to stick to something pretty well known and well marked. I just had to do the tourist photo at the Death Valley sign 😉

Death Valley Sign

I’m not overly familiar with hiking in deserts so I wanted to take every precaution as Death Valley, being in a desert, is of course very hot. Therefore, a whole different set of challenges need to be taken into consideration, ones that I don’t work with on a regular basis.

After a review of the map, we decided to try and take in Mosaic Canyon before heading to do a bit or hiking in Badwater Basin. Mosaic Canyon is, roughly, in the middle of Death Valley, just beside one of the few habitations in the Valley, Stovepipe Wells.

Easy to Find

The start of the trail is well marked with a sign post pointing to it from the main road. You have to go off the main road for it and the off-road to get to the parking area is pretty rough. No problem in a 4X4 but not ideal in a hired Ford Focus lol 🙂 We took our time on the way up though and it was fine. We got to the parking area which was actually quite busy.

The hike itself runs anywhere from 1 mile to 4 miles round trip. We probably did about 3 miles, 1.5 in and 1.5 back out. Mosaic Canyon is really beautiful and there are plenty of excellent views to take in. There are some parts of it where you need to do a little bit of scrambling which added a nice extra dimension to it. The trail is mostly rock and sand on tough, but mostly flat, ground so it’s very easy to hike on.

Mosaic Canyon 2

I didn’t see any but I am told that Death Valley has plenty of Rattlers floating about so I would recommend a pair of hiking boots, just in case! You could comfortably hike in trail or even sports shoes though. Aside from snakes, there is a diverse range of wildlife in Death Valley. We ran into a coyote (At least I think that’s what it was) on the way to Mosaic Canyon and it wasn’t the least bit bothered by us as we drove by.

Coyote In Death Valley

It’s Hot!

The coves and nooks along the canyon are fun to explore and there are plenty of great photo opportunities. All in all a really nice hike. Now, as I mentioned, we only did about 3 miles round trip. I normally hike anywhere between 10 to 15 miles on a day hike so this was quite short. However, the heat adds a whole different dimension to it.

Mosaic Canyon 4

As mentioned, I’m not used to hiking in desert environments and the temperature was between 77 to 90 degrees Fahrenheit (25 to 32 Celsius) so it really does drain you quite quickly. Of course, you need to carry a lot of water with you and be sure to take an adequate amount.

You can see how easily you could get into trouble if you ran out of water and couldn’t make your way out of some place for whatever reason, the heat would dehydrate you fast! That’s also why I really wanted to stay on very clear trails as if something was to happen, someone would be along at some point.

Sunscreen is also essential as well as covering your body up to protect yourself from the very heavy heat. You could do shorts and a tee but I chose to cover up with light hiking pants and a tee as well as a sun hat. A sun hat of some kind is strongly recommended. It will protect your head from the searing heat which I for one was very grateful for.

So, in summary, those few miles, took a fair bit out of me. Just with the heat factor added in it was definitely tougher hiking in it but of course, still very enjoyable.

Badwater Salt Flats

After we finished up in Mosaic Canyon, we made our way to Badwater Basin to see the Badwater Salt Flats. The Badwater Salt Flats are located well below sea level but it seems the sea was never actually in the valley in the form it is in today.

However, it may well have been a seabed millions of years ago. It is also North Americas lowest point in terms of elevation. It’s hard to make it out in the photo below but I’ve highlighted it in the green box where the sign on the side of the basin says ‘Sea Level’. As you can see, it’s very high up.

Badwater Basin Sea Level Sign 1

The Green Box above is blown up below … hopefully you can read it OK:

Sea Level Sign At Badwater Basin

I was laughing thinking that while I couldn’t get one of North America’s highest points, Mount Whitney, on this trip I would at least get it’s lowest 🙂

As mentioned, Badwater Basin is covered in salt flats. I assume the name comes from the water being bad with all that salt. You can hike out across the flats if you want to. They run about 5 miles in distance across so you can get a 10 mile hike in round trip.

Badwater Basin 2

However, Badwater adds an additional and unique challenge to a hiker which is worth noting. The salt flats are of course a large flat area of ground covered in salt, see the picture below, which is of course white. White, as you probably know, reflects the sun, similar to how snow does. So when you hike out across the white salt flats, you not only have sun beating down on you from above, but also reflecting back up at you from below!

Sunglasses

If you’re spending any length of time hiking on the flats, I would think suitable sun glasses are also a must as I assume a similar problem to snow blindness could result from the reflecting UV rays hitting your eyes.

Badwater Basin 3

As mentioned, you’re also at the lowest point in North America. As you also probably know, if you go up in altitude, the temperature cools so the opposite applies here. As you’re down so low, the temperature which is really, really hot anyway, is hotter! Add that to the general desert environment and the reflecting salt flats, and you more or less have a cooker lol 🙂

To add some numbers for illustration, Death Valley itself can easily reach 122 degrees Fahrenheit (50 Celsius) plus in the Summer so you can just imagine what it is like in Badwater at the height of summer. In short, while it can get intensely hot in Death Valley alone, it can get ridiculously hot hiking in Badwater Basin.

I shudder to think! Frankly, I wouldn’t consider hiking in Death Valley in Summer as the temperatures would just be too much for me personally. I think, visiting in March was a good idea as although the temperatures were hot, they were manageable.

Colm In Badwater Basin

We hiked out into the flats for a mile or so and then headed back in … before we frazzled lol 🙂

Death Valley is most definitely worth a visit. It’s a special place with a very unique character. I recommend you check out all information on the National Park sites to ensure you’re well prepared for your trip before you go there. Planning as always, but especially for this type of hostile environment, is critical. You need your supplies and protections to prevent you or any member of your party from getting into difficulty.

Conclusion

While every hiking environment will have it’s own set of challenges, there is a very particular set of them in Death Valley. From extreme heat to flash floods, from rattle snakes to other not so friendly variations of snake and other wildlife. Be sure you do proper research in advance of any trip to Death Valley and prepare yourself appropriately.

If you want to hike in Death Valley, I recommend going there at a milder time of year (which is still really hot I hasten to add) as visiting in mid summer would be tough going and I think hiking would probably not be enjoyable for many at that time as it would just be too hot. It’s not uncommon for cars to give trouble in the burning summer heat as well, AC’s have a tendency to break. Not the most ideal place for that to happen!

Bring plenty of sun screen and cover up to protect yourself from the sun. I’d run with Light hiking pants, with UV protection, and a suitable tee or shirt. A proper sun hat is a really good idea as well as sun glasses, especially if you plan to hike in Badwater.

It’s worth noting that I only touch on two spots in this post, there are lots of other really neat places to visit and great opportunities for hiking in Death Valley National Park. For example, old abandoned ghost towns like Rhyolite and Leadfield sound awesome and there are numerous canyons and viewpoints throughout the park for you to explore. I’ll be back to hike in Death Valley again at some point in the future for sure.

If you enjoyed this post and found it useful, please like, share and / or leave a comment.

Hiking The Giant Forest In Sequoia National Park In March

I mentioned a couple of weeks back that I was heading to the West Coast of the US on vacation and part of that would involve a visit to some of the many stunning national parks available. I’m close to the end of my trip now and my hiking finished up with The Grand Canyon yesterday which was truly awesome.

The Big Trees Trail Sign

Going back to last week, my first hiking trip started after I left the beaches of Santa Barbara and headed for Sequoia and Kings Canyon National Park. The main gateway town to Sequoia National Park is Three Rivers. It’s pretty easy to access and as I was travelling there in March, I wasn’t expecting it to be overly busy, as it would be in Summer time for example.

When I started researching Sequoia before my trip I couldn’t find too much about what possibilities there are with regards to hiking in March so I thought a post with some information in it might be useful to others travelling in March in the future.

The Plan

So, to start, I traveled there last Tuesday 29th March 2016 and was planning to stay only one night. As this was my first visit to Sequoia and I needed to move on the following day, my primary hiking objective was to take in the Giant Forest and of course see some of the main featured Giant trees like The Lincoln Tree and of course General Sherman, the biggest of them all!

Yes, all very touristy I know 🙂 but that’s cool, you have to do the main points of interest first time out I feel and with the short time frame available to me, it seemed the best option to aim for. Please don’t get me wrong, the Giant Forest is Truly awesome and I don’t mean to talk it down in any way, but it is of course very popular with tourists.

How Much can you Hike in Sequoia in March?

This was the big question I wasn’t 100% sure about and truth be told, there is an element of pot luck involved. In March, there is still plenty of snow around in Sequoia and many of the roads to popular areas, The Crystal Cave for example, will quite likely be closed. In fact, it is possible that the Giant Forest will not be accessible. If that is the case, you are left with the lower lying areas of Sequoia like Buckeye Flat to get a bit of hiking in.

Of course, I assume you can always hike into the snowy areas by hiking up to them, you just probably can’t get a car through to get close and it is a very, very big national park. There may well be restrictions involved on that type of thing too but wilderness permits are available.

Snow Chains

When we arrived last Tuesday, we had to pay our park entry fee which was $30 for a car. That get’s you access for 1 week so a very good deal for the price. The Park Ranger at the gate told us that if we wanted to visit the Giant Forest we would need snow chains for our car. We didn’t have these but they are easily acquired (Bought / hired) in Three Rivers. The Ranger will give you a list of places to get them so they’re not hard to find.

There are three levels of show chain restrictions, if I recall correctly, when it comes to car / vehicle access, R1, R2 and R3. Each level is more restrictive than the last. So for example:

  • R1: Required that all cars must have snow tires or chains on their wheels
  • R2: required that all cars must be 4 wheel drive or have snow chains
  • R3: all vehicles must have snow chains

I stress that may not be exact as I can’t recall the precise detail but it’s more or less what it was. Again the park rangers will give you the full explanation as required.

Check Restriction Levels

The restriction level changes on a daily basis and can even change while you’re out and about in the park. So basically, as advised on the government national park site, you may need to have snow chains in your car even if you don’t need to use them when setting out as the weather can change very quickly.

Now, if you’re a passing through tourist like I was, you probably have a hire car. If that’s the case, most car rental companies don’t let you use snow chains on their cars so if you do need to use them, you could get into hassle with the rental company.

When we arrived on Tuesday, I went to one of the hire places and bought a set of snow chains. The deal was you buy them for $57.95 and if you brought them back you got $20 back. Otherwise, you keep them. They also showed me a quick video on how to put them on as it was totally new to me. When we arrived last Tuesday, the weather wasn’t great. Cloudy and there was rain but it was still very beautiful, see the picture below.

Sequoia In Clouds

Off to the Giant Forest – Take One

With our snow chains in the car, we started up to the Giant Forest. It’s a good 40 minute drive from the gate up to the forest area and you of course are going up to heights of 6,000 feet plus to get to the Forest. As we drove up, the rain turned to snow and we reached an area where a sign said that you had to put the snow chains on your car.

At this point, snow was lying on the ground and I wasn’t 100% sure about putting the chains on my rental car as I hadn’t checked on the snow chain policy from the rental company as yet. I’d also just drove 4 hours from Santa Barbara and it was about 3 pm.

We decided to leave it and go to the hotel and check in. I would research the snow chain policy (Which I found is a no no) with the rental car company and maybe practice putting them on, as having only watched a video I didn’t really feel like I had a clue on what to do lol 🙂

On the way down we decided to stop at Buckeye Flat and hike a little bit around there. It was nice but as it was getting more and more overcast, we couldn’t get a lot of great views. Still pleasant though. Hospital Rock, pictured below, is clearly visible from the road and you can follow a trail or two from there.

Starting from Hospital Rock at Buckeye Flat, we hiked about 3 miles in and around the trails there before heading back to the car. Going down towards the river is nice but brief, but there are other trails available. After 4 hours driving, it was good to stretch the legs a bit!

Getting to The Giant Forest – Take Two

The following morning, I opened the curtains and it was a beautiful morning! Clear blue skies all around with barely a hint of any clouds. Fresh and cool outside but a really good start to the day!

Sequoia Blue Sky

After getting some food, we headed up to the park gate again. We were hoping that it had stopped snowing and that we wouldn’t need the snow chains.

When we got to the gate, the Ranger told us that the snow chains would still be required 🙁 Bummer, I was really hoping I wouldn’t have to put them on. Anyway, the weather was beautiful so that was the main thing. We drove on up to the area we had been at the previous day where the snow chains had to be put on.

Now, I was a bit unsure what to do as the roads looked fine, no snow or ice on them. We were probably about a mile or two from the forest at this point. As it happened there was another Ranger there at the side of the road. I went over to him and asked him about the snow chains again. He said that he wouldn’t require me to have them on if heading on to the Giant Forest but that it was my choice whether or not to use them.

What a stroke of luck! It meant that we could continue on to the Giant Forest without putting the snow chains on the rental car, happy days! I wasn’t sure what exactly to expect as we continued on up to the car park at the Giant Forest Museum but the road was more or less perfect. there was snow and ice in the car park but no issue to get parked.

Hiking in The Giant Forest

If you’re a hiker and you want to check out the Giant Forest, General Sherman, etc. I recommend that you park at the Giant Forest Museum and then hike up from there through the forest.

The Giant Forest Museum

You can go to the Giant Forest trail, which is what we did first. It’s just up from the museum and only about a mile in length but it’s a nice introduction to the forest as you head up from there.

The Giant Forest

From there I recommend you follow one of the many trails that lead you to the General Sherman tree, the oldest tree in the Park and one of the oldest trees in the world. It’s about 3 miles to hike up to the Sherman tree from the Museum, probably 6 miles round trip depending on which trail you take but it’s by far the better option.

You can of course drive up the road and walk up to the Sherman Tree but we’re all about hiking here so that is of course what I recommend you do.

As mentioned we got a truly beautiful day, blue skies and with the chilly morning there was a bit of light snow and ice on the ground so crisp underfoot. The trails are all very well marked out, so you can get to the Giant Forest quite easily without a map.

Trail Sign

Map Trails

However, while you will be given a basic map when you pay into the Park, there are only a limited number of trails listed on it. More detailed trail maps are available in The Visitor Center, so definitely worth buying one of those if you’re staying around for a longer period. For the Giant Forest though, you’ll be fine following the signs.

The main feature of the Giant Forest is, of course, the giant sequoia trees. They really are a marvel to behold, really very beautiful and some of them have been around for thousands of years. They are of course ‘Giant’, see me standing beside one below to give you some perspective, and can only grow in very specific conditions which are of course just perfect for them at that height and location in the Park.

Colm Beside A Giant Sequoia Tree

The main trees are of course marked out, the McKinley, Lincoln and General Sherman are the main ones I think. The trail from the Museum to General Sherman can take you past the McKinley and Lincoln trees on your way to General Sherman. We crossed a small river on the way too and with the freshness of the forest, it really was a very pleasant hike.

General Sherman Tree

We started out at about 10:30 am from the museum and made it back to the Museum at about 1:30 pm. We stopped to take the scenery in and did go off on one or two other trails for a bit as well but overall, about 3 hours for approximately 6 miles.

Visiting in March

If you’re thinking of going hiking in the Giant Forest In Sequoia National Park in march, it’s worth checking out the status of the roads and so on before you get there. In winter, many parts of the park can be closed and this can run from the winter months right into March and well into April, as there can still be plenty of snow and ice around.

The National Park website, link below, is very detailed and covers just about everything you need to know but the weather forecast is something that can change on the day, and probably even an hourly basis.

Whether its the start of March or the end, might make a bit of difference in terms of the odds of having to use snow chains. However, in saying that, it could easily have been a heavy blast of snow last Tuesday night and we may not have been able to make it in without the snow chains, or perhaps even not at all. While we didn’t have to use them, the regulations are clear that we still needed to have them as they can be mandatory at any time.

Overall, I think we got really lucky not having to use the snow chains for our trip into the Giant Forest, especially as we had a rental car and had never used snow chains before. Definitely not beyond the realms of possibility that damage could have occurred followed by a hefty bill from the rental company!

As I mentioned, I was only there for one or two days, staying one night in Three Rivers Village, which is a really lovely little town.

Conclusion

We had two days to get in to see the Giant Forest and while day one was pretty crappy in terms of weather, we lucked out with day two.

You could easily spend a week or two, and much longer, checking out the trails and hiking opportunities available in Sequoia and Kings Canyon National Park. I plan to be back at some point but I am really glad to have got to see the Giant Forest.

It was the main objective for the couple of days as I passed through and I’m really pleased we got to see it in all it’s majestic glory, in bright blue skies and sunshine with crisp ground underfoot. Certainly one for the memory scrap book for sure!

If you’re planning on going there, as mentioned, definitely spend a bit of time reading and researching the National Park Website, they have all the information you need there. I’m far from a knowledgeable resource on the park after just one visit but if I can help you with any questions you may have, please feel free to leave a comment below and I’ll do my best to help if I can.

El Camino De Santiago – Some Top Tips for the Pilgrims Trail

Just over a year ago, August 2013, I did one of the most popular and well known hikes in Europe. Calling it a hike would, to some, be incorrect as for many, it is first and foremost a pilgrimage.

Wooded Path On The Camino

The hike was on the ‘Camino de Santiago’ or ‘Way of St. James’. Recently I was chatting with a friend about the experience and he asked me what tips I had for it as he was thinking of putting it in on his travel plans for next year. After that conversation, I thought it might be useful to capture those tips in a post and share them here.

The Camino is a very popular hike. There was even a Hollywood movie called ‘The Way‘ made about it some years back starring Martin Sheen and Emilio Estevez to name just a couple of the actors. I watched it before I went actually, it wasn’t bad.

What Is The Camino de Santiago?

Before getting into things, some background information on the Camino de Santiago might be useful.

Historically, the way of St. James was one of the most important pilgrimage routes in medieval times. Legend has it that after St. James died, his remains were carried by boat from Jerusalem to northern Spain where he was buried on the site of what is now the city of Santiago de Compostela.

I actually did a post about a year back explaining more about the history of the Camino de Santiago so you can check that out here. Or if you would like to check out some more in depth information, you can follow my trip here.

The Camino attracts all types of hikers and travelers all of whom have their own unique reason for walking it. For many it is a spiritual journey that can be symbolic of leaving something behind on the Camino, for example after a major change or transition in life. For others it is simply a beautiful hike.

The symbol of the Camino is the scallop shell, pictured below. There are many thoughts as to why this shell is the symbol of the Camino. From being used as a drinking vessel to scoop out water from a trough in medieval times to representing the nice idea, if you follow the lines on the shell, that all roads lead to one. Every Pilgrim will have one though, usually attached to their pack. You can get them in any shop for a euro or so.

The Camino Shell

The pilgrimage can take a number of routes but the main one starts in St Jean Pied De Port in France and ends in Santiago in Spain. Most people travel to St Jean via Biarritz or Pamplona.

The main Camino route can also be split into three parts, the hills of the Basque country, the hot and flat section of the ‘meseta’ and the beautiful green hills of Galicia. It’s common for people to opt to do one section at a time on different trips, mainly due to the time it takes to hike the whole way.

The minimum distance you need to complete to officially complete the Camino de Santiago, defined as qualifying for a certificate of completion or Compostela, is sixty two miles on foot or one hundred and twenty four miles by bike, cyclists are just as common on the Camino. The closest big town to start from on foot, is Sarria.

Anyway, back to the main event so to speak. Below are some of the top tips I learned from my own and other peoples experience on the Camino. If you’re planning on travelling to hike the Camino anytime soon, I recommend taking a look through them as they will help maximize your experience there.

Travel Light & Smart

Whether you’re planning to do the whole five hundred plus miles of the Camino or just one or two of the stages, remember that you will need to carry all your gear with you on your back for the whole journey! Unless of course you plan to have porters 😉

You can arrange to have your gear moved on to your next location by taxi drivers and so you just have to do the walking. However, I think to really get the experience it’s better to carry it yourself. While it is advisable to book accommodation ahead it is nice to have the freedom to do as you choose as things present themselves. That is, you might take a notion to sleep by a stream out underneath the stars, and why not!

Five hundred miles is a lot of walking so first and foremost, you’ll need a good backpack to carry your stuff in. Also, you need to pack sensibly and pack light. If you bring any unnecessary stuff with you, be prepared to lose it as you will dump all unnecessary stuff as you travel. I can guarantee this as you just won’t be bothered carrying anything more than you need. You have been warned!

Bring Clothes Pegs

Following on from the traveling light point above and in line with it, you should bring some clothes pegs with you. Why clothes pegs? Well, it’s better to pack several pairs of socks and underwear that you wash every other day to reuse rather than gathering up lots of washing. Having a few clothes pegs handy means you can hang them up to dry either in your hostel or on your pack as you hike, the latter being a very common sight on the Camino.

Clothes Peg

Trust me, as already mentioned, you just won’t carry any extra unnecessary clothing or materials with you when you get going and you will happily dump anything like this in the nearest bin rather than carry it needlessly for a hundred plus miles!

It’s worth noting as an aside here, the nice spiritual symbolism of this i.e. not carrying any extra baggage and dropping stuff as you go. I don’t think it’s intentionally connected but it’s a nice metaphor for what the Camino represents for many. Anyway, on to the next tip …

For Accommodation – ‘Albergue’ it!

If you want the full Camino experience, I recommend that you stay in the hostels (Known as an Albergue). In the Albergues (Not sure of the plural in Spanish!) you will be sharing dorm type rooms, see picture below, with many folks from all walks of life. The downside to the hostels is that the sharing of snores and odors is a given!

An Albergue In Santiago de Compostela

However, this is where you will meet your fellow Pellegrinos (Pilgrims) and make friends. You will also find that as you travel along the Camino you can repeatedly meet the same people from one place to the next and a sort of camaraderie and an attitude of helping one another out naturally develops which is kind of cool.

Some of the stories you’ll get to hear from the folk you’ll meet in the hostels will be well worth any snores you may have had to endure while crashing in them! Some will make you laugh but many will make you cry too.

Food – The Pilgrims Menu

You will see these offered in most restaurants as you travel through the various towns and hamlets on the Camino. The Pilgrims menu is a bargain three course meal for Pilgrims. The cost, when I was there last year, was anywhere from nine to twelve euro (eleven to fifteen US dollars exchange rate at time of posting). Standards will vary from place to place and you can of course opt for more expensive options. Generally speaking, the standard at these prices was pretty good. Look out for it on the menus!

On the trail, a standard sandwich (bocadillo), which is a hefty feast in itself, will cost you around three euro or five US dollars in a cafe along the Camino. The quality is generally very good so you can’t go far wrong at prices like that!

Bocadillo

Pictured above is a typical bocadillo I ate on the Camino. It gives you a good idea of what you can expect for an average sandwich on the trail. As you can see by its size, at only five bucks, you won’t go hungry!

Bring Suitable Hiking Gear

It’s crucial you have the right hiking gear with you for walking the Camino. I walked it late July and the weather was very changeable. Some days it was hot and other’s it was very overcast and cloudy.  I was also caught in several downpours.

As part of your main gear, be sure you wear appropriate hiking boots or shoes that are well broken in, to avoid the dreaded blister, and definitely have a light hiking rain jacket with you for the inevitable rainy spells. As already mentioned, when it rains it can rain heavily so be prepared!

If you’re hiking at a cooler time of year you will need rain pants and more layers for warmth. Most people choose to walk the Camino over the Summer period and I recommend this, definitely a better time to go and I think many of the hostels and restaurants are closed at colder times of year.

Always Wear Good Hiking Socks

I could have put this under hiking gear but I feel so strongly about this one I think it deserves a special section all on its own! I can’t emphasize enough the importance of having good hiking socks with you.

I’ve said this many times before and will continue saying it. I think your hiking socks are as important as your boots or shoes. You need good quality ones that will not help lead to blisters, a very common complaint on the Camino, or other sores on your feet.

As well as the sock option above I recommend the two sock strategy as well as using Vaseline on your feet. You need to do your best to keep your feet in good shape as it’s the fastest way to a miserable hike on the Camino. There are some free medical clinics for Pilgrims all along the Camino that will treat minor ailments for free but Prevention is always better than cure!

Getting the Certificate of Completion or ‘Compostela’

To get the certificate of completion for the Camino or ‘Compostela’, as it is known, you need to acquire a ‘Pilgrim’s passport’ in advance, also known as the ‘credencial’. These can be acquired on arrival on the Camino.

Remember, you need to get the passport stamped in locations with the official St. James stamp in each town or village you pass through. Every bar, cafe, restaurant, church, etc. will have a stamp. Remember, to be sure you have no issues getting your ‘Compostela’ on arrival in Santiago, you should get at least two stamps from two separate establishments every day!

On arrival at the certificate office in Santiago they will inspect your passport to be sure you have the correct amount of stamps. They will then ask you to pick why you did the Camino from three options: 1. religious reasons 2. religious and spiritual reasons 3. recreational reasons. When they have that they will then prepare and give you your personalized ‘Compostela’, with your name on it, in Latin.

I did actually witness an Asian couple getting refused their Compostela’s as they hadn’t got it stamped correctly. They weren’t happy campers! It goes to show though that they do take it seriously enough so be sure you get your stamps as you go.

Don’t be Afraid to Travel SoloSolo Pilgrim On The Camino

The final note I will add here is don’t be afraid to walk the Camino on your own. Many people do it this way and if you are on your own, you will make even more of an effort to meet people and make new friends on the trail. Meeting people from all walks of life and from every corner of the globe is a majorly cool part of the whole Camino experience so don’t be afraid!

On the other hand, if you’ve some stuff you need to process or things you need to let go off, being on your own will give you the time and space you may need.

Conclusion

And thus concludes my main tips for walking the Camino. If you’re planning to do it in the future, you won’t be disappointed, it’s a wonderful and unique experience! If you follow some or all of the tips listed, I can assure you, it will only add to the whole experience.

If you’ve any questions about the Camino I am happy to answer them if I can. Leave a comment below or drop me a line via the contact page.

Have you hiked the Camino? What was your experience? Have any top tips for it? I’d love to hear about it in the comments below!

Glendalough – The Two Lakes Hike

Today’s post is about a short but very pleasant hike in the Wicklow Mountains National Park that I have done many times. That hike is the two lakes hike in Glendalough in the Wicklow mountains.

I think Glendalough actually means ‘The Glen of Two Lakes’ in the Irish language although I’m not 100% sure of that. Glendalough is a popular tourist destination in county Wicklow in Ireland. It’s close proximity to Dublin means that it’s an ideal location for a day trip from Dublin city and surrounds.

This hike is a relatively easy one and takes about 2 / 4 hours depending on your pace. If you’re a regular hiker, you’ll find this a comfortable hike. If you’re completely new, you might want to take it handy enough and just play it by ear as you walk around.

There is a clear trail the whole way and the terrain varies between rocky bits and boardwalk but there are a few steep ascents which could prove tough to legs that aren’t used to it.

Getting There

To get started you can park up in several locations in Glendalough. Normally, I park up in the Glendalough hotel as the parking there is free. It’s also a nice place to stop in after your hike for a cup of coffee or a bite to eat. The hotel is a bit further down from the actual lakes themselves, so it adds an extra 10 / 15 minutes to your hike.

Not a big deal but if you want you can drive further up past the hotel and there is paid parking available at the upper lake. There are also lots of nice green areas in the upper car park area and some picnic benches if relaxing in the sun is the order of the day.

I should also add that the area is very accessible from Dublin City Center. There are lots of day tours available from various private companies which will take you out and back for the day by coach.

Anyway, for our purposes today, we’ll start from the Glendalough hotel.  The map below shows the exact location.

As mentioned above there are lots of hikes to choose from. once you get into the national park there are boards dotted around showing some of the common walking trails people like to take. These walks are highlighted along the way by colored arrows, one color for each walk, so they’re very easy to follow.

You can also get a walking trail map in the information center at the upper lake and at the Glendalough Visitor center. You can learn more about these trails and you can download a free map here. This hike is a bit of a mix of a few of the trails listed on the map. Don’t be afraid to get a little lost as you venture around, it’s pretty easy to find you way back onto a main trail and any wrong turn will likely lead you on another beautiful trail anyway 🙂

Getting Started

Now, I should start by saying that there is no set route to take on this particular hike. You can approach it from either direction from the Glendalough hotel car park or from the upper lake car park.

However, I will cover the route I normally do. Firstly, I head out of the car park entrance and take a left which will take you further into Glendalough towards the lakes. Follow this road all the way down till you reach the upper lake car park which you will pass on your left. Along the way you will see some lovely medieval remnants of old buildings. You can visit St. Kevin’s church too as part of this hike but we’ll get to that later.

The Upper LakeBeside Glendalough Upper Lake

As you pass the upper lake car park on your left and continue on the road, it will eventually become a path and merge with another path which comes from the upper lake car park. At this point the upper lake will start to come into view on your left.

It’s a beautiful sight on any day of the year. You will have a faint treeline on your left and a mountain rolling upwards directly to your right. On the other side of the lake you also have a sharp mountain ascent.

All this combined provides a beautiful hilly backdrop that cradles the lake in its center. It’s worth taking the short walk down to the lake edge itself as the views are beautiful. The lake is peaceful and serene on good days but can get quite wild when the winds are up!

The Quarry

Heading back up onto the path, continue on along with the lake on your left. You will be surrounded by pleasant tree cover overhead for a short while before the path eventually opens up into an open area at the top end of the upper lake.

At this point you will see the two mountains on either side of you join at the end. Where they join a beautiful river flows down into the lake. Again the views are simply fantastic. As you walk towards the river, you will also pass a few old stone building ruins. I believe these were part of an old quarry which used to mine here, for Lead, Zinc and Silver to the best of my understanding.

View of the River

As you move towards the bottom of the river you will need to walk over stepping stones to get to stay with the path. This is fun and adds a nice mix to the hike but be careful not to slip in, although at worst you’ll get your feet wet. You’ll also pass some very old mining equipment from way back in the day as pictured below.

Old Mining Equipment At Glendalough

Eventually you’ll reach the base of a stony path that meanders up the side of the river. This is probably the toughest part of the hike coming from this direction as it’s a steep enough climb to get to the top.

It’s again really beautiful though and there is ample opportunity to walk over right beside the river. The sounds of the running and gurgling river provide a comfortable background to this part of the hike itself but going over right beside it is worth it. there are lots of little waterfalls and flowing streams within streams. It’s very beautiful.

The River

The Foot Bridge

When you get to the top of the river, you will see a bridge crossing over it. The river continues on into the horizon but for this hike, it’s as far we go alongside it. We now want to cross over the bridge and head across the stone path. Again you will see some old stone building ruins along the path to your left. It’s worth taking a wander over to take a look around. It must have been a tough place to work or live back in the day, that’s for sure!

Bridge

This is an ideal place to stop and have a quick snack or cup of tea or coffee. At this point you’re looking back down through the vale and the views are again stunning.

It seems like I am repeating myself when I keep mentioning about the views but in all honesty, until you head into the forest at the end of the hike, all views available to you are just amazing. The forest walk is beautiful too but the views aren’t as striking mainly as you are surrounded by trees.

The BoardwalkBoardwalk

After heading over the bridge, keep following the stone steps along the path. They will start to rise upwards and they will eventually come to some boardwalk. This takes you up into an area known as the Spinc.

The boardwalk was put there as the ground in the Wicklow mountains is very marshy so it wouldn’t be practical or safe to walk over it as normal. It would damage the landscape too. The Boardwalk is made from railway track sleepers and has lots of round nails sticking out of it. This is excellent for walking on as it provides excellent grip for your hiking boots, even in rain.

The Boardwalk slopes upwards and as you continue to walk up it you will see the lake below you to your left. There is no real place to stop along the boardwalk until you start to come down the other side and single file walking is required the whole way along the boardwalk.

After about twenty or thirty minutes, you will reach the top of the upwards section of the boardwalk. The boardwalk then goes downward in a much steeper descent. Along the way there are a few viewing points which are definitely worth stopping at to take it all in.

The picture below looks back down across the upper lake and in the distance on the right you can see the lower lake.

View From The Boardwalk

The Forest Walk

The boardwalk continues on downwards and you will notice that it veers off to the right into the trees. You have two options here. You can take either the first exit into the forest that you come to or continue on to the next one. I recommend the last exit if this is your first time, as this will take you closer to the path than runs by St. Kevins.

This is a beautiful part of this walk as you walk downwards for about 15 minutes or so through the forest. Surrounded by trees on either side, it gives one a very secluded feeling as you descend.

When you get to the bottom, you will see a path going downwards alongside a large river. Continue down along this path which will take you towards the car park of the upper lake. As you follow the signs for the car park look out for a  path veering off to the right, I am nearly sure it is signposted, which will take you towards St. Kevins church.

Note, this is another great opportunity to stop off for a short break. You can head into the car park itself where there are bathrooms and a cafe where you can get food and drinks.

St. Kevin’sTower At St. Kevins

St. Kevin’s is an old monastic site which dates back to the 5th century BC. St. Kevin set it up and over the centuries the site played various roles throughout history. It has an interesting history which is worth checking out. You can read more about it here.

As you walk towards St. Kevins you will have the lower lake on your left. Again there are lots of opportunities to venture closer to the lake on other paths off of the main route. Going to visit St. Kevins is also optional as you can continue onward back towards the car park in the Glendalough hotel. However, if it’s your first time there I highly recommend you stop off and check it out, it’s an impressive piece of history to walk around in.

Pictured to the right is the round tower beside St. Kevin’s. I think this would have been used to hide in when under attack back in the day.

Back to The Hotel

After you’ve finished exploring and taking in all the history at St. Kevin’s, walk back to the main path you were on and continue onward in the direction you were going. Eventually you will see the back of the hotel in the distance. Just stay on route towards it and you will eventually come to another bridge which you cross to take you back to the car park.

Conclusion

Overall, this is a really pleasant hike that will be suitable for most although some will find it tougher than others. What I really like about this hike is the fact that it takes in so many different types of terrain and surroundings.

You start on country road and move to walking alongside beautiful lakes. Then you head upwards on a rocky path alongside a river. After that you move to a boardwalk which traverses marshy bog land before heading down through the thick of a forest. Finally you end up back on man made track again alongside a lake with the option to take in some medieval monastic ruins. Pretty impressive hey?

Another great advantage to this hike is that it is very accessible, save very bad weather, all year round and it is good to enjoy at any time of day or night. I recently did a full moon hike here and with a clear sky, it was just beautiful, peaceful and serene. If you do plan to do a night hike though, be sure to take a head lamp.

It’s a pretty special and it’s no wonder it’s such a popular tourist destination. Even as a hiker who has hiked it on many occasions, it’s one hike that never fails to satisfy!

Have you ever hiked along the two lakes in Glendalough? Did you enjoy it? I’d love to hear about your experience so please leave a comment below.

Hiking In The Alps – Part Five – Mont Blanc Summit Day!

Day Six Had Arrived – We Head For The Summit Of Mont Blanc …

So this was it, the day had finally arrived. Although I’d been to bed early the previous evening, I still hadn’t slept that well and only managed a couple of hours. My sleep record in the huts wasn’t too hot at this stage. Also, my cold was still lingering and I was a little bit concerned as I had coughed up phlegm from my chest during the night. However, aside from that, my body felt fine so I was excited to get started!

After some breakfast, we got our gear and went outside of the hut to put our crampon’s, etc. on. It was another fine morning although it was still quite dark as it was so early. We needed our head torches at the start but even though the sun wasn’t up, there was still reasonable visibility.

We roped up and started out on foot to the base of the rocky area below the Gouter Hut to make our way up.

Scrambling up to the Gouter Hut

This bit was a bitter sweet part of the climb for me.

Sweet, in that I love scrambling and it was really cool to climb up through this on the way up. there were lot’s of rocks to negotiate while we were roped up. It involved team work and it was great fun when full of beans in the morning. There are lots of steel cables on the way up that are a great aid to the ascent too.

The Rocky Face Leading To The Gouter Hut

Bitter, in that by the time I got back down from Mont Blanc and had to descend back down through this part, twelve hours later, I was exhausted lol and the last thing I wanted to do was start scrambling down through rocks tied to a rope! As mentioned before, getting down is always harder than getting up. At least I generally find that to be the case and this was a great example of it.

Anyway… 🙂

We got to the top of the rocks after about two hours scrambling. It had been a nice climb and we came out at the old Gouter Hut. We then made our way over to the very modern looking new Gouter Hut shown in the photo above. I believe it is only a year or so old. It has the look of a space station of some kind.

An Omelette in the Gouter Hut

The original plan was to only stop here for a minute and then push on to the summit. As we were getting there at around 6:30 / 7am, the restaurant part wasn’t expected to be open for business. However, our lead guide popped up into the restaurant area of the hut and found that it was open. He came back down and asked if anyone would fancy an omelette!

This sounded way too good to miss out on so I jumped at the opportunity. A chance to get stocked up on protein in a nice and warm environment before making the final push seemed like a great idea.

As we waited for the omelette, I have to say that I did feel a little bit funny. At this stage of the trip I was familiar with the mildly disorienting feeling that high altitude can give to one. I wasn’t ill, nor did I have a sore head, I just felt, well … odd. no other way to describe it.

All perfectly normal and nothing to worry about but I was conscious of it as at this stage, my fitness had proved to be adequate, the weather was in our favor so the only thing left that could potentially scupper my Mont Blanc summit attempt was altitude sickness.

The omelettes came and we feasted like kings. They were very tasty indeed. The standard of food in all the huts we visited I have to say was very good.

With all that extra protein on board, it was time to hit the trail again for the summit.

Starting out Towards the Summit of Mont Blanc

As the weather was so good and some people had already been to the summit in the previous days, there was already a clearly marked out path in the snow which we could use to our advantage. It would certainly make our summit journey that bit easier.

At this point, from the Gouter hut, I think it’s really all about endurance. As you move towards the summit, you’re inching ever higher so altitude plays more and more of a factor. The ascent gets larger and larger as you go up and down several very high hills on your way to the summit. All this means you’re pushing harder and harder as you go so you need to be sure you have that extra bit of gas in the tank.

Approaching The Summit Of Mont Blanc

On reflection, this bit was just tough, there is no way other way to describe it. You just need to put your head down and get on with it.

As you ascend towards the summit there are several quite hairy bits as you walk along ridges. Hairy in that, there is quite a drop on either side of you as you walk along the ridge itself. We were lucky on the day and there was minimal wind. The head down and one foot after another approach is the best for these bits and to be honest, I hardly even noticed these scarier bits along the way as I was so focused on just taking the next step.

The Sun

One thing I haven’t mentioned in this series of posts as yet is the sun. The sun was shining when we summited both Gran Paradiso and Mont Blanc which was just fantastic. The views we had were just stunning and this is how you want it. However, the sun is, as you know, a very powerful element of nature and you need to respect it and protect yourself accordingly.

The Hot Sun On Mont Blanc

There are several things to consider with the sun when in the snowy Alpine environment.

The snow acts as a huge mirror and just reflects the UV rays back off of it back onto you. With that in mind you need to protect any exposed skin with lots of sun screen. One key area you need to be wary of is your lips and just under your nose. These bit’s can be easily missed with normal sun screen and it’s best to get a UV protection chapstick and apply it regularly.

This actually became a bit of an issue for me as my cold was in full flight now and I was regularly blowing my nose. As I was putting sun screen chap stick on my nose, I was rubbing it back off when I blew my nose! A pain!

Another critical necessity related to the sun that you must have is appropriate category four sun glasses. Again Mont Blanc Guides explained all this in detail in advance so I was prepared. To protect your eyes form the sheets of UV all around you, you need strong protection in your glasses or you can quite quickly run into problems with your eyes getting damaged.

Finally, the sun dehydrates. You’re of course exerting yourself as you hike towards the summit and with the sun beating down, you are losing water all the time. This is why you need to re-hydrate regularly and having the right amount of water with you is crucial. Again, this became a real issue for me on the way back down as the darn cold, exacerbated my fluid loss. By the time I got to the Gouter hut on the way back I was gasping for water! It worked out fine though but man was I thirsty 😉

The Final Push

All the way along we just kept going at a steady pace with a break every so often. Again, as with Gran Paradiso, the key is to have small amounts of food handy for you to take as you need when you can as well as a drink of water.

My friend gave me carb gels for the Mont Blanc summit attempt. I’d never actually used them before and I had heard they were awful but I actually found them alright. As we drew closer, about 2-3 hours, to the summit of Mont Blanc I started to take these mixed with other snacks, like banana or bread. I found them effective and they gave me a good boost to push on.

Another thing that is worth noting and is entirely common is that, your appetite can go to nothing at altitude. I definitely wasn’t pushed on eating but I made myself eat anyway. Again, nothing unusual at high altitude.

The climbs on the last legs of Mont Blanc are long and hard. We continually followed the path laid out by previous climbers so we were lucky in that we didn’t have to exert more energy making out our own trail.

Another interesting thing that can happen as you get closer to the summit is that your steps get smaller and smaller. The altitude makes each step that bit harder so your steps get smaller. I did notice this happening to us but we did keep a reasonable pace up all along.

The Summit!

We reached the summit at about 12:30 on Monday June 9th. We had set out at 4:30am so at this point we had been on the go for about 8 hours. With about two hours to get to the Gouter Hut from the Tete Rousse Hut, a 30 minute break at the Gouter for an omelette, it took us about 5 / 5.5 hours to get to the summit from the Gouter.

It was quite a feeling to make it to the top! The weather was still beautiful and so we had time  to enjoy it. I took the short video below to give you an idea. It’s a view from the summit. Starting out, it looks out over Italy and as it pans right it moves to look over France.

So we had done it! It was a bit emotional if I’m honest. Between the tiredness, the cold and damp sleepless nights, the altitude, blisters on my feet, the waiting and anticipation, the hoping that the weather would be in our favor, hoping our fitness would be enough, the sheer amount of effort to get there, etc. It was quite a mix of emotion, that is for sure! Overall though, it felt really good and we were all very proud of our achievement!

On The Summit Of Mont Blanc

What Goes up Must Come Down!

At this stage, I was feeling decidedly odd lol 🙂 which must have been from the altitude. Again, I wasn’t nauseous but I did have a faint headache and I just felt kind of out of sorts. Again, the milder effects from altitude can be hard to describe. The best way I can describe it is that I am standing here but I feel like I’m standing over there three feet away. Not sure if that makes any sense but in short, I was pretty sure altitude was playing with me.

We spent about twenty minutes at the top before deciding it was time to head back down.

So, we had done what we had set out to do but now we had the daunting prospect of getting back down. With a lot of energy already spent, I was under no illusion that this would definitely be nothing but tough. At this stage my water supplies were running low and my cold was still as full on as ever with me still blowing my nose every few minutes.

So, off we went! We basically just set out back the way we came. The hills we had come up and down, we now just did in reverse. They were just as tough though as there are plenty of downward slopes prior to ascending upwards on Mont Blanc. So doing these in reverse meant we still spent a fair bit of time going upwards.

Just Over That Peak!

Another thing I found in my time in the Alps was that they are deceptively long lol 🙂 I am used to hiking on relatively small mountains by comparison. You get to the top of a peak and you look ahead to try and see the next peak and maybe even the summit not too far away. This is good encouragement to keep you moving and works fine in Ireland or the UK but I don’t recommend it in the Alps.

Countless times, we would get to the top of a peak and I would look over expecting to see the summit or our next destination ahead but no, you would just see more peaks and troughs … lots of them! False tops aplenty!

This can be demoralizing if you’re pushing hard to try and get to the summit or back down. Again however, it’s easily avoided with the head down and one foot in front of the other approach. This doesn’t mean you can’t stop to enjoy the scenery. Not at all, just don’t be regularly looking for the finish line … you will be disappointed 😉

Another element to this is that, with the white snow covered surroundings, things can look closer than they are and you can set off at quite a pace to get to the next peak. Then, when you look up, lo and behold you’re still what seems an age away and you’re really hot and tired after pushing yourself.

To avoid all the above, simply don’t be overly concerned with seeing your destination in the distance or where you’re going to next when climbing Mont Blanc, keep a steady pace and focus on your next few steps. That’s by far the best approach you can take in my opinion. You’ll get there in good time.

Back To The Gouter Hut!

We pushed on and after some hours we got back to the Gouter hut, probably around 4 / 5pm. At this stage I was exhausted. Not so much from just the climb but from the mix of the cold, the climb and lack of water.

A storm was possibly coming in so our guide was keen to get back down to the Tete Rousse as soon as possible but I asked him to stop as I needed to get water. He was a really nice guy from the States and he could see I was finding it tough so we nipped in.

I bought a tea and a 1.5 Liter bottle of water. I polished both of them off in about 5 minutes flat lol 🙂

To be honest, at this stage I just felt like crap. The cold was now a chest infection and it was kicking in. My body was of course tired from the climb as well so I knew I’d have to dig deep to get back down over the rocks to the Tete Rousse.

Descending To The Tete Rousse Hut

So this was it, the last leg of the journey 🙂 I was happy to be here but man, as I looked down the rocks that stood between me and the end of the climb, I was just like, ‘how in the hell am I going to do this!’ lol 🙂

Again, our guide was great. He was very encouraging and got me psyched up to do it. We roped up again and started down. It was hard going back down. Concentration and focus was critical as a bad slip here couldn’t end well. Again, the ‘focus on the next step’ mantra came into it’s own. That’s just what I did and took one step at a time.

When we started out on our way back down the sun had, thankfully, ducked behind the clouds so it was nowhere near as hot as it was. There was a potential storm coming in and we started to hear thunder in the distance. At this point, some light snow also started to fall. We definitely did not want to be stuck out there if a full on storm kicked in. We would be using the metal railing ropes again to help us get down so if thunder and lightening ensued, it wouldn’t be a good time to be clinging to anything metal!

The snow fall did get a bit heavier but the storm didn’t materialize, thankfully! We went at a reasonable pace and we eventually got back down to the end of the rocks and the final walk through tent city, some folks camp close to the Tete Tousse hut and a bunch of tents had appeared since that morning, back to the hut.

Our guide actually told us that it was probably the worst weather he had ever been in to come down those rocks so when all was said and done, we did well.

Home At Last!

I gingerly took my final steps through the snow to make it back to the Tete Rousse hut. I went into the boot room and sat down. My legs were like jelly and my chest and head were gunged up from the cold. But Man, I felt great! I had done it. I had successfully got to the top of Mont Blanc and back. I was chuffed inside!

I took off my crampons, harness, boots, etc. and stored them in one of the lockers. I walked into the main room of the Tete Rousse hut and my friends and some others from our climbing party were already back. Two of my mates came over to congratulate me and I was thrilled. My voice was more or less gone from the cold and taking in lots of cold air all day so I had no sound when I spoke. I didn’t care though, it was done and everyone had made it to the summit. HAPPY DAYS!

Two of our party were still on their way back so I headed down to the dorm and lay on my bed for a half hour till dinner time. Man, I was exhausted! We ate dinner and the food tasted divine. I didn’t hang about after dinner and went straight down to bed as did many of our group.

One thing is for sure, I got my first sound nights sleep in an Alpine hut that night! I was out like a light and slept through till morning 😉

Back To Chamonix

We got up for 7am the following morning. We were in no rush so we got ready slowly. My body was aching and my cold was in full flight so the thought of walking back down to the car park near Saint-Gervais did not appeal!

However, I was pleased to learn that we would actually be able to slide down a lot of the way back over the snow. This made me very happy as, as soon as I stood out on the snow my body had some kind of reaction and I was walking very gingerly across it. Not sure why, I think I was just snowed out!

So, with a mix of walking and sliding on our bums, we made it down to the snow line. I can’t tell you how happy I was to get off the snow and walk on a normal hiking trail. We were on a trail now all the way back down to the car park and the sun was shining yet again, what more could we ask for!

Sunny Alpine Scene

In another hour or two we were back at the car park. I got out of my boots and slipped on my sneakers which I’d left in the van … man they felt good!

And that was that. We headed to a nearby town, Saint Gervais I think, for a celebratory drink and then back to Chamonix.

We had one more night to relax in Chamonix before heading back on the Chamexpress to Geneva airport and back to normality.

Final Thoughts

Sitting on my couch back in my living room now writing and reflecting on it all, it’s hard to put into words what it felt like to make it to the top of Mont Blanc. The whole trip in itself was without a shadow of a doubt, the best trip I have ever been on! It might seem odd to some that one would say that about going somewhere where you have to rough it a bit and work hard to get to where you want to get to. Definitely not everyone’s idea of a relaxing holiday, that is for sure!

However, the sense of achievement having made it to the top of both Gran Paradiso and Mont Blanc was just awesome. The folks I met on the trip were all really nice and for a few days we all became brothers in arms, if you will, who pushed and cajoled each other to success. There was a definite sense of camaraderie among all the team and there were many good laughs along the way.

Again, special praise and compliments should be given to Mont Blanc Guides, without them, none of it would have been possible. They are a top notch and professional set-up who know what they’re doing every step of the way and they’ll do their utmost to help you get to the top of Mont Blanc. If you want to climb Mont Blanc, I highly recommend them, you couldn’t be in better hands.

As part of the Mont Blanc Guides set-up, a special mention should be given to all the mountain guides who took care of us on the way to the top of Gran Paradiso and Mont Blanc. Their professionalism and emphasis on safety was clear at all times but they were also very human, happy to share a joke, laugh or a story with any of the climbers along the way. Really nice guys all round!

The weather was just perfect throughout our trip so I just feel so lucky with the whole experience. Basically, I don’t think it could have went better for us. There was one guy climbing in our group who was actually there for his second attempt as the weather had scuppered him the first time round. He told us how disappointed he was the first time round so I feel blessed we didn’t have to go through anything like that.

I started the year wanting to push the hiking adventure boat out a bit and I feel I have certainly done that with this trip, an amazing experience!

I guess the only remaining question is, what next!? The Matterhorn maybe? 😉

Have you climbed Mont Blanc? How did you find it? I’d love to hear about it in the comments below 🙂

To go back to part four of this series click here.

Hiking In The Alps – Part Four – Heading For Mont Blanc!

After Gran Paradiso I think everyone felt tired and was grateful to get back down to the valley in Chamonix to get a long hot shower and changed out of clothes we had been wearing the last couple of days.

That is another thing worth mentioning about hiking high into the Alps As mentioned before, you need to be efficient with weight and you don’t want to carry needless extra weight. So, by wearing your gear a couple of days in a row, you save on carrying extra stuff.

This is fine and you can get away with wearing the same gear for a few days but I think it is advisable to take a change of base layer and socks. I am pretty sure the guides told us to do this too but it is worth mentioning. It is nice to be able to put on a clean pair of socks and top in the morning, that is for sure, especially on summit day.

Day Four – Chilling Out In the Valley

As already mentioned this day was really about relaxing after Gran Paradiso and getting organised for the march on Mont Blanc the following day. As Mont Blanc Guides told us it would, what the trip up Gran Paradiso definitely did was give us a real taster for the Mont Blanc experience.

At this stage we all had a good idea of what would be expected of us physically and mentally. We also learned a lot from the first run with regards to what worked well for us when trekking and what didn’t.

We knew what extra bits and pieces we could do without and what we were missing and needed to get while back down in the Valley.

I think that was one of the great thing’s Mont Blanc Guides were doing all the time but you don’t really realize it till afterwards. As we prepared for and climbed Gran Paradiso, they were constantly drip feeding pieces of information to us all. We were taking it on board whether we knew it at the time or not and were adapting our plans as we went. It’s a great way to prepare for a big undertaking like Mont Blanc, that is for sure!

The rest of the day was spent doing washing in one of the local launderettes and eating good food. With regards to laundry, I recommend carrying less over and washing stuff mid trip rather than taking twice as much gear with you.

Again, we got to bed early for an early start, about 6:30am if I recall.

Day Five – Heading to The Tete Rousse Hut

We got up on day five, had breakfast and were in a van to the valley below the Tete Rousse hut by 7:15am. I had slept OK but my cold was developing in the background so I was a bit chesty. I think we went to the town of Saint Gervais, not 100% sure about that, and then took a four by four up another bit of the trail along train tracks.

The train is a tourist train, the Mont-Blanc Tramway I think, in Chamonix than runs up part of the way during the Summer I think. It hadn’t started for the summer season though as yet.

Tramway du Mont Blanc

From there we began the hike up to the Tete Rousse hut. It was a pleasant hike. We basically followed the train lines the whole way up until we reached the snow line. We again then had another steep enough climb up through snow to get to the Tete Rousse hut.

The sun was again shining brightly though so it was another fine day. We got to the hut probably around lunch time or so. The hut sits at 3167 meters high so it was slightly higher for a base than the Chabod hut of the previous days.

As with the Chabod Hut, the Tete Rousse hut was fine. The food was really nice in it and the staff very friendly and pleasant. It was early afternoon the day before the summit attempt. At this point, we just had to sit and wait for the following day to come so we could get started. The plan was to have a meeting after dinner with all the guides to go over any final details.

Sitting And Waiting

I thought it was worth a mention here that we often spent time sitting and waiting for the following day to make our summit attempt. This was the case in Gran Paradiso and was the same when we went to Mont Blanc. You can’t do too much other than sit around and enjoy the scenery or play a game of cards.

Setting Sun In The Alps

It was kind of funny actually, as many of us went outside to sit in the sun and enjoy the scenery. As the day progressed, there were numerous small avalanches on the side of the mountain leading up to summit of Mont Blanc. I don’t think this was near anywhere we would be hiking over but you couldn’t help but wonder!

While at first glance, sitting about doing nothing may just seem like it could only be frustrating there are actually very sound reasons for taking this approach. First off, your journey to the hut is made easier by going earlier. As mentioned before, the earlier in the day you’re hiking, the harder the snow is and therefore easier to walk on.

Secondly, you get to spend a bit more time at altitude before really exerting yourself, so I assume that extra bit of time relaxing at altitude before making the big push, helps the body to further acclimatize. Sleeping at altitude also plays a big part in the acclimatization process. Finally, you get to rest for the afternoon before you go and so you have plenty of time to get organized for the morning.

These are all very sound reasons but one thing that is inevitable is that with time on your hands, you start to think about whether or not you’ll make it to the top the following day. The mind starts to do what it does best and starts to query and ponder!

  • Will I be OK?
  • Will I handle the altitude?
  • Will the weather hold?
  • What if this or that goes wrong!?
  • etc., etc.

This of course is just human nature so don’t worry if you do this type of thing and have a train of thoughts running through your head. My best advice is to just put it out of your head. You’re going to make it or you’re not, it’s as simple as that. No worrying or thinking about it will make any difference. I know this can be easier said than done though 😉

The Plan Of Attack

After dinner, the lead guide put two of us to every one guide. It’s the law or rules of the Alpine association I believe that there must be one guide for every two people. We then broke off to have a chat with our respective guide.

The general plan was to be up and out by 4:30am. We would spend the first two hours ascending upwards by scrambling up over the rocks to reach the Gouter Hut at 3835 meters. From there we would hit the snow for the summit of Mont Blanc, probably about 6 hours to the summit from there. With about an eight hour trip back, we could expect to be  out for up to 14 hours! A long day lay ahead.

I would be summiting with a chap I had met in our group from London. He was a really nice guy. Our guide was an American chap from Colorado. Again, a really nice guy who really put us at ease and answered all our questions. He just said the same as above, you will make it or you won’t, no point burning up nervous energy thinking about it. Go with the flow, enjoy the moment, keep putting one foot in front of the other, do your best and you’ll be good!

Conclusion

So, the big day was finally here. The weather was looking great, I seemed to be handling the altitude OK and I was fit enough so this was it! It was exciting. We went to bed early and I really hoped I would get a few hours sleep. My sleeping at altitude to date had been abysmal lol 🙂 and I had the cold lurking in the background. Some good rest would definitely be appreciated, that was for sure!

No going back now though 😉 The day was finally upon us!

Have you climbed Mont Blanc? Have you stayed in the Tete Rousse Hut? We’d love to hear about it in the comments below!

To go back to part three of this series click here. To go to part five, click here.

Hiking In The Italian Alps – Part Three – Climbing Gran Paradiso!

In the last post I had left things off at having woken up after a very sleepless night! Even though I was very tired, I was still very excited and raring to get started on the climb ahead.

We got up early that morning at about 4:30am for a 5am departure. This sounds crazy but it makes a lot of sense to do this in the Alpine environment. There are three main reasons why setting out early is best which, if I recall correctly, are listed below:

  • The snow is still frozen in the morning so when walking over glaciers, the more frozen the snow on them is, the safer they should be to traverse
  • As the day progresses it heats up and so storms / inclement weather are much more likely in the afternoon and evening
  • If you summit early, you descend early. Again, the snow will be more frozen earlier in the day and so it is easier to walk over

To give you an idea of what lay ahead of us, the pointy mountain above my head in the picture below, that was where we were heading for!

Gran Paradiso From The Chabod Hut

We started off up the mountain over snow still hard from the evening before’s frost. The plan was to hike up until we reached the side of a glacier where we would need to put our crampons on and rope up.

This first bit wasn’t too bad. It was early in the season so not many folks had been up to the top of Gran Paradiso as yet. Therefore, there weren’t a lot of trails in the snow, as such, to follow. It makes things that bit easier when traversing over relatively recent snow if someone has already done the hard work of clearing away a bit of a trail for you. In saying that though, we got up to the side of the Glacier just fine.

Crossing a Glacier

When we got to the glacier we stalled to have a quick drink and bite to eat. We also took our snow shoes from our packs and left them beside a series of rocks as we wouldn’t need them until we came back down and so any extra weight is gratefully avoided.

At that point we also put our crampons on and roped up. The reason we did this is that when walking across a glacier it can be very easy to fall into a crevasse. A crevasse is effectively a hole in a glacier that snow and ice fill up. Over the season the glacier moves and the hole becomes unstable. If you happen to walk over it at this time, boom, you can quite easily fall in! Sounds very dramatic but again with expert guidance and skill, this risk is greatly minimized.

Crampons

It’s worth mentioning a few lines about crampons if you’re not familiar with them. They are effectively boot attachments that have metal spikes sticking out of them, see the picture below, from various angles that enable you to walk comfortably on ice and over hard snow. They’re perfect for walking on a glacier and, surprisingly enough, really good for scrambling over rocks, as I was to find out later on climbing Gran Paradiso and on my Mont Blanc Climb.

Crampons

They’re pretty easy to attach to the your boots. You need to get them fitted appropriately as they need to be very snug and tight on your boots. These bad boys are crucial so take the time to get them fitted right!

Roping Up

The next element, critical to safety when crossing a glacier, that’s worth delving into a bit for someone new to all this, is roping up. We were tied together, as such, by a rope. This rope ran between five of us plus a guide and was attached to each of us using karabiners attached to our harnesses. The rope ran through securing each of us to one another.

Roped Up On Gran Paradiso

There’s a knack to walking with the rope. When you walk, you always leave enough distance between each person so the rope is always just touching the ground. This means that if anyone was unfortunate enough to go into a crevasse, the stability of the other people on the rope should easily support them and they can easily climb back out of the crevasse with hopefully a shocked face at worst.

The tension in the rope when doing this is critical. Too loose or too tight and it won’t have the same stability and can have a tugging effect if someone were to fall. The distance is also critical, people need to be far enough apart so if one goes down the others are still on solid ground.

Finally, you need to watch which side the lead person, who will usually be the guide, has the rope on. Everyone should follow suit and walk with it on the same side. The reason for this is that if one person is unaligned and someone falls into a crevasse, the rope can sweep from the wrong side and pull the feet from underneath them and with the additional weight to the person falling, a domino effect can ensue. Doesn’t sound good!

So, as you can see, only a few things to consider 😉 It took a bit of getting used to but with practice it worked out fine and everyone soon got the hang of it.

The Guts of the Upward Part of the Hike

We continued onward and upwards using the roping method mentioned above. I have to be honest and say it was hard work. In saying that though, I was in the middle and our guide was at the front. as there was no visible trail he had to effectively stamp one out in the snow.

The snow was normally knee deep and deeper than that in places. I can only imagine how hard it was for him to stamp out a trail which we would then follow in. He is a seasoned guide though so well used to it. We continued on up over the glacier. The morning had started to break at this point and the scenery was just fantastic.

Scenery From Gran Paradiso

There isn’t too much to add to this period of the climb, it went on for about 4 hours and while it was hard work, the views were stunning. We had a quick stop every hour or so to have a drink of water and a quick bite to eat.

A key thing the guides all emphasize in the Alps is maximizing your break time. As you’re against the clock for the reasons mentioned above, it is better to keep a steady and consistent pace with minimal breaks. For these kind of treks, you will be out most of the day so you need to keep your energy up but you don’t have time to stop for a long lunch!

Therefore, the motto is eat little and often and drink while you move. This is easier said than done in some ways as you can’t really use a bladder at those altitudes as the tube will likely freeze so drinking on the move can be a bit tricky. In saying that, I found the short breaks every hour to be enough to get some water in.

However, as mentioned above, these breaks are usually used to do something specific e.g. put your crampons on, add another layer, or so on. This is were you need to be thinking ahead and multitasking so you’re having a bite to eat while you’re changing layers and that type of thing. Time is of the essence so, like everything in the Alps, it must be used efficiently!

Gear and Supplies for the Trek

It’s worth adding a note on what you need to bring with you. Again the Mont Blanc Guides are brilliant at helping you with this and they will tell you exactly what to bring. The goal is to be as lightweight as possible so you can travel efficiently with speed. Therefore, you don’t want to be carrying any needless extra gear with you.

You will find that a lot of your regular hiking gear, waterproof hiking jacket and so on, will be perfect but you do need to get specialized gear too (see crampons, etc. above) but this stuff can be hired from the MBG team.

It is also worth noting that you will need some basic medical supplies e.g. stuff to treat blisters, aspirin, etc. Aspirin is useful to help thin the blood if you’ve a headache at altitude, I definitely found it effective.

Aside from the appropriate gear, of which there is a lot, you will of course need food and water. There is any manner of things you can take with you but think along the lines of minimal input in small amounts to get maximum output! Therefore, take anything from fruit, to cereal bars, to gels, to a couple of small sandwiches. A range of food is preferable as you’ll be out for the day but it needs to be easy to carry, easy to access and easy to consume.

Water is of course critical and you need to carry enough to drink. I am a particularly thirsty person so I needed lots of it. However, I learned a neat trick from one of the guides on the way back down from Gran Paradiso. You can stuff some snow into your water bottle, make sure it’s clean, and put your bottle in your bag close to your back. After carrying it for a while, the snow will melt and you’ve a nice cool drink of water!

I used a variation of this and added some snow to hot fruit tea I had left when my water ran out. I didn’t fancy a hot drink as it was a hot day with the sun beating down so I added some cool snow to the fruit tea. Badda-bing, I had  a nice and tasty ice cold fruit tea drink. Worked a treat!

Finally, as with any hike in the cold and somewhat contrary to the last paragraph, a warm drink is a nice option to have so a flask of tea or coffee is a winner. It is normally pretty cold high in the Alps, even in summer. I enjoyed a cup of hot tea at the summit before I did the ice trick on the way back down 😉

The Summit of Gran Paradiso

Eventually our trek upwards came to an end and the summit was in view. The summit of Gran Paradiso is interesting in that you need to do a bit of scrambling to get to the top. The snow stops and there’s a short rocky climb to the top where there is a statue of the Madonna.

Now, as we were at the summit it got a fair bit windier. Before we started out onto the rocks, our guide told us that we would need to attach our rope to a karibiner clip in the wall of the summit for safety. I wasn’t sure why this would be needed but we soon found out as you can see in the photo below.

Climbing To The Summit Of Gran Paradiso

Yep, it was a little bit scary at one point but we just got on with it. I took the photo above from the top and the photo below is me beside the Madonna (you can’t see the statue).

On Top of Gran Paradiso

So that was that, we’d done it! We made it to the top. It was all the sweeter as it was also my birthday! So I could say that I climbed the highest mountain in Italy on my birthday. That was pretty cool!

The view from the top of Gran Paradiso was of course stunning. Check out the short video below for a small taster:

Heading Back Down to the Chabod Hut

At this point, I thought, well that’s the hard work done, we made it to the top. Oh boy, was I wrong! Even in my normal weekly hikes at home, I always find it easier to go up than to go down. This was no different and if anything, emphasized it more. As the guide told us, you need about a third of your effort to get up and two thirds to get back down!

We started out back down the mountain at a fast pace. It was a beautiful sunny day and while this was great for the scenery, it wasn’t so great for the firmness of the snow. As the day progresses and the sun shines, the snow melts and it gets harder and harder to walk on as your legs just sink into it. Also, going across the glacier again, the risk of falling into a crevasse increases.

So, in short, it was best for us to get our asses in gear!

We bombed down the mountain at a very fast pace. Not being used to walking in snow, it was tough going as your legs sink into it time and again. The nearest thing I can compare it to is walking in deep bog. Never pleasant or easy!

We eventually got to where we had left our snow shoes and we put them on. These were to help us walk over the melting snow but I found them very difficult to get the hang of andBirthday Picture 
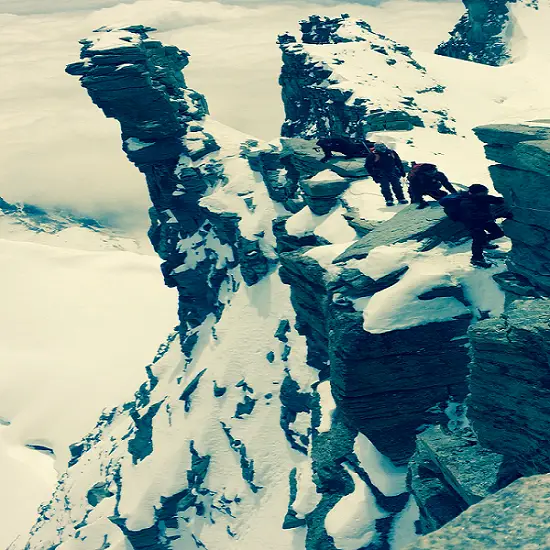
so I kind of stumbled my way back to the hut lol 🙂 At that point we were over the glacier so the main dangers were over for the day.

We eventually got back to the hut. All in all we had been out for 11 to 12 hours! I was physically exhausted but it had been a good day. One slightly concerning thing I noticed though was that I had a bit of a snivel in my nose. I forgot about it but this would soon develop into a full on cold and chest infection.

We got back to the hut, got our gear off and had dinner. Man that hot food tasted amazing after a day like that! As it was my birthday, the guides kindly got me a surprise cake and a rendition of happy birthday was sang out in the hut. A nice end to a fantastic day!

Conclusion

There was a lot of great banter among all the Guys on the trip so there was never a dull moment. With the day over, we headed for bed with a late enough start at 6:30am the next day. The plan was to walk back down to the vans in the car park, at an easy pace, and drive back to Chamonix for a day of rest before undertaking the big one, Mont Blanc!

Unfortunately, even though I was exhausted I again didn’t sleep that well. My cold also started to develop a bit more so it was another uncomfortable night. The next morning we hit the trail back down to the vans. It was another beautiful morning and it was a really pleasant hike back down to the car parks. We got back in good time and headed back to Chamonix stopping for a gelatti and a coffee on the way.

It was an amazing experience and we all felt confident we could take on Mont Blanc now!

Have you climbed the Gran Paradiso? What was your experience? We’d love to hear about it in the comments below!

To go back to part two of this series, click here. To go to part four, click here.

  • 1
  • 2
  • 3
  • Next Page »
  • Facebook
  • Pinterest

What are you looking for?

Copyright © 2025 · Cool Hiking Gear

Cool Hiking Gear is a participant in the Amazon Services LLC Associates Program, an affiliate advertising program designed to provide a means for us to earn fees by linking to Amazon.com and affiliated sites.

  • About This Site
  • Privacy Policy
  • Affiliate Disclosure Statement
  • Contact