coolhikinggear.com

  • Men’s
    • Best Hiking Rain Jackets for Men In 2024
    • Best Men’s Hardshell Jackets Of 2023
    • Best Hiking Pants For Men In 2023
    • Best Ultralight Rain Pants For Men
    • Best Men’s Daypacks For Hiking In 2023
    • Best Backpacking Backpacks For Men In 2023
    • Best Base Layers For Men In 2023
  • Women’s
    • The Best Hiking Rain Jackets For Women In 2023
    • Best Women’s Hardshell Jackets Of 2023
    • Best Hiking Pants For Women In 2023
    • Best Ultralight Rain Pants For Women
    • Best Daypacks For Women
    • Best Backpacking Backpacks For Women In 2023
    • Best Base Layers For Women In 2023
  • Hiking Accessories
    • Best Hiking Poles
    • Best Trekking Pole Monopod Camera Mount
    • Best Hiking Headlamps
    • The Best Hiking Watches In 2023
    • The Best Hiking Gloves In 2023
    • Best Hydration Bladders For Hiking In 2023
    • Best Compass For Hiking Our Top Picks
    • Cool Hiking Gadgets
  • Footwear
    • The Best Men’s Hiking Boots In 2024!
    • Best Hiking Shoes For Men In 2023
    • The Best Women’s Hiking Boots In 2023!
    • Best Hiking Shoes For Women In 2023
    • Best Hiking Sandals
    • Best Hiking Sandals For Women in 2023
  • Hiking Guides and Resources

Hiking In The Italian Alps – Part Two – Climbing Gran Paradiso – The Chabod Hut!

When I left off part one we had left for Italy in mini buses for Italy to summit the Gran Paradiso in Italy.

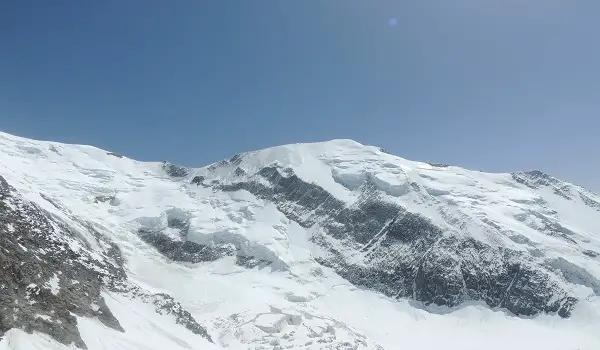
Gran Paradiso is in the Graian Alps and reaches a height of 4061 meters. To the best of my knowledge it is the highest mountain in Italy, that is, the highest mountain with it’s entirety being in Italy. Now, I am happy to be corrected on that. Mont Blanc of course straddles France and Italy so technically, I guess Mont Blanc is the highest mountain in Italy. Not sure who gets to call it their own!

Either way, it’s a high mountain by anyone’s standards. Now before continuing, I should add some perspective from my experience. Before this, the highest mountain I have ever climbed was about 1200 meters. So, as you can imagine this was quite a change for me.

The plan was that we would get to cut our cloth, so to speak, on the Gran Paradiso and this would give us a real taster for Mont Blanc. It would also give the guides the opportunity to observe the group to check for fitness and so on.

Another key element of this first leg of the trip was to begin the acclimatization process. While climbing Gran Paradiso we would spend two nights in the Chabod hut. The hut is 2750 meters above sea level. The body starts to react to altitude after about 2500 meters so we would get to spend a couple of nights at that altitude employing the ‘climb high sleep low’ acclimatization method after climbing to the top of Gran Paradiso. This all goes to help you acclimatize to the higher altitudes required for Mont Blanc.

Day Two Continued – Off to Italy

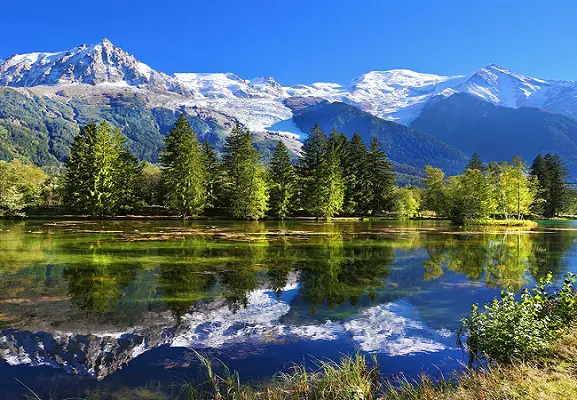
We left Chamonix and headed through the Mont Blanc tunnel for Italy. As a note, watch the traffic on the Mont Blanc tunnel as it was pretty horrendous from the French side while we were on our way back. I believe there is a website which gives you average wait times depending on when you plan to go. Entry into the tunnel is strictly monitored after the tragic fire in the tunnel back in 1999 so even with little traffic you can expect to queue a bit.

When we got to Italy we headed to our first location where we would park the vans for the next couple of days. We got out of the vans and got our gear ready, boots on and prepared to head upwards into the alps to our first hut, the Chabod hut. More about that in a bit.

Getting Ready In The Car Park

This was the first time we wear putting everything into / onto our packs so it took a bit of double checking. I has never really used all the loopholes and so on on a backpack before for winter gear so it was good to pack it all up.

The guides were great and showed us how to fit our ice axes, snow shoes, etc. to our backpacks. This again demonstrates the necessity for having experts showing you what to do as you simply would not know how to efficiently pack all that type of gear for carrying without being shown by experienced guides.
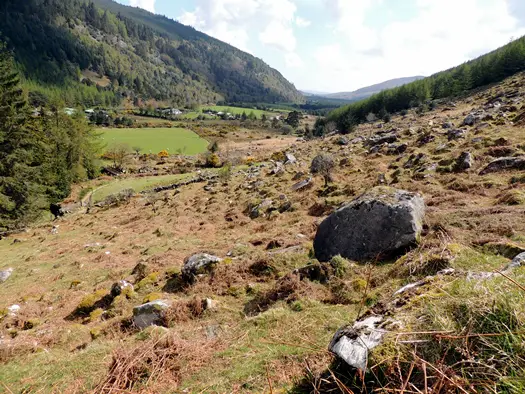
The Forest Path

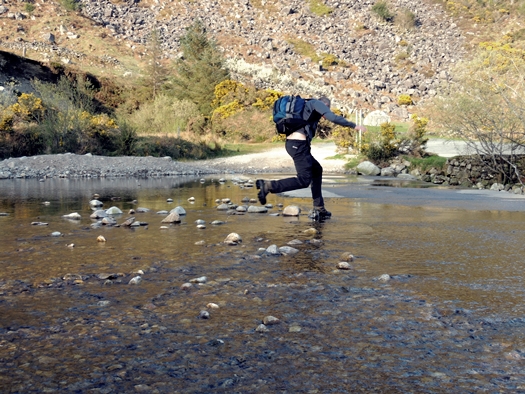
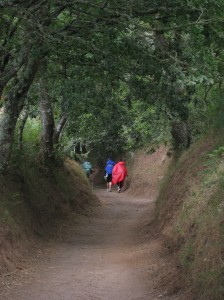
The hike started from about 1800 meters with a beautiful walk up a zig zag path. The scenery was like something out of the Sound of Music. Beautiful Alpine hills engulfed in fresh Alpine air. It really was a sight to behold and a pleasure to hike in. The sun was shining and we even got to see some of the local wildlife when a beautiful Ibex decided to cross our path.

Walking Through The Forest

The walk was pleasant and we continued on in this vein for about an hour until we reached the end of the forest and the beginning of the snowline. This was the first time we encountered snow albeit that it was very patchy and dotted around and about at this stage of the hike.

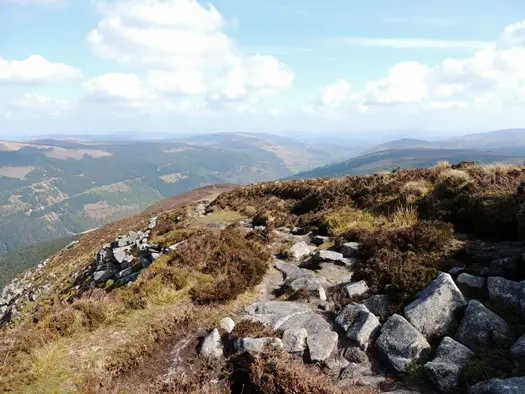
The terrain gradually got more rocky as we ascended and the path got distinctly steeper. The sun was still shining though, so it was quite a hot day to be hiking. The air does start to cool noticeably though too as you ascend. We continued at a steady pace until we reached the Chabod Hut.

The Chabod Hut

We all headed in and got settled down before our first evening meal which was to be prepared by the hut guardian. All was well and we had plenty of time to enjoy the late afternoon sunshine over a beer or a coffee.

The Hut Experience

Huts or Refuges are dotted all over the Alps. There are two kinds, manned and unmanned. A manned hut is a hut that is ran by what is known as a guardian. The guardian lives in the hut and provides various services to guests when they stay e.g. dinner, etc. Other unmanned huts have no guardian and are usually very basic with some blankets, some kindling and fuel to make a fire and so on.

In a manned hut, the guardian will, to the best of my knowledge, only be present during the spring / summer season. They and their team will stay there throughout the season taking care of their guests. The unmanned huts are normally open to all and offer shelter from the storm, so to speak, in bad conditions.

We didn’t stay in one of the unmanned huts although there was the winter hut for the Chabod just above the one we stayed in which we walked past on the way to Gran Paradiso the following morning. It was locked and I think it is only open when the other one is closed.

Huts can be both privately owned, as the Chabod is, and government owned, normally by the countries Alpine association. My understanding is that they all offer a broadly similar service but some are known to be better than others though.

The rooms in the huts are dormitory style with bunk beds which can sleep anything from 12 to 40 per room with the biggest huts sleeping 200 people at a time. The huts sleeping quarters are basic with a bed, duvet and pillow provided ( bringing a sleeping bag liner is a good idea 😉 ). Toilets are there but there may or may not be running water. Yes, you read that right, running water may not be available which is fair enough if you consider how far up you are. The Chabod does have running water though.

Another thing to mention is that the dorm rooms don’t always have lights, or the lights may be turned off centrally at night. This is where a headlamp comes into play, a must if you need to go to the boys room in the middle of the night, be careful not to shine your torch in someones face while they’re sleeping though, be sure to point it at the floor.

Black Diamond Spot Headlamp

The first ‘fact of life’ within the huts is to prepare yourself to have, more or less, the basics. Showers are unlikely and were not available in any of the huts I stayed in. Therefore you can expect not to have a shower for 2 to 3 days. This is all the more unpleasant to think of when you realize that you’ll be exerting yourself all day and therefore sweating a lot. It sounds nasty but it isn’t that bad. You’re in the mountains remember so man up! 😉

In all seriousness though, you get used to it pretty quickly. The one thing I didn’t adjust well to personally is that the rooms are naturally a bit damp and cold. That’s to be expected at high altitude. Unfortunately I think it helped me on my way to a cold / chest infection after my first day or two using them but that’s just the luck of the draw and little can be done about it. If you can, bring a change of top and stay warm to help prevent anything like this. The rooms do warm up when everyone is in them at night to sleep though.

The huts have rules like anywhere you stay so be sure to familiarize yourself with them. Always be sure to leave your bed made up as you found it and discard any rubbish appropriately.

Every hut will have a main room where you can buy drinks and snacks. This also doubles up as the main dining room when you’re eating dinner or breakfast. This will definitely be the warmest room in the place and so you will spend most of your time there, if not outside, when you’re waiting to go out on your hike or climb.

The folks in the Chabod hut were really nice and cooked a great meal for us each night we stayed there.

Dinner In The Chabod Hut

The other key part of the hut is the boot room. Similar to when skiing, the boot room is there so you leave all your wet and dirty gear aside before entering into the main living areas. Every hut will provide slip on sandals for you to pop on for walking around the hut in. The boot room will be the place to leave a lot of your gear e.g. your harness, ice axe, etc. Sometimes there are lockers and sometimes not, depends on the hut you’re staying in.

If you can, take some of your gear out into the sun if it’s shining as it won’t really dry properly in a dark boot room. This is not always possible but it is nice to have your hiking socks and boots dry if you need to put them on again in the morning.

My First Night At Altitude

OK, so my first night at altitude. Nothing crazy high, just a bit over 2500 meters. I was a little nervous as I of course wanted to adapt to it and not have altitude sickness ruin my trip.

I was fine when we reached the hut but I had an ever so slight headache. Nothing major and it could have been for any number of reasons so I wasn’t that concerned. We had dinner and afterwards we learned that we needed to be up at 5:30am the following morning to get breakfast so we could be on the trail for the mountains by 6am. This meant an early night made sense. It was a bit earlier than usual but I thought, hey no problem. Get to bed and get some rest to be fighting fit in the morning!

I wish :-/

I could not get a wink of sleep! Sleeping in a dorm with a bunch of folks of course brings on the usual suspects, snoring, etc. However, I had ear plugs and figured I’d sleep eventually. No siree bob!

There was snoring for a time but even when that subsided I still couldn’t sleep. I had numerous trips to the bathroom throughout the night too. When going to altitude it is important to stay hydrated so we all drank a lot of water beforehand and while there. This is a good idea, within reason, but as I couldn’t sleep, I spent all night going back and forward to the bathroom using my head torch to see my way. Also, as I mentioned above, the dorms can be a bit cold and damp so they’re not exactly a nice place to be sleepless in.

I must have drifted off for an hour but next thing everyone was getting up. Man I was p*ssed off lol 🙂 Tired with a massive climb ahead of me, I was not a happy bunny but I thought what the hell, get on with it.

As an extra note to this, I was to find out later when chatting to our guide, no sleep is a regular occurrence for many and entirely normal on your first night at altitude. Good to learn that I was still in the normal bracket but I was still none too chuffed. I was soon to learn that sleep is a valuable commodity high in the Alps 😉

Conclusion

As I’m writing, these posts are getting a bit longer than I thought they would be 🙂 so I think I will cut this short for now and revisit the climb to the top of Gran Paradiso in the next post.

So that was it, I had survived my first night at altitude. My head hadn’t exploded, I hadn’t fainted and even though I was one grumpy and discombobulated mofo that morning, I was still very much in the game with regards to altitude. Happy Days!

Have you ever stayed in a hut in the Alps? What was your experience? Did you have any issues adjusting to altitude? I’d love to hear about it in the comments below!

To check out part one in this series, click here. To go on to part three, click here.

Hiking In The Alps – Part One – Climbing Mont Blanc – Getting Started!

I am not long back from the most amazing hiking / mountaineering trip I have ever been on. As I mentioned in some previous posts, this year I wanted to take on some bigger challenges with my hiking adventures and so decided to go hiking in the Alps with the main goal of climbing Mont Blanc.

Well, the good news is that I successfully made it to the top of Mont Blanc. It wasn’t easy and likely the hardest thing I have ever done! However, it was an amazing experience. I am back home now with a day or two off before normal day-to-day life resumes.

Mont Blanc From Tete Rousse

I am glad I left myself an extra day or two to recoup after the trip as I have some war wounds like blisters and my body is still pretty achy after being pushed pretty hard over the last week. On top of that I have a cold that I caught while on my trip. Yes indeed, I climbed Mont Blanc with a cold / chest infection. Not ideal but at the time I convinced myself it was just a snivel and got on with it.

There is so much to cover for this amazing trip over the last week so I reckon I will break it down over a series of posts over the coming weeks. There’s much to cover.

The two main events of the week were climbing Gran Paradiso in the Italian Alps as a primer for Mont Blanc, and of course climbing Mont Blanc, see the picture above, itself. My goal with these posts is to give you a good flavor, from my own experience, of what to expect if you take on a trip like this and to tell you how I went about it. If you’re planning to take on a similar challenge soon, hopefully you’ll find the information useful.

I mentioned this when I first decided to do Mont Blanc back in January but I will say it again here before I get started, unless you’re an experienced Alpinist or mountaineer, you need professional help and guidance to take something of this magnitude on. In my opinion, this is simply not optional. The company we went with were just superb so I will let you know all about them below.

So, where to start …

Choosing A Company

I think the best place to start is with the company you choose to guide you to the summit of Mont Blanc. As mentioned, professional guidance is essential for an undertaking of this kind. There are many options available but based on a personal recommendation we received from a friend last Christmas, we chose a company called Mont Blanc Guides.

After having spent the week with them on this journey I can only second my friends high recommendations and say that if you want to climb Mont Blanc, there is no better company to choose than Mont Blanc Guides.

Mont Blanc Guides are based out of Chamonix and I think what really set’s them apart from other companies, who offer guided climbs to the top of Mont Blanc, is that they specialize in climbing Mont Blanc. With that as a central tenet of their offering they have of course built up very specific experience over the years.

This is key in so many ways as they have a clear understanding of all the concerns and obstacles someone may face when considering taking on Mont Blanc. To that end they have very clear instructions on their website and also when you sign up on all aspects of the endeavor. From training to gear, travel to what to bring with you, they have it all clearly laid out from the start.

On top of this, a key aspect of climbing Mont Blanc is safety. It is a dangerous environment to enter into if you do not know what you’re doing. The Mont Blanc Guides safety record is impeccable and as they clearly state from the start, safety always comes first.

Finally, it is also worth mentioning the logistics that are involved in moving a group of people around to enable them to climb Mont Blanc. Take it from me, there is a lot going on in the background and the MBG team have it all taken care of so you can focus on the climbing which, I can assure you, is more than enough to keep your body and mind occupied 😉

There are other options available but I think you are unlikely to find a more professional and specialized offering than what Mont Blanc Guides offer.

Logistics

Any attempt at Mont Blanc will likely be based from the small town of Chamonix-Mont-Blanc. To get there you need to first get a flight to Geneva airport in Switzerland. There are several transfer options available to get from the airport to Chamonix. The most convenient and economical seem to be the mini buses.

These buses take about 8-10 people at a time and cost roughly 60 euro return. They leave on a timetable type basis and they agree with you a pick up window on your return. It is more or less door to door for multiple people. Think of a shared taxi. We used the chamexpress and I found them to be spot on.

As alluded to above, there are a whole lot of logistics involved in the trip, for example:

  • Gear hire – you need a lot of stuff for the climb that you are unlikely to purchase for once off use e.g. an ice axe, harness, etc.
  • Base camp (if you will) accommodation i.e. a central location in Chamonix to base yourself from
  • Mountain hut booking – these are huts in the Alps you base yourself in to acclimatize and set out from when climbing
  • Travel to and from the base of the mountains to begin the climbs
  • Meals – breakfast and dinner were provided for
  • Hiring professional guides
  • Etc.

Thankfully this is all taken care of by the MBG team. I’ll touch on some of these items in the detail below but from an experiential rather than an organisational point of view. One can safely assume though, that the organizing behind all of this is considerable.

Day One – Getting Settled in Base Camp

We flew in on Wednesday on a red eye. I had a 4:45am start, yikes, but that was to become quite the norm over the coming days! As mentioned above, we got the chamexpress to Chamonix. We got to our destination which was a really nice chalet in Chamonix.

We got there early enough in the day, around noon, so we got our rooms and were told to head back for a meeting at 6:30pm. By then the whole party would have arrived. Ah, I should add … I was there with two of my mates but the total group was to be twelve made up from other folks.

At this point we were told to just head into Chamonix and enjoy the afternoon, so off we headed to downtown Chamonix!

Place de l'Eglise Chamonix

Chamonix is a small French town / village. I reckon there is about 10 / 15,000 people living there but I think a lot of them may be transient folk. That is to say, Chamonix is a popular destination for mountain activities all year round. Be it hiking in the Alps in summer or ski touring in winter. There is a lot on offer. Therefore I think there are a lot of folks who come and stay for a season or come in for a week or two as we did.

The fact that Chamonix is a mountaineering and outdoor sports mecca in the Alps is clearly seen in the list of shops that are available in Chamonix. It is predominantly filled with either:

  • Outdoor Gear Shops – and I mean every brand name under the sun seems to have a store here
  • Souvenir Shops – tourist tack is always a must – I left with a bag of it lol 😉
  • Nice Restaurants – anywhere I ate whilst staying there was just great

There are of course the standard run of the mill shops like the pharmacy, supermarket and so on too but you can tell you are in a very popular destination where a lot of money flows. It is also worth noting that Chamonix, as it seemed to me, was still a very charming and tasteful location. That is to say, it didn’t have the feeling of being totally overran by commercial interests. While there are plenty of those, it is nestled in the bosom of the Alpine hills and forests with stunning mountain vista’s in the background so it has quite the backdrop.

Lazing About Town

We spent the next few hours of day one just lazing about town and getting some initial bearings. We of course were hungry after a long journey and so got our first sample of the local cuisine in a place called Moo Bar. A local restaurant with a Swedish theme I believe. I got tucked into one of their pork burgers, highly recommended, which definitely filled a hole. After that we headed back up to the chalet to do a bit of unpacking and waited for our meeting at 6:30pm.

The Meeting

6:30pm came and we headed into one of the main rooms for our initial meeting with the MBG folks and to meet our fellow climbers. The Director of MBG was there, as well as our lead mountain guide for the week ahead, and led the conversation by explaining how the week ahead would work.

Again, it was all very clear and concise. He walked us through what would happen day by day and walked everyone through a video covering the planned route. He also reviewed what the chances of making it to the top of Mont Blanc were. Mont Blanc Guides are very clear from the get go that success will be influenced by how things fair under the three broad categories below:

Fitness:

The main item under your control is fitness and you should prepare adequately in advance to ensure you’re able for the climbs ahead. MBG provide loads of information on how best to prepare well in advance so you’ve no excuse not to be ready and fighting fit! I did a lot of hiking carrying a weighted backpack as well as my normal couple of strength and conditioning sessions in the gym each week in preparation.

Altitude:

One of the great unknowns! I did a post a while back on altitude sickness but in short, you simply don’t know how your body will react when you go above 2500 meters. Some cope easily enough while others start to show the signs of altitude sickness straight off the bat!

Interestingly, as an aside, I assumed that when you were in altitude before and you were fine, the same would apply when you went back to altitude. Not so apparently. You can be fine on one trip but it may come knocking on your door on another day when again at high altitude.

The Weather:

Simply put, if the weather isn’t in your favor, it ain’t gonna happen. Mont Blanc is just too dangerous to risk being up there in a storm or white out which presents a whole range of other very dangerous problems. Again, this is where expert guidance is crucial. Your guides know how to judge the weather and what to do should it turn on you.

The MBG Director and our lead guide covered any queries anyone had and finally referenced an FAQ document which was available throughout the chalet which would cover any questions we likely had. They’ve been doing it for some time so at this stage, nearly every question under the sun has came up at some point so handy to have everything documented everything for easy reference. It made good reading and definitely answered any questions I had.

Day Two – Gear And Gran Paradiso

This day can be split into two main events 1. sorting out gear and 2. heading for Gran Paradiso. This post is already quite long so I will only look at the first item here before closing it off for today.

Gear

A key aspect of climbing Mont Blanc is of course your your gear. You need quite a lot of stuff to do it comfortably. Much of it, like a rain jacket, waterproof pants, etc., a regular hiker will already have. However, a lot of it they won’t and it will need to be either bought or hired. Again, the MBG website clearly lists out exactly what you need to take with you and also lists out what bits you can hire from them when you arrive.

Gear To Carry

It was really handy to be able to hire some of the bits from MBG as you would not want to buy them to probably never use again, or have to head off into town looking for a hire shop. So the morning started by heading down to the gear room in the chalet to get fitted for some required bits and pieces e.g. boots, crampons, etc.

When that was done, we then had to lay out all the gear we brought with us on our beds in a military style fashion so that one of the guides could come around and take a look. This was to enable them to make sure we had everything we needed for the days ahead. Again, this was really useful to do as even though I thought I had everything, one or two of the things I had weren’t best suited. The guys made a list of required stuff we needed to get and then it was off into Chamonix to purchase.

As mentioned above, Chamonix is a mecca of outdoor gear shops so you have a massive selection. If you want top brand names or the cheap as chips but functional version, they’re all available. We got our missing bits and then headed back to the chalet and packed our gear up.

This was it, all the preparation had been done at this stage. We rendezvoused around noon and hopped into mini buses and headed for the hills. Our first destination was Italy where we were to climb Gran Paradiso. This would give us a real taster of what to expect on Mont Blanc so it was exciting and a little nervy too if I’m honest lol 🙂

Conclusion

So, that was it for the first day and a bit of the trip. There was loads more going on but I have already wrote way more than I’d planned. I thought it would be useful to cover some background of the logistical side before going into the fun stuff of the actual climbs.

As mentioned at the start, this will be a series of posts. In the next installment we’ll take a look at how we got on with the Gran Paradiso in the Italian Alps. Lot’s to come!

Have you climbed Mont Blanc? How did you go about it? We’d love to hear about it in the comments below!

To check out part two in this series, click here.

The Mont Blanc Trip Begins!

OK, well the day has finally arrived … well nearly 😉 Tomorrow morning I head for the airport for a red eye to Geneva. From there I will be taking a transfer to the beautiful town of Chamonix-Mont-Blanc. By this time next week hopefully I will be able to say that I have hiked and climbed to the top of Mont Blanc!

The Itinerary

The rough plan is that after we arrive in Chamonix, we will get settled into our digs for a few of the days while we are there. This will be a chalet in the valley, I think we will be staying here for about 2 or 3 days of the trip.

Chamonix Mont Blanc

Day one, which is Thursday, will involve a lot of intense training. This will be about how to use the appropriate gear correctly. For example, crampons, how to be roped to someone and so on. This will be a really critical part of the trip as these skills are the ones that will keep us all safe. I expect a busy day with a lot to take in but I am looking forward to it.

Head For The Hills

I think come Friday we will head for the hills. As we make our way up, I think we will take every opportunity to practice all the skills from day one in the real environment. The first mountain we climb is Gran Paradiso.

It goes to a height of, approximately, 4000 meters. I think this is really where we cut our cloth with regards to all the skills we learned on day one. I think we will try and summit on either the Friday or Saturday, not 100% sure. All will be weather permitting of course.

Then I think we aim for Mont Blanc itself  on the Saturday / Sunday / Monday. As I understand it, a three day window is left open to try and give ample opportunity to get up it as the weather can be very unpredictable. As I mentioned in my post on Mont Blanc earlier in year, it is possible that you go all that way and you don’t get to climb it. If the weather isn’t suitable, it’s just too dangerous.

The evenings we’re up in the mountains we stay in the huts. I think there are a couple at the base of the main ascent routes to the top of Mont Blanc. I haven’t seen one of these huts but they sound comfortable enough. I doubt they’re the Hilton 😉 but they have bunk beds, food and are warm so they should be fine after a long days trekking!

I’m really looking forward to getting to see and hike in the Alps!

Scenery From Gran Paradiso

Getting Ready

Well, I am off work today, the day before I go, so I have plenty of time to get ready. The company we are going with gave us a detailed and extensive equipment list which I got the last few bits for this morning. I have everything, more or less, packed up and ready to go. Everything else I will hire when I get there.

I actually have my rain jacket in the washing machine reproofing as I type. Figured it was a good idea to give it a wash and a reproof before heading over. If you don’t know what reproofing is or if you want to learn more about how to care for your waterproof hiking jacket correctly, check this post out.

Conclusion

So, that’s really that for this post. It will probably be quiet here until I get back next week. I assume I’ll have lot’s to share about my experience.

I am really looking forward to it. There will be a lot of stuff to take on board and it will be an alien environment to me. I’ll also have altitude to deal with which is another new experience. It’s challenging and exciting, that is for sure.

Hopefully this time next week I will have been to the top of Mont Blanc 😉

Lugnaquilla In The Wicklow Mountains

It was Easter Saturday last weekend and with a long weekend in play, some time to relax and a good long hike were on the cards. To top that off, it was a really sunny day when we got up on Saturday morning. All the signs were good so we got our gear together and headed for the hills!

The hike we decided to do was Lugnaquilla mountain in the Wicklow mountains in the province of Leinster Ireland. The Wicklow mountains are very accessible from Dublin city center and so are a popular haunt for tourists as well as weekend hikers coming from the city at the weekend.

The Wicklow Mountains form the largest continuous upland area in Ireland and were formed in the last ice age. They are located in the middle of County Wicklow in Ireland but they branch out into Counties Dublin, Carlow and Wexford. The mountains themselves are composed mainly of granite but other older rocks do form part of the geological makeup of the range. Many major rivers are sourced from the Wicklow mountains and the area itself has a lot of history running as far back as the 6th century.

As mentioned, the Wicklow mountains are a very popular tourist attraction and they provide a handy location for weekend hikers coming from Dublin city. With that in mind, they are officially a national park in Ireland and protected as such under European law.

Getting Started

To get started on this hike you need to head out of Dublin south on the M50 motorway. Take the exit marked Glendalough / Kilmacanogue and follow the signs to Glendalough and Laragh. When you get to Laragh, just before Glendalough, take a left at Lynams pub, located in the middle of Laragh, and follow the road for about one to two miles until you come to a a sign pointing right to Glenmalure.

Lugnaquilla Waterfall

At the junction take the right to Glenmalure, and follow the road for about three to four miles, that’s approximate, until you come to a crossroads on the road with a big pub called the Glenmalure Lodge on your left hand side ( This is a really nice spot and perfect to stop into for a quick coffee, beer or bite to eat after  your hike 😉 )

Take the right here in the opposite direction of the pub and follow the road for about one to two miles.

As you drive up the road you will have mountains on both sides of you with the ones on your left more visible. Keep going until you come to a waterfall running down the side of the mountain on the left hand side. You can’t really miss it, but I’ve taken a shot of it here to hopefully help identify it.

Now, this is the first place you can park up on the side of the road for this hike. It’s a little hard to get a definitive point on the road on Google maps but you can click onto street view on the map below and you’ll see the waterfall above. Park anywhere there but be sure to not block the road. You can also drive further on and you will find several car parks.

You can also do this hike in reverse starting from one of those car parks or, alternatively, walk back up to this spot and start from here. Whatever you prefer of course but for this hike we started from the waterfall.

The Zig Zag Path

When you stand on the road at the start of the hike and you look up towards the waterfall to the left, you should see a ziz-zag type path going upwards to the right of the waterfall. This is start of your path to the top of Lugnaquilla. Head off the road towards the white house in the picture above. The path is pretty well marked so you can’t miss it. There are some directional arrows on posts too which you can keep your eyes open for.

OK, on with the hike. The Zig Zag path is a gentle enough route ascending to the top of the first peak on the trail to Lugnaquilla. As you walk upwards you’ll start to get the opportunity for many beautiful views of the valley from the path. The shot below gives you a taster.

View From The Zig Zag Path

As mentioned, the path is pretty easy to walk up. It’s wide and clearly marked so no real fear of getting lost. However, for those of you who use a compass, it’s a good idea to take a general bearing to aim for the summit of Lugnaquilla from the top of the ziz zag path.

The Cliff Edge

After walking up to the top of the Ziz Zag path, you follow on upwards towards the summit of Cloghernagh which sits at about 800 meters altitude. There is still a visible path of sorts but it isn’t as obvious in places as the Zig Zag path was.

This is a popular hike though so you can see foot prints and natural steps, as such, left by previous hikers. The path becomes a mix of boggy terrain and granite stone. Depending on the time of year you’re hiking this can be tricky to negotiate in places with your hiking boots sinking deep into bog at times. You can stick to the stone for most of this part though too. The hike here also gets quite steep too, probably the steepest part of the whole hike.

As you go further and further up you will notice a cliff edge developing on your right hand side. Again, some of the views across the valley and over to the other mountains from here are just stunning.

View From The Cliff Edge

We were blessed with the weather. It was sunny with only some clouds in the sky. You can stop on some of these cliff edges for a cup of coffee or a banana break as we did. It’s worth stopping to take it all in!

The Summit in Sight

As you move further up from this cliff edge area, you will move into a flatter area going up in a steady but gradual incline. Now, on a good day, you can see the summit of Lugnaquilla from here. It’s a bit like a horseshoe shape to get from here to the top. You walk straight up and then you start to veer to the left to the summit.

Now, I should add here that the weather at the top of Lugnaquilla can be very temperamental. In fact, I have hiked to the top more than ten times and yesterday was the first time I could actually see the summit from a distance or see out from it for that matter. As it’s a high mountain close to the sea, it has a tendency to be wrapped in mist and fog at the summit so visibility isn’t always great. Still a joy to hike though, even in tougher weather.

It’s worth mentioning that there are little triangle sets of stones on the ground which you can follow, if the visibility isn’t great, that were put there as a guide for folks on the trail.

You’re now on the final leg when you veer left to swoop upwards to the summit!

The Summit

When you get to the summit you will be greeted with the summit marker on top of an island of stones. These are common on top of mountains in Ireland and the UK. This is an ideal spot to stop, if the weather is agreeable, have a bite to eat and take a breather. At this stage you’ve hiked about 5 kms to a height of 925 meters so you deserve a break 😉

Colm At Lugnaquilla Summit

After you’re sated, and weather permitting, I highly recommend that you head over towards the edge of the mountain at the top and take a look out at the views across the mountains. It really is beautiful to look out from there, the area known as the South Prison in particular has great view on a good day. As I mentioned though, yesterday was one of many times at the top of Lugnaquilla but only the first time I got to enjoy the views from the top!

Heading Back Down

At this point you have two options to head back down to the start point. Option one is to head straight back down the way you came up. This is easy and handy to do. However, if you’re feeling more adventurous you can head back down a different way effectively doing a loop back to your starting point. We were feeling adventurous yesterday so that’s what we did 🙂

From the top of Lugnaquilla we started out on, more or less, a reversal of the previous bearing from the way up, aiming to head across open mountain to descend down Fraughan Rock Glen. Now, it’s worth noting here that at the top of Lugnaquilla you are right beside an artillery range for the Irish army.

So be careful you don’t wander off in the wrong direction. The artillery range is well marked though so it should be easy to spot and stay out of. The bearing 59 took us along the edge of the south east corner of the artillery range.

As you move out this direction you will start to see a quite steep descent to get down to the top of Fraughan Rock Glen. Take your time here and find a spot you’re comfortable walking down. It’s slippy and steep so exercise caution.

We skirted along the top till we found a suitable point and started to side step down to the bottom. As you look down, weather permitting, you’ll see a river than leads off into the distance falling over the edge. You want to aim for the left hand side of that going down. As we had skirted up a bit I took another bearing to the river just to be safe. As we would descend it was possible the visual marker could go out of view so no harm to have a rough directional bearing.

As you head downwards you also need to cross a small river or two. These are all flowing into the main river down through the glen. They’re very beautiful with lot’s of little waterfalls along the way. There are plenty of handy places to cross so if you don’t fancy the place you’re at just walk up or down the little rivers a bit till you find a more suitable crossing point.

Fraughan Rock Glen

Eventually, you’ll come to the top of the river at the top of the Glen. As you look down the glen you’ll see lot’s of felled trees.  These do hamper the route down a bit so take your time and be careful. We decided to skirt along the river down through the glen. It was really pretty to hike down here with the sounds of the river all around. There is also plenty of nature in the glen too. From sheep to deer, there’s lot’s to see and enjoy!

Fraughan Rock Glen

When you get to the bottom of the glen you will see a path forming in front of you. Take this path and follow it all the way down back to the end of the road. The one you’re parked on. Tree’s surround you on either side and you might see some campers as you descend, we saw lot’s yesterday. There are loads of nice spots to camp out alongside the river at the bottom.

When you get to the bottom, you’ll see a big car park. There is one more obstacle you may have to cross to get to it though and that is the river! This river is quite big and normally it’s dry to cross over the road. However, yesterday the river was flowing over the road so I needed to do some nimble jumping to get across it!

Jumping Across The River

I’m only kidding, it wasn’t that deep at all but I guess it could get harder to cross in heavy rain.

Now it’s worth mentioning here that you can actually start the hike from here in this car park at the end of the road. You could drive to the end of the road and park there. This is effectively the hike above but in reverse as I mentioned at the start.

The Last Push

At this point we were back on the Road so we just had to walk back along it to the car. It’s about 30 minutes from the car park at the very bottom of the path from Fraughan Rock Glen back to the starting point.

Conclusion

This is a really nice hike to take any time of the year. It’s about 10 miles in total distance with about 900 meters in ascent so anywhere from 4 to 6 hours depending on your pace. You need to be pretty fit to attempt it so probably not a good start for a total newbie to hiking. You can of course take your time but it is steep in places and I think you’d be better to get a few shorter hikes in under your belt first before attempting this one.

We were really blessed with the weather on the day and, as you can see in the photo’s above, there are some amazing views to be had. It’s a hike I’ve done, in various forms via different routes, and it never ceases to please.

As always, be sure you have the right gear with you. As mentioned, we were lucky with the weather but it does rain a lot in Ireland so a good rain jacket, proper hiking boots and other suitable hiking gear are a must.

If you’re looking a challenging but really nice hike in the Wicklow Mountains, this fits the bill!

Enjoy 🙂

El Camino de Santiago – Santiago de Compostela!

Today I want to make a final post on my hike on the Camino de Santiago. I pick it up after my last El Camino de Santiago post where we just entered Santiago.

Walking into Santiago is really like any other city with roads, traffic, etc. However after about ten to fifteen minutes you cross into the old town of Santiago or the old part of the city. This is very noticeable as it gets very beautiful very quickly.

You eventually walk down on the last parts of the Camino before you come into the square in front of St. James Cathedral which is a truly beautiful site.

St. James Cathedral

The square was filled with Pellegrinos all lying about on the ground or wherever they could get some reasonable comfort and rest, many of them exhausted after five hundred miles of hiking the Camino. It’s quite a sight to behold.

After taking in the beautiful vista of the Cathedral, I walked around the side to enter the Cathedral. It’s interesting as I have been in many major Cathedrals in the world, for example St. Peters in Rome. I always find that all Cathedrals usually have an air of piousness or a somber twinge to them. However, St. James was really quite different.

Because of the nature of the Camino, Pilgrims arrive in with large backpacks, hiking boots hanging off their feet and looking tired and tatty. That is of course to be expected after hiking over five hundred miles. However, I found that this added a much different atmosphere in the Cathedral. It was much more relaxed as people sat on the floor stacking their backpacks against the walls.

There really was just a sense of quiet relief all round from people who were just happy to have finished it. This gave a relaxed feel to the cathedral which I found really infectious and it was a really nice feeling.

As all the group came in bit by bit, we assembled at an agreed time at the right side of the Cathedral and some of us went in to sit down and wait for the Pilgrims mass at noon. As it is always so busy, it is advisable to get into the Cathedral earlier to be sure to get a seat. I highly recommend sitting in one of the sides of the altar in the cathedral. The main reason for this is that for some of the masses, the Botafumeiro is swung in the cathedral and so if you’re sitting on either side of the altar, it will swing directly over your head.

The Botafumeiro is a massive incense burner that hangs on ropes. Four men come out and using the ropes swing the Botafumeiro from one side of the church to the other with the incense smoke flowing out if it. It really is quite a sight, you can get a sample here.

The story goes that in centuries past, Pilgrims would arrive in for the mass after walking the Camino and they would, for want of a better way of saying it, be quite smelly. They would do their best to wash up in the troughs of water around the Cathedral but this wasn’t really sufficient so to help alleviate the smell, the Botafumeiro would send incense out across the cathedral easing the smell of the many pilgrims. Incense of course has a purifying purpose in a spiritual sense too so perhaps they could cleanse the air whilst cleansing the soul!

For the Pilgrims mass I attended the Botafumeiro wasn’t used. However, we were told it would be used the following evening at the seven thirty mass so I did get to see it in action and it really is a spectacular sight.

The other thing I remember about the mass was the nun who sang throughout it. She came across as really kind and friendly as she encouraged the whole congregation to sing along with her in Spanish. Her voice was truly amazing, I can still hear it in my head.

Getting your Certificate (Compostela)

After the Pilgrims mass, the next thing to do was to head around to get the Compostela (certificate of completion). This was handy enough to do and the queues weren’t too long when I got there early Friday afternoon. The people really do check your pilgrims passport so remember to get at least two stamps each day while doing the Camino. There was one lady across from me who only had two stamps in her passport. She obviously didn’t know that you needed two per day! The officials refused to give her, her certificate of completion. She was heartbroken. Make sure it doesn’t happen to you if you do the Camino!

The officials will ask you to sign your name and mark why you did the Camino. You have three options which are roughly 1. For religious reasons 2. For religious and / or spiritual reasons and 3. For recreational reasons. After you select, they give you a certificate in Latin with your name on it. They will try to find a Latin version of your name, if it exists, for the certificate too.

And that is that! The Camino de Santiago complete, pilgrims mass finished and Certificate in hand.

Lot’s to do in Santiago

I was staying in Santiago the next two days so I had a lot of time to have a walk around the city. It really is beautiful. There is a lot to do in the Cathedral itself like hugging the status of St. James, viewing his tomb and of course the many tours that are on offer. You can get one of the talking accompaniments to take with you and go at your own pace or you can join one of the many tour guide groups available in multiple languages.

I highly recommend the tour of the Cathedral roof and the Museum. Great way to kill a couple of hours. While on the tour, the tour guide lady told us about a mass in a church beside the Benedictine monastery where mass is sang every morning by the nuns at eight o’clock. That sounded amazing so I got up to attend and it was amazing. The majority of the mass is sang by a choir of nuns, was really beautiful.

There are of course many beautiful restaurants to sample in Santiago and you can kill happy hours strolling around the city watching the many street performers or sampling a coffee or the hot chocolate and churros in one of the many cafes.

The city park is worth a visit, there’s a beautiful view of the city from the main viewing point in it and there is of course plenty of bars and night life with live bands, clubs, etc.

I was staying in a converted monastery called Hospederia San Martin Pinario just on the left hand side of the Cathedral. It was really nice and very cool to stay in an old monks room converted with modern amenities.

Finally, I highly recommend a coffee or a bite to eat in the five star Parador hotel just on the left hand side as you’re facing the Cathedral. A bit of luxury is nice after all that walking. If you can stretch to stay for a night in the place, all the better. Oh and don’t worry about looking scruffy in your hiking gear after walking, while not normal in most five star hotels they’re well used to it there. A pilgrim is a pilgrim!

The Camino Shell

There is one more thing I just realized that I forgot to mention about the Camino. Most Pilgrims you see on the Camino will have a shell on their person or ties to their backpack.

The Camino Shell

This shell is the symbol of the Camino. Legend has it that it was used symbolically to show that all roads lead to one and practically as tool for scooping up drinking water from the troughs and wells as the Pilgrims travelled the Camino centuries ago. It’s an interesting thought and I do like the symbolism.

Conclusion

So that is the end of this series of posts on the Camino de Santiago. I hope you found them useful if you plan to hike the Camino yourself. I do recommend it, it really is an experience unlike any other I have ever had in both hiking and general terms.

Remember to always have the right hiking gear with you. If there was ever a time when you needed to have the right hiking boots and hiking socks on, a comfortable back pack or a good rain jacket, this is it. Walking long distances repeatedly day after day brings its own unique challenges and so you need to be prepared with the best hiking gear available to ensure you have as comfortable and safe a hike as possible.

Have you hiked the Camino? What experiences did you have along the way? I’d love to hear about it in the comments below!

El Camino de Santiago – Day Seven and Eight!

And so, we come to the last stage of hiking on the Camino de Santiago!

This stage runs twelve and a half miles from O Pedrouzo to Santiago. As with my previous blog entry, the group I was travelling with actually did this stage over two days but I will be combining both days into one post.

O Pedrouzo to Santiago

We started from O Pedrouzo and headed for Lavacolla. This was about six and a half miles in total and so was completed in a very short time. People who had been having trouble with their hiking boots and blisters were now pretty hardened up so this was a cake walk in hiking terms.

It was another sunny day and again we walked through dense eucalyptus in shade and peace and quiet. It really was a very serene walk. As we were Hikers on the Camino
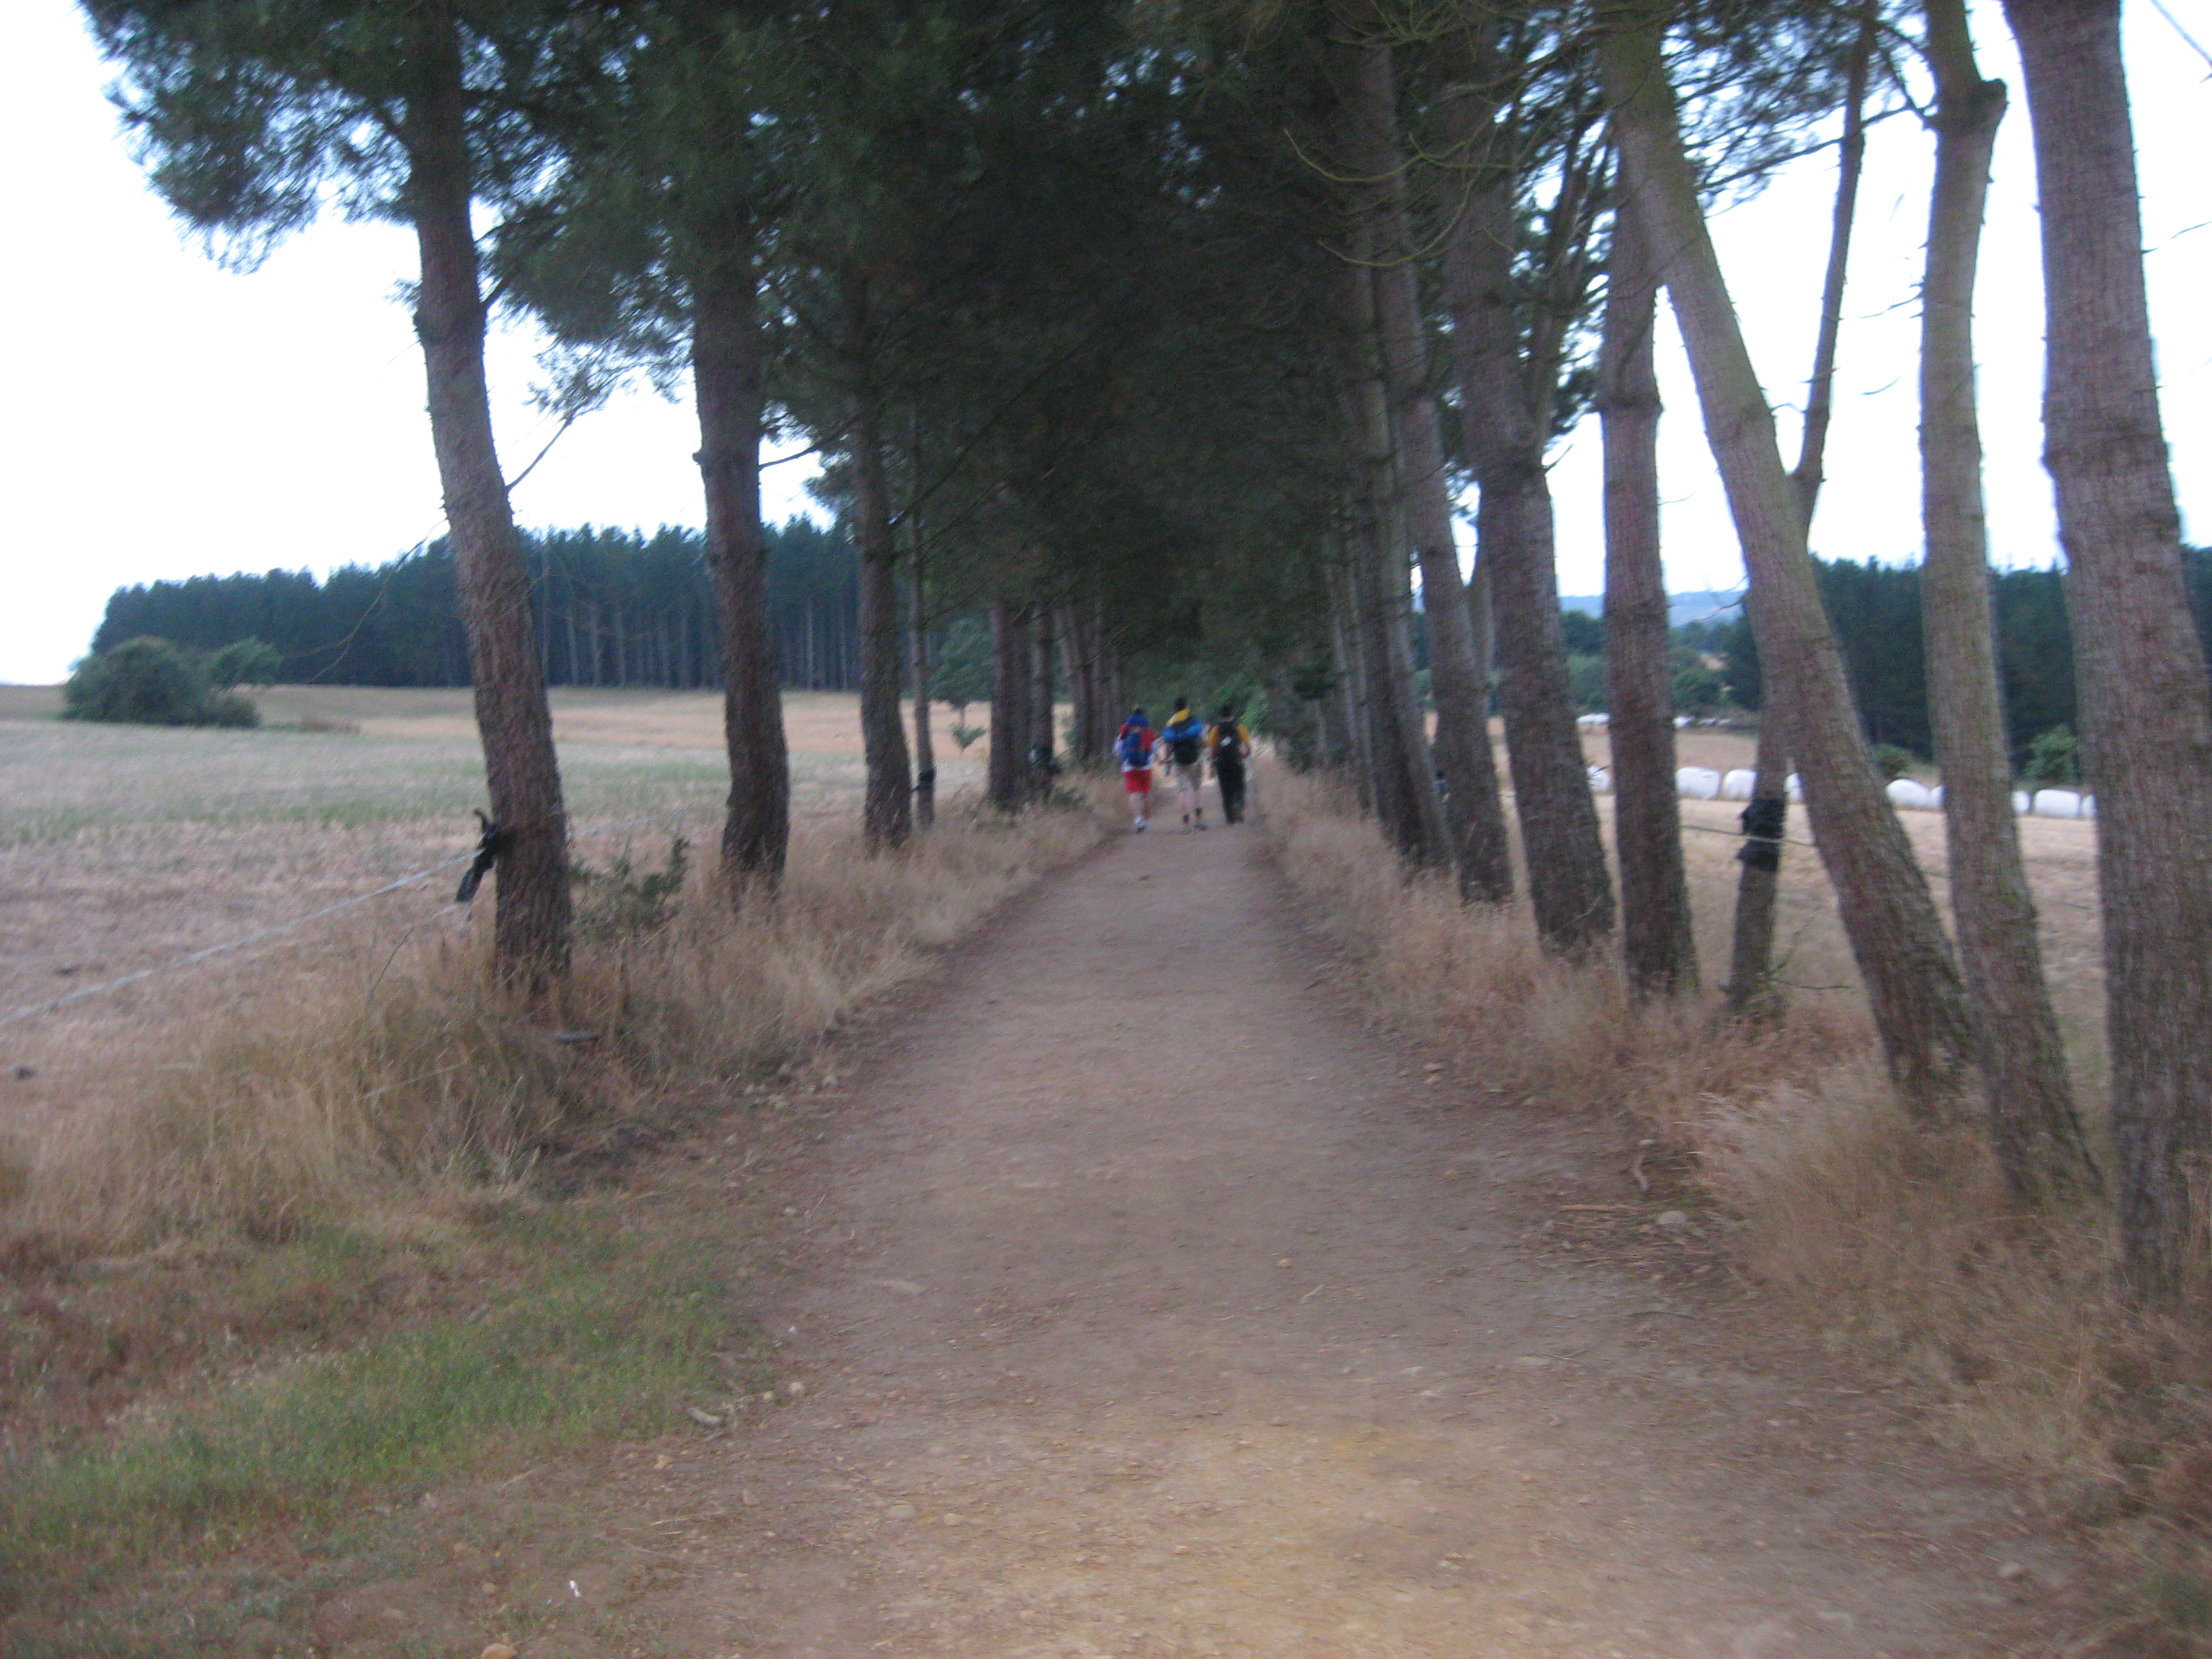
only going a short distance, we didn’t set out till much later than previously so we were not on the road till about nine in the morning. By that time the normal caravan of Pellegrino’s who set out early in the morning, to take advantage of the cool morning air, were long gone.

We were staying in Lavacolla and I want to make a special mention for a really beautiful country house we stayed in on this night. It’s called Xan Xordo. It’s located in the quaint countryside of Lavacolla and it really was a beautiful place. I had a beautiful four poster bed and a proper full sized bath! A luxury I can tell you as even though I had been staying in hotels the whole journey to date, so far from roughing it, they all only had showers, no baths. I’m not normally a big fan of baths, much more a shower type of guy but after all the walking of the previous days the opportunity to stretch out in a long hot bath was just divine!

As mentioned, the location was just beautiful. There’s a small courtyard in front of the Xan Xordo with a table and chairs for resting in. There’s a canopy over the table and it was so cool as it is actually made from grapevines with real bunches of grapes hanging from it! Totally awesome. AsXan Xordo Church 
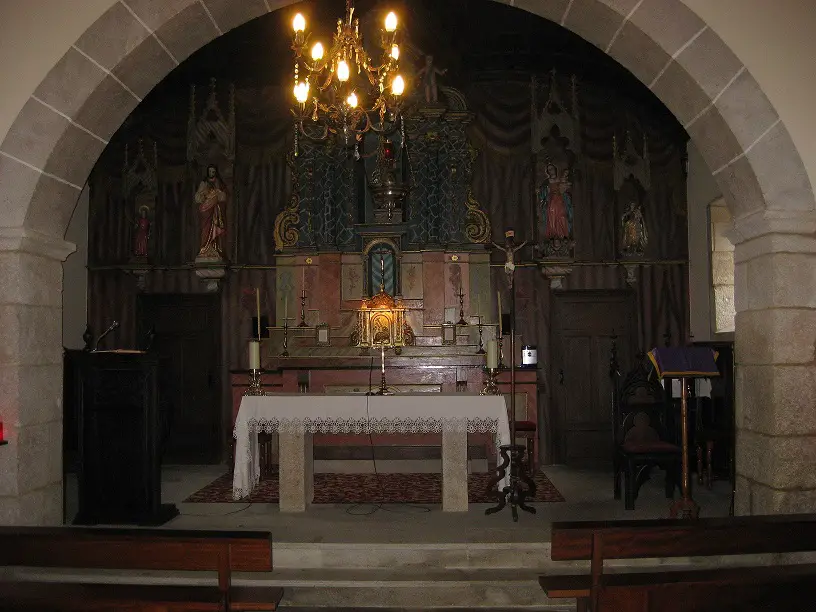
well as that, at the very front of the courtyard there was a tiny little church. This would have been owned by the family who were of means going back generations. It really was something special. A private little church in your front yard, how about that!

The next morning, the final day of hiking, we started out around eight in the morning to make our way to the beautiful city of Santiago. We wanted to be there for the Pilgrims mass which is on every day at noon so this gave us plenty of time to get there.

As we approached the city, we expected hoards of pilgrims on the Camino and things did start to crowd up the closer to Santiago we got. The first major place of note between Lavacolla and Santiago is Monte do Gozo. There’s a long hike uphill here which can be tiring but I found it fine on the cool overcast morning that it was.

You will also find many of the one day bus tours starting from this point. They drive and drop off bus-loads of people who then walk back into Santiago to St James Cathedral.

Overall the hike was pleasant and as expected we arrived in good time to Santiago for the Pilgrims Mass at noon.

Conclusion

In my next and final blog post on the Camino de Santiago I will go into a bit more detail on arriving into Santiago, St. James Cathedral and the Pilgrims mass, acquiring your ‘compostela’ (certificate of completion) and so on. Much to review!

But that was that as far as the hiking was concerned. We had all reached our destination successfully! There were some casualties along the journey with blisters, swollen feet, sore backs and the like but overall everyone did a great job to get there. Approximately seventy miles walked over eight days. Not bad going!

If you want to go to the start of this series on the Camino, click here. If you want to read the next installment, click here 🙂

Have you hiked the Camino? What experiences did you have along the way? I’d love to hear about it in the comments below!

El Camino de Santiago – Day Five and Six!

As with the last blog entry in this series on the Camino, I am combining my two actual days, five and six, into one post here as normally, most people would do what I and my group did over two days in one day.

This is the penultimate stage before heading along the final part of the Camino for Santiago. The stage covers twenty or so kilometers from Arzúa to O Pedrouzo.

Arzúa to O Pedrouzo

For most of the day we walked on natural paths that were sheltered well from the sun by the many eucalyptus trees. The end of the hike for the day saw us climb around the alto de Santa Irene. Before that we walked on largely level pathways crossing three small shallow river valleys.

Eucalyptus Tree

At this point we started to notice the Camino was starting to get a bit busier. This is because we were of course drawing closer to Santiago but it is also because many tour operators operate shorter walks for tourists in from some of the smaller hamlets and towns closer to Santiago.

You can’t get your Compostella for doing these tours but it does give people a small flavor of walking the whole Camino.

The weather held again for this part of the hike with the sun poking its nose out from under the clouds across the morning.

This day I had put on a pair of freshly washed hiking socks from day one. I had hand washed them with me in my shower in the hotel, the previous day! I wasn’t entirely sure if this would work but that’s the advice I was given from another Pellegrino.

You will notice as you walk the Camino that many people are effectively a walking clothes line. They wash their dirty gear in the hostel and then attach it to their backpack walking the next day to let it dry in the sun. This is why a good tip for doing the Camino is to bring a few clothes pegs with you!

There’s another general point I should mention here that I have not mentioned in any of the posts on the Camino yet to date and that is to do with the cost of things.

As with most of Spain, Northern Spain is very reasonably priced. When you are buying food in any of the many café’s in either the small towns along the way or the many beautiful little ‘middle of nowhere’ farmhouse cafes along the way, the prices are very good.

Prices do increase, as with any city, as you approach Santiago but even there I found everything to be very reasonable.

To give you a few examples, in the smaller towns a standard glass of red wine was about sixty cents in Euro, approximately eighty cents in US Dollars.

A coffee maybe one euro, approximately one US dollar twenty five.

A Bocadillo, or sandwich, on the Camino is usually a very large affair and will cost you about three euro, approximately four dollars but Man do you get one hell of a sandwich for that price. See the bad boy below as one example and I’d already ate a big chunk off of it!

Bocadillo

You will also find that in the many small towns and restaurants along the Camino, they will have what is called a Pilgrims menu or meal. This usually involves a three course meal with a few options for each course. While you will generally get offered similar items in each location, as nice as Galician tart is by day three I was very tired of it, the food is generally pretty good. This will cost anywhere from nine to twelve euro, approximately eleven to fifteen US dollars.

So, as you can see, food prices are very reasonable as is accommodation.

Conclusion

All in all, another very pleasant day’s hiking on the Camino and I certainly didn’t go hungry 🙂 Well, I will leave it at that for today. Tomorrow will be the final entry on this series of posts on the Camino as we head for Santiago!

If you want to go to the start of this series on the Camino, click here. If you want to read the next installment, click here 🙂

Have you hiked the Camino? What food experiences did you have along the way? I’d love to hear about it in the comments below!

El Camino de Santiago – Day Three and Four!

Day three on the Camino de Santiago took us from Palas De Rei to Melide. Now, this stage should actually be from Palas De Rei to Arzúa but the group I was with decided to split some of the last stages down into smaller chunks.

Camino Kilometer Pillar

This was due to some people not being able for the demands of the full stage in one day which was fair enough. This was a little frustrating from my point of view as being a regular hiker, and after having nearly thirty two miles under my belt from the first two days, I was itching to keep on walking to Arzúa when we got to Meilde.

I should add that this plan was well established in advance of the trip and so therefore it was more of a miscalculation on my part.

Not having hiked large distances over more than two days before I wasn’t sure how I would react to it either so I erred on the side of caution. Always a wise thing to do when hiking but in this instance I was probably too cautious and was more than able to continue on the long day hikes day after day. Some people were starting to have blister issues from either having listened to bad advice on hiking socks or having the wrong hiking boots or shoes with them.

Because of this I will combine what actually happened over days three and four for me into one post here as it is normally how most people would approach it.

Starting from Palas De Rei

We started from Palas De Rei crossing six river valleys. About half of this stage was on pathways mostly through woodland. This helped keep the noise of passing traffic down and energy levels up as we walked through the fresh morning enveloped by trees and the fresh aromas of the various trees and brush. Melide makes a good half way stop on this part of the stage.

As mentioned above, this is where we actually stopped for the day after completing about ten miles. I should add that this is a perfectly valid option for those wishing to take a slower pace to this particular stage of the Camino. Melide is a big enough town which is renowned for its octopus pulpo a la Gallega. This is a nice option for lunch if you are continuing on to Ribadiso or dinner if you plan to stay the night.

It is worth mentioning here that there are many beautiful little churches dotted all along the small little towns and hamlets along the Camino. Therefore there are many chances to stop for a quiet moment of thought or reflection if desired in many serene and peaceful places.

Church in Melide

As walking the Camino is a very spiritual journey for many, a lot of people will take time to do this. The architecture in many of these places is very beautiful. I was walking with two fellow Pilgrims from the group. We were well out in front of everyone and as we approached Melide, about three miles out, the skies opened up!

When we got into the outskirts of the town we took refuge in the beautiful little church pictured above. There was a little girl with her Mum at the door who were all smiles and ready to stamp our passports as we walked in. We were soaked to the bone and a little frustrated so their warmth and smiles only helped to cheer myself and two fellow Pellegrinos up!

At this point we’d more or less reached the halfway point for our journey. For every kilometer you complete on the Camino you will see a little pillar like the one at the start of this post telling you how many kilometers are left to Santiago, so you always have a good idea of how far you are away from your next destination.

On to Arzúa

The following day we set out early to head the last twelve or so kilometers to Arzúa. This day was probably the shortest of all days as we only did about twelve kilometers. The sky was overcast but the weather held while we were walking so all was good as we reached Arzúa and drew closer to Santiago.

If you intend to detour off the route to visit Pambre Castle or the famous Pazo Ulloa, between Palas de Rei and Melide, you should leave early in the morning especially if you are aiming to be in Arzúa by evening. Starting early is good advice every day regardless! Just before entering Ribadiso, just before Arzúa, we passed out of the Galician province of Lugo and into La Coruna.

If you want to go to the start of this series on the Camino, click here. If you want to read the next installment, click here 🙂

Have you walked the Camino or had the famous octopus pulpo a la Gallega in Melide? I’d love to hear about it in the comments below!

El Camino de Santiago – Day Two!

Day two saw us set out early, 6am, to start the journey from Porto Marin to Palas De Rei. Generally speaking, we got up with the dawn every day to set out walking as early as possible.

This was the standard among most pilgrims and the Camino would be starting to get busy from that time on. The main advantage to doing this is that the mornings are so fresh and cool that you can easily walk in them before any sun gets up later in the morning.

Wooded Path On The Camino

It also means you should get to your next destination by afternoon or early evening which will at least give you some time to relax, rest and eat before setting out again the next day. Definitely a good way to do it.

Terrain for Day Two

This was a day of differing terrain covering twenty seven kilometers. We walked from Porto Marin, through the small hamlets and towns of Gonzar, Hospital, Ligonde, Eirexe and Portos to get to Palas De Rei.

We started by skirting the reservoir Embalse de Belesar climbing up through woodland to move back and forward from the main road before leaving it to climb the ridge beyond Ventas de Narón Sierra Ligonde, dropping down to portos.

Then there was a pleasant climb around the side of Rosary Heights, Alto Rosario, to drop down finally to Palas De Rei. If you intend to take the detour to Vilas de Donas, an option on this stage, prepare for an early start. The detour adds a level four or five kilometers but there are several uphill stretches during the rest of the stage.

The weather held throughout the day. It was a little overcast at times but all in all it was pleasant and good conditions to hike in.

As it was day two, the legs were a bit stiff from day one so I think this was probably the hardest day for most people and everyone was grateful to see the bridge into Palas De Rei stretching out in front of them as we arrived in.

Conclusion

By this stage some issues were beginning to develop for people, mainly developing blisters. This was also the day my choice to wear brand new socks straight from the packet also caught up with me. It had started the day before but the remnants where still with me, that is a swollen ankle. Thankfully no pain though so just a matter of time for it to ease off.

I’ll leave this for today. Tomorrow we’ll take a look at the next stage of the journey from Palas De Rei to Arzúa. If you want to go to the start of this series on the Camino, click here. If you want to read the next installment, click here 🙂

Have you hiked the Camino before? I’d love to hear about your experiences in the comments below.

  • « Previous Page
  • 1
  • 2
  • 3
  • Next Page »
  • Facebook
  • Pinterest

What are you looking for?

Copyright © 2025 · Cool Hiking Gear

Cool Hiking Gear is a participant in the Amazon Services LLC Associates Program, an affiliate advertising program designed to provide a means for us to earn fees by linking to Amazon.com and affiliated sites.

  • About This Site
  • Privacy Policy
  • Affiliate Disclosure Statement
  • Contact