coolhikinggear.com

  • Men’s
    • Best Hiking Rain Jackets for Men In 2024
    • Best Men’s Hardshell Jackets Of 2023
    • Best Hiking Pants For Men In 2023
    • Best Ultralight Rain Pants For Men
    • Best Men’s Daypacks For Hiking In 2023
    • Best Backpacking Backpacks For Men In 2023
    • Best Base Layers For Men In 2023
  • Women’s
    • The Best Hiking Rain Jackets For Women In 2023
    • Best Women’s Hardshell Jackets Of 2023
    • Best Hiking Pants For Women In 2023
    • Best Ultralight Rain Pants For Women
    • Best Daypacks For Women
    • Best Backpacking Backpacks For Women In 2023
    • Best Base Layers For Women In 2023
  • Hiking Accessories
    • Best Hiking Poles
    • Best Trekking Pole Monopod Camera Mount
    • Best Hiking Headlamps
    • The Best Hiking Watches In 2023
    • The Best Hiking Gloves In 2023
    • Best Hydration Bladders For Hiking In 2023
    • Best Compass For Hiking Our Top Picks
    • Cool Hiking Gadgets
  • Footwear
    • The Best Men’s Hiking Boots In 2024!
    • Best Hiking Shoes For Men In 2023
    • The Best Women’s Hiking Boots In 2023!
    • Best Hiking Shoes For Women In 2023
    • Best Hiking Sandals
    • Best Hiking Sandals For Women in 2023
  • Hiking Guides and Resources

Backpack Buying Guide

Whether you’re hiking out into the wilderness for just a day, or going for a week-long expedition, your backpack is one of the most important pieces of gear you’ll need.

Backpacking Backpack Buying Guide

So, it makes sense to take time to pick one that’s comfortable, durable and has all of the features that will make your trip a memorable one, for all of the right reasons.

Let’s take a look at some of the main considerations to take into account when purchasing a hiking backpack in our Backpack Buying Guide.

If you already know all you need to know and just want to check out some cool backpacks, then check out our best backpacking backpacks for men and our best backpacking backpacks for women.

Capacity

Your ideal pack size will depend upon several factors, how long your trip is going to be, the time of year and the weight and bulk of your hiking gear.

If you’re planning short day hikes in mild conditions, then a 30-liter daypack is going to have plenty of capacity for all of your needs.

Longer trips of several nights or more are going to be better served by a 60-70 liter backpack, to ensure that there will plenty of space to pack your tent, sleeping kit, food and water and any other essentials.

It’s worth bearing in mind that if you prefer to keep things ultralight and aren’t making long trips into the wilderness on a regular basis, you may get more use out of a smaller backpack.

With today’s compact, ultra-light gear, there are plenty of hikers out there who like to keep things light on short 1-3 day trips, especially on trails with more extreme terrain.

Other aspects to bear in mind when considering which capacity you need, are when you intend to be using it and where. Winter trips will, of course, require a lot more equipment and extra clothing layers for when you’re not moving.

If you frequently hike at warmer times of year you may need to factor in extra capacity for more water and if you’re heading into bear country, a bear canister.

If you have recently upgraded several elements of your gear, or you’re contemplating your first multi-night trip, it can be useful to set out all of your kit, plan the essentials you’re going to need and to see how much space this is going to take up.

What This Looks Like

If you’re having a hard time visualizing this, try packing it into a bag with a known capacity.

Backpacking Gear

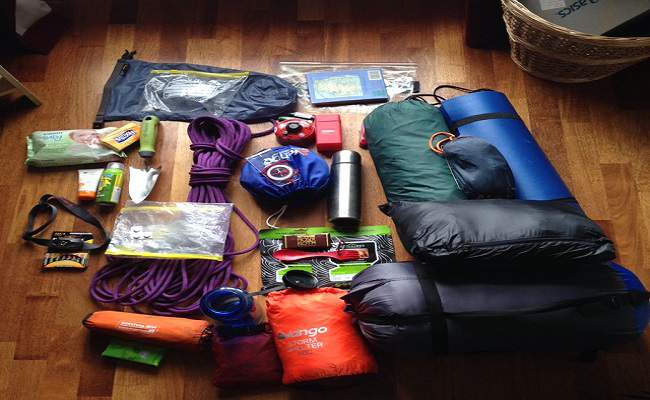
Bear in mind that if you have several bulky items you can run into difficulties as the capacity of a backpack will include any compartments, so you may struggle to comfortably fit in any less compact items.

Also, be aware that strapping on any larger items, weather and terrain permitting, will leave you much more space, but can also destabilize your load. Generally speaking, its better to have all your kit inside your backpack, and utilizing dry bags is an excellent way to keep stuff dry inside.

Finally, remember that today’s backpacks are designed to be carried fully loaded in order to provide a maximum of comfort and weight bearing support.

You should always use a backpack with the correct capacity for your needs, if it’s under or over-charged your load will not be balanced or stable and you’ll risk a fall. So, don’t be tempted to economize by getting a larger, one size-fits-all pack with the intention of half filling it for shorter trips.

Weight

Modern backpacks are much lighter than those used even in the not too distant past. Of course, everyone would like to have a lighter load where possible.

However, unless you’re looking at a backpack that seems much heavier than similar ones in the same range, backpack weight is probably not going to play much of a deciding role in your purchase except for those who are into ultralight and light backpacking.

Ultralight backpacks typically have an empty weight of less than 2 lbs, with lightweight packs up to the 4 lbs mark and midweights coming in at around 5 lbs.

However, if you’re looking to lighten your load, you should first think about upgrading your pack contents before focusing too much upon your backpack’s actual weight.

Replacing the essentials like your stove, tent and sleeping bag with new lightweight models and cutting back on any non-essential items will drastically reduce your load weight and really justify the pound or two weight saving in a lightweight backpack.

Otherwise, focus more upon the capacity, features and fit. If it has everything you need and you’re not planning on going ultralight, then a pound or two difference in weight shouldn’t put you off.

Remember that lightweight packs have to make a saving in weight somewhere and this can sometimes compromise on comfort, reductions in padding on straps for example, or fewer features. In some cases, you may prefer a slightly heavier model depending on your trip and hiking style.

Heavier packs are also known to be more durable, being made from thicker, more robust materials, again this may or may not be an issue for you, depending upon your budget, where you commonly hike, for how long and what your priorities are.

Material

Backpacks come in a range of different materials each with their own merits. Most backpacks are made from nylon or polyester, with many manufacturers choosing to use a combination of the two.

Polyester fabrics such as XPAC are popular for being light and waterproof, whereas nylon, in particular, Codura, is used for its durability and strength.

A backpack might have a body made mainly from XPAC with a nylon-Codura bottom and edges for reinforcement, or a Codura backpack could have an XPAC laminate.

In fact, XPAC is often applied as a laminate to other fabrics for waterproofing. Codura is available in different deniers which enable its weight and rigidity to be adjusted as needed.

Unless you have very specific needs, most modern backpacks will be made of material that has been tried and tested to provide the experience that you are looking for.

If your trips tend to go deep into the backcountry you may prefer a fabric with a higher denier to ensure longevity and avoid rips, if you mainly stick to trails and more open areas you may prefer a slightly lighter material.

Most backpacks will offer some degree of waterproofing and the majority come with a fully waterproof cover for protection in downpours and extreme weather. The effectiveness of these are limited though, so as mentioned above, utilize dry bags inside your backpack to keep essentials dry.

Backpack material is an important consideration that the experts have spent time perfecting, so a good hiking backpack will do its job. It really comes down to a matter of personal preference and durability when opting for a more heavyweight or lightweight fabric.

Fit

A well-fitting backpack is essential to your comfort, thankfully with so many adjustable options on many packs today, it’s easy to make adaptations for an individual, fine-tuned fit.

Once you have found a backpack that you like the look of, check that your upper body length matches its recommended length range. Some backpacks may be available in different torso lengths.

To find out your torso length you will need to measure from the base of your neck to the point of your spine that is level with the tops of your hip bones, known as the iliac crest. Make sure that you stand straight as you measure to ensure an accurate reading.

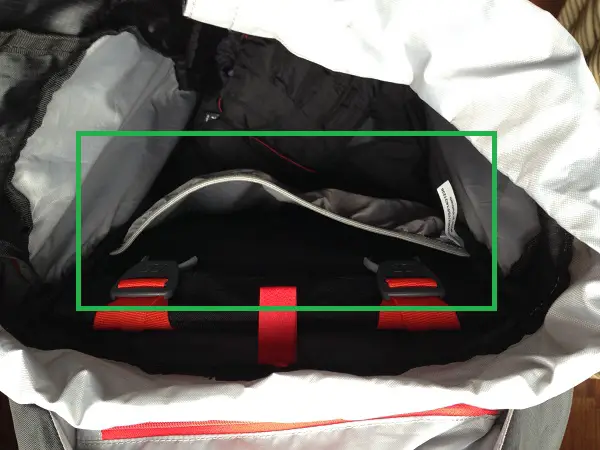
Once you have the correct size backpack, you will be able to adjust the suspension system, the hip belt and shoulder straps, load straps and sternum strap for a perfect fit depending upon your body size and load.

You may wish to make adjustments throughout your trip as your load lightens, for optimum balance and comfort. Check out the video for some more information on fitting a backpack comfortably.

Features

To the uninitiated, backpacks seem to come with a bewildering array of features. There’s no shortage of great extras that will make your trips much more comfortable with less hassle. Here’s a list of some of the main features you should find on any decent hiking backpack.
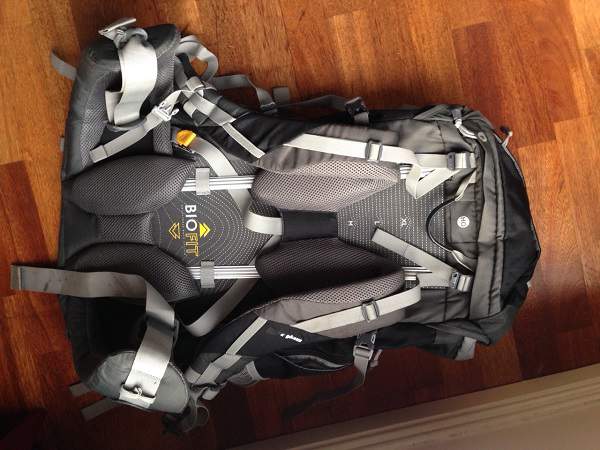
Frame

If you’re looking for a hiking backpack for any longer than a day trip, we recommend getting one with an internal frame.

This may add a little weight but will even your load out and help to transfer the pack’s weight to your hip area. Internal frame backs, as opposed to external frames, are much better in helping to balance the weight distribution across your body.

Pockets

Pockets are essential for storing items for easy on-the-go access, such as maps, mobile phones, water bottles (if you use them) and snacks.

Their location and size vary vastly from one backpack to another, with a huge range of options, typically including hip belt pockets, side pockets, large stash pockets, waterproofed dry pockets and top lid pockets.

Some side pockets can be accessed without removing your pack, making them a popular and practical option, although when it comes down to pockets it’s a matter of personal preference.

Attachment Points

Attachment points are practical if you use trekking poles or ice axes and they can be found on most good backpacks.

Adjustable straps are also useful at the bottom of the backpack to attach bulky items which may take up too much space inside. As mentioned above though, if possible, we recommend you try and keep everything inside your pack.

Hydration system sleeve

If you use a hydration system it’s worth noting where you’ll be storing it, especially if you plan to be using your backpack on long trips. An easy to access location will make refilling much easier and save you from having to unpack everything, if you come across a convenient, unplanned water source.

Hydration Pack Sleeve

Extendible lid

Extendible lids allow you to fit in extra bulky items between the lid and the main compartment, this can be useful for sleeping pads or extra warm layers.
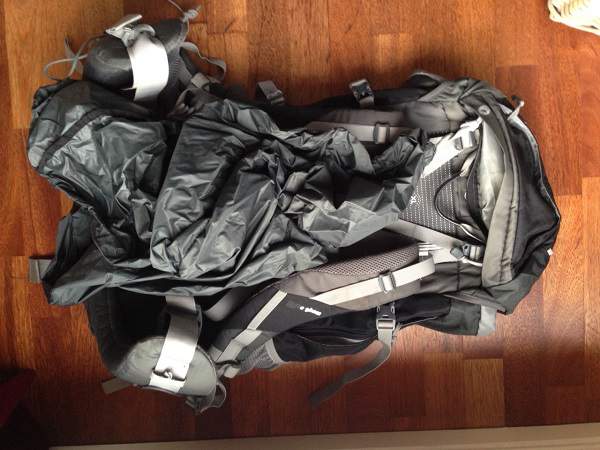
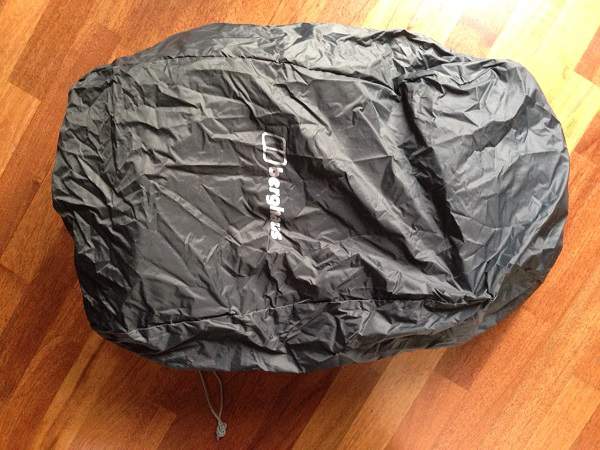
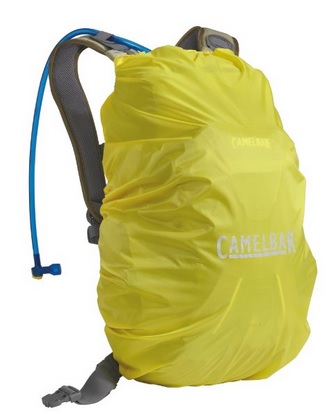
Waterproof cover

Most backpacks come with an extra waterproof cover for wet weather. Although your pack may be weather resistant, the majority will benefit from a waterproof cover in heavy downpours preventing leaking at the zippers and other possible points where water may enter.

Again, always pack stuff you need to keep dry in dry bags inside your back, as while waterproof covers help, they aren’t 100% effective in very heavy rain.

CamelBak Rain Cover

Ventilated back panel

If you’re planning on making trips in warm weather a ventilated back panel will help you stay cooler and dry even with a heavy load. Most backpacks feature a comfort back panel, when this panel is covered with a mesh fabric, air can flow between your back and the panel for added comfort.

Price

As the saying goes, you get what you pay for. Higher quality backpacks, in terms of design, comfort and durability, are definitely at the higher end of the price scale.

Spending more on a high-quality backpack will make your hiking trips more enjoyable, with more features, a lighter, more balanced design and longer-lasting materials.

Higher-price end models do tend to last longer than cheaper ones so purchasing a cheap backpack can actually turn out to be a false economy if you end up needing to replace it.

For those who cannot or do not want to spend big bucks on a backpack, there are plenty of extremely competitively priced options out there.

As more products hit the market, this tends to drive prices down and the upsurge in hiking popularity has created a more level price range with accessibly priced, quality items. Such products are ideal for those who are just starting out and may not be ready to fully invest in more expensive products.

Read online reviews, ask questions, get a good idea why one backpack costs so much more than another, if it doesn’t’ seem justifiable, then you may be better off going with the cheaper option.

A great way to get yourself a good bargain if you’re not the type that likes to show off the latest and greatest, is to purchase slightly older models especially after new releases.

Sellers looking to reduce stocks will often try to offload older models, and in some cases, the upgraded model may not actually offer much more than a change of color and a few pockets difference.

Do your homework, there are plenty of bargains to be made and with it being such an important piece of gear, it’s important to get the best quality backpack that you can.

Conclusion

There’s a lot to bear in mind when purchasing a backpack and it’s important to consider your options thoroughly before committing to a particular model.

By breaking down this decision into a list of key considerations, as covered in our Backpack Buying Guide, you should be able to purchase with confidence, making a choice that meets your needs and desires.

Too often we’re swayed by eye-catching designs or the new must-haves, however, true quality stands the test of time and it’s worth reading through customer reviews and taking the time to fully consider all of the options available before deciding upon a firm favorite to journey with you out into the wilderness.

We hope you found this backpack buying guide useful, please like, share and comment if you did 🙂

How to Clean a Hiking Backpack

How to Clean a Hiking Backpack

If you use a backpack for hiking, you will likely have come across the issue of what to do when the backpack needs cleaning. Unlike clothes such as socks and t-shirts, which are straightforward items to clean by simply putting through a washing machine cycle, backpacks are items where the process of cleaning them is not so well known.

In this article, we are going to explain how to clean a hiking backpack, give you tips on how to care for your backpack, and let you into one or two insider secrets on how to ensure that when you must wash your backpack in the washing machine, there are no disasters.

Prevention and Care

There’s an age-old saying that ‘prevention is better than the cure’, and although it is normally used in the context of health, it can apply to all manner of subjects, and in our case, hiking backpacks.

While it is impossible to keep your backpack from never needing cleaned, caring for it properly will mean it needs cleaning less often and it will also prolong the life of your backpack.

Keeping The Interior Of Your Backpack Clean

Liquids are one of the most common reasons why a hiking backpack needs to be cleaned. These can be liquids inside the backpack or those which it encounters outside.

On the inside a common problem is drink bottles leaking, which is why you should always ensure that bottle lids and screw tops are closed tight before placing them in the backpack.

A good tip is to wrap any liquid bottle in a sealable plastic bag, so if they do leak, any liquid will remain in there, rather than spilling all over the interior of the backpack.

Another way to prevent liquid containers from leaking is to pack your backpack properly and carefully. Any sharp or heavy objects should not be resting on the bottle as this could pierce a hole or burst it open.

A good suggestion is to buy backpack liners or put your stuff in dry bags, and place them inside your backpack so if the worst happens, the main materials are protected if there is spillage.

Keeping The Exterior Of Your Backpack Clean

For the exterior, one of the primary problems is mold forming on an area where the backpack has been wet and not cleaned properly. First, you should always dry your backpack whenever it gets wet, and try not to leave it sitting on wet patches of grass, for example, for extended periods of time.

Please note when we say let it dry, this means let your backpack dry naturally. Do NOT put it in the dryer, which will destroy it, and potentially ruin your dryer too.

One great tip to help prevent your backpack from getting soaked through is to spray it with a waterproof spray. This should help prevent the material of the backpack from getting wet or damp to some degree, by repelling any water.

Just as there are liners to protect the inside of the backpack, there is a low-cost solution to protect the outside too. These are backpack covers, which as the name suggests, fit over the backpack. With the backpack inside the cover, any moisture or liquid on the outside cannot dirty or wet the material.

Basic Cleaning

If you are hiking, and notice any dirt or mud on your backpack, you should clean it off immediately. You should carry a small, bristle brush which you can use to clean other items such as your hiking poles or boots.

When you get home, empty your backpack completely, and ensure you have emptied out all the side pockets and other zipped enclosures. You could turn the backpack inside out if it is flexible enough, but a better solution is to use your vacuum cleaner.

It should be able to vacuum out all the little bits of dirt or grit which may be inside. These are what wear away the material and reduce the life of your backpack, so it is vital they are removed.

Read The Label

You should be aware of what material your backpack is made from, but if not, either check the sales information page for the product or look inside to see if you can find the washing instruction label. This will tell you what the materials are and more importantly how you can safely wash the backpack.

Just as it’s important that your clothes are washed in the correct way, and if machine washed, at the right temperature, your backpack needs the same care.

Although your backpack may look and feel the same as another, there are lots of different materials used to make these products and what might be suitable for one backpack, could ruin another.

Handwashing Your backpack

If the washing label or instructions say you cannot put your backpack in the washing machine, then you will need to handwash it. First, ensure you have taken everything out of the backpack, especially the small pockets. Fill a basin or sink with warm water. Do not use hot water as this has the potential to make any colors run.

Use a light soap to make a lather, and do not use detergents or fabric softener as these can damage the materials.

A soft brush can be used to get rid of some of the more stubborn marks or stains but do not rub too hard. Once you’ve finished cleaning, let the backpack drip dry naturally, and another reminder that you MUST NOT put it in the dryer.

Machine Washing Your Backpack

If the washing instructions say it is okay for the backpack to be cleaned in a washing machine, then follow those instructions carefully. Pay particular attention to the temperature it says you need to wash it at. If you choose too low, it won’t clean properly; if you make the water too hot, it could cause the colors to run.

A great tip is to place your backpack inside an old pillowcase and use a short piece of thread or string to tie it closed.

This will prevent all the buckles and straps from making a noise as the backpack is spinning around inside the washing machine. It also makes sure that there is nothing that can cause any damage to any washing machine parts such as the agitator.

Conclusion

It is inevitable that your backpack is going to need to be cleaned at some point; however, you can help to limit the amount of cleaning required by protecting your backpack from spillages inside and waterproofing it on the outside.

Always make sure you check the washing instructions for your backpack before placing it in water, and especially before using the washing machine to clean it.

What’s the Difference Between a Backpack and a Rucksack?

I was flicking through some gear sites yesterday, and I noticed that some of them advertise ‘rucksacks,’ not backpacks.

Now, what made this interesting was that one leading brand, Berghaus, has several different backpack options but some of them are called rucksacks while others are called backpacks.

old basic backpack

This got me wondering: what is the difference between a backpack and a rucksack? So, I did a little investigation and thought I’d write up a short post on it.

This article not only covers the differences between each but also helps you decide which is best! We’ll give you my top pick for the best rucksack and backpack as well as the pros and cons of each. Many things make any backpack or rucksack great – from the ability to carry heavy loads, to being waterproof, to lightweight design, and much more.

But I’m getting ahead of myself. Before we get into which is best, let’s looks at the differences between a backpack and rucksack:

Etymology

Now, that is a big word to start a paragraph with, isn’t it? But the first place to start was to look at the source of the words. From what I can find, “rucksack” is derived from German, ‘rucken’ meaning back and ‘Sack’ meaning bag. So, a bag for your back effectively.

If we look at the word “backpack”, well, there isn’t a whole lot of difference, now is there? “Backpack” is in English, it is obviously a sack (pack) for your back, too. The word backpack seems to originate in the US.

So, do the differences stop at the origins of the word? It doesn’t seem that way! Read on to find out more about what differentiates these essential hiking/backpacking accessories.

US and UK, are There Differences?

I was curious to see if there were any differences and, from what I can ascertain, in terms of how the words are used, there aren’t many. It seems that a lot of people use the two terms interchangeably.

Broadly speaking, when looking at hiking gear providers in the US, the term backpack seems to be more commonly used; however, as mentioned in the comments below, it seems the US military uses the term “rucksack” quite a bit. I don’t know anything about military backpacks or equipment but it makes sense that they would need very functional backpacks/rucksacks.

I saw one mention that a rucksack is a mid-sized pack used for multi-day camping hikes of up to a week. A backpack, on the other hand, is different in terms of size and use. It’s bigger than a rucksack and used for very long treks and trips into the wilderness – so, for weeks to months. I couldn’t find much to corroborate that, though. After looking around, there seem to be options that are equally as large in size, some referred to as a rucksack and others as a backpack.

The UK also seems to lean toward using the term “backpack” as opposed to “rucksack”. In terms of hiking gear, though, it did seem that “rucksack” was more commonly found in the UK than in the US.

Anyway

Even if there isn’t an “official” definition of each term, sometimes the way a term is used can be quite helpful in identifying the differences. After all, if we are referring to a rucksack as more of a short-term travel supply or something for weekend trips, then the difference in the way the term is used and understood is important.

We might even say that the difference between a backpack and a rucksack depends on the region or context in which the term is used. Different areas might have a different understanding of what distinguishes one bag from the other.

Let’s take a more in-depth look at each below:

Backpacks

Again, a backpack is a bag that you carry on your back, hence the name. Backpacks typically have two adjustable shoulder straps but you’ll find that these don’t really help carry the weight of the backpack. The weight is instead carried on the hips.

The hip belts transfer the load, allowing the weight of the backpack to be evenly distributed across your body. Not all backpacks have these straps, however, including small functional backpacks. For example, you will find that on most children’s schoolbags (backpacks) do not have padded hip belts at all. There’s no need as they are too small.

The hip belts are how we transfer the weight of the bag from our shoulders to our hips so we can use our legs to help us carry the weight. For this to work, the backpack needs to have a hip belt that is long enough to wrap around the bones of the hip and not just around the waist. We can carry a lot of weight in this area and if you have a backpack with an effective belt, you will immediately notice the difference.

Rucksacks

Contrary to some of the evidence I found, rucksacks seem to be considered a larger backpack with very specific design elements. It seems that they are more often used by the military and they have very specific features useful to the military built into the design e.g. detachable sustainability pouches.

Like backpacks, rucksacks also have plenty of pockets, sometimes more than a backpack, and the belts are sometimes designed to hold a much more substantial amount of weight than a backpack. Thus, a rucksack, depending on its design, maybe a better fit if you are looking to carry heavy loads over a longer period of time.

You will also find that rucksacks typically only have one main area for entry at the top of the bag while backpacks usually have multiple entry points into the main compartment.

Rucksacks don’t typically come with a zippered closure, either. Instead, like backpacks, rucksacks are often either tied shut at the top or cinched closed with a buckled top lid on top.

Which to Look for?

In terms of hiking and backpacking, which is what we are mainly interested in, it is safe to say that a backpack is the best bet for hitting the trail. With that in mind, looking for a backpack is a good idea.

Remember that there are lots of different types of backpack sizes e.g. daypacks, backpacking packs, etc. You can check out our best daypacks and backpacks for men and women from the menu on this site. There, we list the best options in each category.

Our Top Men’s Backpack Pick

To help illustrate the differences between a backpack and a rucksack design, below we have listed an excellent men’s backpack, the Granite Gear Blaze 60 as well as a functional military rucksack option.

The Blaze is 60 liters in capacity and an excellent backpack that delivers outstanding ventilation and carrying comfort. It features anti-gravity suspension so it feels like you are carrying much less than you actually are. The harnesses of this hiking backpack are also adjustable and the hip belt can provide you with the best fit.

It has all the bells and whistles you need for an extended hiking trip, including stow-on-the-go trekking pole attachments for hiking and trekking, dual zippered top lid pockets, a large front stretch mesh pocket, and a sternum strap with a safety whistle. There is also a sleeping bag compartment at the bottom of the pack for conveniently separating your sleeping bag from the rest of your materials.

Another cool feature is the internal hydration reservoir sleeve that holds up to three liters so you don’t have to worry about finding room for a water bottle. (Keep in mind that the reservoir is sold separately.)

Customer reviews of this product have been largely positive with most people raving about how the storage and organization features of the bag are very convenient and accessible.

You can check out more top backpacking backpack recommendations for men here and our top backpacking backpack recommendations for women here.

Our Top Men’s Rucksack Pick

The US Military Surplus Molle II Rucksack is also about 65 liters in capacity but get this – in addition to the main compartment, it also includes two sustainment pouches that are about eight liters each and a waist pouch with an additional 6.5 liters of space. It has a 100-pound capacity, too, so it’s spacious and tough enough to carry just about everything you need.

Another great thing about this rucksack is that it’s really comfortable to carry. It features a lightweight durable polymer frame, enhanced shoulder straps, a molded hip belt, and load lifter attachment to give you the proper support no matter how much gear you’re carrying.

The material is pretty impressive, too. It’s made of water-repellant 1000D nylon that resists abrasions so you can take it out in any weather and it should last a really long time.

Customers really like this product, too. Most reviewers were really happy with how much this pack can carry and pleasantly surprised that the frame and straps were so comfortable to carry.

Summary

So, there you have it. It seems that in terms of backpacking or hiking, there isn’t really a whole lot of difference in how people use the terms “backpack” and “rucksack”. In the US, the term “backpack” may be more commonly used in terms of hiking gear but the term “rucksack” is also common, especially in military circles.

In the UK, it seems that it is a different word for the same thing. The only difference I came across in the UK was that a rucksack is a smaller version of a large backpack used for shorter hikes and backpacking trips. As mentioned, though, I couldn’t really confirm that in any viable way so I won’t take it as Gospel and it certainly doesn’t seem to tie in with the US military definition of a rucksack.

Therefore, the true difference between a backpack and a rucksack might depend on where you are. Regional differences are important in language so it really depends on how people have come to understand a term to understand its differences. Regardless, as long as people know what you are talking about, the differences are really quite arbitrary.

Conclusion

All in all, in terms of usage, many people use the terms “backpack” and “rucksack” interchangeably. The various differences mentioned above may not even be the same across the board.

All you really need to know is that either is acceptable for a day trip, weekend trip, trip to the store, or a walk on campus. You should pay more attention to the design and added bells and whistles when choosing the best backpack or rucksack for your needs.

So, go out there and enjoy whatever it is you are using your backpack, rucksack, or any kind of bag for! No need to get bogged down in semantics, you may as well focus on getting ready for that next camping trip or whatever it is you enjoy doing in the Great Outdoors.

Berghaus Verden 45+8 Backpack Review

Please note, this product is no longer available. You can check out our top backpacking backpack recommendations for men here.

Last year I got to climb Mont Blanc. It was an amazing experience and I had never taken on a challenge of that kind before.

As you can imagine a big part of that trip was preparation. While I needed to train to be sure I had the fitness to get to the top, there were a bunch of other things I needed to prepare for. As I was going high into the Alps, a key one was gear.

Berghaus Verden 45+8 hiking bag jet black/coal grey/black

Check Availability at Amazon.

Pros:

  • Good adjustable fitting options, so should be able to get a good fit for most folks
  • Lots of outdoor specific features e.g. walking pole, ice ax attachment loops, etc.
  • Hydration bladder holder works well
  • Rain cover included

Cons:

  • Hip belt pocket would be nice to have

Features:

  • BIOFIT back-system
  • Height adjustable, removable chest strap
  • Top tension straps
  • Raincover
  • Grab handle
  • Base compartment with bivi divider
  • Top lid pocket
  • Hydration system compatible
  • Two expansion side pockets
  • Zipped entrance to main compartment
  • Zipped front pocket
  • Side compression straps
  • Base compression straps
  • Attachment points on lid
  • Draw cord bivi closure
  • Synch straps on hip belt
  • Walking pole attachment

Summary  

While I would hire some of the various things I would need when I got there, for example crampons, there were also a lot of bits and pieces I needed to get in advance. One key thing was a suitable backpack.

I did a lot of looking around but I ended up going with the Berghaus Verden 45+8. Berghaus are a very well known brand in the UK and Europe but they don’t seem to be as well established in the US just yet. I’ve noticed that none of the main retailers stock there stuff.

However, I do recall reading some place last year that Berghaus was planning a big move into the North American market so perhaps they’ll start showing up in more stores soon. I have a few hiking gear items from Berghaus and I am very happy with them.

So, today I wanted to take a closer look at this versatile backpack from Berghaus.

5 Stars

Cool Hiking Gear Rating: 5 stars out of 5

Look and Design

When I was out buying the backpack, I recall standing in the store looking at backpacks. I had asked the store assistant to single out the ones that would meet my size needs for my Mont Blanc trip which was that it needed to be between 45 and 55 liters.

I had about 4 backpacks in front of me and the Berghaus Verden really caught my eye. I’m not sure what exactly it was but it seemed to have a much more technical look about it than the others. If I was going to go to the highest point in the Alps, this backpack looked like it had the technical capability to do it.

Now, the other backpacks, not all, had most of the requirements I was looking for too, however, they didn’t look very technical. Now, I was about to head up into the Alps, wear crampons for the first time, get roped up, use snow shoes, etc. All of that is technical so I think subconsciously, I was looking for something that had a technical look to fit the bill.

As far as design goes, the Verden 45+8, has a sleek look built on an internal frame. The pack is designed to be very adaptable. Now, that of course wasn’t the only criteria in this category. A technical look and overall design was one thing but it needed the technical functionality to back that up which I’ll look at below.

Fit

The Verden 45+8 has a lot of adjustable options available on it. The first thing to look at here is that the height is adjustable across 4 settings, see below, small, medium, large and extra large. This is adjusted via a sliding back panel as part of a ‘BIOFIT System’. I was a little concerned when I first saw this, thinking it might be a bit weak but it seemed sturdy enough on closer inspection.

As you can see, the back panels are are all well padded for comfort and that combined with the BIOFIT system enables your back to stay well ventilated.

Biofit System
BIOFIT System and Adjustable Height

Once you have the desired fit on your back, you can then further adjust for comfort using the tension straps which are available on the top, side and base of the backpack.

Overall, I found it pretty easy to get a comfortable fit quite quickly and easily with just some quick manipulation of the BIOFIT system and the various straps so it is very easy to use in that regard, plus it also held under actual use with heavy weight which is important. Sometimes with extra weight, straps can come loose which is a pain.

Capacity, Storage and Weight

The capacity of this backpack comes in at 53 liters, (45  + 8 ). This means that the main compartment in the backpack has a capacity of 45 liters but that there is an additional 8 liters available in pocket space, the floating lid, etc.

The dimensions come in at 75 x 32 x 28 cm. I haven’t used this pack for more than a two night camping trip in my regular hiking environment but I think it should be fine for longer week long treks too. Longer than that, you probably need something bigger. If you do need more there is a Verden 65 + 10 version available.

A key part of any backpack is weight and the Verden 45 + 8 comes in at 2.050 kg.

If we look at storage there are a lot of features. First up the base of the internal compartment comes with a bivi divider which can be zipped closed. Useful if you have wet gear that you want to keep separately or if you want to ensure something doesn’t slide down inside your pack into the depths below.

There is a top lid pocket which is a good size as well as two expansion side pockets. Another handy feature on the pack is that the main compartment has zipped access from either side of the pack which is handy if  you need to get something out of the main compartment without having to open up the top. There are also two water bottle mesh pockets at the side.

Finally, there is a draw cord bivi closure at the top of the pack to give you the opportunity to string the top of the main compartment tight before securing the top compartment in place.

Other Features

There are a lot of other nice features with the Verden 45+8. There’s a grab handle at the top for handy lifting, for example, say onto an airport conveyor belt.

The pack is fully compatible with a hydration system with a sleeve at the back of the inside of the back as well as all the required tube ports, etc. There are attachment points on the lid and the pack has walking pole, ice ax, snow shoe attachments.

Finally, there is a built in rain cover with is something that can be handy to have, although I rely mainly on dry bags to keep my stuff completely dry inside any backpack.

Rain Cover Out
Rain Cover out of it’s Compartment
Rain Cover On
Rain Cover on.

Price

The pack is reasonably priced I feel for all the features available in it. Plus having used it, I have the benefit of having experienced it first hand so I am very happy with the quality and overall makeup and functionality of the pack.

Overall I think it’s fairly priced for the quality you get.

Conclusion

Overall, I was very pleased with my purchase of the Berghaus Verden 45+8 backpack. I think it is a great pack for a multi day hike but probably not best suited for an extensive backpacking trip, for that you would need to get the bigger 65 + 10 model.

It has all the capabilities, features and functions I would look for in a good backpack and it fits very comfortably. I have used it on my trip to Mont Blanc and on a few multi day camping hikes and I have been very pleased with it. Price wise, I think it’s reasonable for the quality you get.

As I mentioned at the start, I don’t think Berghaus have made many inroads as yet into the standard big North American gear retailers but I would be surprised if we didn’t start seeing their gear popping up in stores in the coming months and years. I like their gear and have been happy with the quality of several items I have bought from them. We’ll see though I suppose.

Have you used the Verden 45+8 Backpack? I’d love to hear about your experience with it in the comments below.

The North Face Matthes Crest 72 Backpack Review

I first came across The North Face Matthes Crest 72 about a year ago when I was starting to look about for a backpack for my trip to Mont Blanc. As it turned out it was a bit too big for my needs but I still liked the look of it.

It seemed to be pretty new to the scene then and I forgot about it. However, I came across it again while doing an unrelated search online and thought I’d add a closer look up onto the site.

Summary

5 Stars

Our Rating: 4.5 stars out of 5  The North Face Matthes Crest 85 Backpack

Price: Check price

Available Colors: Summit Gold / Asphalt Gray

Review

The North Face Matthes Crest 72 Pack is an Athlete Pick from The North Face. It’s a relatively recent addition to The North Face family and it looks like it means business.

Designed to be used all year round, as its The North Face, you know it has the quality, durability and reliability to meet all your backpacking needs.

At 72 liters, it’s perfect for backpacking trips and longer treks where you need plenty of room to carry all your gear and kit.

This state-of-the-art fully featured pack is designed with an Opti-Fit™ X suspension system for a dialed fit that improves large-load control without sacrificing ventilation. This means your weight is spread appropriately across your body and the ventilation functionality should prevent heat spots from forming.

There is an Integrated X Radial™ frame which is supportive while encouraging freedom of movement across technical terrain. This is an internal frame pack. If you’re not sure what an internal frame pack is, click here.

The pack has a shoulder harness which easily slides up or down to match the user’s back length and locks in place. To create a snug-fitting hipbelt, flip down the lumbar pad and adjust the cams located at the base of the pack. This more or less means you can adapt it to fit your body as required and is a must these days on any serious backpack.

Pros

  • 5 points of contact from the pack on the shoulders, iliac crest of the hips and lumbar support maximizes ventilation.
  • Customizable fit for a range of body sizes.
  • Water resistant material used throughout pack body.
  • Removable top lid and easy access to pack via top loader and front zip.
  • Hydration sleeve inside the pack
  • Multiple gear attachment points.
  • At 72Liters this pack has plenty of space.
  • Modern state-of-the-art look.
  • Men and women specific versions available.

Cons

  • This pack is a bit pricey, but you know you’re getting quality so I reluctantly put it as a con.

Specs (at a glance)

  • Proprietary Opti-Fit™ X technology provides unparalleled fit and ventilation
  • Next-gen X Radial™ frame is light and strong yet provides superior carry
  • Top loader with an additional panel zip opening for quick access to gear
  • Opti-Fit™ adjustment system ensures perfect fit
  • Interior pocket and gear-attachment points
  • Removable top lid
  • Ski carry loops
  • Fabric: 210HT geo ripstop nylon, 630D ballistics nylon
  • Avg Weight: S/M: 5 lbs 11 oz (2580 g) / L/XL: 5 lbs 13 oz (2637 g)
  • Volume: 4393 in3 (72 liters) – note: other sizes are available

Other Points

  • Guarantee: Lifetime Warranty

Conclusion

This is a very technical pack for the serious backpacker or trekker. If you’re planning a major trip, especially into harsher conditions then this could we worth adding to your review list.

It’s a big pack at 72 Liters volume, there’s an 85 liter option available too, so you should be able to stay away for long periods at a time with the amount of gear you should be able to get into this backpack.

There are some nice features and from what I can tell, there seems have been a lot of research and effort put into getting a design that is balanced and comfortable for a large backpack.

Have you ever used The North Face Matthes Crest 72 Backpack? I’d love to hear your thoughts on it in the comments below.

How To Weight A Backpack For Training Purposes

Today I wanted to take a look at how best to weight a backpack for training for a bigger trek or hiking trip. As I have alluded to several times over the last month or two on here, I am planning to undertake my biggest hiking challenge, to date, this year in June. That challenge is to climb Mont Blanc in the Alps, the highest mountain in Western Europe.

Backpacker Packing A Pack

One of the key pieces of kit I will need for that trip is of course a good backpack and my search for a suitable backpack is ongoing. (I've pretty much picked the backpack I will use and will likely purchase it this week).

Anyway, once I have my backpack, it occurred to me that I can't just show up to the Alps with my new backpack filled up with gear and head for the summit! I will not be used to carrying gear for multiple days on my back while ascending a very large mountain like Mont Blanc. Therefore, I will need to 'pack' my pack, so to speak, in advance and get used to carrying a similar weight of gear on my back.

This was fine and I figured that once I got my backpack of choice, I would weight it up to take on my normal weekly hikes. That should get me up to some reasonable level of being used to hiking with the heavier weight of gear on my back when doing the real thing.

However, the next thing that occurred to me was, what should I pack it with to add weight!?​​​​​

Our Top Men's Backpack Pick: Osprey Atmos 65 AG 

Osprey Mens Atmos 65 AG Backpack

The Osprey Atmos 65 AG is a 65 liter is an excellent backpack that delivers outstanding ventilation and carrying comfort.


View More

Weights and Bricks?

Now, you may be thinking, don't be silly, just get some heavy bricks or a dumbbell or two and fire them in. Well, when you think about it, they probably wouldn't be very good things to put in a backpack. They are heavy but over quite a small surface area. If anything, this could very well damage a backpack as it would have too much pressure on one smaller part of it. It could very easily rip a hole open or warp the backpack in some way!

After some consideration, I thought I would consult one or two of my hiking friends who have been on many backpacking expeditions before to get some tips. Here's what they recommended to use when trying to weight your backpack for training purposes.

What to Use to 'Weight' Your Pack

Bottled Water

This was top of the list. A few big bottles of water can easily fit into pack and laid across the bottom. This should spread the weight relatively evenly across the pack. Another great advantage of water is that it's easy to offload if things get too hard to carry. Just open the bottles up and pour the water out!

Old Books

Another easy and convenient thing to use is to put a few big books into your backpack. This will add some significant weight to the pack but you probably need to add a fair few of them in.

Books

Be sure to use books you don't care for too much as they will likely get a bit rustled up in your backpack while out on the trail with you!

Magazines

Similar to books, although they do have the extra advantage of being more disposable. That is, you're probably less concerned with what happens to some old magazines of yours than part of your book collection 😉

OK, I was happy that I had several easy options for weighting my pack but then another question formed in my head!?

How Much Weight Should I Add to the Backpack?

The approach I have taken to this is very logical 🙂 and I hope sensible! In short, I am going to pack the backpack up when I get it with all the gear I think I will need to have in it for my trip.

Now, unfortunately some of the gear I don't actually own and I will have to hire it when I get to the Alps. For those pieces, I will need to do some research and make approximations. The company I am going with have provided a gear checklist so this should be relatively easy to do with a bit of research.

When I have all of that, I should be in a position to give a pretty good estimate of the weight of the backpack I will need to carry for the 6 days on my trip. Then I can weight up accordingly for my normal weekly hikes in preparation!

Conclusion

I was in two minds about whether this should be a post or not as, like most people, when you first think about weighting a pack for training purposes, you assume it's very straightforward i.e. just put heavy stuff in your backpack.

However, after consideration there were a few things I wasn't sure about and so thought it best to ask around to see what may be the best approach. I'm happy that I have found the best approach for this which is to use bottled water, large bottles, to an approximate weight of the actual gear I will carry in the backpack for the trip. A few of my regular hiking outings with that before June should get me in good shape for the real thing 😉

As an aside, It's worth noting that there is a whole method and science to how you 'pack a backpack' too. That is, what items you should put to the bottom first and so on. This makes a lot of sense and is something important to learn for any trip you will be undertaking with a backpack.

Check out this guide on what I take for a 2 to 3 day backpacking trip, that goes into the details. In short summary, pack what you will need soonest, say rain gear, at the top of your backpack and what you won't need soon, say a sleeping bag, at the bottom.

I think everyone needs to develop their own optimum solution or system to this but these basic guidelines help simplify the process. I'll be sure to add up a post on that at some point and link to it from here, it may be helpful to folks new to backpacking / wild camping.

Finally, if you're looking for a backpack or a day pack, you can start your search right here. Check out some nice day packs here, these are perfect for a day hike on the trail. If you need something more substantial and in the vein of this post, to carry kit for several days, check out our top pick backpack in the red box above.

Have you ever weighted a pack for training purposes? Any other suggestions on how best to do it? I'd love to hear about it in the comments below!

Gregory Backpack – The Gregory Z65 Backpack Internal Frame Review

Today I want to review a Gregory Backpack, the Z65 Internal Frame. I mentioned in a recent post that I need to get a new backpack for my trip to Mont Blanc in June so the hunt has begun for a suitable pack for the trip. I have already decided that an internal frame as opposed to an external frame pack is the best way to go for this particular trip.

Summary

Gregory Mountain Products Z 65 Backpack, Spark Red, Medium

4.5 StarsOur Rating: 4 stars out of 5

Available Colors: Ember Orange (Pictured), Navy Blue

Where to Buy: Check Price on Amazon

Review

The first thing I want to comment on about this pack, is that it’s ideal for extended multi-day hikes. With a capacity of 65 liters, it is a multi day backpack. Good for a few days wild camping where you need to carry a fair bit of camping kit with you. With that in mind, it is not really suitable as a day pack, just too big in my opinion. This is something to factor in if the majority of your hiking is day hiking. It may not be a great idea to buy a pack that is best suited for extended trips.

The next thing to comment on that many folks complimented this pack on, was it’s airflow ability. Internal frames can be known to cause your back to get very sweaty so to read that this one has a good airflow via the JetStream LTS construction, one that works I hasten to add, is really good. The pack also has moisture-wicking mesh and breathable foam throughout.

Next, we  move on to storage. One of the cons of this pack I feel is that it could have more pockets. However that is really down to personal preference. There is ample space in the main compartment and the pack comes in three sizes, small: 3539 cu.in (58 Liters), Medium: 3906 (64 Liters) cu.in and Large: 4272 cu.in (70 Liters).

The main compartment is accessed by an all-access front zip which means its handy to get into the pack. This is very useful to get at stuff further down in your pack after it has been packed up. Otherwise, you need to take stuff out to get at the contents below.

The Gregory Z65 backpack also has quick access waist-belt pockets which are good for things you need to keep on hand. To conclude on the storage capabilities, the Z65 also has dual hydration ports and sleeve so you can easily carry a hydration pack.

The zippers throughout the pack are welded and water resistant to prevent rain drip through them so your gear stays dry. I highly recommend  always putting the contents inside your pack into either bin liners or dry bags, to help keep you kit dry. If you’re hiking in winter type conditions, or climbing a mountain like Mont Blanc, you can take advantage of the ice axe loops on the Gregory Z65. There are additional attachment options available on the pack as well.

Moving on, a key function I want in a backpack is good weight distribution so I can carry all my gear on the trail as comfortably as possible. The Gregory Z65 has a lightweight framesheet made with a hollow aluminum stay. This design enables easy support of heavier loads while keeping you as comfortable as possible as you move. The weight is further catered for by the exterior compression straps that ease the weight load on your back. The dual-density lumbar foam pad transfers weight from your back to your hips, and the adjustable waist belt has a plastic HDPE stiffener for a better carry.

The pack has an auto-fit harness system which can be adjusted to fit comfortably. These generally speaking work quite well in my experience. The harness is also specially designed to eliminate hot spots which can develop in many packs. Finally, It’s worth mentioning here that this pack is designed to be used by both men and women.

Pros:

  • Good suspension – secure, stable and comfortable
  • Allows good airflow to your back (A common problem with internal frames)
  • Easy to load and good capacity

Cons:

  • Could have more pockets available

Specs (at a glance):

  • Pack material: 210 denier double-diamond ripstop nylon and nylon twill
  • Frame type: Internal
  • Frame material: HDPE framesheet and aluminum stays
  • Hydration compatible: Yes
  • Pack loading: Top and front
  • Recommended use: Backpacking Multiday
  • Volume liters: 58 to 70 liters
  • S:
  • Dimensions: 28x12x11″
  • Pack capacity: 58 Liters (3539 cu.in.)
  • Weight: 3 lb. 15 oz.
  • Fits torsos: 16-18″
  • Fits torsos: Small: 16-17-½” Medium: 18-19-½” Large: 20-21-½””
  • M:
  • Dimensions: 30x12x11″
  • Pack capacity: 64 liters (3906 cu.in.)
  • Weight: 4 lb. 3 oz.
  • Fits torsos: 18-20″
  • L:
  • Dimensions: 32x12x11″
  • Pack capacity: 70 Liters (4272 cu.in.)
  • Weight: 4 lb. 7 oz.
  • Fits torsos: 20-22″
  • Pack style: Backpacks
  • Pack gender: Men,Women

Conclusion

The Gregory z65 Backpack is a popular pack and ticks many of the boxes I need for my trip to Mont Blanc. The key attractions for me for this are good air ventilation to the back when carrying, as well as good suspension and weight distribution allowing easier weight carry. The easy access zipper into the rucksack from the front is also a nice feature (Getting into your gear can be a real pain in some backpacks if it’s packed at the bottom!).

Overall, this pack looks and acts the part and has a a lot of positive customer feedback to support it!

Have you used Gregory backpacks before? How did you find them? I’d love to hear about your experience in the comments below.

  • « Previous Page
  • 1
  • 2
  • Facebook
  • Pinterest

What are you looking for?

Copyright © 2025 · Cool Hiking Gear

Cool Hiking Gear is a participant in the Amazon Services LLC Associates Program, an affiliate advertising program designed to provide a means for us to earn fees by linking to Amazon.com and affiliated sites.

  • About This Site
  • Privacy Policy
  • Affiliate Disclosure Statement
  • Contact