In today’s post, I want to take a look at the what you need to consider when buying a hydration bladder also known as a hydration reservoir.
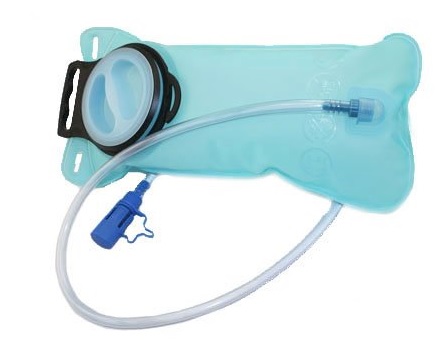 When you’re out hiking, one of the crucial resources you need to have with you is drinking water and plenty of it. Whether you are hiking in the height of summer or the dead of winter, while your consumption levels may differ, you will always need to have a good supply of easily accessible drinking water. For hiking, a good supply can be roughly defined as 20 – 25 Oz of water for every hour on the trail.
The problem here for the hiker is that if you’re out an average day hike of anywhere from four to eight hours, that can be a significant amount of water to have to carry in terms of both weight and volume. It can also be a lot to try and manage in a convenient and easy manner.
One of the obvious ways to to carry your water is in a container. You have many options from standard plastic water bottles to more targeted and functional items of kit like a Thermos water bottle or flask.
These are functional, effective and will do the job for you but there is a more efficient and effective way to carry your drinking water in comfort and ease. That way is to use a hydration bladder to carry in your day pack.
What is a Hydration Bladder?
A hydration bladder, also referred to as a hydration reservoir, is more or less exactly like a bladder in that it can be filled with water for storage to be used to drink.
A hydration bladder slips into your day pack and has a long tube coming out of it to provide easy access to it’s contents. The tube has a valve at the top of it that is opened by a biting and sucking action. This then let’s the content of the pack, the water, flow out easily into your mouth.
What are the Advantages of a Hydration Bladder as Opposed to Water Bottles?
I think for me there are two key advantages a hydration bladder / reservoir has over standard water bottles:
- As the bladder is carried in your day pack, it distributes the weight of the water evenly across your back and is therefore much easier to carry.
- If you have water bottles in your day pack and you want to access them, you generally have to stop and delve into or around your day pack to first find and open them. After you’ve drank from them you have to close them up and put them back. With a hydration bladder you can drink water while you are moving which I find really useful when you just want a quick top up. In short, it’s easy to get a drink.
Now you may be thinking …
‘What, It surely doesn’t take that long to stop and open a water bottle?’
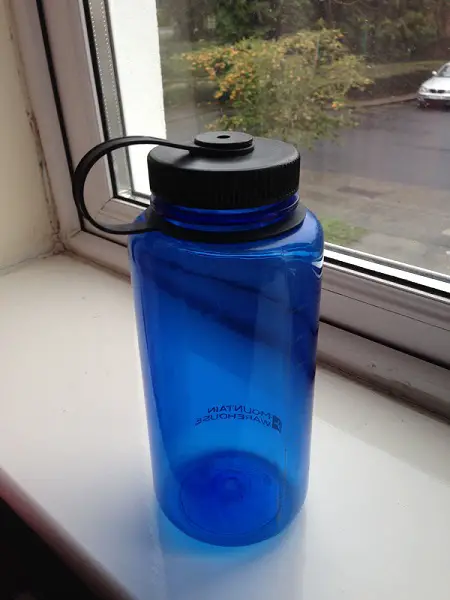
No, it doesn’t but when you’ve been exerting yourself continuously and your energy levels are being pushed it is nice to not have to waste any energy fumbling around looking for water in your day pack. Instead you can just access it very easily and quickly with a simple movement of your hand.
Also, if you’re hiking with a group and you fancy a drink, if you stop to get a bottle out of your bag, you could risk falling behind and maybe even holding the group up. Your only option may be to have to wait for the group to stop together. Not ideal if you get thirsty while others are not. With a hydration bladder, you can just drink as you go.
Another lesser but still good advantage, that I probably should have listed above, is that they can be really effective in cold weather. That is, if you’ve a water bottle in your pack and you’ve got thick gloves on, you may need to remove your gloves to get at your water bottle, open it, close it and so on.
With a hydration bladder you don’t have any of those problems, you can keep your hiking gloves on and stay nice and toasty whilst having a convenient and refreshing drink of water. Of course, there’s a limit to that advantage in that is it is cold enough, the water in your tube may freeze! You need to be hiking in pretty cold conditions for that to happen though.
It’s worth noting here that hydration bladders are not only great for hiking but are also fantastic, and essential, for many other sports where you need to get hydrated quickly and easily. I am thinking of sports like cycling and skiing. In particular skiing as it’s very difficult, quite likely impossible, to carry a water bottle with you hurtling down a piste, just not practical! I’m not much of a skier though so I am open to correction on that one.
What do I Need to Consider When Choosing a Hydration Bladder?
Size
The first thing to think about is size. Hydration bladders usually come in varying sizes, usually along the lines of 1 liter, 2 liters and 3 liters. Personally, I recommend the biggest one your pack can take as you can never really have enough water on the trail plus the price differential is relatively minimal for the bigger option in comparison to the smallest.
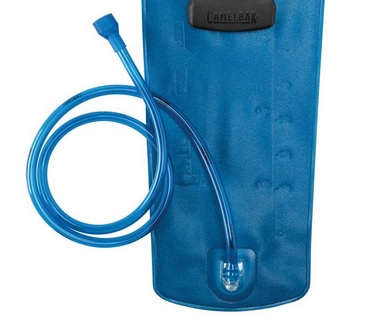 Depending on the type of hydration bladder you get, it can come with the ability to wear it on it’s own (effectively as a hydration pack) or it can come as a separate bladder to be slipped neatly into your regular day or back pack. Generally you will be adding it as a bladder to your existing day pack so you will want to check that the actual shape of the bladder is compatible with the relevant compartment in your pack.
Most good packs now also come with hydration bladder compatible fittings e.g. a hole in a compartment for the drinking tube to slide through. These are quite common nowadays.
The next key part of the bladder you want to think about in terms of size is the hose. Length wise, approximately 110 cm’s should be good and for thickness, in and around 1cm, should do the trick. You should aim to get a detachable hose that can be relatively easily replaced. This comes in useful for replacing a broken tube and also, if you’re hiking in extreme weather, swapping to a tube that is more suitable for very cold conditions, as mentioned above, so the water in the tube doesn’t freeze.
Access
To fill the hydration bladder there are generally two options. One is a screw cap and the other is a zip (works like a Ziploc bag). I have used the screw option and I have found it easy enough to fully fill in any sink.
Last year though, I switched to using a zip loc hydration bladder and I have to say I am a fan! I have found it even easier to use in terms of filling up and they are definitely easier to clean in my opinion. The cleaning thing may not be a major concern for some though if you’re using your pack solely for water as I do, I tend not to need to clean it as often.
Cleaning
This can be a very important consideration when choosing the right hydration pack for you.
The first thing to consider is cleaning the water reservoir. Some hydration pack water reservoirs can be hard to access to clean adequately. This is a significant concern as bacteria can build up over time in those hard to reach spots. If you’re only using your bladder for water on an ongoing basis, which will be the case for most hikers, this isn’t as big a problem as you won’t need to clean it as often. Personally, as mentioned above, I only ever use mine for water.
However, if you happen to use your bladder for other types of drinks, very possible if you use your bladder for other sports like trail running, then you need to clean it after every use as residue from the drink can turn to bacteria over time. I do personally know one hiker who mixes a diluting orange drink with his water to take with him on all his hikes, so this would be a relevant concern for him.
As mentioned above, a water reservoir with the zip option is easier to clean as you can easily open it up wide to access the whole pack. Some zip hydration packs can be put in the dishwasher too. For some screw top bladders you may need to get a special brush / cleaning kit to be able to clean them.
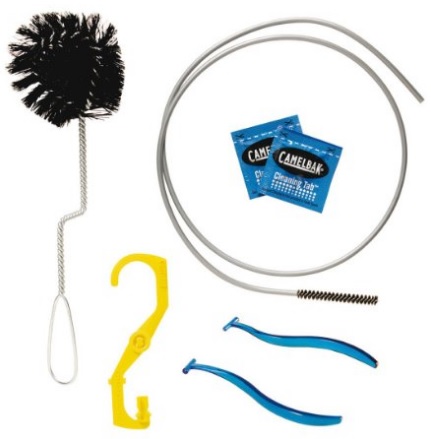 This may or may not be provided with the bladder when you purchase it so keep this in mind if you go for the screw top option.
As already mentioned, if you’re using your bladder only for water it’s not a big concern. Many bladder’s with screw tops can have openings that are quite big so you can get into it pretty easily if required. I find, for water use only, some good rinses in warm soapy water does the trick for cleaning it. I am also going to try out denture tablets for cleaning soon. I use them to clean my thermos flask and I have been very happy with the results so I am seeing no reason why this shouldn’t work on my zip bladder too.
The other key part of the bladder that you need to keep clean is the drinking tube. As you can imagine, this part is harder to clean. Again, not a big deal if you’re only using your bladder for water but if you’re using other drinks in it, you’ll need to consider how you will clean this in advance. Again, a special cleaning brush may be needed which you may have to purchase separately.
Pressurized
Some hydration packs are pressurized. I have never used one but from researching them they have two chambers, one for your water and one for air. The advantage is meant to be that the water will squirt out of the valve without you having to suck on it.
I am not certain if this is really a great advantage, in terms of drinking water, as I have never had any issues just biting and sucking from a standard hydration valve on a bladder. I did read that the pressure does help you keep your tube cleaner as the pressure forces the liquid in one direction and so no backwash can come back up the tube. If you’re using your bladder for other drinks other than water as mentioned above, I think you would still need to clean it regularly regardless. However, water squirting out could be very useful for other purposes e.g. if you need to clean something while out backpacking.
I have also read that the pressurized systems are, logically, more complex and heavier to carry. My advice here would be to really look into this option to see if it will give you any extra advantages for your needs. If not, a standard non-pressurized hydration pack should do just fine.
Other Considerations
As a rule all hydration packs should be odorless and tasteless but there’s no harm in checking this in the specifications to be sure. Reviewing user reviews can be a good way to ascertain peoples experience with this too.
Some bladders offer anti-microbial technologies in the materials or BPA (Bisphenol A) free material. These are worth checking out but again, it’s always useful to see how other folks got along when using it to see how good these materials actually are.
My Recommendation
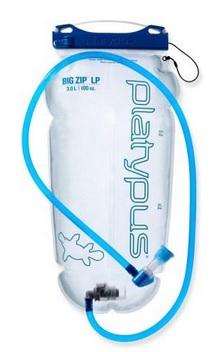
If you’re looking to buy a Hydration Reservoir / Bladder for your hiking trips, I recommend the Platypus Big Zip LP Reservoir. I’ve been using it for a few years now and I have been very pleased with it. Easy to fill and very easy to access for cleaning purposes. It’s a winner!
Conclusion
So, there you have it, I hope you found this post on how to buy a hydration bladder useful. A hydration bladder is an investment in a great piece of kit to add to your hiking gear. Not only exceptionally functional and practical but can be used in many other outdoor sports as well as hiking.
I recommend an easy clean, zip option with a changeable and replaceable hose fitting. There are a lot of good options available on the market today so you should be able to find something that will meet your needs and personal preferences. If you’re in the market for a new hydration bladder, you can check out our top hydration bladder recommendations here.
Do you use a hydration bladder on the trail? What do you look for when choosing one? I’d love to hear your thoughts in the comments below.
Nice thorough article! Certainly is important to keep it clean! I wash mine with a water/bleach solution and flush thoroughly.
Thanks Chris. Yes, it is definitely a good idea to give it a good clean and flush when you can.
Enjoyed the thorough presentation, Colm. The idea of drinking from a ‘bladder’ is somewhat repulsive, so if it’s all the same, I’ll happily refer to this item as a hydration pack. 🙂
Thanks Bill 🙂
I hear you and absolutely, run with hydration pack!
Drinking from a bladder can definitely bring some unpleasant associations to mind lol 🙂
Think that covered it, Colm! I’d never even thought about these units before… always just had the water bottle hanging from a belt or stowed away. Nice brief coverage on other uses also! Thanks partner!
No problem Randy, glad you found it useful.
The hydration pack is a really handy piece of kit and it’s hard to do without it once you get used to it. Definitely a must for other outdoor activities like skiing.
In saying that, when I’m hiking I will still utilize water bottles too when I know my hydration pack won’t be enough … that’s a case of topping up though rather than ongoing use.