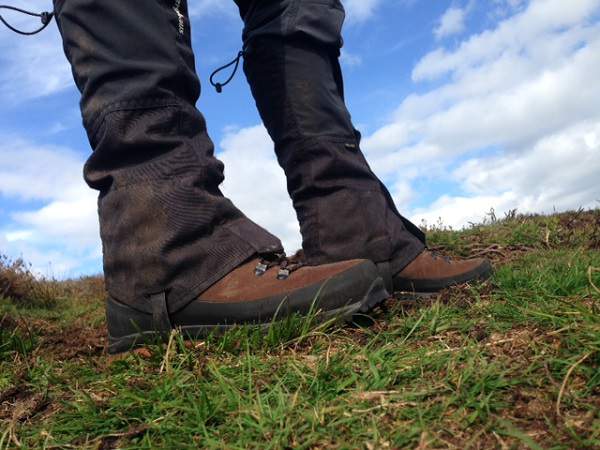
Good quality leather boots are definitely worth the investment. They keep your feet comfortable and offer great support over miles and miles of trails.

Leather hiking boots can last for years provided you take good care of them. However, if you don’t know how to clean leather hiking boots, you may find that they become brittle, lose their waterproofness and crack, drastically reducing their lifespan.
Keeping Your Boots in Good Condition
To keep your leather hiking boots in prime condition, take the time to regularly keep them free of dirt and prevent it from building up. Trapped dirt particles can have a highly abrasive effect, rubbing the surface of your boots like sandpaper, drying them out and breaking them down.
Always chose a recommended leather cleaner that is appropriate for your type of leather hiking boots. This is extremely important as other cleaners that aren’t specifically made for leather can cause irreparable damage, severely weakening the leather, removing its flexibility and waterproof capabilities.
Sometimes your boots will need a little more TLC than a quick hosing down. If you find that they’re starting to let in a bit of water, you can reproof them, so they’ll feel as good as new. After all, dry feet are happy feet. Any scratches will need to be inspected for deeper damage and you can have any tears repaired by your local cobbler.
For worn out, tired-looking leather boots, try conditioning the leather after washing to soften it. This will restore moisture levels which will help the leather to remain flexible and waterproof.
As mud dries, it removes moisture from leather causing it to dry out. If you do a lot of muddy hikes and haven’t always rinsed your boots off, they’re probably going to need a good conditioning.

Cleaning Your Leather Hiking Boots
Below we list out the step by step instructions on how best to clean your leather boots, please note, we don’t recommend you do this every time, this is for a deep clean.
Typically, after an average hike, a good rinse and dry will be enough. A deep clean will only be needed from time to time though, use your best judgement to decide when.
1 – Remove laces and insoles
Before cleaning your boots, it’s essential to remove the laces to ensure you can get any trapped dirt out, an thorough all-over clean and the chance to wash your laces too.
Remove your insoles and wash as recommended if necessary. Even if your insoles don’t need cleaning, you’ll want to remove them anyway as this will speed up the drying process by preventing them from getting wet if left inside.
2 – Brush off dirt
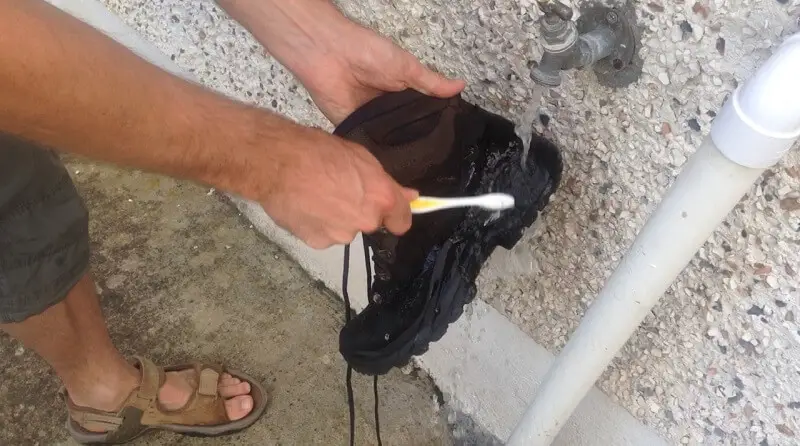
Take a shoe brush, an old dish brush or, my implement of choice, a toothbrush and remove any loose dirt from your boots before washing. Pay particular attention to any caked-on mud and the soles.
This step will make cleaning your boots much easier and allow the cleaner to take effect. It’s much easier to flick off dried dirt now than when moistening your boots.
This is also an ideal opportunity to inspect the condition of your leather hiking boots close up. Look for any damage, scratches that might worsen, or cracks and folding in the leather. If the leather seems dry and looks like it could be deteriorating, you’ll need to condition it after washing.
This will prolong your boots’ lifespan and keep them in good condition. Note, mud is the main culprit for dried out leather as it sucks moisture out if left on your boots for any length of time.
If possible give your boots a quick clean and rinse after each use, or at the very least, try walking through long damp grass or puddles to remove the worst of the dirt on extended trips.
3 – Moisten
Dampen a clean cloth or sponge and moisten your leather hiking boots. It makes sense to start higher up where they tend to be cleaner and work your way down to the soles. It can be quite difficult to get the surface thoroughly moist, so you might have to spend some time going over them slowly.
This is a good point to check if you’ll need to reproof. If you notice that the moisture is no longer beading or its seeping into the material as you start to dampen your boots, it’s probably time to reproof them after washing.
4 – Apply Cleaning Gel
Clean out your cloth or sponge and apply a leather cleaner like Gear Aid Revivex to your boots. Some come with inbuilt brush heads for convenience, but don’t forget to rinse it through after use.
Rub the cleaner into your boots and make sure that you cover all of the surface. If they are still pretty dirty you may need to use a nylon brush on them and maybe even rinse off and wash again.
5 – Rinse
Rinse off your boots, either with a cloth, sponge or slow running water. Be sure to remove all of the cleaning product.
6 – Reproof or Condition (Optional)
If you noticed that your boots were in need of reproofing or conditioning, now is the time to do so, while they are clean and damp.
Reproofing
Apply your leather waterproofing solution to your boots following the instructions. Reproofing products vary depending upon the type of leather your boots are made from, so be sure to choose one that is specific to your type of leather hiking boots.
Typically, there are two main types, one for nubuck and suede-type leathers and another for full-grain leather. For maximum efficacy, be sure to apply the product all over your boots.
It helps to work all the way round continuously, for all-around protection. Leave to set for five minutes, or as recommended by the manufacturer, and wipe off any excess.
Reconditioning
Using something like Nikwax conditioner for leather is not required to be done after every use, but it is good to do this from time to time to keep your boots in tip top shape.

Leather conditioner will help to restore tired, dried out leather and prevent it from cracking. However, do not over-condition your leather hiking boots. Only condition them when they appear dry, as too much conditioner will make them soft and thus reduce the level of support they offer you. Note, only full-grain leather requires conditioning.
If you have new hiking boots you’re trying to break in, conditioning can help make them more supple and more comfortable during the first few hikes. Obviously, you aren’t going to need to wash them, so just dampen your boots until thoroughly moist before conditioning.
Apply the conditioner to your damp boots and rub it in with a cloth in small circular movements. Allow a few minutes for maximum absorption before blotting away any excess.
7- Dry
Once your boots have been washed, rinsed, and if necessary, treated, leave them to dry. To protect the leather and ensure that they remain in excellent condition for many years, it’s important to leave them to dry at a normal room temperature, preferably in an area with low humidity.
Do not use any form of direct heat source to speed up the drying process. Doing so can damage the leather and can cause it to crack, age and become brittle.
If you want to speed up the drying process or just get your boots out of the way quicker, place scrunched up newspaper inside them and remove and replace every couple of hours to absorb extra humidity. A fan can also help to decrease drying time.
Once your boots have thoroughly dried, replace the insoles and re-lace. If you’re not rushing to get back out on the trail in them, be sure to store them somewhere that temperatures remain stable. Avoid any hot, damp or unventilated storage places to keep them in their prime for longer.
Check out the excellent video from REI below to see the whole process in action!
Conclusion
Good leather hiking boots are a worthy investment and with a little care, they can last for many years. It is pretty quick and easy to give your leather hiking boots a good clean over after a day of hard hiking, the only downside is the drying time if you’re looking to use them soon afterwards.
Regular cleaning will prevent dirt building up and damaging your boots, both through abrasion and removal of moisture, causing cracking. Now you know how to clean leather hiking boots and protect them from drying out, time to hit the trail and get them thoroughly dirty 😉